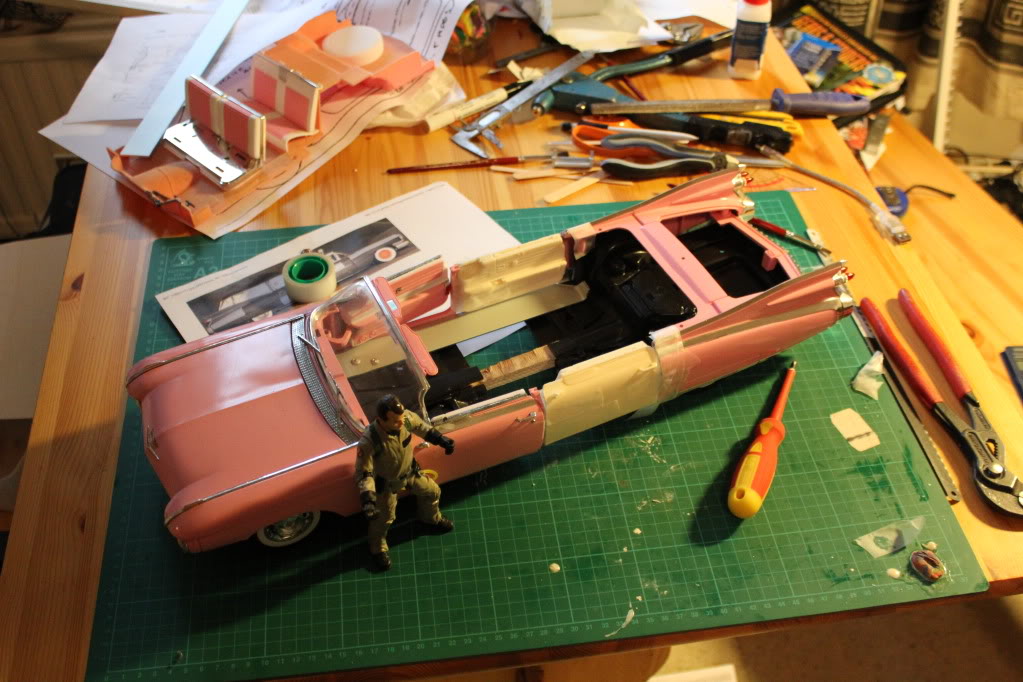
1/12 Scale Ecto - 1 Project.

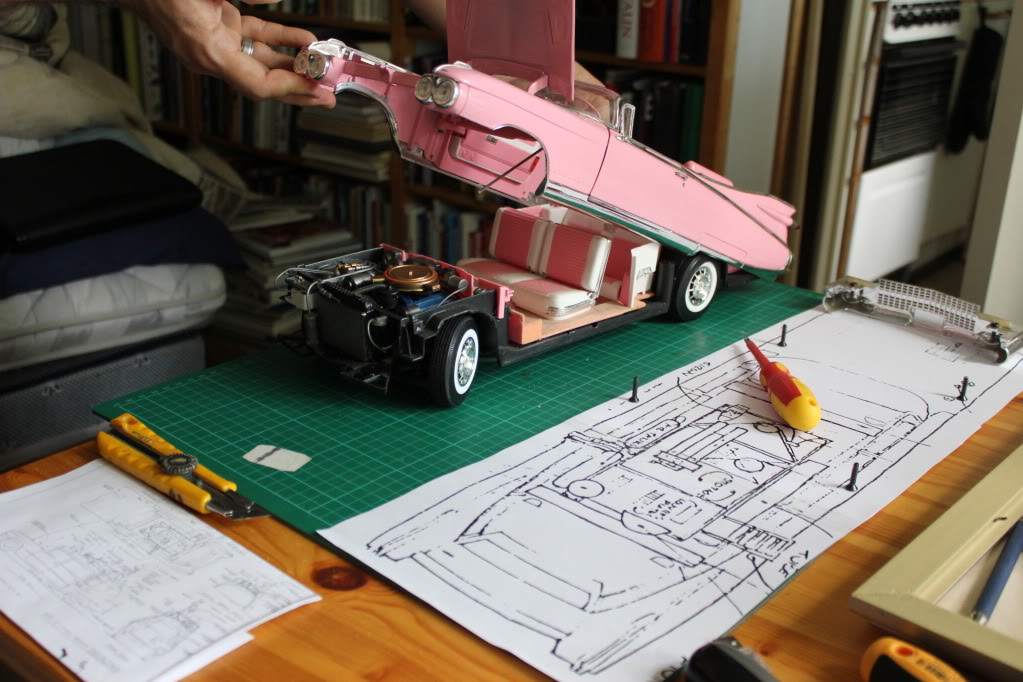
I found a little project for me through Ebay. I won a Maisto '59 Cadillac Eldorado Biarriz model at 1/12 scale, cheaply, considering the size of the car! It is pink, open top Caddy, perfect for a 6" Barbie, but as you can guess, it will accompany my 6" Ghostbusters… It just needs a little paint, roof, etc… It is 20" long, and fits the guys somewhat snuggly.

See it in our facebook site, my supporting memebership ended, and I haven’t yet paid for another year, so I cannot post pictures..

Lol. the picture looks great. I can already see the finished poject in my head. cant wait to see

very cool!

i want one now… :frowning:

Heh, thanks guys, I know the feeling… It is a Maisto 1/12 scale Caddy. It fits the scale for the 6" figures nicely. For an open top caddy, it is an inch shy for a hearse caddy, though.. But, I think that even though the doors on the rear passenger side of the Ecto-1 would be a little small, I am not gonna cut this in part and add a half of inch to it..

There might be something to adjust in order to get the 6" GB figures to sit in confortably, though. The seat cushions on the caddy are plastic, as are the clothes on the figures. That means that neither will ‘accomodate’ either, meaning that I need to think of a way to make hard plastic in to accepting another, while remaining in shape…

I think that the seats will need to be adjusted so that the guys can fit in…

I am thinkin over my head here… I see the end result in my head too, but, I am in the beginning of this road… I am racing my head with Radio Control, sounds and lights…

This might be a long project… But, be sure that I WILL post pictures of it, along the way..

Nice idea. I wonder if you could cut the top off a kenner ecto and attach it to the top of this car. if it sizes up right I may give it a try also. You said this is 20" long kenners i believe is 14" long. it may be possible.

edit

I can’t find anything about a 1/12 car, everywhere I look I find 1/18. The description says its 9-10" long. Can someone verify that the one in the pic is 1/18 scale. I want to make sure before I buy one. Thanks.

The 1/12 scale is a bit hard to find. I was REALLY lucky to get mine. I was about to pay nearly a hundred bucks on the auction, but ended up with less than forty.

My Caddy is 20" long, and it is 1/12 scale. Fits the 6" figre scale. It is a pretty pink, I almost regret painting it up..

The 1/18 scale is MUCH smaller, approximately the size for 3.5" figures. It would be a little over ten inches long. WAY too small for 6" figures.

I though of the kenner top, but that car is rare here in Finland. It might be easier to make it from scratch, but, it will be a long way before I get to finishing line.

Edit;

Here is some info on Maisto 1/12 diecasts. There are three sets of Cadillac Eldorado Biarritz there, two pink, one white. They are all released in 1999 and 2001.

I got his from an auction description;

“From the information on the bottom of the box: Die Cast Metal with Plastic Parts 1. Opening Doors 2. Opening Bonnet 3. Opening Boot 4. Adjustable Sunblind 5. Adjustable Seats 6. Adjustable Front Wheels 7. Workable Steering *Independent spring suspension for wheels. Not suitable for children under 8 years of age because small parts can be swallowed. 1992 Maisto International, Inc…Made in Thailand.”

Ok, I’ve began the 1/12 scale Ecto - 1 project. I paid for my support for the year, and I am still learning to use this site. I uploaded the photos to a photobucket album, but I still do not know how to get the pictures visible on the posts… If anyone can tell me what I am doing wrong, I’d appreciate it…

Still, here goes;

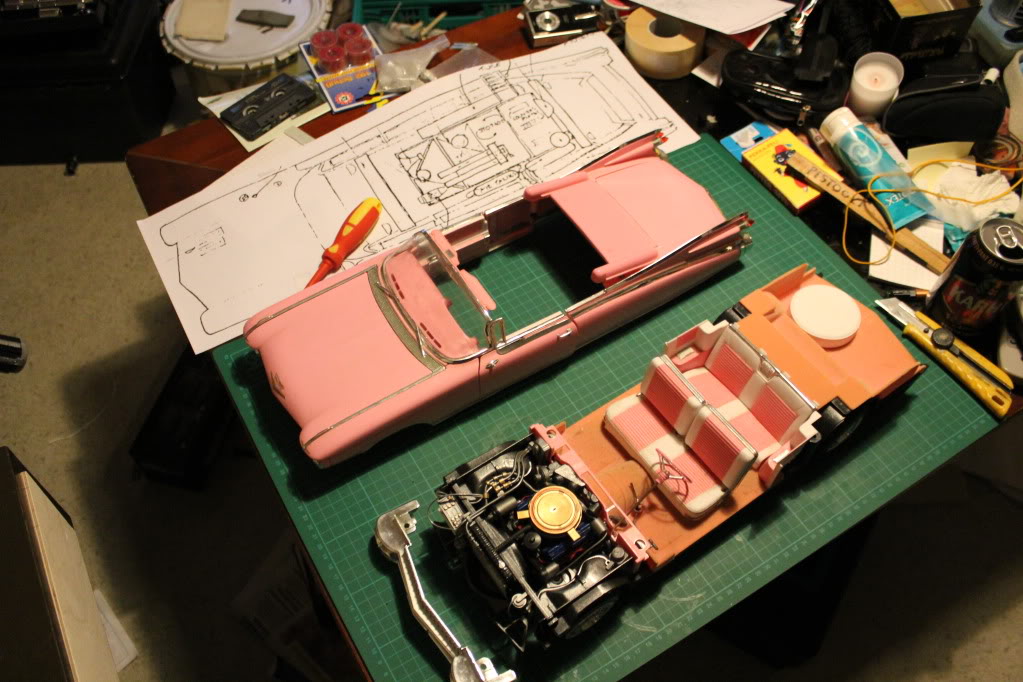
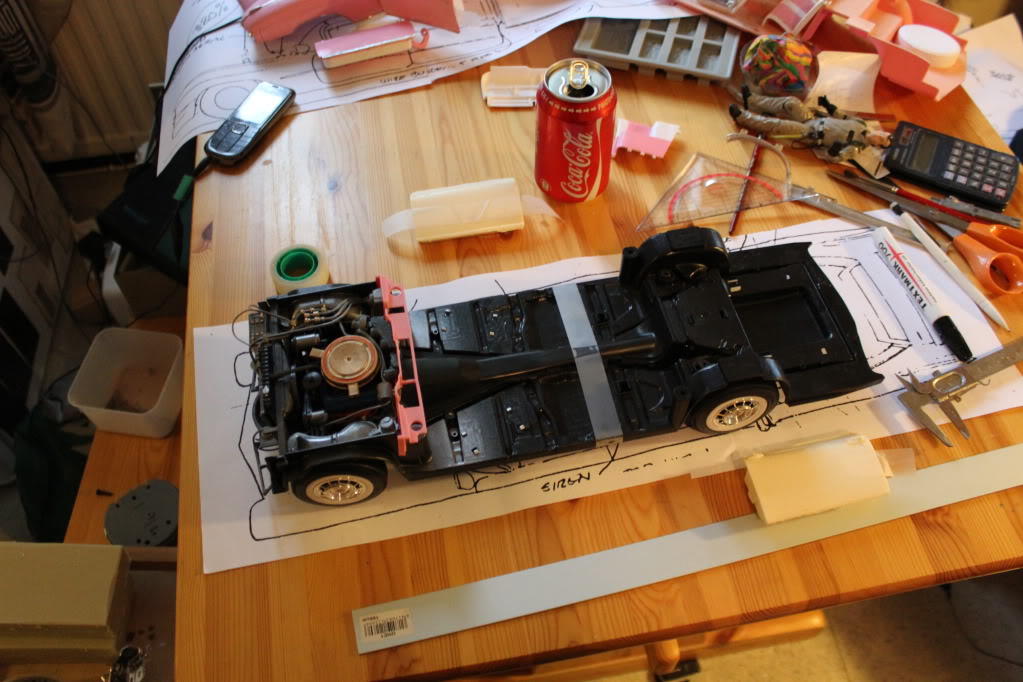
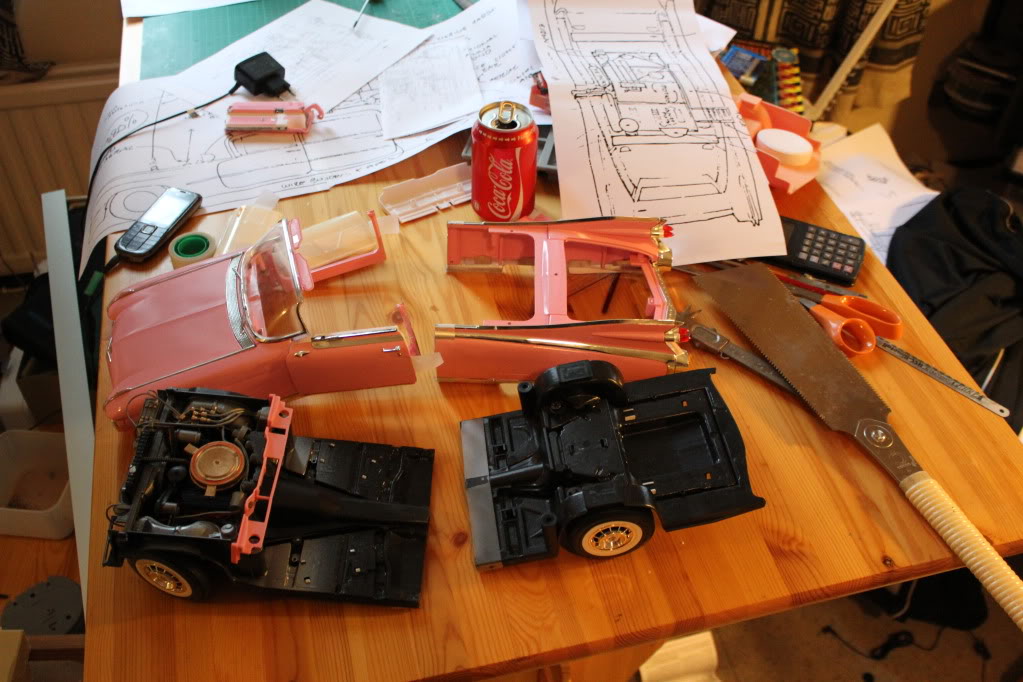
I photocopied the Ecto - 1 plans found on the Making Of Ghotsbusters book to match the width of the 1/12 Caddy. The Caddy is 17cm wide, measured from the hood, just top of the front tyres/axle. I then began to dismantle the vehicle. Luckily for me, the car is VERY sturdy, and is held together with few sqrews.

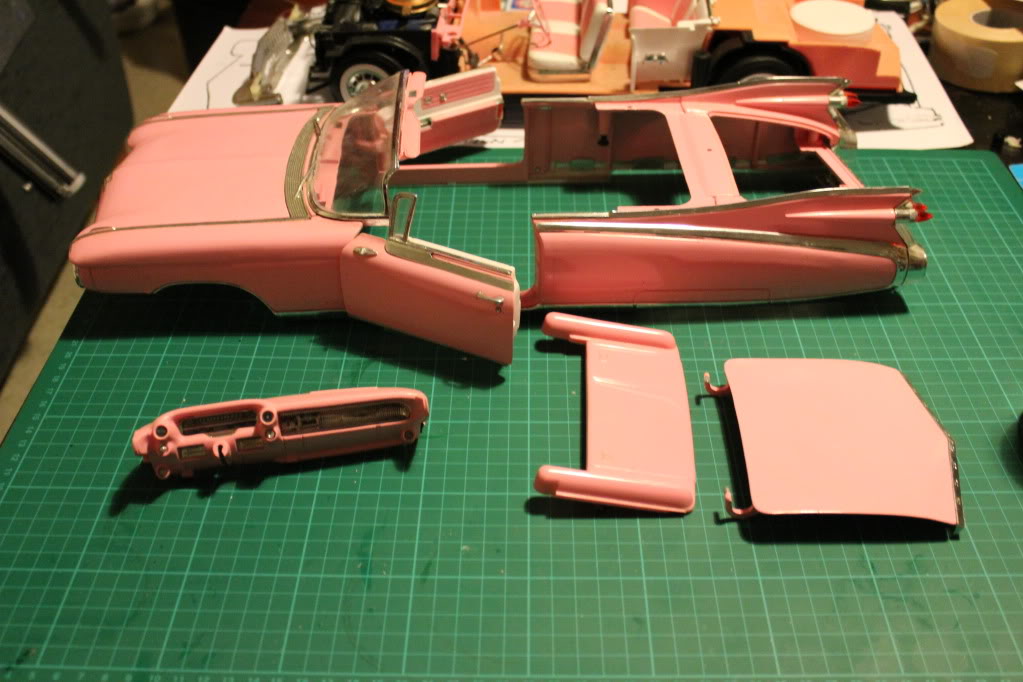
Without much time, I got the main parts loose.

I then removed all of the little bits from the chassis. The details on the dashboard are beautiful!

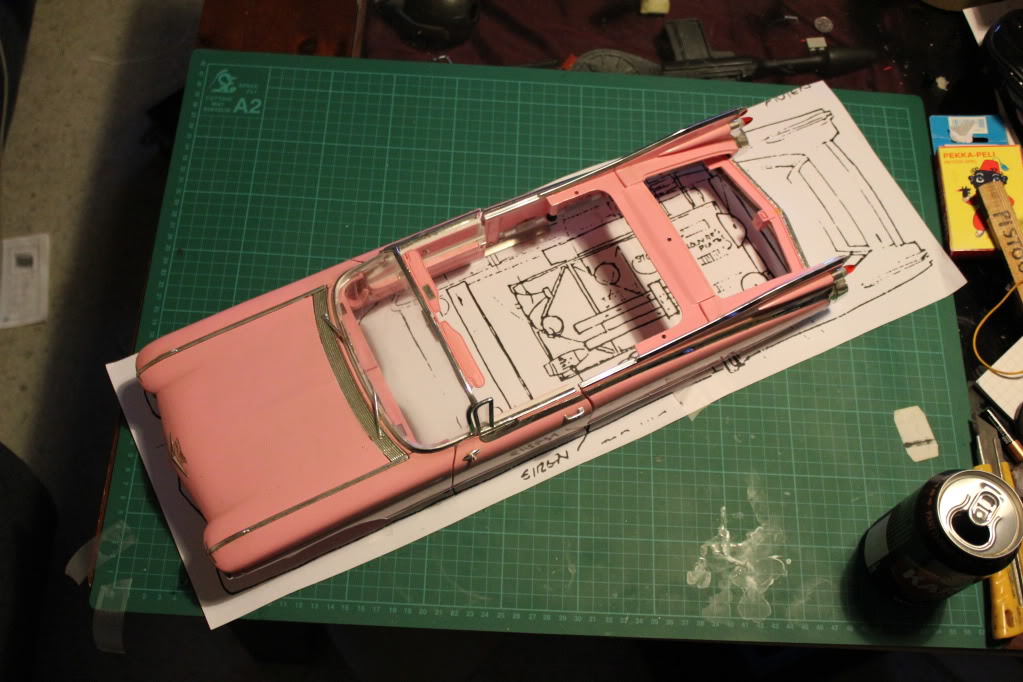
I then laid the stripped chassis of the Caddy on top of the blown up plans, and Whoa!! the car is over three inches shorter than the plans indicate… Nick-A-Tron was courteous enough to dig his splendid Ectomobiles from the closet and take some measurements for me. The Width to Lenght ratio for the AMT model is x3.05. That means that with the 17cm width, the 1/12 scale model must be over 51cm long.. And, the Eldorado is 48cm long. As you can see in the picture, the hood, front doors, front tyres, all match perfectly on the blown up plans and the model. I will, therefore use the plans as a measure of how long the model will end up to be. That would be, 57cm, or 22.5 inches.

The Cadillac Eldorado has only two side doors, and I suspected that I need to lenghten it somewhat, to get the rear doors into it. The plans would indicate that the car is one set of doors longer than the regular Caddy, so the easiest way for me to add the lenght is to make a mold of the doors, and cast them in resin.

Now, this will be a project that I will do my utmost best with. I cannot say how often I can make updates, but once a week is what I am hoping to go for. I got all of teh casting resins, mould material and such, and I will make the first parts of the two part moulds for the doors. Then, resin, and the car can be lenghtened to it’s full length..

Be patient with me, and do comment me

Edit; Thanks Nick!!! I finally managed to get the photos showing!!

-Ville

Ok, one more update:

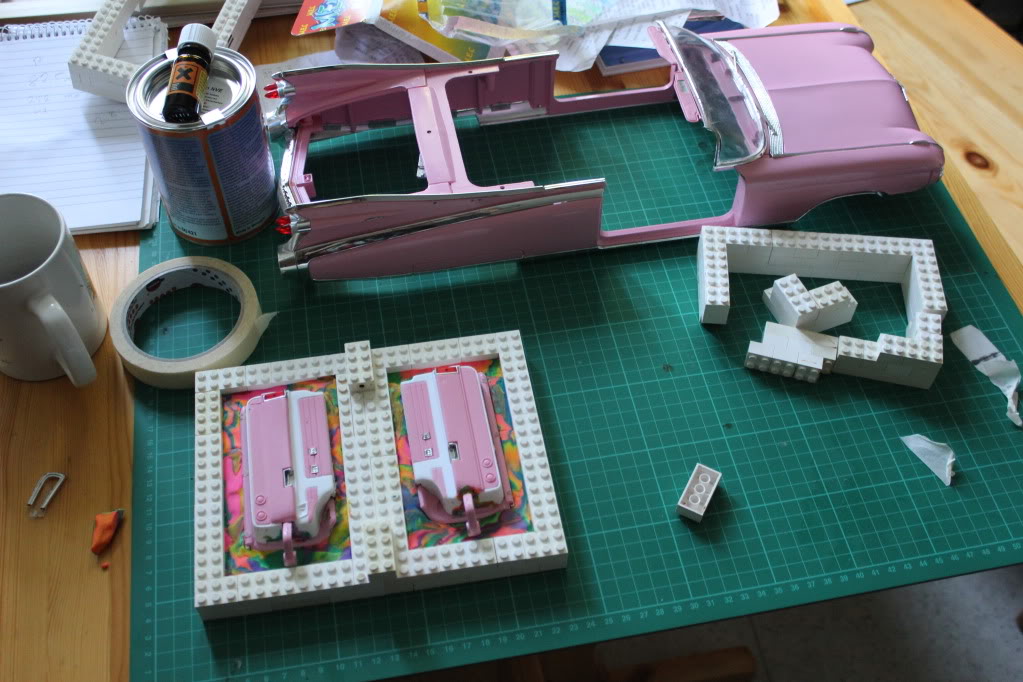
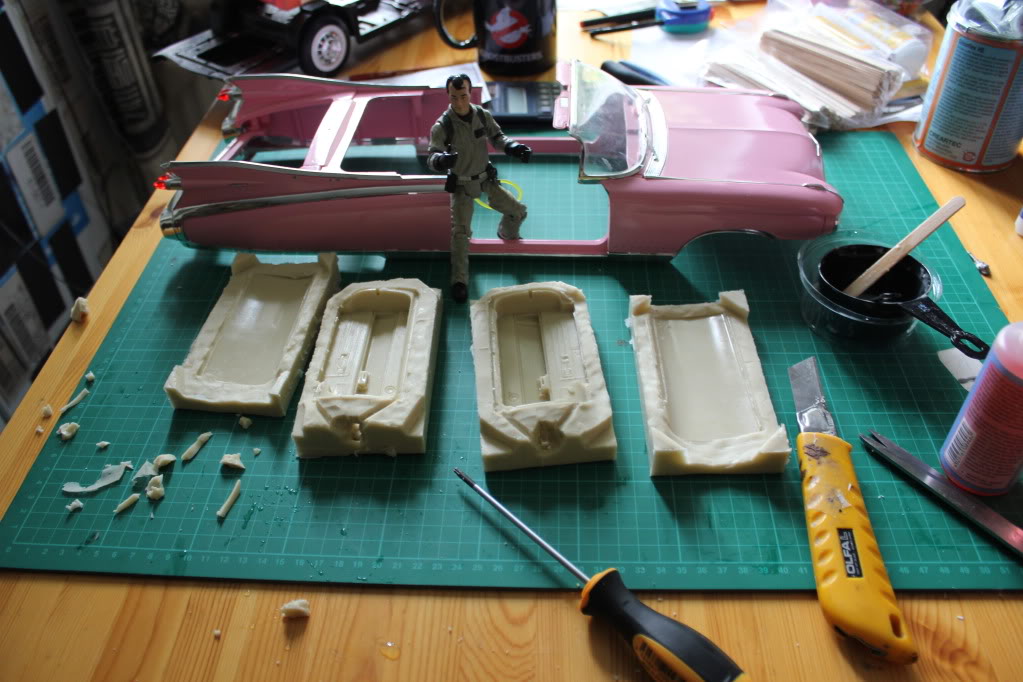
I took some Legoes, some plasticine, and went to work on the mould for the doors. I layered the plasticine on the bottom of the Lego cradle, and laid the doors into it. I then pushed the plasticine to cover any gaps that might leak the silicone to the bottom.

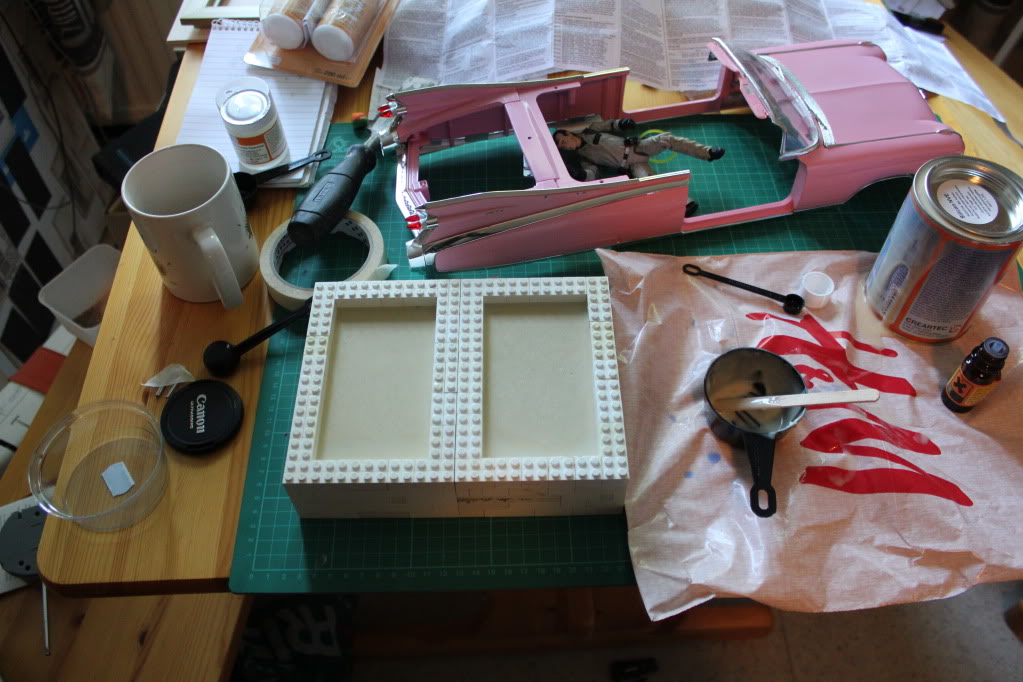
I poured the silicone mould material to the Lego cradle, and Boy, it took almos all of my silicone!! This mould making business sure is expensive.. I need to get my car from the repairshop tomorrow, and then go and get some more silicone for this two part mould…

Still, the first part of the mould needs to cure before the second can be cast, so I might as well sleep over it, and resume work on this tomorrow.

Hope you like my project..

Hey big C!

This has the potential to be epic. I’ll be following your progress and cheering you on. One or two small questions for you. What brand of silicone are you using to make your molds and what size (volume) were they? Did you seal the hinge sections of the doors before you poured your mold?

Thanks, I’ll be sure to do my best on this..

The mould material is Silicoval MVE brand RTV casting material. The jar had about 500g of material, so there was not much to work with. There aren’t that many sellers of silicone here in Finland, and I like to buy everything on the same seller. That way, I can buy what I need, and there is not much material left to rot on the shelves. And, as I had no idea whatsoever, on how much silicone was needed, I took only one jar…

I did seal the openings on the hinges, so no silicone got there, but as I was pouring it in, the plasticine on the bottom seems to have an opening, so there is some silicone wasted on the bottom of the mold. I know more tomorrow.

it the car!

A little update…

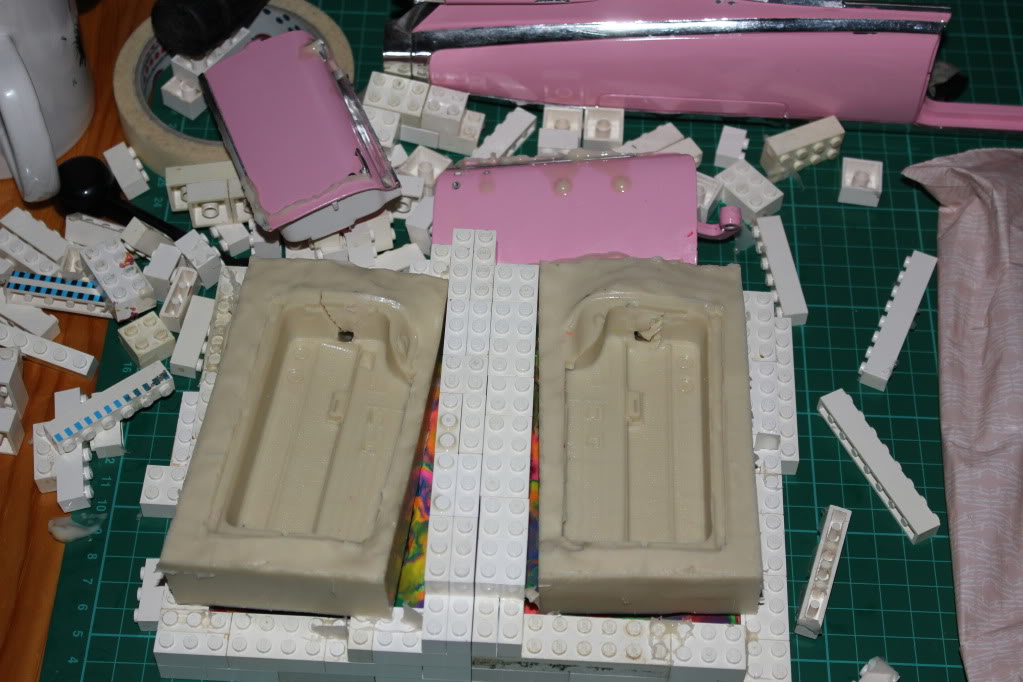
After a full night of curing, I pulled the mould out the Lego cradle and I was greeted with succesfull one half of a mould of both doors! The teared parts of the mould are from the hinges of the originals. I do not intend to make the rear doors openable, so the hinges were not needed. I will use the teared part as a pour hole on the mould.

You might not be able to tell from the picture, but the mould is perfect. All the details are there..

I also found out where my silicone went… I had not fully sealed the plasticine and the original door parts, and the silicone found it’s way to the bottom of my mould, to the cutting mat… Of well, this is a learning experience…

Today, after I get my car from mainteinance, I will get more silicone, and do the top part of this two part mould…

After that… Resin, and cutting wheels on my trusty old Dremel, and the lenghtening process can truly begin..

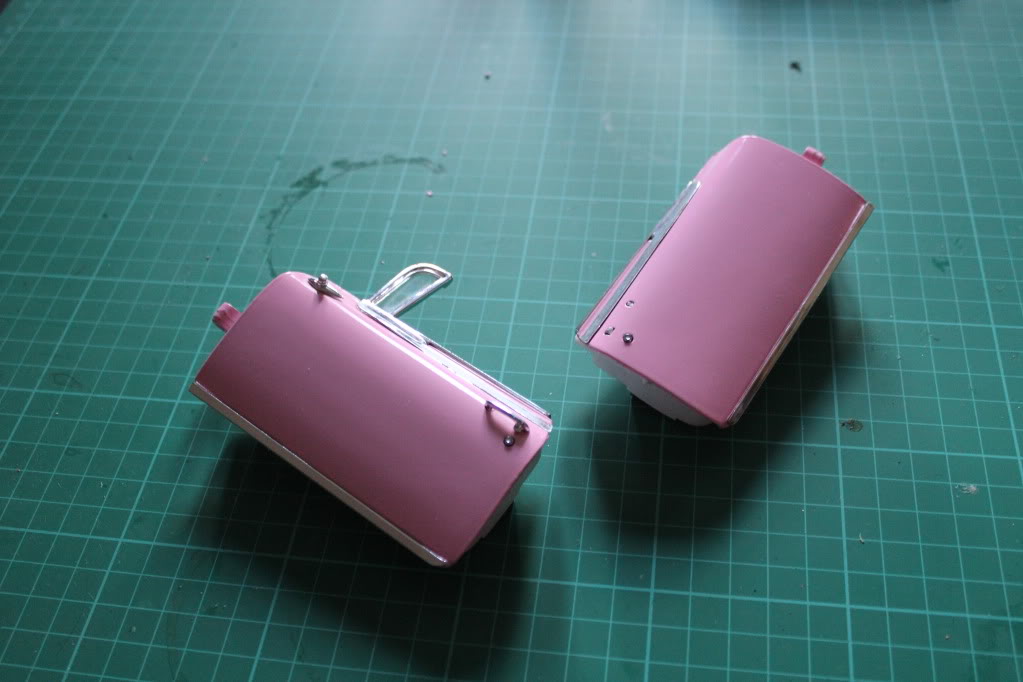
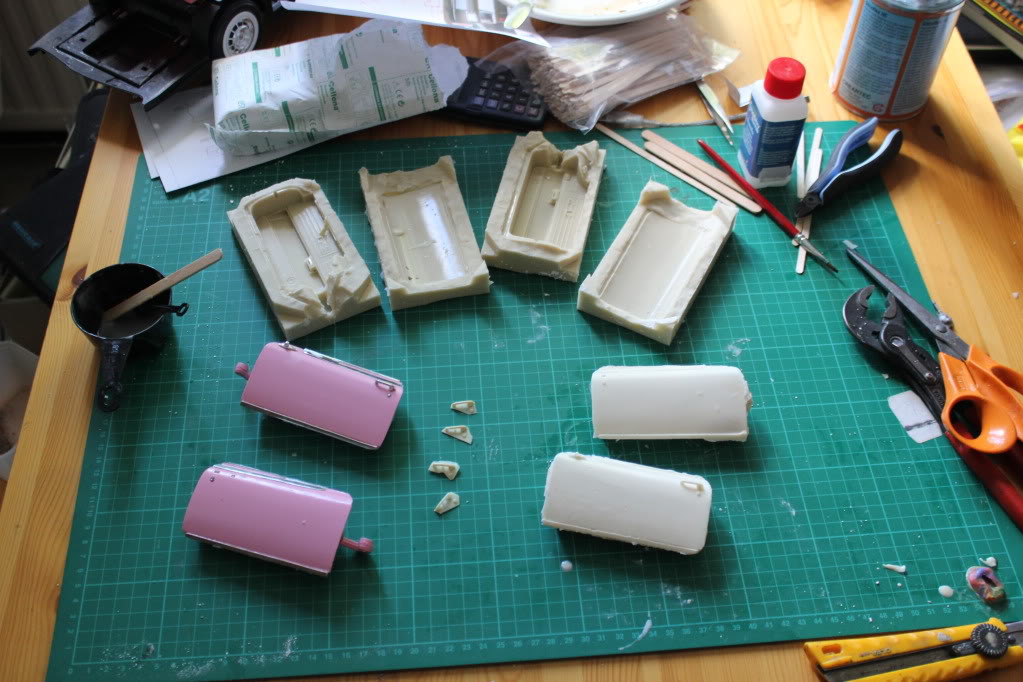
De-Moulding Success!! The doors were cut out of the moulds, and the details were CRISP!!!

I cut conduits for the resin in the moulds with an Xatcto blade. These would have been easier to do with plasticine when making the mould, but I was in a hurry…

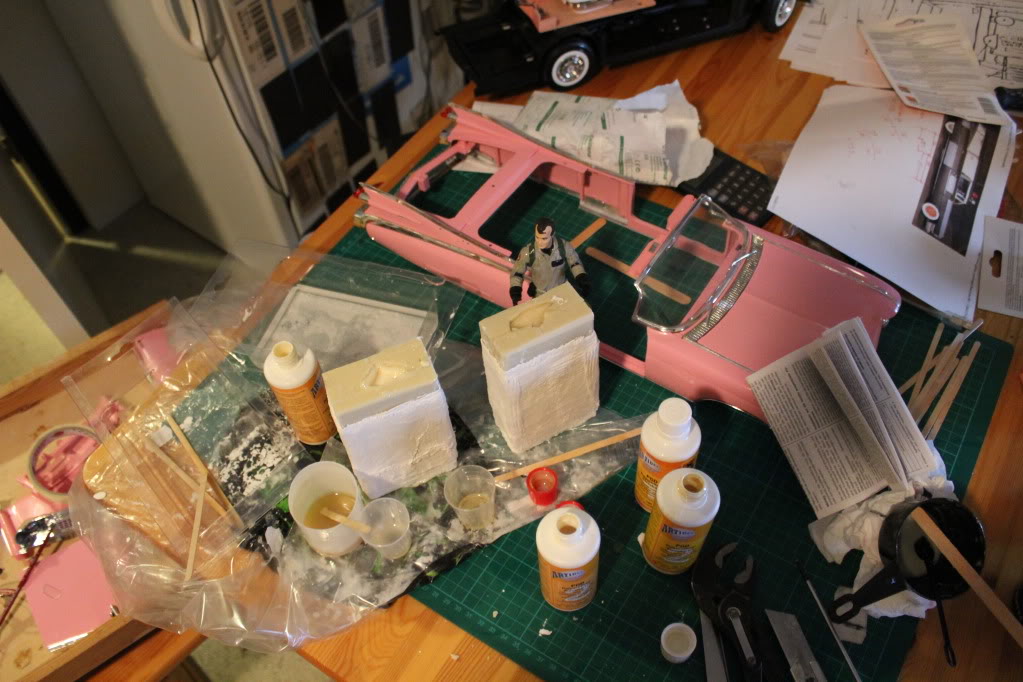
I then wrapped plaster bandages around the moulds to help them keep their shape while the resin was curing.

The doors came out near perfect! They do have some defects, but they can be sanded off easily. To my surprise, the resin made good with the handles too, and I used the remaining resin to mahe some handles for the doors. I need these, as the Caddy was damaged and only one door had the handle in place. And, I am adding two side doors, and a rear door, so I needed four additional handles..

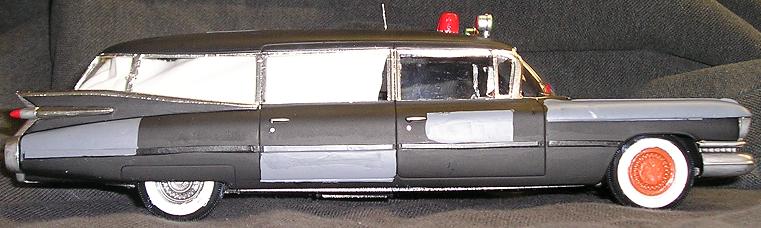
I found this picture to be invaluable for my project. I took a measure of the front door, and got from that, the size of the rear door, and the height of the windows. With those measures I can begin the extension on the Caddy..

More later on…

WOW!!!

I’m so happy someone decided to take this project on and i’m with CaptCyan in saying it has potential and i hope you pull it off!!

Goodluck

Dermot :smiley:

Thanks Dermont! I’ll do my best not to let you down on this..

I sanded the resin doors to fit the measurement I got from the ProtonDefender’s Ectomobile, and measures given to me by Nick- A-Tron. The doors have some imperfections, but those will be corrected once the car body is glued together.

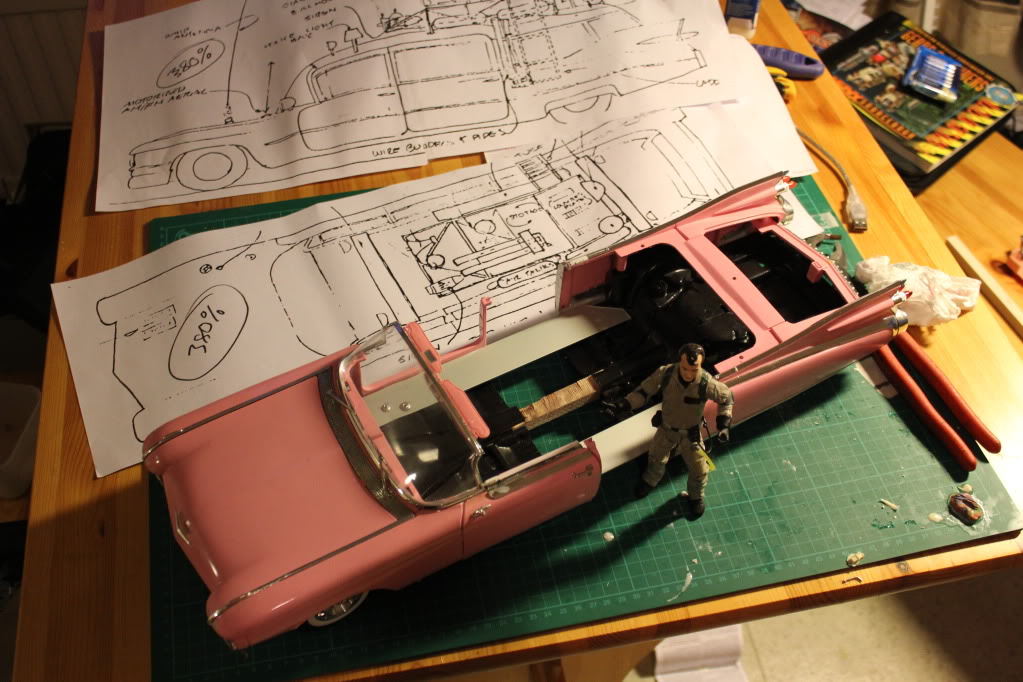
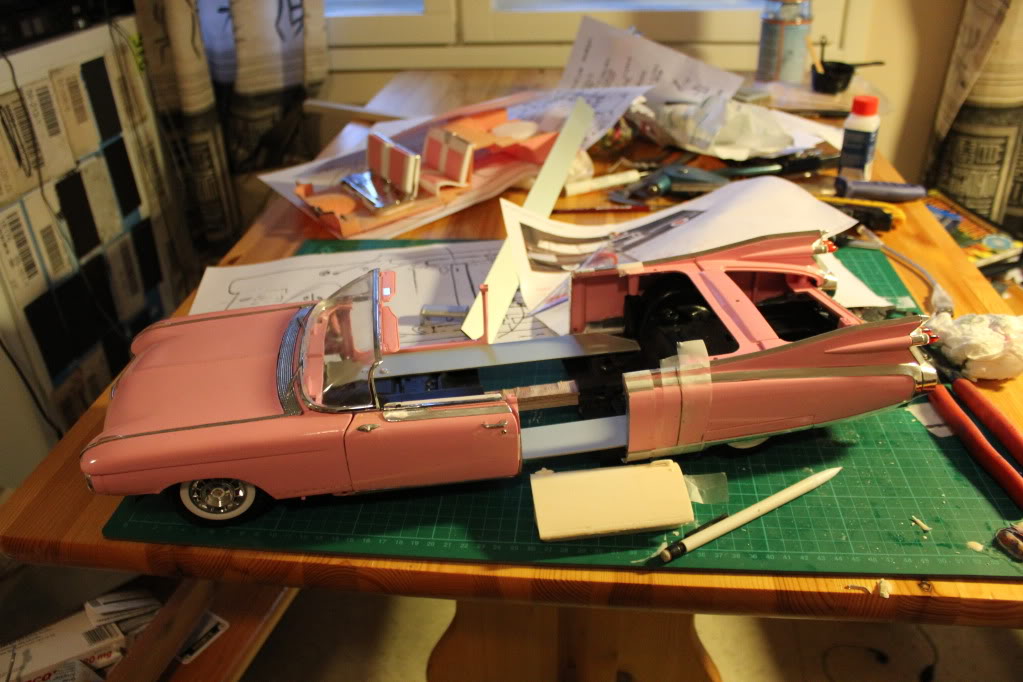
I cut the Cadillac Eldorado in half, just behind the front door. It was tedious job, as the point I was sawing was almos the thickest part on the side. Nearly 6mm thick. Still, it gives me more room for glue, pinnings and such..

I then quickly taped the resin doors to the caddy, and laid it on top of the photocopied plans from the Making of book. It matches near perfectly, making this vehicle reeeeaally long… I do need to measure the caddy again, and compare it with other screenshots to make sure that I got the measurements correct, as it would be a drag to find out that I made it too long after it is finished..

Just awesome man, really really really awesome! Keep up the great work, your progress is a blast to follow :slight_smile:

This is the one thread ive been keeping an eye on, its so cool, I love seeing your progress, I cant wait to see the finished product!

Getting better each day :wink:

On with the show again..

I took the car body and laid it on the table next to the photocopied blueprints to see just WHY does my caddy seem a bit too long… I discovered that the photocopied pictures from the Making of Ghostbusters do not match up with the screen used Ecto… There are some differences, and there is almost 4cm too much on the sides.. There should only be about 16mm between the rear wheel fender and the rear door. In this caddy, there is about 50mm…

Taking my thoughs elsewhere, I taped the floor of the car with scotsch tape…

..And proceeded to cut it in half at that point. I will need to lenghten this too, as well as the upper part of the body, and this was the best point..

I cut up some aluminum for strenghtening the floor, and pop riveted them in place. The rivets will be hidden under the silencers of the exhaust pipes, and matting on the inside, so they will not be seen. I also used a piece of plywood in the trans axle conduit to give the car some additional strenght.

With those in place, I could begin the final cutting to the lenght of the Caddy. I used the resin doors as a visual guide, taped the sides, and marked the cutting point..

After cutting the sides to size, I taped the parts together. I needed to bend the aluminum a bit, so that it tapers to the reas axle housing, as it was a bit too long. I managed to break my metal cuters, and need to buy new ones…

The Caddy is now at it’s final lenght. There is no other point that can be cut out without making things worse.. After a bit of sleep, I will rivet the Caddy’s floor together, making the bodywork possible…

At this time, the Caddy is exactly 53.5cm long…

I have always loved projects like this, where someone artistically follows a dream through to reality, but also does all of their research at every step. Can’t wait to see what this becomes.

You should offer a kit of it!

Alex