damn… my bad english.. 
yes i have a switch and a small red LED.
And now i only dont know if it is possiple the charge the battery via the cable for the output. Of course, the switch is “On”
I think it always has to be “on” while charging?
damn… my bad english..
yes i have a switch and a small red LED.
And now i only dont know if it is possiple the charge the battery via the cable for the output. Of course, the switch is “On”
I think it always has to be “on” while charging?
Yes, the switch always has to be on while charging. What I suggested earlier, is to cut off the 2 cables, the red led, and the little switch, and solder new wires on to the battery. Then hook the new wires to a dpdt switch so you can switch the output from the battery to either a charging port or a pack kit.
But i dont want to open the accu an i wish to hold the small switch in place.
the reason for my question is:
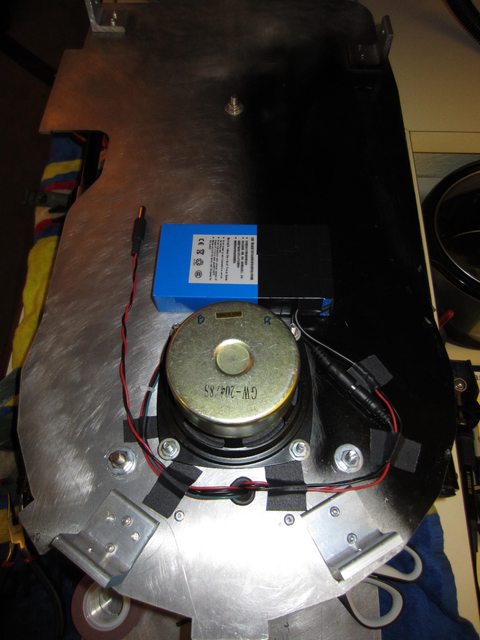
I have the accu outside my motherboard so that i can switch between the accupacks when one is empty.
To switch is a bit hard because there is not so much space and it needs a while till it is changed.
At moment i have only one Accupack.
The Plug to connect with the Mightyboard is below the batteryholder. I only have to plug the Batterycable in that female Plug and switch on the Batterys switch and the Mighty gets engery.
And now the reason for my question:
I wont every time put the Batterypack out of the holder to charge it but only the Outputcable is long enough to look out of the Batteryholder.
Thats why i ask if its possiple to charge with that cable (i only need a female adapter to tha Charger)
I have looked at the wiring in the battery and yes you can use the same cable to charge the pack as you use to run your lights/sound.
The only reason there are 2 different connecters on there is because it is designed to be plugged in all the time to a charger and device as it made to be used as a backup battery when the power does out.
The reason we are suggesting removing the LED from the battery is if you leave you battery in the pack (and its all closed up) when you turn the main power off for the pack the LED is still on draining the battery.
Wharin did you ever get your battery to charge? I deal with a lot of battery systems in my job and what you said has confused me. For charging you would normally hook the positive lead of the charger to positive. The negative lead of the charger to negative. What you have there is reversed. Plus you do also need a voltage higher then 12v. Some 12v chargers run around 13.1v.
Nevermnd, I just read your post where you said you figured it out. Sometimes I hate reading posts on my phone. I end up missing things. 
Since this is the main thread that comes up when I search blue brick wiring and I haven’t found any pics of people opening theirs up to remove the LED, I figured I’d post mine. If anyone has any concerns about how I did it or any suggestions, please let me know.
First, I carefully split the plastic coating to try to keep as much as possible and pulled the tape back. Not knowing what was underneath, I cut a little more than I needed to. If yours is similar, this should help guide you where it’s located.

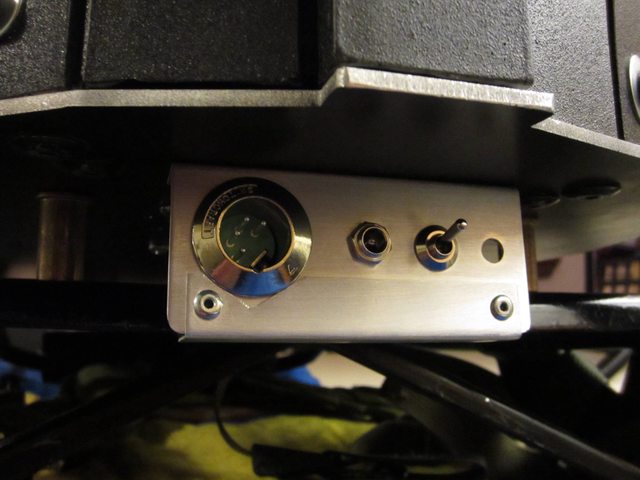
I didn’t feel like messing with the switch as I was already a bit paranoid about working on these direct-from-China batteries. That said, they aren’t too complex if you’re careful and know what you’re doing. I’ll still have it switched “ON” all the time so I don’t have to remove the shell and I’m using my XLR Spengler plate with a master power switch.
In my case, I just decided to remove the LED and keep the existing wires/connectors as I’ll be using them with a matching male/female quick-disconnect inside the pack (since my electronics are on the shell and battery on the motherboard). I didn’t get a before photo but right above the switch on that little round nub is where the small red LED was located. I planned on unsoldering it but it didn’t want to come off cleanly and I was getting the board too hot so I just clipped it and cleaned the leads so they don’t touch/short.
On mine, it also had some fuzzy cardboard beneath the blue tape (see above) which didn’t come apart cleanly. So when I put it back together, I used some double-sided 3M clear tape to re-seal it it nice and tight and wrapped it in electrical tape. All set, minus the draining LED.
Edit: here’s a few more after completing the install. Everything went great.
I opened mine up to move the switch to an external location and posted a thread in the tutorial section: Blue Brick CCTV Battery Switch Replacement - Tutorials & Guides - GBFans.com
Awesome thread Jack, much more detail. Bookmarked for future reference.
Wondering if anyone can shed some light on the issue i’m having with my battery. I bought the same style battery off ebay, same charger, same design with the rocker switch, same charging method. Mine is registered for 12v, 8000mAh, DC 128000. I left it 16 hours to charge which should be the correct time for it. Tested it, absolutely nothing. More worrying is the fact its outputting at 16.4v, tested this with two different multimeters and got the same reading. It’s also delivering no current at all, which makes me think it can’t hold a charge. If anyone has any ideas as to what I can do I’d appreciate the advice, fed up with it being just a blue brick
I just had a similar issue, had to get a new battery. It seems that these things can be bad right out of the box fairly regularly.
Yes always verify your voltage prior to using it. These are notorious for failure but given they are cheap and…well where they are made.
Can anyone, either publicly or through private message, recommend where to buy these blue brick batteries from and which sellers are good?
Recommend contacting AJ for his supplier.
To be fair, on eBay they all seem much of a muchness, not an awful lot to distinguish one battery from one seller to another. I’d just recommend checking their feedback history, see what others have to say there
I picked mine up from a US seller. I’ve found that a run down battery can take as much as 2 days to fully charge, just be sure the green light turns on or else it won’t be doing anything and wait for it to turn off for full charge.
I got a D.O.A one this last year and the eBay seller string me along until I could no longer make a claim. Make a claim as soon as something is wrong.
Much appreciated Alan, I’ll get right on that. Seems like a bit of pot luck with getting one that is working ok, a few of my UK crew have had duff ones too.
i too just got the blue brick, and am confused with the charging.. it seems different than what people say ^
charger has 2 lights, one red one green.
battery has 1 light(?) red, lights up when on or charging
when i plug the charger into the wall (not connected to batt) red light turns on, connect to battery still only a red light, but now a red light on the battery turns on (weather the batt switch is on or off)
at no point the green light has turned on…
i have tried plugging the charger TO the battery first then into the wall, AND turning the batt on before ect…
i am guessing the red light is always on, my next guess is that when the charger green light turns on that will mean its done charging?
also since the batt light turns on when charging even when battery is set to off would thins mean i can charge the battery in either the on or off positions?
any thoughts would be helpful
right now i have the battery set to on and is charging, i left it charging overnignt, still no green
Yeah, it’s a bit confusing at first but you’re on the right track if yours is the same as mine.
The battery switch must be powered on (and show the red light) in order to charge.
The red light on the charger is normal and will always be on, simply indicating it’s plugged into the wall.
Charging is done once the green light goes on (meaning both red AND green on the charger).
So my hunch is you’ve been charging yours overnight with the battery switched off, the same mistake I made the first day. Additionally, it DOES take a while to charge that first time (some say up to 12 hours) so be patient and let it go once you get it switched on.
My supplier is still unable to ship to the US in bulk for some reason.