FS: HasLab Ghost Trap and Pedal Upgrades Kits - No Soldering Required

In stock and ready to ship.

Seller Info:

Doug Keithley

Boise, ID USA

Doug @ GhostLab42 . com

I am offering several Upgrade kits for the HasLab Ghost Trap and Pedal. Some of the items do require some drilling and filing for the installation of the parts, but NO SOLDERING required for the switch and Indicator kits!

Currently there are 6 available kits and a combo upgrade package that includes all 6.

Ghost Trap

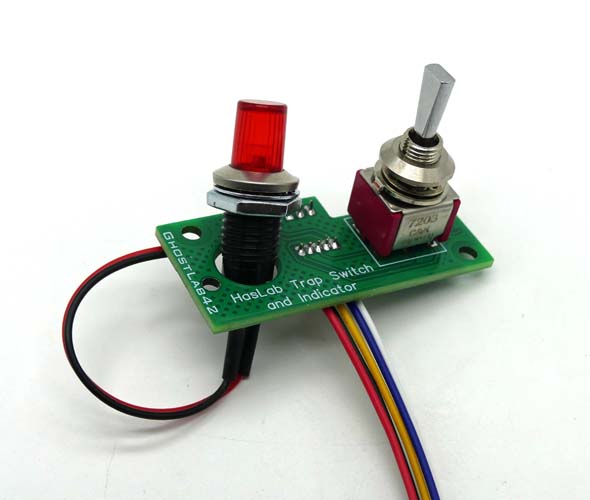
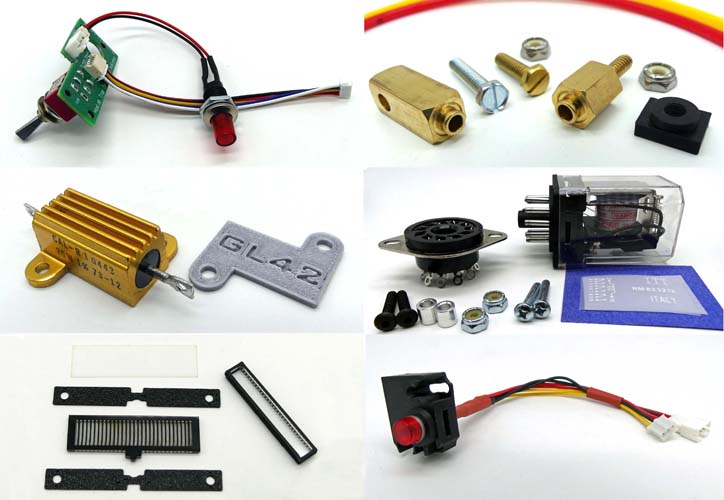
1) Plug-n-Play Accurate Switch and Indicator

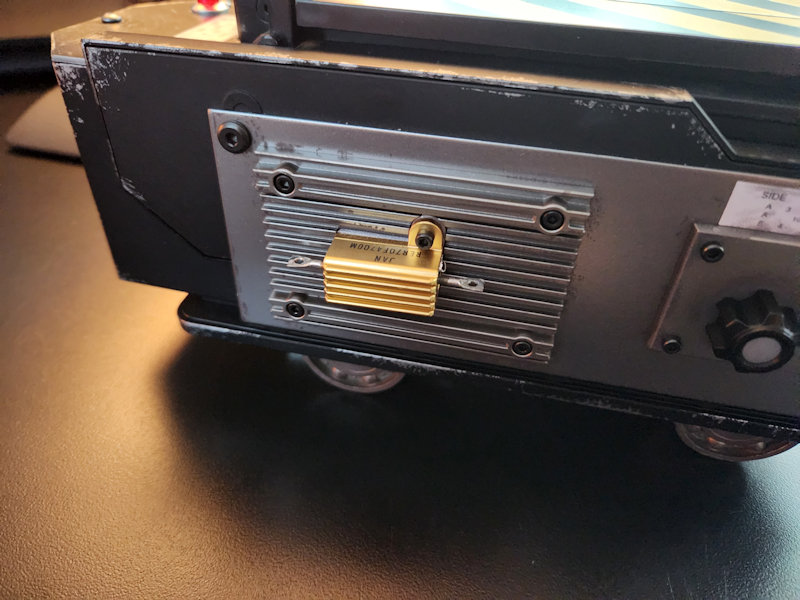
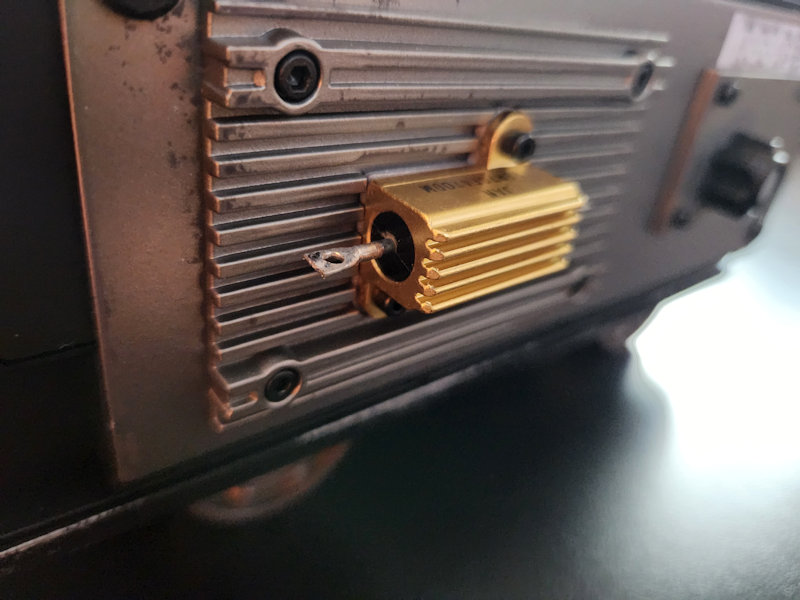
2) CAL-R Real Resistor and Mounting Plate

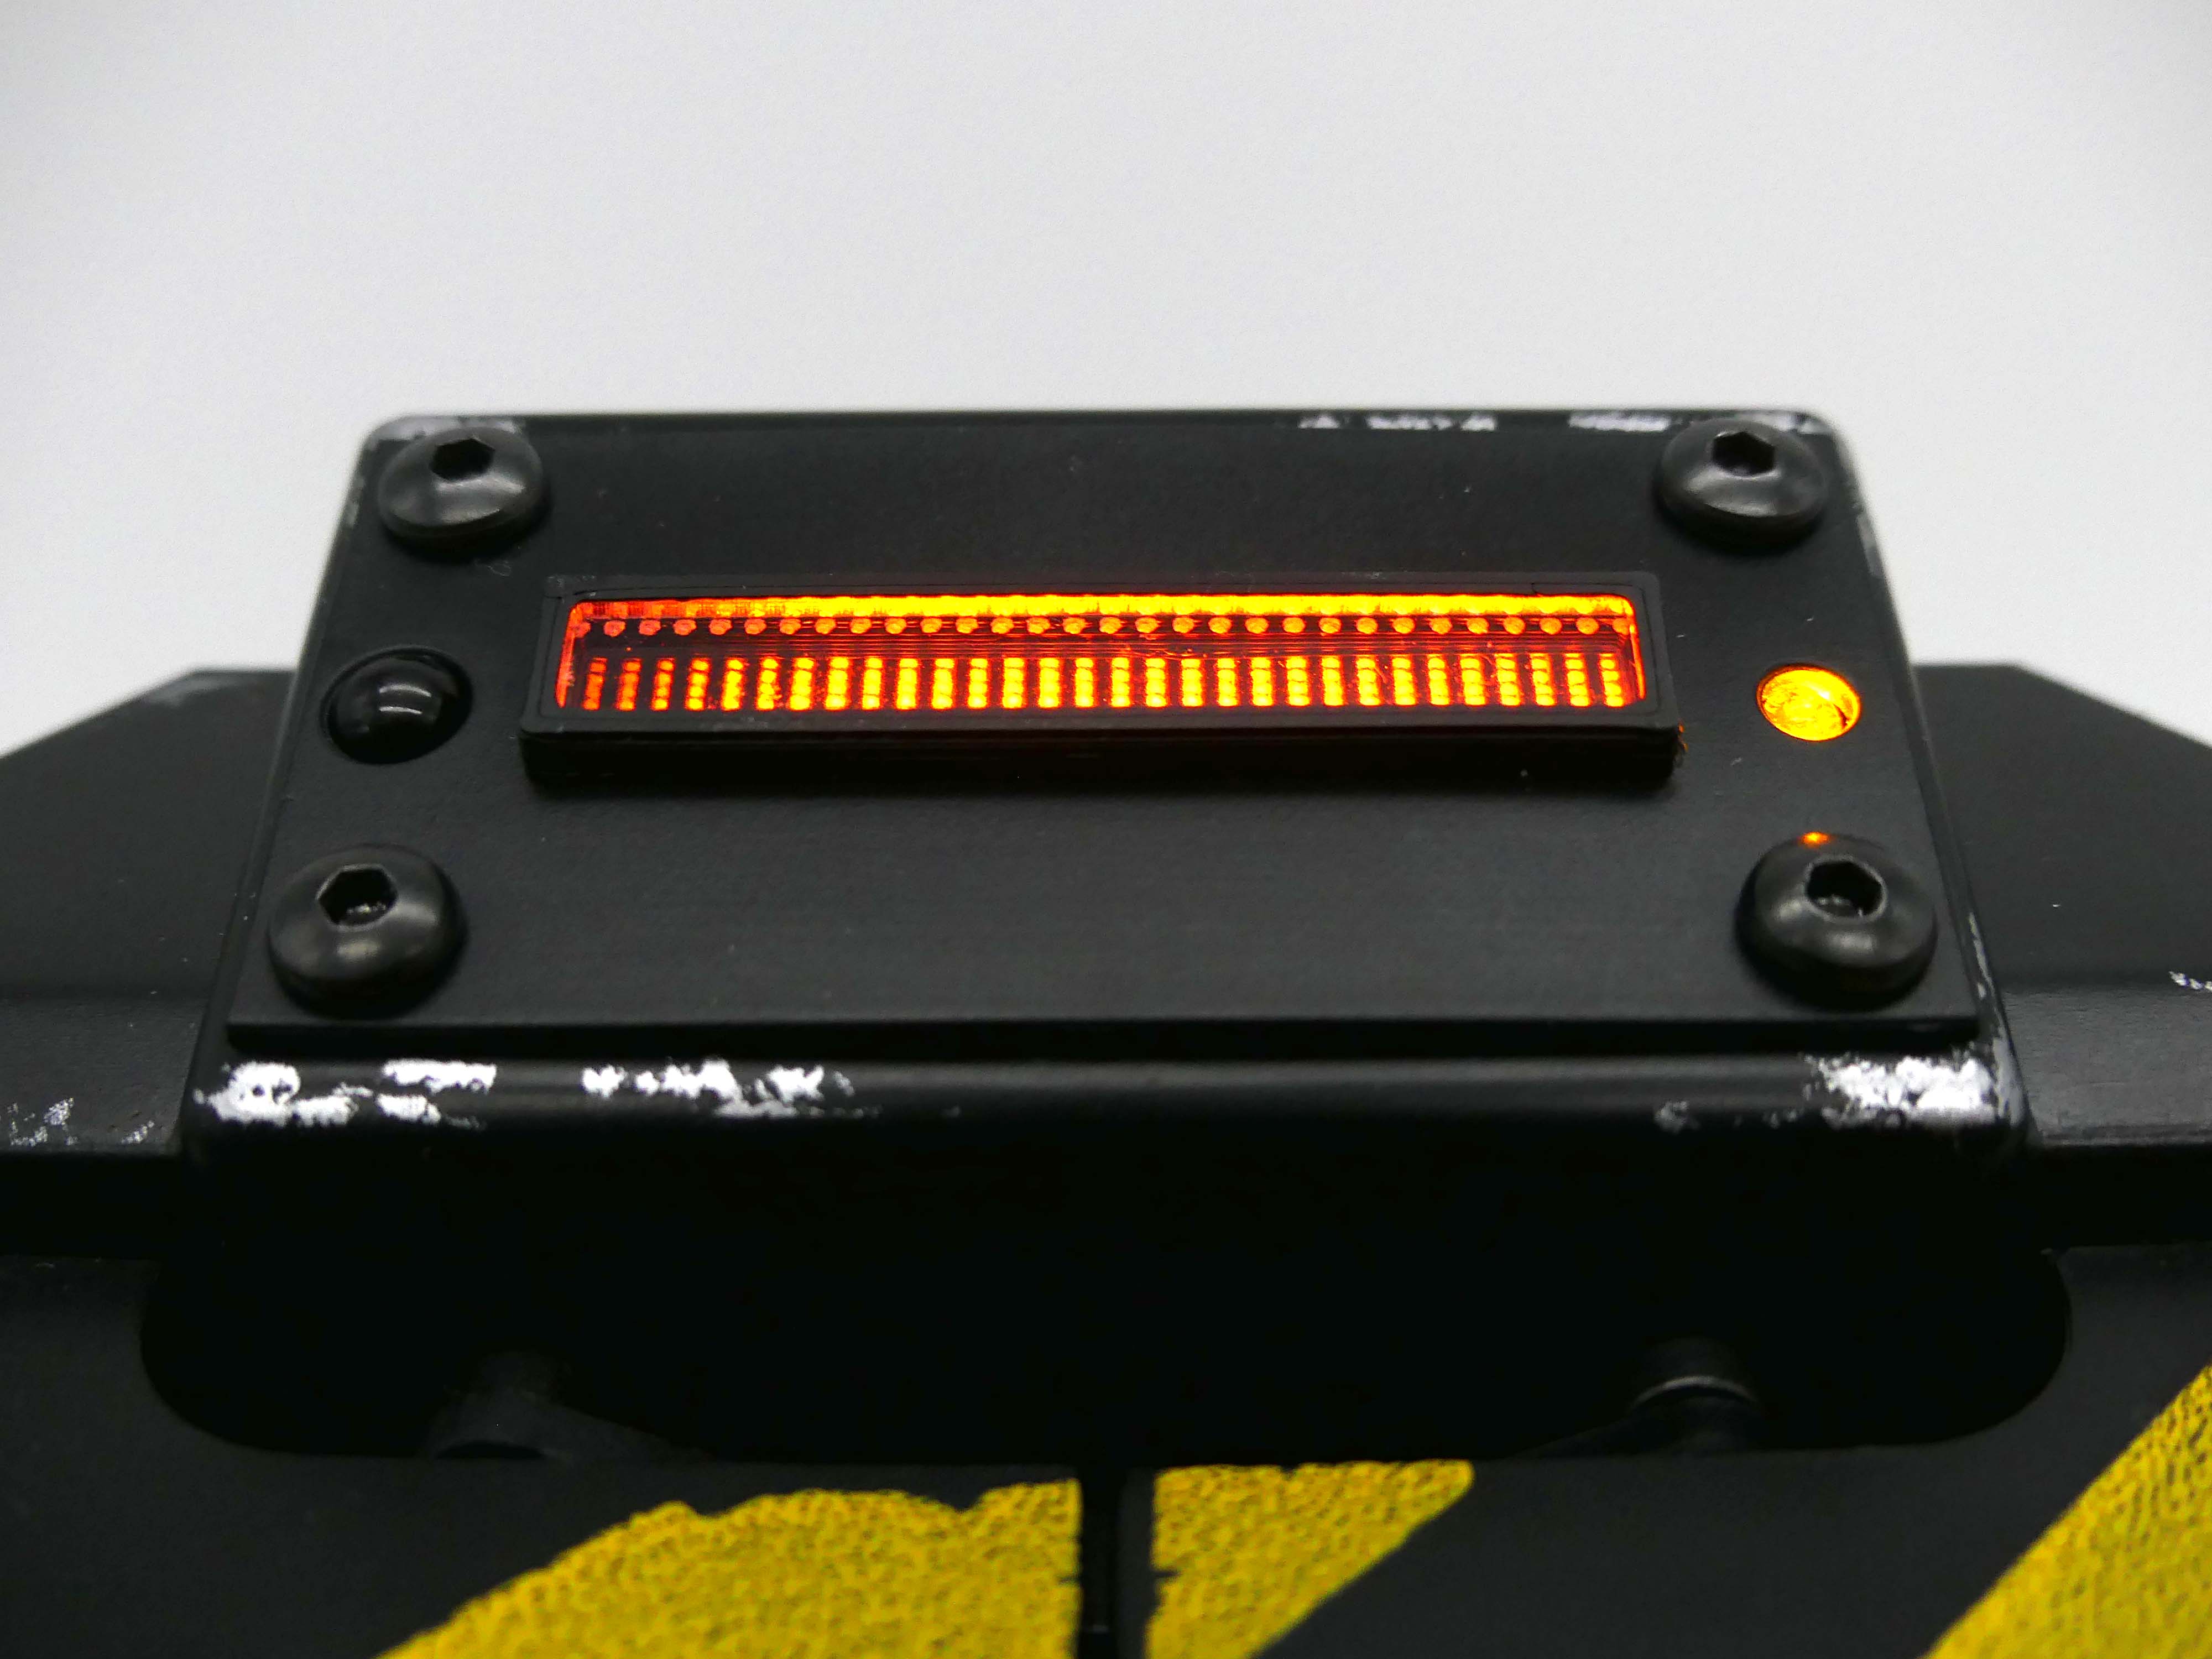
3) 30 Segment Bar Graph Look Display Upgrade

Ghost Trap Pedal

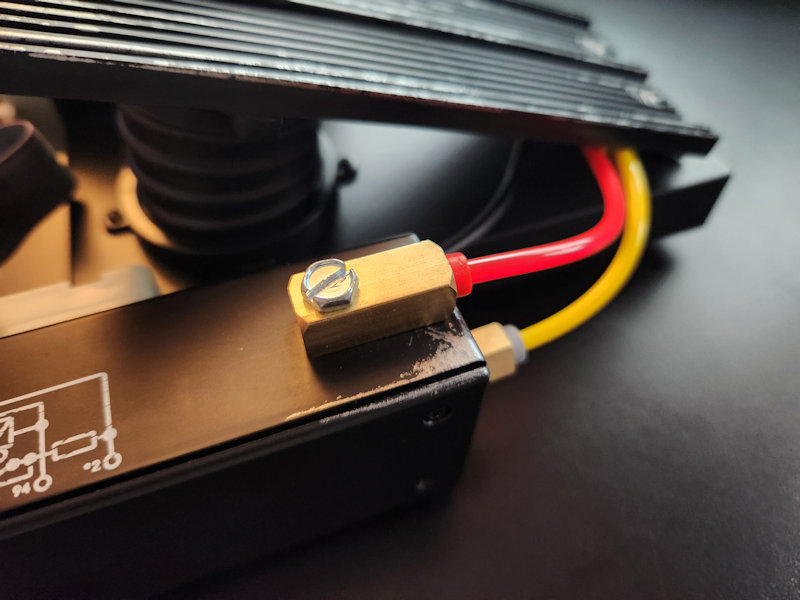
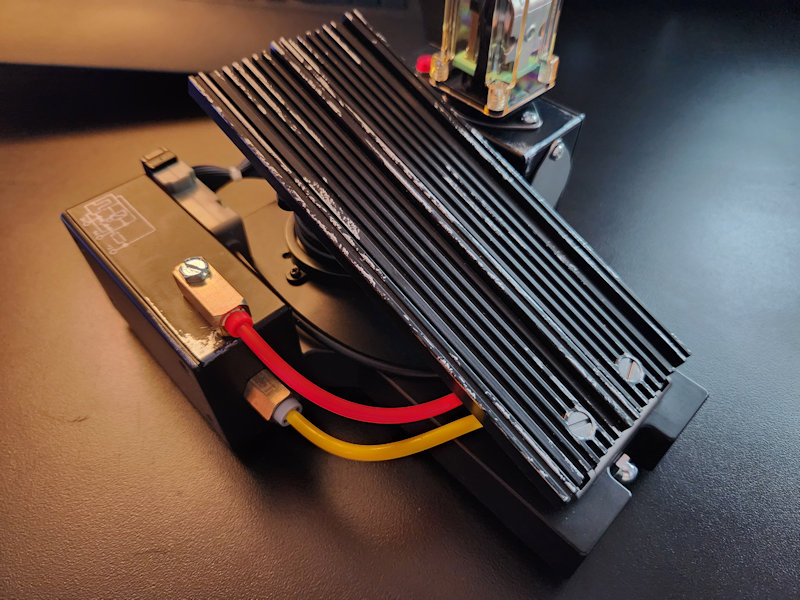
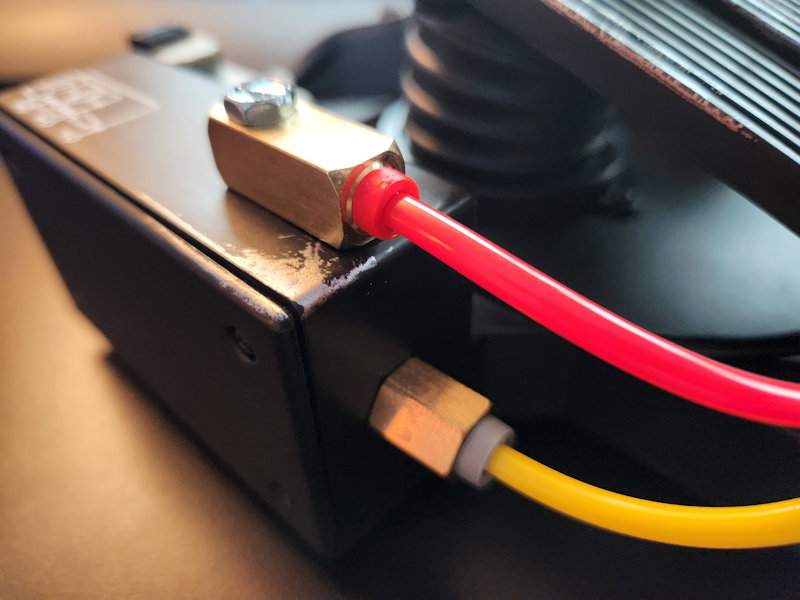
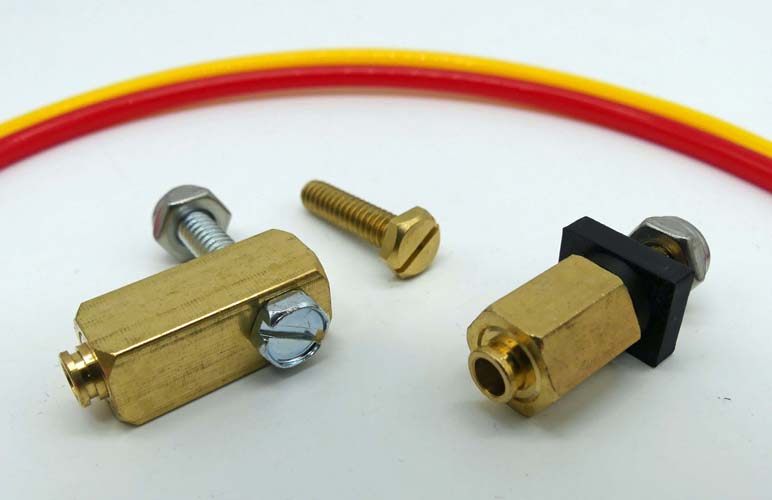
4) Custom Brass Fittings & Tubing

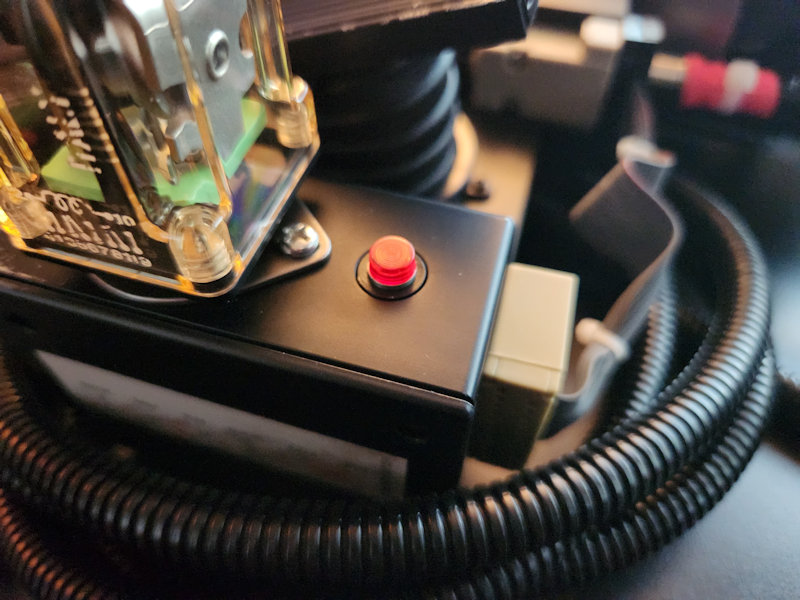
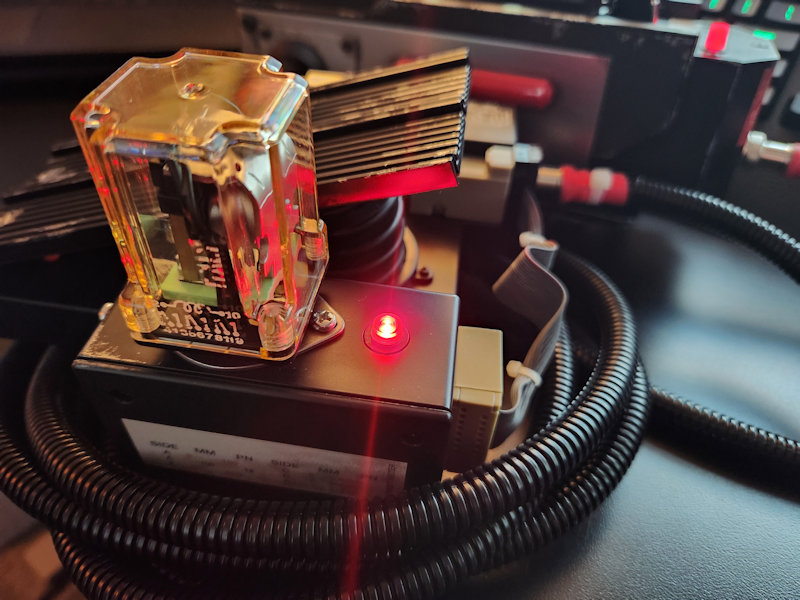
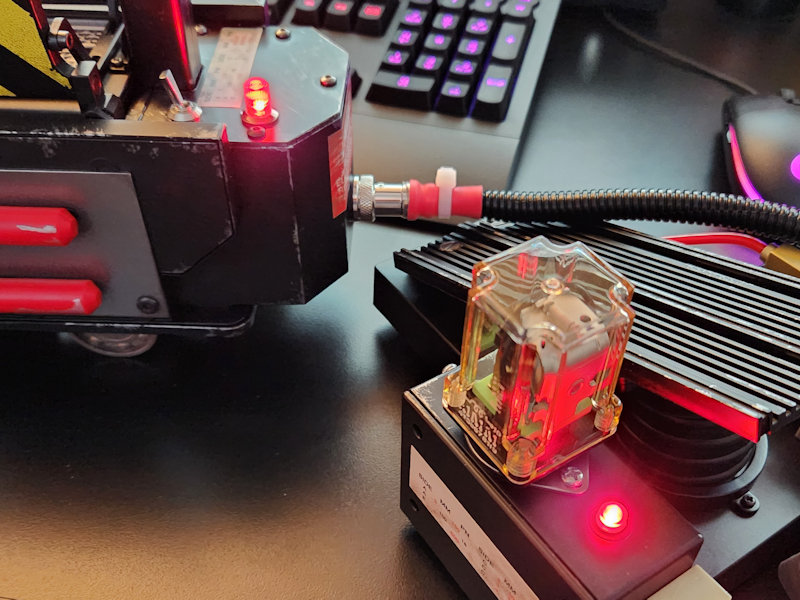
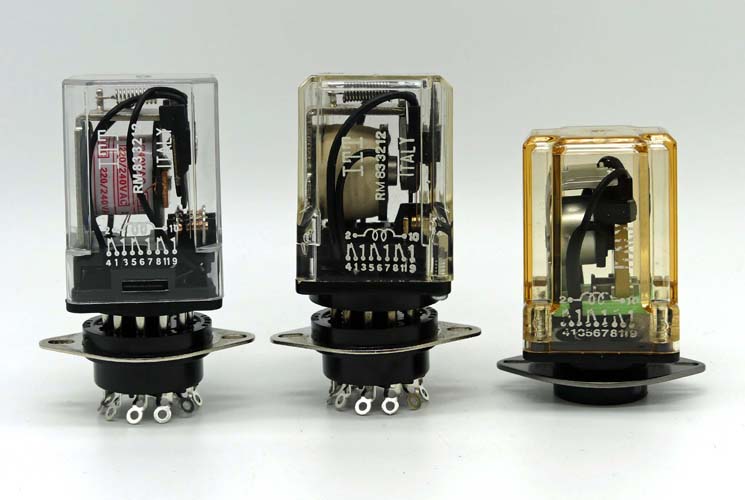
5) Replica ITT RM833212 Relay w/ Socket

6) Arcolectric Replacement Indicator
  1. Combo kit of the above 6 items

Installation instructions:

  1. Plug-n-Play Accurate Switch and Indicator

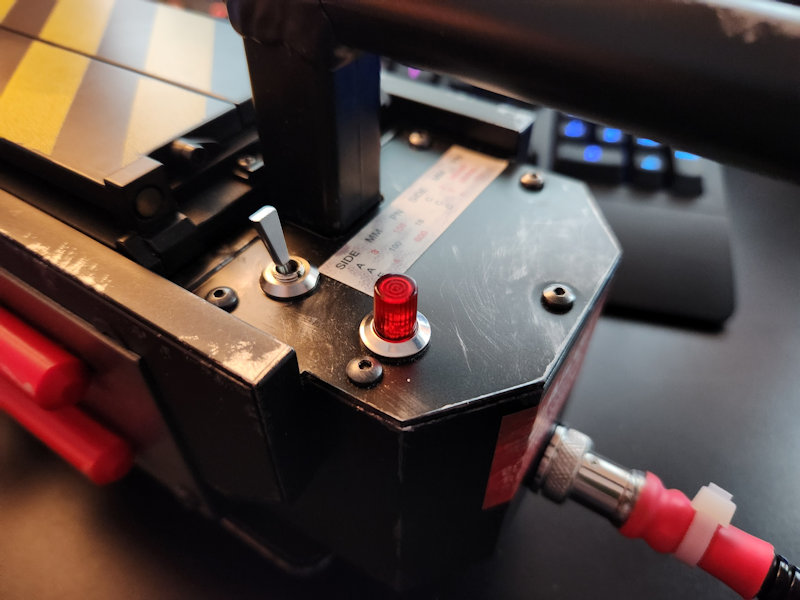
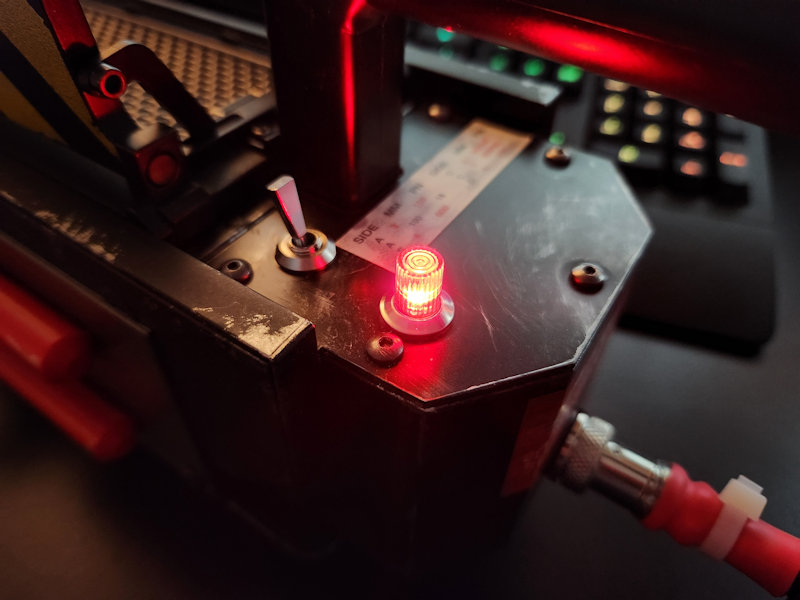
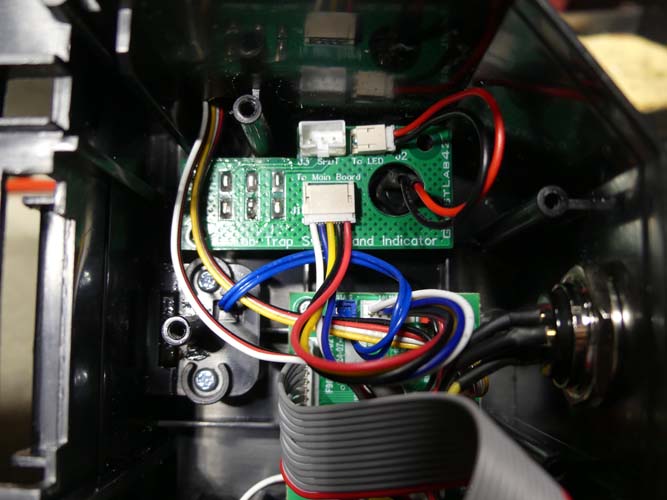
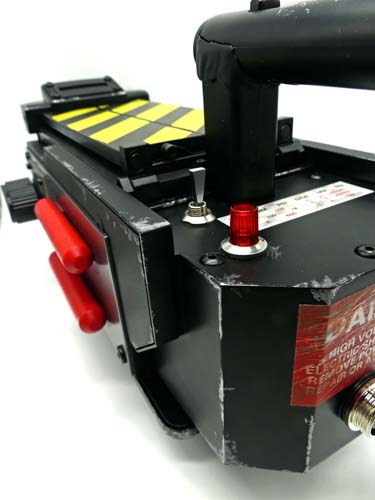
A great 3-position (on-off-on) DPDT toggle switch with the alignment spacer and appropriate nuts for the different versions of the Movie used props. Also a working Linrose indicator that is just like the ones used on the movie props. The assembly includes an LED integrated into the Linrose indicator.

No soldering required. Just use the included cabling and it just replaces the existing curcuit board and cabling.

Some drilling and filing needed to get the larger Linrose indicator to fit.

The circuit board also has a JST PH 2.0mm 3 pin connector to easily access the unused portion of the DPDT switch (basically a paired SPDT, 0n-off-on switch) for your own use for whatever you come up with!

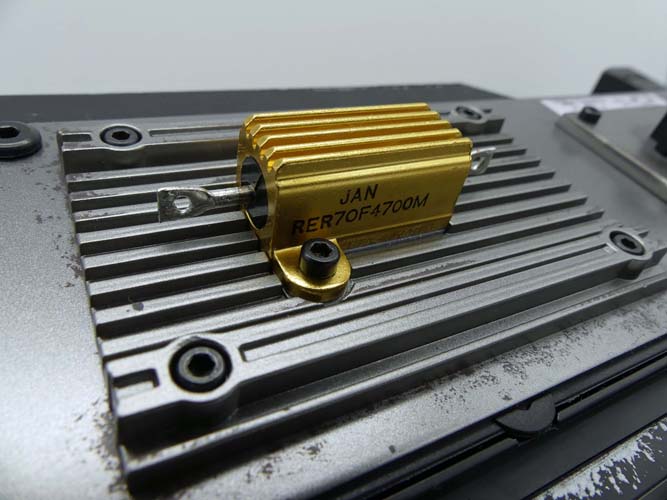
2) CAL-R Real Resistor and Mounting Plate (next to the HasLab molded part, not included)

Simply unscrew the Hasbro molded part and place the 3D printed Mounting Plate and real CAL-R resistor in its place and screw it back in. The Mounting plate raises the CAL-R resistor up a bit to make it sit better visually.


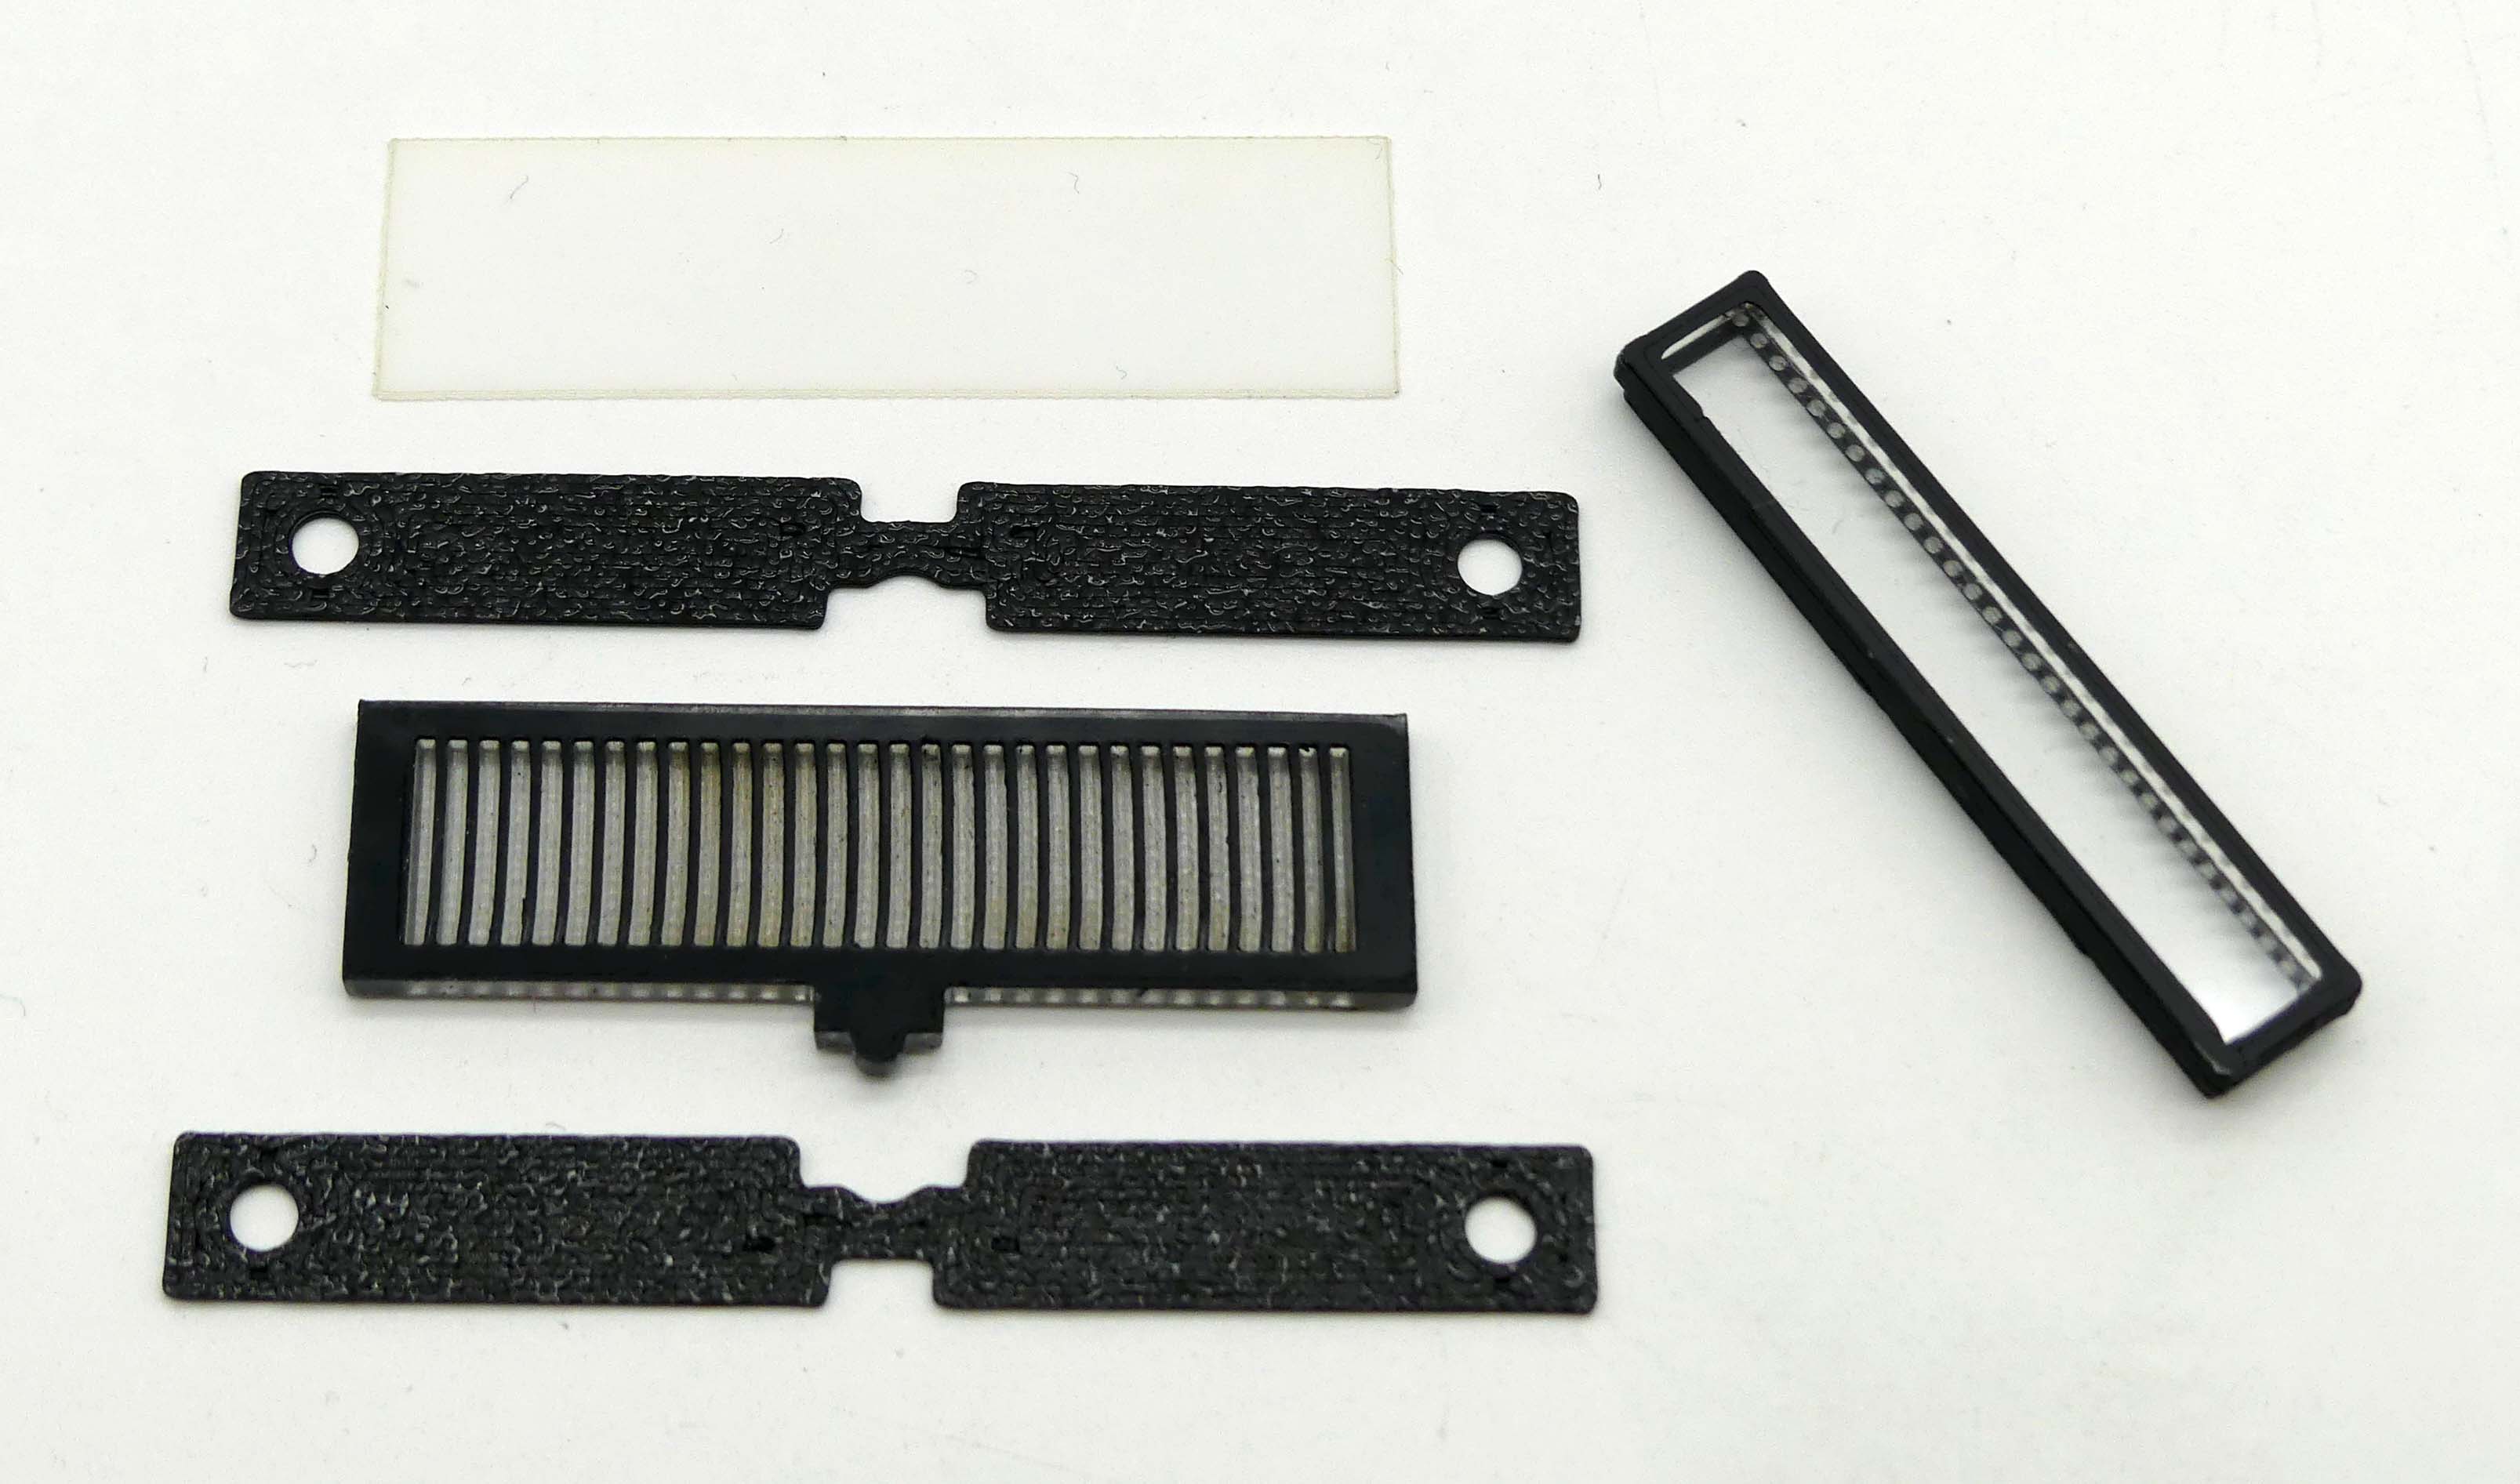
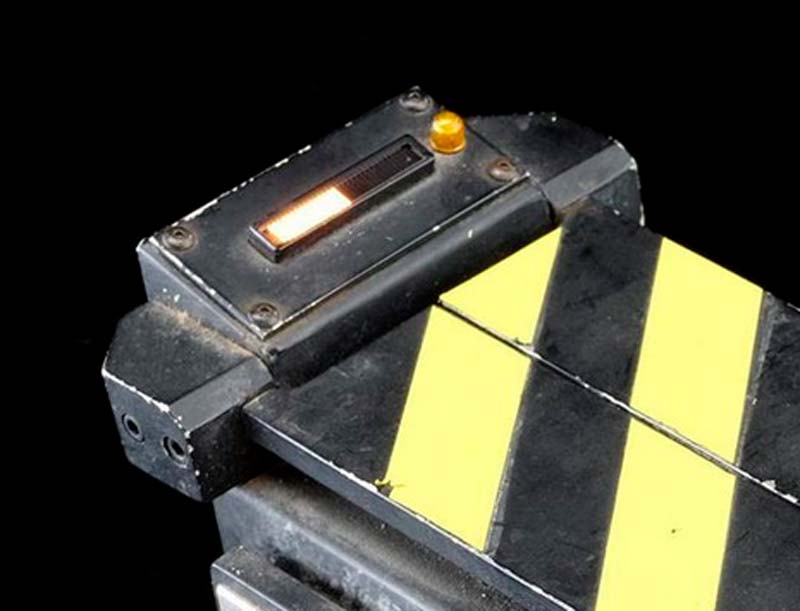
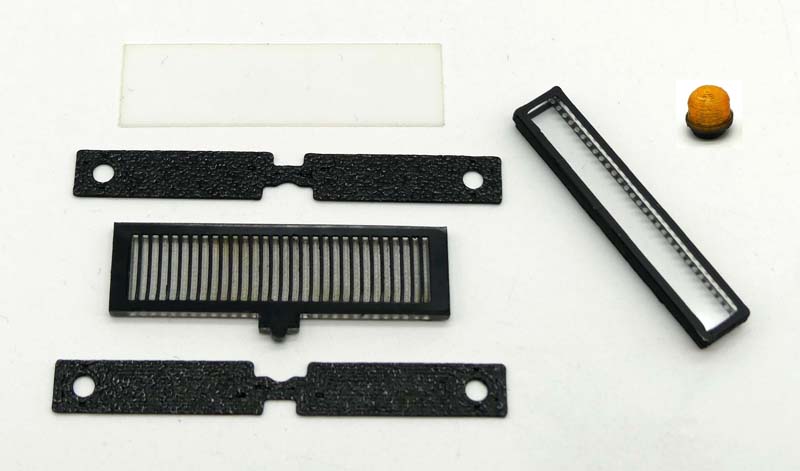
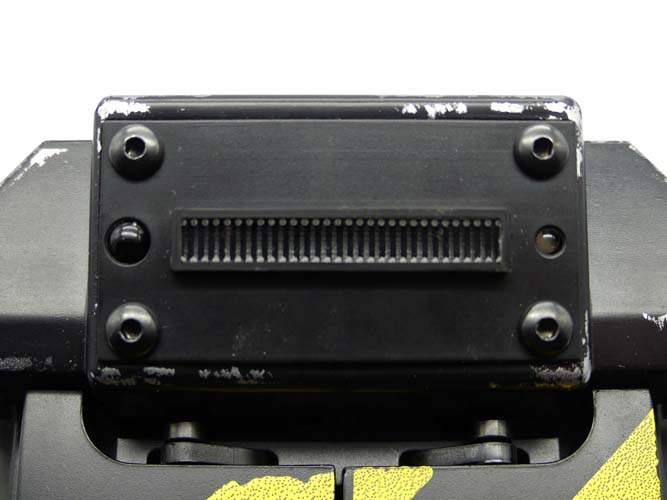
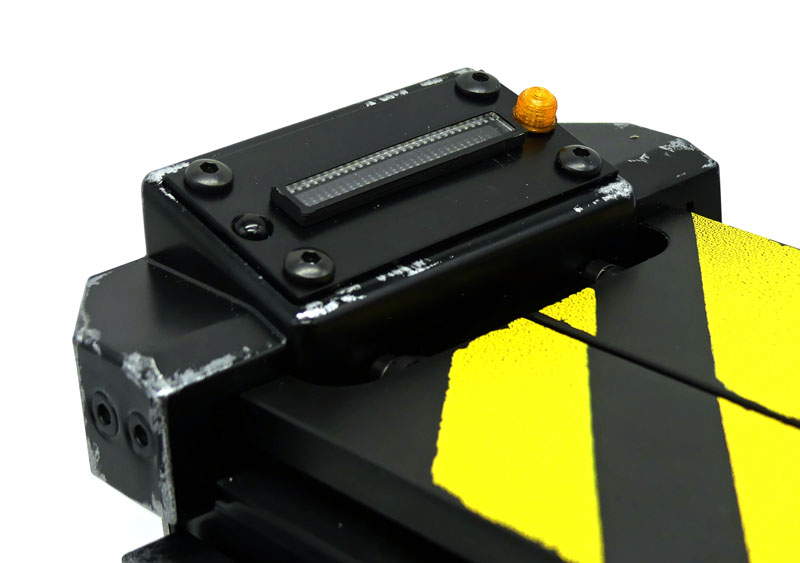
3) 30 Segment Bar Graph Look Display Upgrade

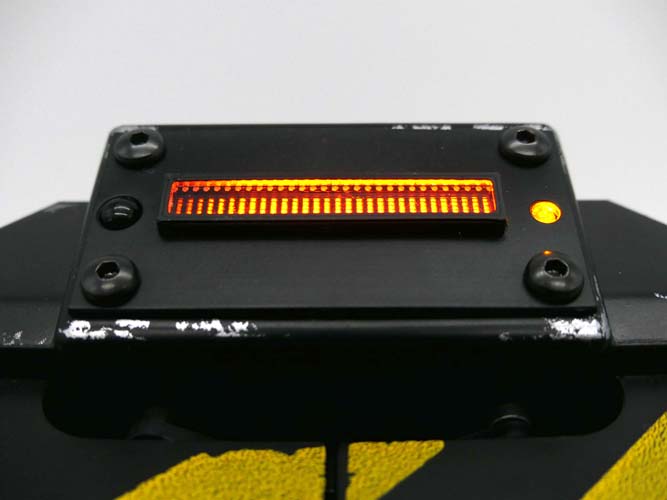
Just swap in a few new parts. No drilling filing or soldering and you get a beautiful 30 segment display look rather than the unique Hasbro 10 segment look. Comes with Display Lens, 2 3D printed spacers, laser cut diffusion material, a 3D printed Transparent Orange lens and a 3D printed riser with acrylic lens to extend above the display plate.

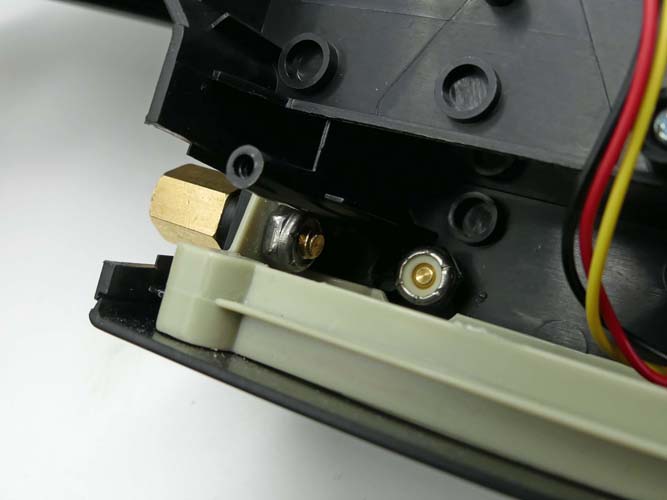
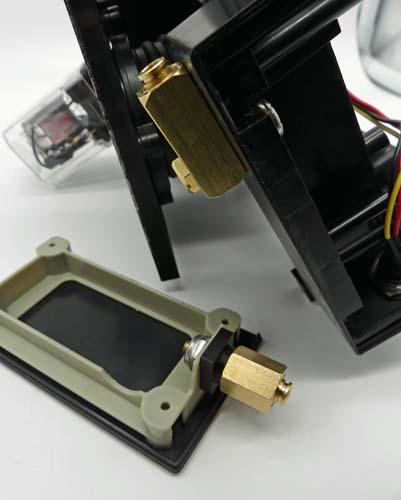
4) Custom Brass Fittings & Tubing

Custom machined Brass fittings and a Brass screw. Also include a steel screw , lock nuts, 3D printed adapter and approximately 1 foot each of Red and Yellow tubing. Some writing may appear on the tubing - just depends where in the roll of tubing the 1 ft section is cut from.

Some drilling and filing is needed to install these parts.


  1. Replica ITT RM833212 Relay w/ Socket

This is a real relay that has no legend printed on any of the sides. It comes with a real 11 pin socket, mounting screws and spacers as well as a Dry-Rub transfer with the ITT relay information that is identical to the movie used prop’s relay.

The images show the use without modifying the Hasbro case at all. It looks like it sits just s bit proud, so ideally the hole would be slightly enlarged (some filing/sanding) to let it sit down a bit, but this is not required.

Mounted on a Hammond box, not the HasLab Pedal:
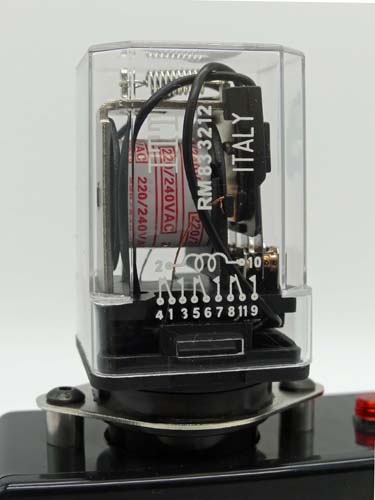

Here are three different relays for comparison: This replica on the left, An ITT RM833212 in the middle and the Molded plastic Haslab version with integrated socket on the right:

6) Arcolectric Replacement Indicator

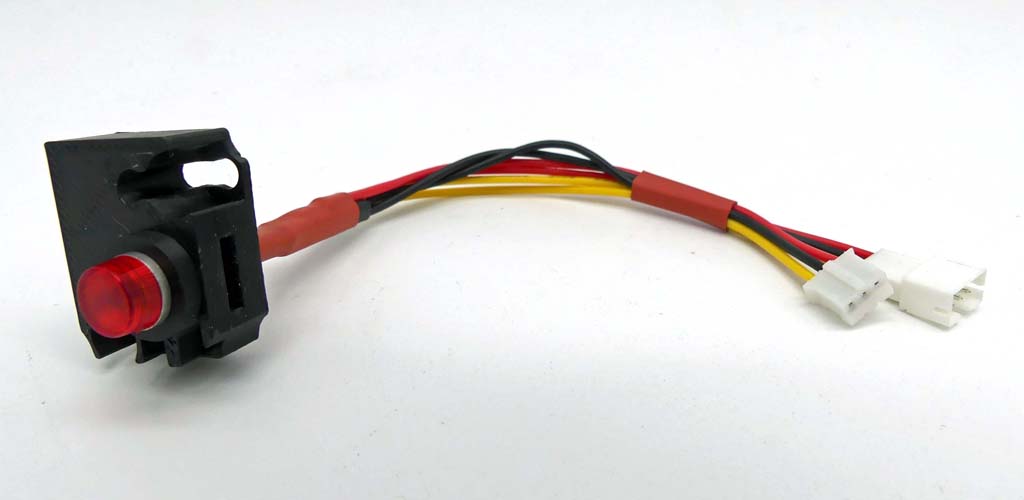
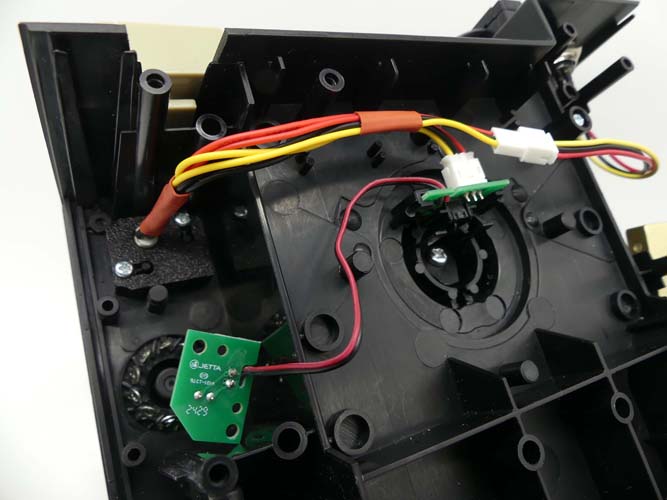
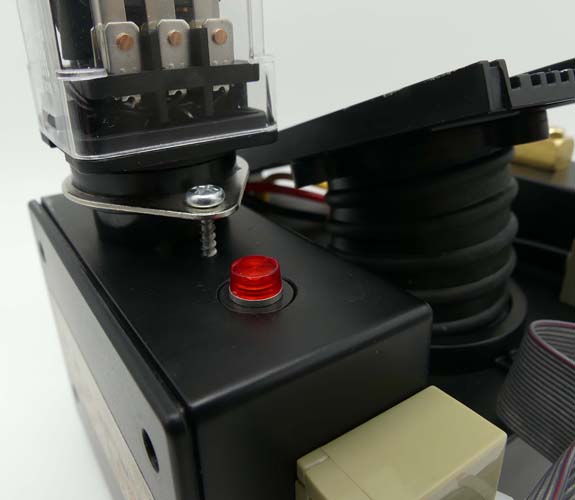
No soldering required! Replace the Hasbro lens with an actual Arcolectric Indicator, same style as used in the movie props. The cable assembly has multiple connectors, a 3D printed mounting fixture and red LED so it just replaces the existing circuit board and lens. The mounting uses the same screws that were used to mount the original circuit board.

You can leave the existing LED in there, but I do recommend cutting that off and taping the wire ends so that they do not accidentally short anything.

7) Combo kit of the above 6 items

Includes all of the above 6 kits.

Prices:

Plug-n-Play Accurate Switch and Indicator : $39 + shipping

CAL-R Real Resistor and Mounting Plate: $11 + shipping

30 Segment Bar Graph Look Display Upgrade: $20 + shipping

Custom Brass Fittings & Tubing: $31 + shipping

Replica ITT RM833212 Relay w/ Socket: $29 + shipping

Arcolectric Replacement Indicator: $22 + shipping

Combo kit of the above 6 items: $129 + shipping

For USA shipments,

PM with a request and your shipping address and I will respond with my paypal address and your total, or

PM me your request, shipping address and email address and I can email you a PayPal invoice, or

purchase on eBay (eBay costs a bit more to cover the eBay fees that they charge for the sale):

http://www.ebay.com/str/ghostlab42

http://www.ebay.com/str/ghostlab42/HasLab-Trap-and-Pedal/_i.html?store_cat=44509717014

For international shipments, please just use eBay. They take care of the customs forms, VAT, etc.

http://www.ebay.com/str/ghostlab42/HasLab-Trap-and-Pedal/_i.html?store_cat=44509717014
Doug, these are amazing!

In the video for the drop in switch and light upgrade, it appears as though the toggle had to be switched twice to turn the trap on. Am I mistaken?

No change in functionality. I toggle it twice to get the light to come on quickly. The trap does turn on (sounds and bar graph display), but the light by the toggle switch only comes on immediately for power down. So I turn on and then off to minimize the time to wait for seeing the light come on!

Hello there,

I appear to be getting 403 Forbidden on most of the image links in your post. In fact the only image that displays properly is ```
https://www.ghostlab42.com/img/Trap/P1300122.JPG


Sounds like an amazing kit, though! If I didn't already have most of the parts in question I'd probably be jumping all over this! That said I'm dying to see the images for your Arcolectric indicator--I already owned one but as you probably found out it is far too small for the Hasbro hole. But as I figured might be necessary you came up with some kind of 3D printed mount to make up the gap? I might jump on that regardless!

Apparently multiple ISPs don’t like my iPage file server… I check it with Chrome, Firefox and Edge and it works for me.

Maybe try removing the “s” from the URL, so just http://… See if that allows you to see the images?

You can also go look at my eBay pages - the prices are higher to cover eBay fees.

The Arcolectric indicator is here:

Yep, changing it to http instead of https lets the images work. Thanks!

Did end up jumping on the Arcolectric, it’s just too slick. I also like the spacer for the resistor so you don’t have to cut up the trap to install it. Great work!

After looking at what others are offering for upgrades, I wanted to differentiate a bit more so updated the Ghost Trap display kit that I am offering by adding a “riser” with an enclosed acrylic lens to look more like the GB2 trap reference prop that had the expensive 30 segment display that extended above the top plate, rather than be recessed into the top plate.


http://ghostlab42.com/img/Trap/P1300138_fix.jpg

Could we get a link to the installation instructions? Please and thank you!

Just finished the first pass of the Installation instructions:

http://www.ghostlab42.com/img/Trap/Hasbro_Trap_and_Pedal_%20Installation_Instructions_V1p0.pdf

Adding additional screws for the replica ITT Relay and socket. This makes it easier to install.

Also updated the Relay installation portion of the instructions:

http://www.ghostlab42.com/img/Trap/Hasbro_Trap_and_Pedal_Installation_Instructions_V1p1.pdf

The instructions for disassembling the trap pedal are inaccurate. You do not need to (and should not!) remove the rubber adhesive pads on the rear feet. The entirety of the plastic rear feet come out. They are only press fit into the holes that cover the rear two screws. You just need to twist them a bit to get them loose, then put a thin implement underneath to wedge them up enough to grab and pull out the rest of the way.

I had not tried that. The feet on my pedal do spin around freely, but not sure what is holding them in. I had a terrible time getting the first one to pop out after reading this. Could not see what was making it so hard to remove since it was spinning fairly freely. I did eventually pry it out and left a small mark on the base (from the flat screwdriver I used). Pushed it back in place and then could remove it by just pulling and twisting with my fingers.

Tried the other foot and it came out with just pulling and twisting - no prying needed. Maybe just a psychological block on the first one?!?

I will add that as an option to the instructions. Thanks!

Doug at Ghost Lab 42 does not disappoint. I have purchased most everything he made for the Spirit 80% pack, and they are all top notch and are still going strong after all these years.

His latest trap parts are awesome. I’ve only installed the trap pedal light so far but dang, this thing looks and works better than the stock LED. Actually, one of my pedals had a bad LED that would barely light up, Doug’s option bypassed the problem and saved me the trouble of sending it into Hasbro and waiting for a replacement.

This thing looks great when not lit and incredible and bright when the power hits!

Thanks again Doug for all you do for the community, and I look forward to installing the Plug-n-Play Accurate Switch and Indicator over the weekend.

Done!

So easy to install and looks incredible! I’m going to order another set for my second trap and pedal!

Thanks again Doug!

Yup, it’s me again… I was very hesitant to attempt the “Custom Brass Fittings & Tubing” kit, as it takes some tricky dremeling to get the job done. But after a good 'ol fashioned pep talk from the man himself, Doug convinced me to give it a try. My biggest concern was the dremling of the top portion of the box that houses the the brass fitting. I was worried I would mess it up and the brass fitting wouldn’t cover my mistakes.

I was very careful, taking my time with the dremel speed set pretty slow and it turns out it was easier than I thought. The tricky part for me was using the dremel to carve out the mount on the inside as it needed to be flat for the nut. Again, took my time and made the cuts need to secure the brass fitting without screwing anything up.

I was kinda on the fence about whether I wanted to change the brass fittings at all as I thought I was happy with the stock setup. But damn, after getting the new kit installed, it makes such a big difference I can’t wait to get started on my second pedal. :slight_smile:

Did you also Dremel out inside the trap for the replacement light fixture? That part made me nervous, since that was such a tight space… but it was worth it in the end. I’m down to just needing to install those replacement brass fixtures on the pedal, and I was kind of in the same space as you, thinking maybe the stock ones were good enough, but your photos look great, so I might take the plunge this weekend.

Yes, but I was more worried about enlarging the whole with a 3/8 drill bit, but it all worked out nicely. I have a cordless dremel with an LED at the end so it was easy to see down in that narrow space, albeit still a little unnerving. :slight_smile:

Using the top plate from CharlesworthDynamics sealed the deal and worked perfectly with Doug’s kit.

I agree, that top plate is a nice add, and meant I didn’t have to grind down any of the old molded silver ring to flatten out the surface :slight_smile:

Hi there!

I upgraded my second pedal with the “Custom Brass Fittings & Tubing” kit without issue. It was even easier than before as I now knew what I needed to do and how. I also added Doug’s “CAL-R Real Resistor and Mounting Plate” upgrade which was very simple. Just removed the screws holding on the plate and stock resistor, and then snipped off the stock resistor mount with a pair of dykes.

Add this mod to the list of Doug’s kits that I didn’t know I needed until I installed them. :slight_smile:

I thought I was done, but Doug’s LED lens setup has now piqued my interest. I have purchased a few lens alternatives but as usual, Doug’s seems to be the best.