This is my Ghostbusters costume I wore for Halloween 2007. The proton pack and ghost trap were built almost entirely from cardboard. It took me about two months to construct this costume. The total cost was around $100. The majority of that cost was the spray paint, glue, and coveralls.
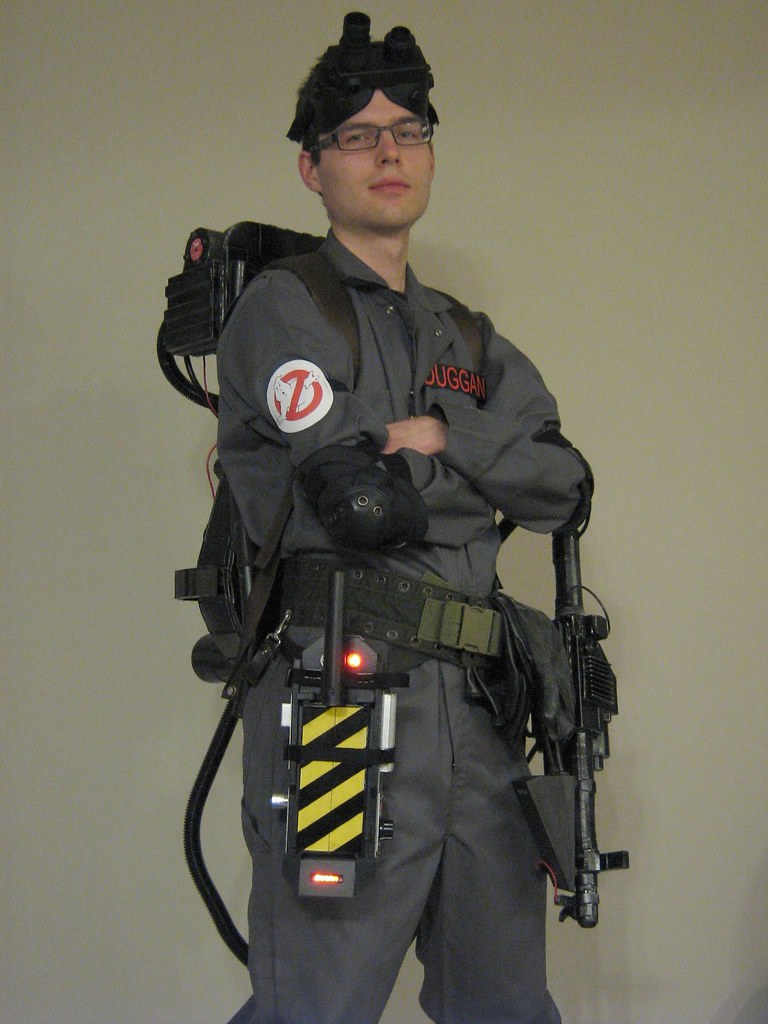
That’s really sharp looking! Especially for 100 bucks!!! …I like how you’re pads and uniform look, it’s got an XGB flavor to it, but with a proper pack of course. Good stuff.
:crunch:
Wow, that pack looks better than alot of wood/plastic/fiberglass packs I’ve seen. Good work.
THAT is cardboard… holy ■■■■!!! you cant even tell
Took the words out of my mouth! Great job!
That is a nice looking cardboard pack man! I love the trap too. Keep up the good work. Cardboard is an awesome prop material that you can stretch a long way if you take your time and pay attention to detail.
Wow!
That looks great! I will probably be doing a Cardboard pack next year for Halloween for the Bars, etc. I’d love to hear more about how you did it! Mine won’t be near that good, but here’s to hoping!
JC
Thank you everyone for the compliments. My work was inspired from this site.
Cardboard is a great material. It is practically free, lightweight, readily available, and no special tools are required. Here are some tips for working with cardboard:
Corrugated cardboard:
-This material is used to build the underlying structure.
-Keep you knife blade sharp and always cut along a ruler edge. Multiple passes are better than one cut.
-Use double corrugated cardboard if you can find it. If not, you can always glue two sheets together when extra strength is needed. The motherboard was made of two double corrugated sheets.
-Respect the direction of the corrugations. It can bend easily parallel to the corrugations, but is quite rigid when perpendicular to them. Use this to your advantage.
-Create curves by scoring (cutting through the cardboard half way on one side and bending) at regular intervals. The result is faceted, but the more sides it has, the smoother the curve. The cylinders, HGA, injectors, cyclotron, wand handles, etc, are all built this way. It is better to score perpendicular to the corrugations for a sharper corner.
Cereal box cardboard:
-This material is used to strengthen the corrugated cardboard and provide a smooth exterior veneer.
-Two layers glued together with Weldbond make a remarkably strong sheet.
-The colorful glossy side will be facing out. It is flat and water resistant. However, be sure to lightly sand any glossy surfaces that will receive glue or paint. The sanding will make the surface loose its water resistance, so priming will be required (see painting)
-Score the surface to wrap around corners of the structure.
Assembly:
-Hot glue is used for the majority of the assembly. It allows you to work quickly, reinforce inside corners, and make weld lines. Avoid it when gluing together large flat surfaces, the glue dries too quickly to be pressed perfectly flat.
-Weldbond provides more working time than hot glue. It is used primarily to glue multiple sheets of cardboard together when extra strength is required. Always compress the two sheets together while it dries.
Painting:
-Cardboard wants to absorb water, so diluted Weldbond is used to seal the surface of the cardboard preparing it for paint. Extra diluted glue is brushed on all exposed veneer corners, making them stay strong and crisp.
-Invest in a respirator. It makes spray painting much more pleasant.
-The pack is given a coat of grey fast-drying primer followed by silver.
-Two layers of fast-drying gloss black. Thin coats, missing a few areas is better than drowning the whole thing in paint.
-Lightly sand the black layer to remove the gloss in some areas to increase realism. Sanding a little more will expose the silver layer beneath.
-Silver paint can also be hit on the edges.
-Most of all, have fun!
I specially love the look of the trap!!! Looks like metal and it has the lights and everything!!!
Could u tell us how u build it? I need to do one as well
SAl
For a cardboard pack that is pretty sweet, Good stuff indeed.
The trap was based on SG1STAR’s ghost trap plans. These plans detail all the parts necessary to build the device. Best of all, they tell you the thickness required for each of the pieces. I drew full size templates to trace onto the corrugated cardboard. To meet the required thickness, I would stack and glue multiple sheets. The piece is then covered on all visible sides with cereal box cardboard.
-The trap side panels consist of double layered cereal box cardboard spray painted silver. Small screws and knobs from an old stereo are added to enhance the illusion.
-The lights used are cheap battery operated LED Christmas lights.
Ohh c´mon!!! Are u serius???
Incredible job then!!! I really like it. If u could take a pic of just the trap would be great!!! SO i guess the trap is very light weight!
Sal
Awesome work! In retrospect I wish I had been more careful and neat and precise like you! Great work! Doesn’t look like cardboard! 
could u please post closeups of your trap??? I have Irricanian´s knobs trap set which are awsome, and i need to start building one trap… but don´t have a lot money to invest… i have a near project about a fan film, but only i will be a GB since i don´t have other people that would build their protonpacks… so it would be great if you could help me .
Thanks
Sal
I’d love some more detailed instructions for how you made the trap… I’m considering using cardboard to build my props but I’m not sure how to go about building with it.
As requested, more trap photos have been added:
:wrongforum:
LOL Man that looks really great. My pack is printed on the computer lol, doesn’t even look half as good.
That’s cardboard?
Excellent job! 
If you have some construction photos I’d love to see them. Awesome work man 
Is that trap strong.. .say if you walk next to a chair or a table, would it break or something??? Or what if it fells from the trap hostler?
SAl