Having recently “finished” my build, I decided to search the forum for what others are saying about or their dealings with BPS, which brought me here. I spent quite a bit of time reading some of the others posts, and this one. Eek! This is quite an impressive overhaul.
A few months ago my girlfriend sought out a proton pack shell for my 30th birthday. In secret, of course. When it arrived, I noticed it was from Bob’s Prop Shop. Unfortunately, I know nothing about him to be honest. Nor have I interacted with this community before. I was completely floored to see the reputation he had created here and on RPF. I wouldn’t have guessed otherwise because the packaging was well done. Everything was neatly set, secured with a ton of bubble wrap. For what it’s worth, the included certificate of authenticity made the both of us chuckle. A replica of a replica [sic]. I instantly thought of an analog signal. sob
Having never interacted with the community, I never felt the need to register on the forum or browse the posts. I mainly read the news on here much like Slashdot, etc. Despite being one of my favorite movies, and adored childhood cartoon, I had no intention of building a proton pack. At least not yet. I like to think I lack the skill to pull off an authentic looking pack.
I will assume my girlfriend did some snooping on my computer. This is where she may have seen my bookmarked notes for previous proton pack builds others have done. Either that, or she reads my mind at times.
Anyhow, I watched his video for building the proton pack on YouTube (I can’t find it now), but that left me mildly confused on how to begin the project. Having never done anything like this before, I let it sit for about a month until I had more time on my hands.
Soon thereafter I found my way to this site looking for reference photos (and parts! lots of parts… Clippard Elbows, Ion Arm, Clippard R-331, Dale Resistors, SMC Elbow Fittings, Bellows, and even a flight suit, just because!). I wanted the positioning of the items to be “right”, I suppose. I stumbled a lot along the way. As for the shell, I found myself smoothing out portions that were warped (curved?). There was no noticeable bubbling or pitting on the shell or the included bumper on the exterior. If I remember right the bumper had some pitting on the interior side. Nothing anyone or I would see. The hardest part was doing up the straps to the ALICE frame. I must have sat there by myself for about 30 minutes until I figured out the center clip on the straps come undone.
For reference I mainly used the Sony Museum photos (assuming it’s Ray’s pack due to the label on the back) Dak_4206 | Flickr. Others were used for decal placement.
Alas, half-way through my build, my poor HTC 8X decided commit suicide (or I attempted to murder it, then death by a shower). I sat on the curb with the phone in my back pocket. That didn’t end well. As you could guess, the glass shattered. The phone did worked, for a time. I could have easily become the poster guy for the one who used a shattered screen with Band-Aids. Then… it rained. If I had any luck it would have been struck by lightning.
Fortunately, I have a few midway through the build. It picks up after most of the edges have been smoothed, and roughly 4 coats of flat black paint. I had just started drilling the holes into the shell, and test fitting it to the motherboard.
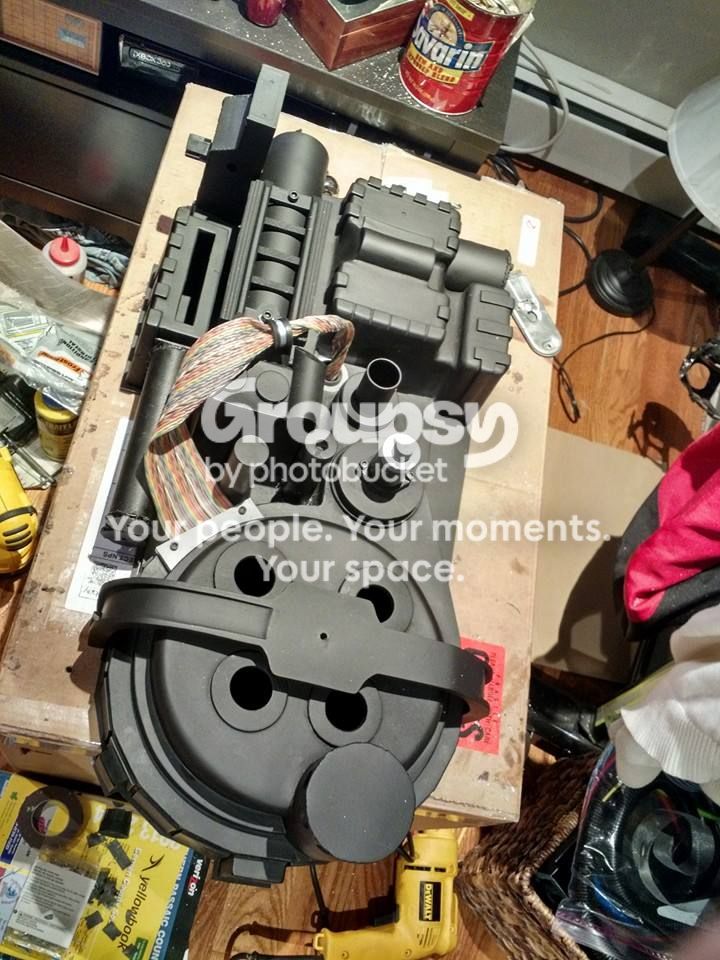
Before I pre-drilled the holes into the motherboard, I used double-sided 3M tape on the L-brackets. This way I could get a snug fit between the shell and motherboard. It also allowed me to take the shell on and off without the brackets moving. After a lot of measuring, I was able to line up the center of the L-brackets to the center of each cosmetic plate. There must have been pencil lines and markings galore on the shell and motherboard. Just be careful when removing the L-brackets from the motherboard. My hand was too close to one L-bracket that refused to separate from the motherboard. I would up catching the edge of the L-bracket on my right hand. It was an ugly scene.
The ALICE frame was mounted to the motherboard with no problem. I adjusted the position slightly because I’m not that tall. Therefore, it doesn’t stand up on the edge. A few small weights on the bottom half of the motherboard should fix that. I assume. I will be making the half-moon spacer in the future to hide the screw. Right now I am using a black rubber spacer from the end of a cane that I shaved down. There WAS a noticeable gap between the upper right-hand side (near the HGA) between the motherboard and shell. I’ve done by best to eliminate it, but it’s still visible (to me, at least).
Once the frame was all set, I bolted the shell down. I started applying decals. After a while I wasn’t “pleased” with the plain flat-black appearance. I went on a weathering rampage. I used a silver sharpie and some Mopar PX8 touch-up paint (pitch black for a Dodge vehicle) to go over some of the edges.
Before:
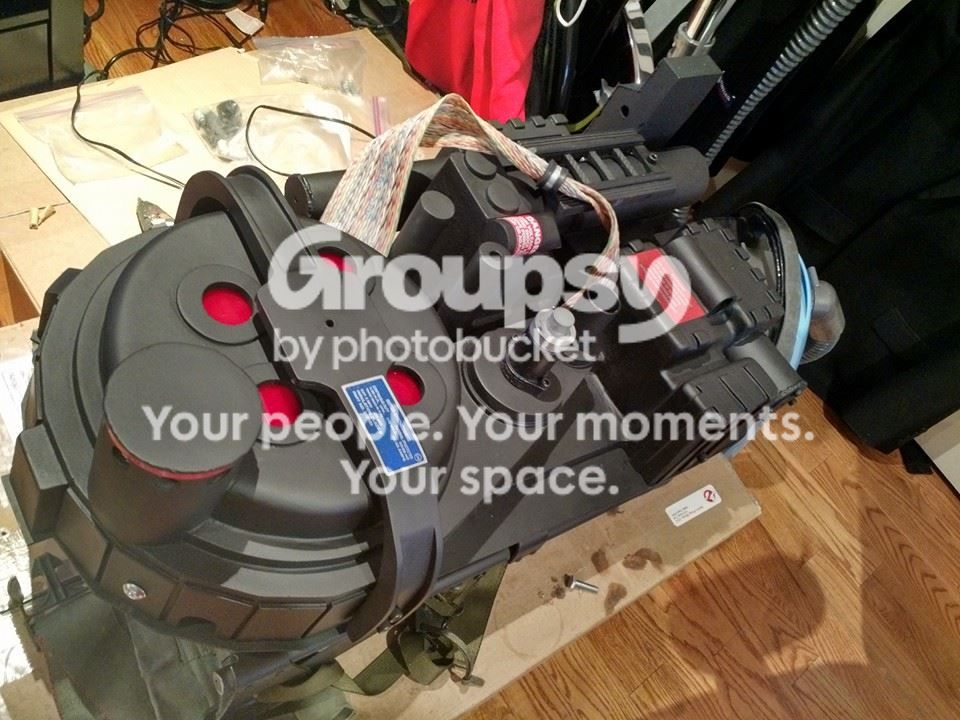
After:

Finally, I am looking for the V-hook attachment, and a Dale RH-50 Resistor to replace the cast. Maybe a light kit in the future. I’ll be starting a neutrino wand sometime after Halloween.
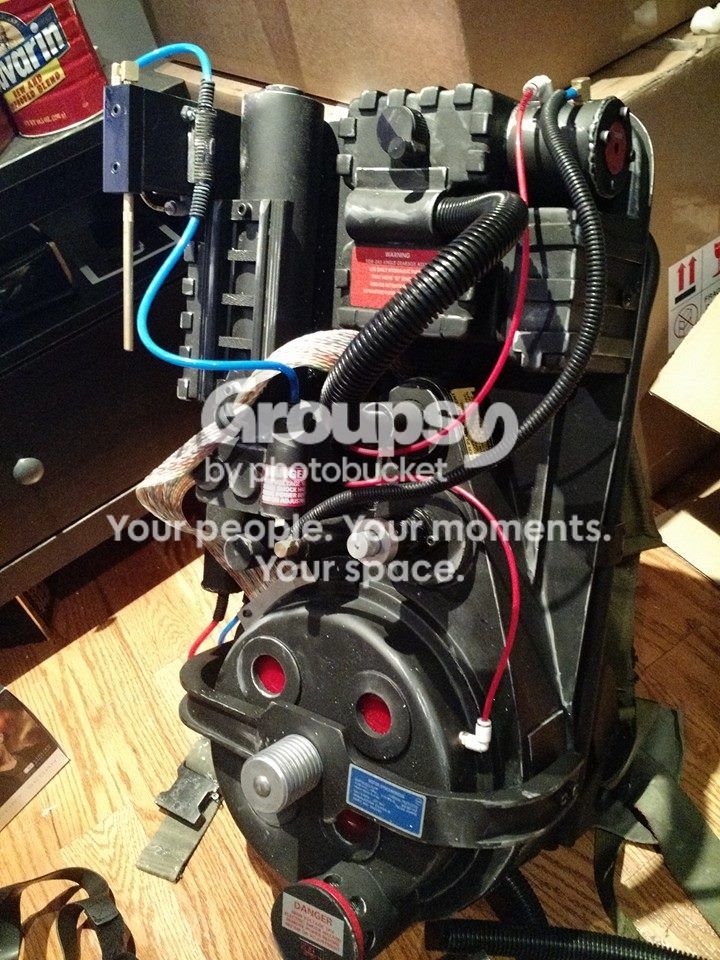
I just thought I’d share my experience with this particular shell. But hey, “I did it”. Abet, the wrong way. 