I’m excited to play around with it. I wanted a solid but inexpensive starter printer. If I get a lot out of it I’ll look to get something bigger like a Saturn. I have to decide whether I want to buy a wash/cure station or do a DIY approach.
I bought their wash and cure Mercury X bundle. Love it too. Perfect for the saturn but will be perfect for the Mars too. Maybe check for the Mercury Plus kit.
Personnaly, I use water washable resin and don’t regret. Almost odour less and no need to use isopropyl alcool.
Is your teensy code publicly available anywhere? I’m interested on how you did the real-time sound effects. I stumbled upon a sears version of the Iona my dad had all this time and never new it. I modeled it and scratched built my own any have it running on a teensy 4.0 but I’m not happy with the way it sounds. Any help would be appreciated.
I’d have to ask my friend Patrick who wrote that code whether he’d want to share it. Note that it was written for a Teensy 3.2 and Prop Shield.
Since the Teensy 3.2 is no longer available we’ve switched to an Adafruit Itsy Bitsy M0 Express with code Patrick wrote in Circuit Python.
A year ago I finished my PKE Meter Mk 1 just in time for Rose City Comic Con. I’ve recently upgraded the unit to a Mk 2. Functionally it’s very similar to the Mk 1, but I made a lot of internal changes.
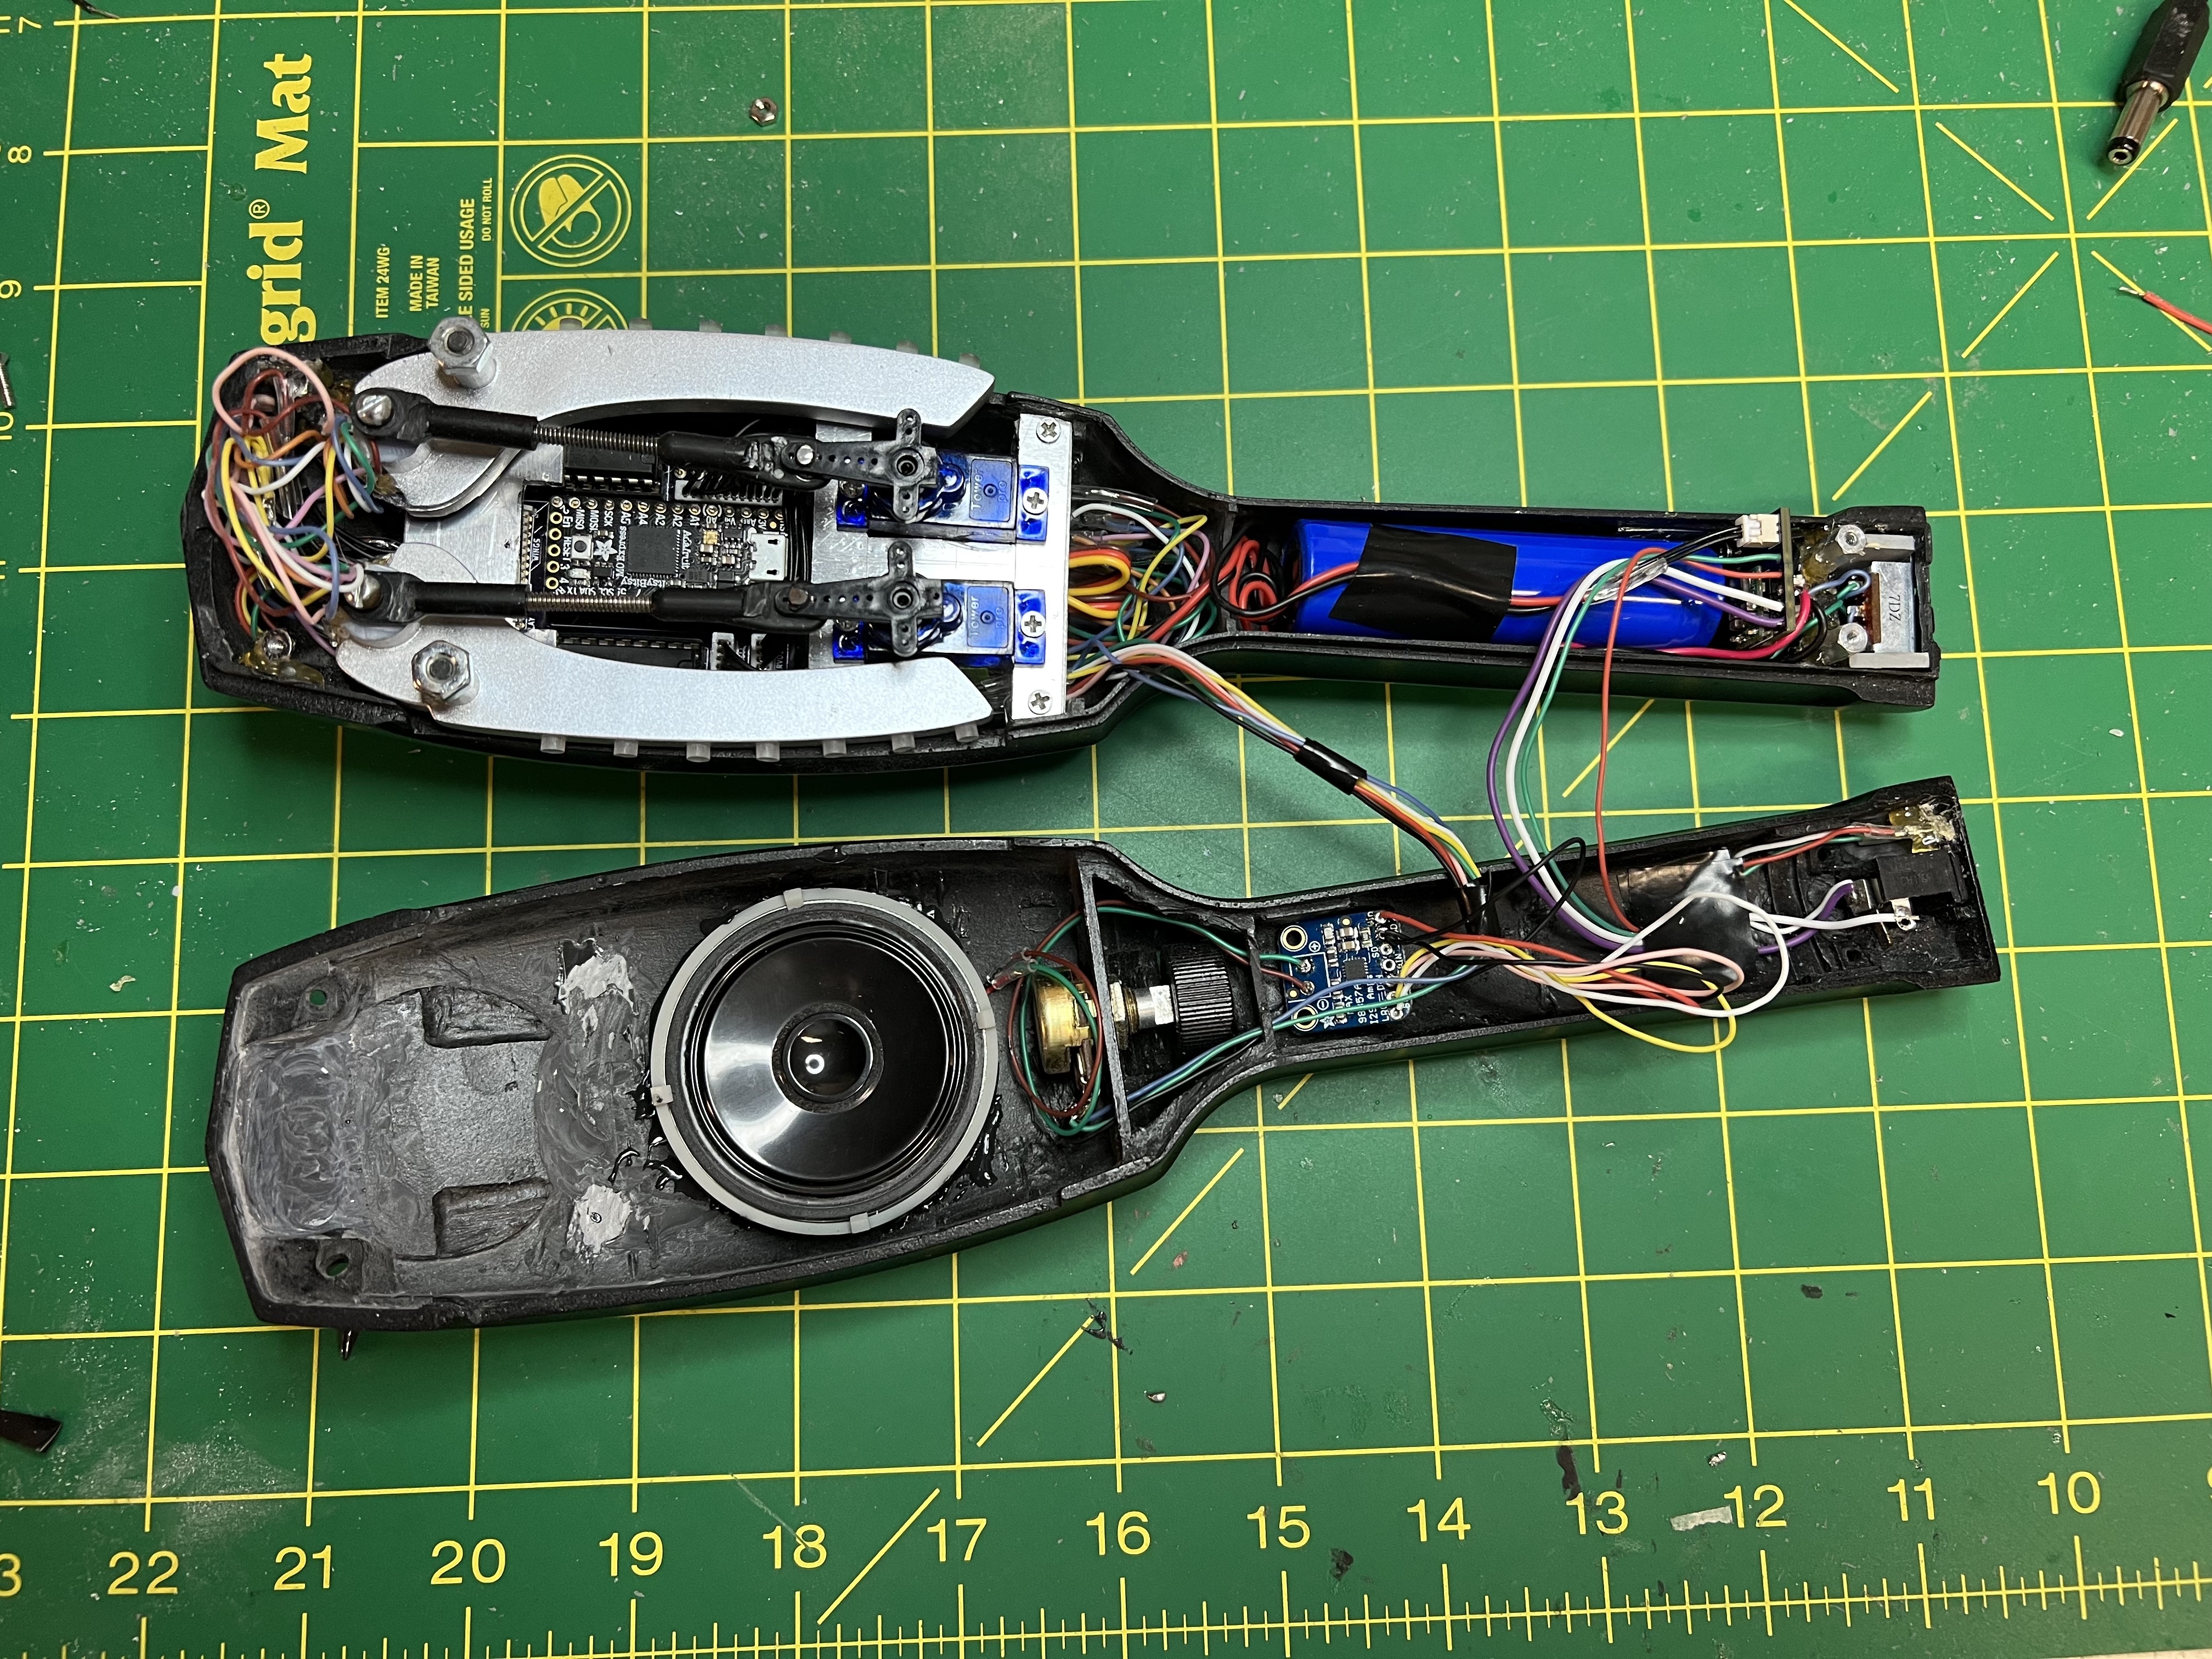
The Mk 1 ran off of a PJRC Teensy 3.2 Arduino microcontroller which is no longer in production, so I’ve replaced that with an Adafruit Itsy Bitsy M0 Express. Patrick Benton did the coding again but this time using Circuit Python; it was a struggle getting everything to fit in its paltry 32 KB of RAM.
I’ve replaced the five 1.2V 2/3 C cell NiMH batteries with a single 3.7V 2200 mAh Lithium Ion battery that can just live in the handle, leaving space for a much bigger speaker in the main shell. I’m using a small Adafruit LiIon charger board to manage the charging (the NiMHs required an outboard charger).
A 3W Class D I2S amplifier board from Adafruit drives the 5 cm speaker.
I’ve switched to micro servos that also free up more space (though they’re somewhat noisy).
Using two shift registers I can change the chase pattern on the wings from the GB1 pattern to GB2 with the touch of one of the touchswitches.
This Itsy Bitsy has built-in capacitive touchswitches whereas I had to incorporate extra components for resistive touchswitches in the Mk 1. These capacitive ones seem to be working reliably, even in the rain (the old ones would get stuck in the FULL position when wet).
I designed in KiCad and had OSHPark fabricate a new main PCB along with a smaller board that combined the LiIon charger board and a Polulu boost converter to regulate and increase the battery voltage from 3.7V to 5V. This also includes a circuit to drive a charge status LED in the handle that glows red when charging and green when complete.
I modeled and 3D resin printed a thing to hold the speaker, for now just epoxied into the shell.
I’m looking to make some tweaks to my Iona buck at which point I’ll make new silicone molds to crank out more resin shells.
The Mk 2 behaved well at Rose City Comic Con this year and at multiple Halloween events with the Portland Ghostbusters. We’re still tweaking the code a bit. I still hope to make kits, but as the name of this thread indicates, it’s slow going.
I would appreciate it if you could ask. I’m sort of stuck. I’m using the same amp board with a teensy 4.0 and fasttouch library for the capacitive touch. Also using micro servos , but i would switch to an all metal geared MC90s servo if sound is an issue. Picked up a 5 set from Amazon. Night and day difference as far as how quiet they are.