So sorry to hear this sad news [emoji45] And thank you - but seriously, no worries about those vents - they’ll be the last thing on your mind at the moment
Best wishes
Alex
So sorry to hear this sad news [emoji45] And thank you - but seriously, no worries about those vents - they’ll be the last thing on your mind at the moment
Best wishes
Alex
Interesting idea, and yeah as for many, there is precious little time for these kind of projects, which is a shame!
Ok so here’s a quick update before Christmas! As you know if you’ve been reading Barison82’s trap thread, we are both working on hero versions of the Nickatron MK2 trap kit and have be collaborating on sourcing some aluminum doors for them.
This turned out to be quite a drawn out process as initially it was assumed (mainly by myself!) that the door seam should be centrally placed. The CAD diagram by CPU64 showing an off center seam has been covered in Barison84’s thread, but I thought I’d show you what helped convinced me that the seam is off center. Basically I printed test versions of Count Spatulas 3D doors and modified them to fit Nicks kit (both off center and straight versions), neither of which look quite right when compared to CPU64’s when viewed from the rear. The offset on the final doors we have is somewhere between the two, giving us more accurate spacing s around the pocket machining on the back:
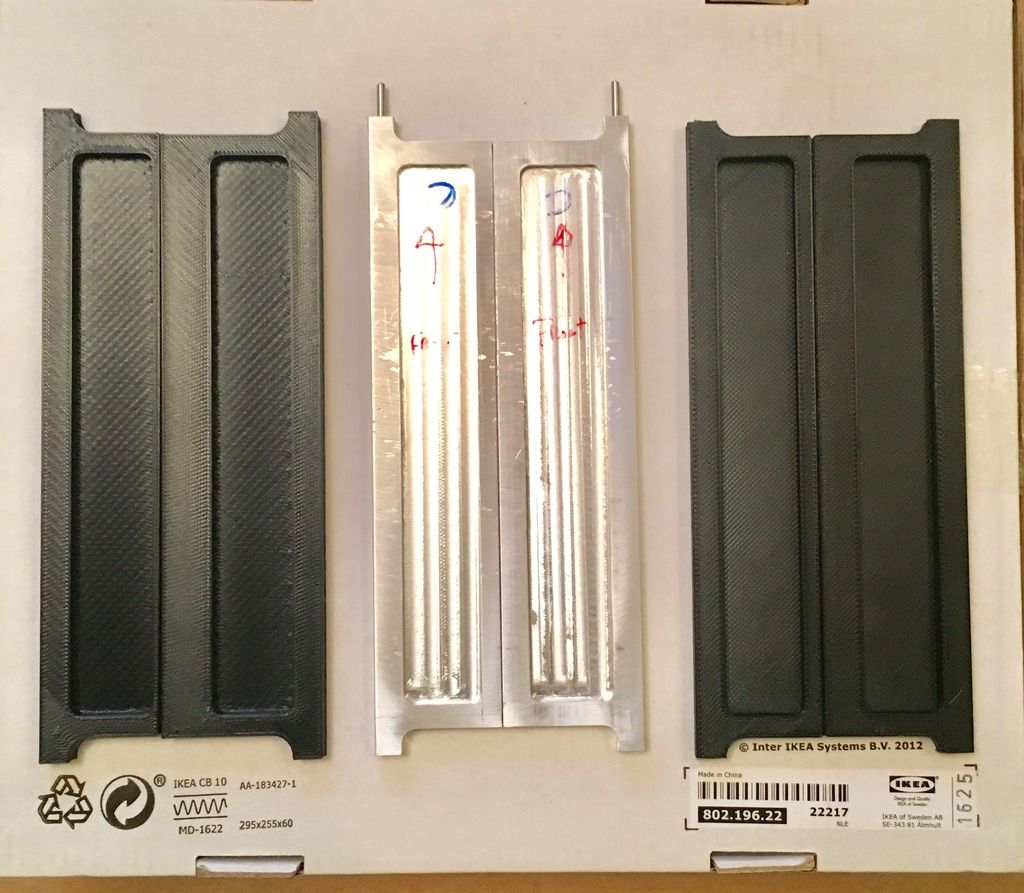
I’m really pleased with the final result- CPU’s done an amazing job of them  Here’s some pics of the doors offered up to the trap- I’ve just thrown all the bits together with tape for the moment but it gives you an idea of how they’ll look anyway.
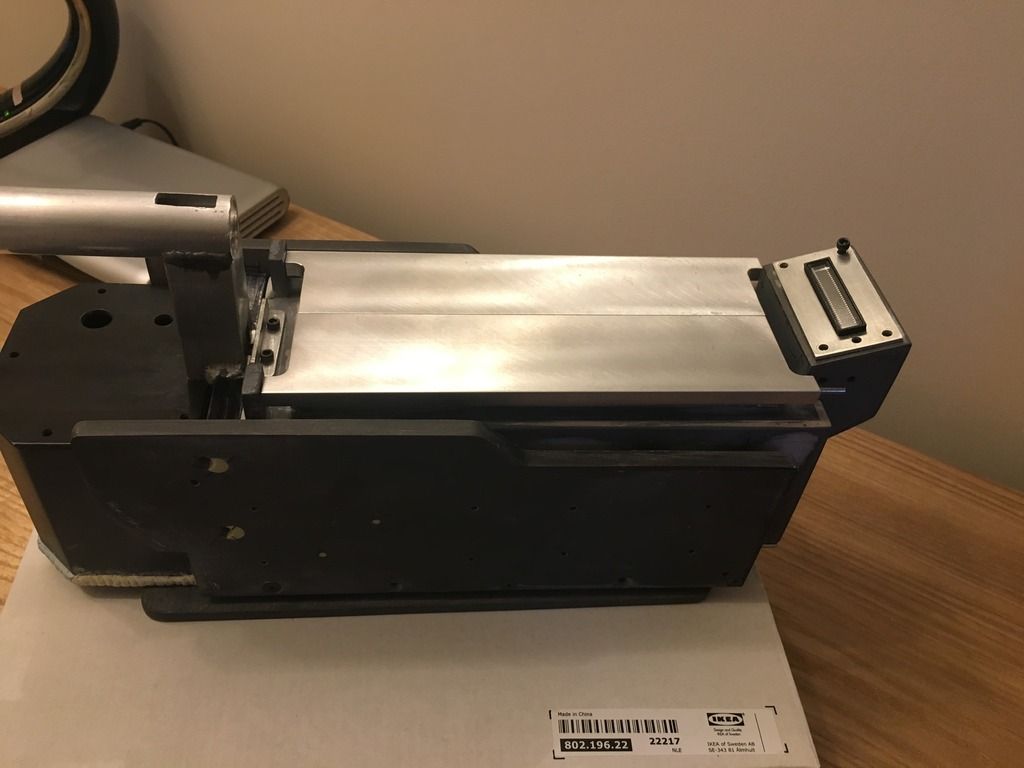
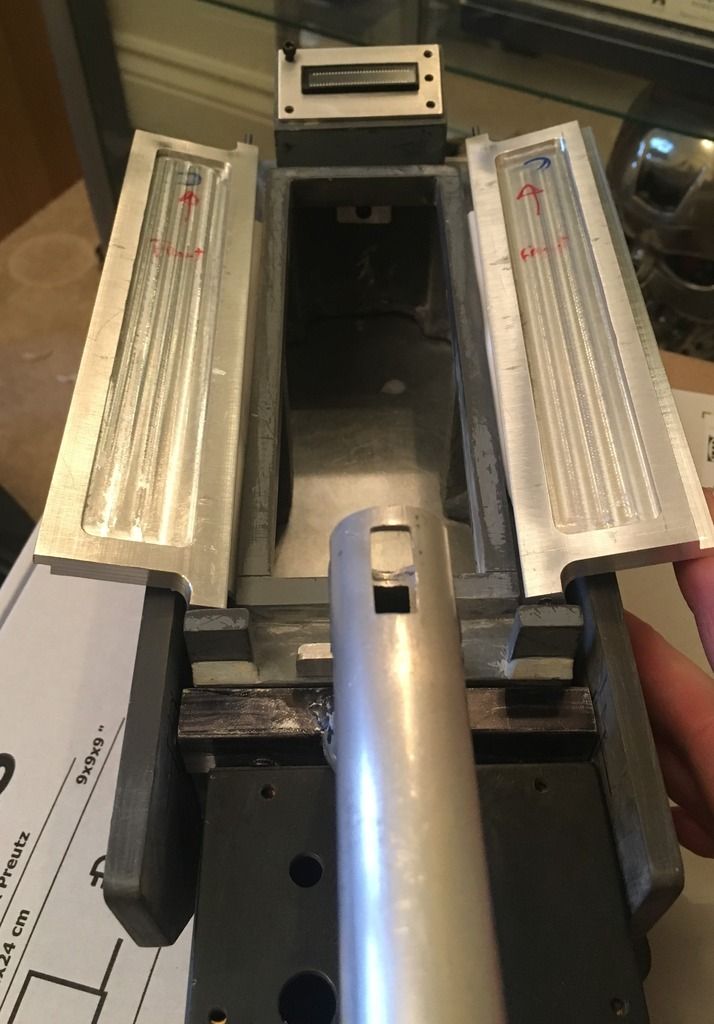
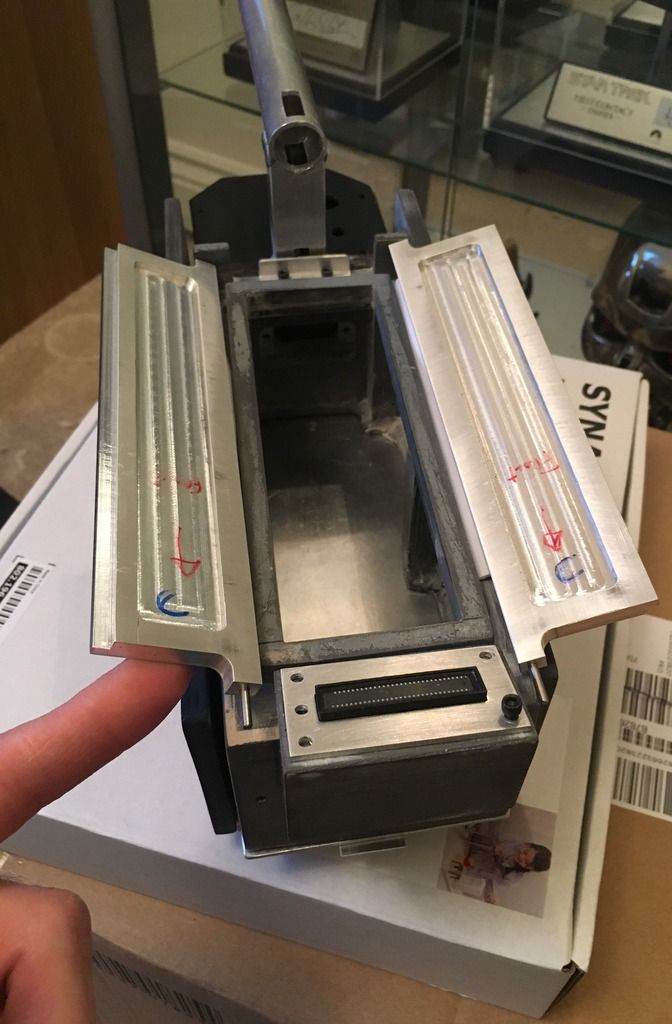
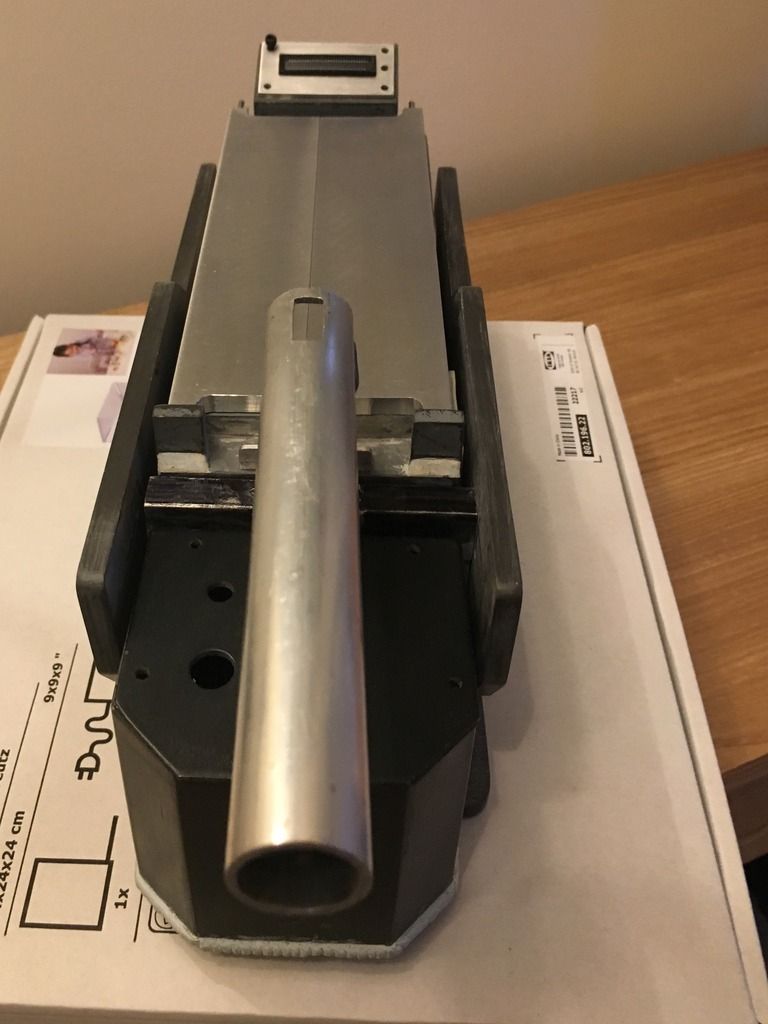
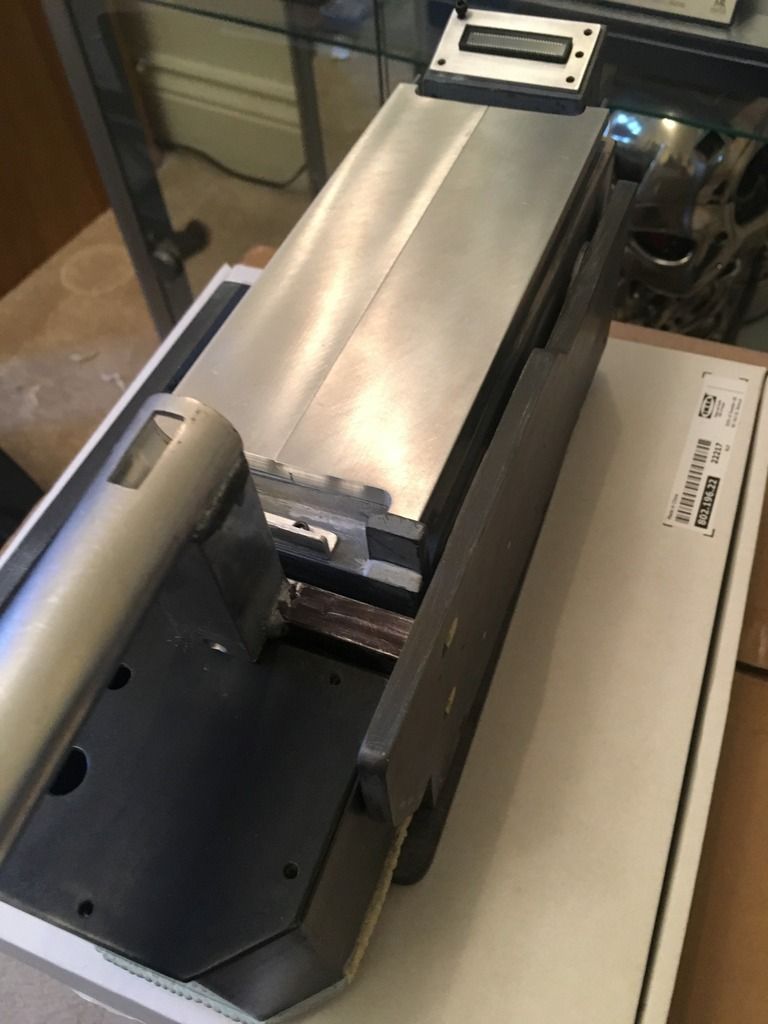
Wow - they look awesome when mounted on the trap :shock: They’re a perfect fit. Those details regarding the offset really stand out when compared against the 3D printed doors. This is going to be the business - look forward to further updates in the New Year Glad we got there in the end!
They do look good on there- It’s going to be a bit of a shame to black up all this shiny metal but it’s the way it has to be! Yeah it’s good that we’ve got such a tricky part sorted- just a few more small details left to track down now!
I know - I really like the finish on unpainted alumium, the grain and brush marks - but it has to be accurate lol…yes really good we’ve nailed this tricky part, and we’ll sort those other details out in the New Year
Happy new year folks! Welcome to the first 2017 edition of my extremely slow trap build (I realised today that I started this in 2015!) I’m going to pick up the pace and hopefully finish it this year
Small steps today but I’m ready to get underway now after a difficult 2016. Onto the build- Started to fit the doors, which are a bit fiddly to get right for a first timer.
Marked out the bolt locations by drawing round the door lugs and finding the centre by drawing intersecting lines.

One hole ended up in the right place but the other one drifted off and I’ve had to fill it in to re-do it. While I had the milliput out I’ve done a few other things on the to-do list at the same time:


and… Started to make another new vent in light of a new detail I’ve just noticed. You may remember that for the RH side of the cartridge I went with a mirror image of the known side with an inverted metal disc? Seems that I’ll have to change it as the real thing has another vent there!
It’s different to the other vents in that the slots seem to run longitudinally

Ok I’d better make one then. I didn’t show how I made my other vents in much detail so I thought I would this time in case anyone else wants to add them to their builds.
You start with some soffit vent strip from a DIY store. Mark your vents out and score along the lines carefully with a sharp knife and a steel rule 3-4 times

turn the strip over and using some side cutters snip through the channels on the back level with the scored lines

Then bend the strips back and forth a few times along the scored lines to snap the strip into sections leaving you with this

Now we want to remove the plastic channels from the back. As before, score with a knife a few times near the base of the channels

and snap off

This will leave a couple of ridges to file off

one nearly done

then give it a light sand

You need to do this to two sections of soffit to make each vent as we will be layering them up

Sand the rear of one section and the front of the other with course sandpaper to provide a key for the glue. Then get yourself some 5 min epoxy, clear sellotape/scotch tape and some clamps if you have them (tape will do if not)

Apply glue to one surface only and tape/clamp together

Leave until glue has set to full strength then sand the edges flat and smooth

After this it will need shaping with a jewellers file and sanding smooth ready for paint which I will do next time.
Great progress and thanks for providing all those details. I’ll be pretty nervous when I get to the door installation part myself lol. I’m taking note!
The doors have been absolute hell I’m not going to lie! I’ve worked out the easiest way to get accurate pivot points allowing the doors to open clean and smooth and sit flat when closed- which if you drill out of position by even a tiny amount simply doesn’t happen! I’ll get to that shortly but this is what I’ve done since last update.
Completed cartridge vents started last time
File the edges square both along and across the edge- the gap between the layers won’t be visible once painted if you do a good job here.

Then round the corners with the file.

Mark and drill the holes for the bolts

Then drill and tap the trap body using the vent to guide the drill

Then countersink the vent holes (use a scrap wood backing as the point of the countersink bit will poke through)

OPTIONAL: File a bevelled edge around each vent

Opposite side vents mounted! I don’t know whether to open them up as functional vents or leave them dummy- What do you guys think?

On to the doors!
I showed how I marked the bolted end of the doors last time. I repaired the hole that drifted off course and re-did it, this time no dramas. The next step was to fit the doors and tape them in correct alignment before tackling the pivot holes in the front indicator “ears”.

Then measured the position of the door pins in relation to cartridge body and marked accordingly

Although this seemed to be working well, once drilled and fitted the doors didn’t sit flat or open properly once the ears were bolted in place!! It turns out that even the slightest hiccup in drill angle or position makes a big difference!
The solution I came up with for perfect pivot holes is to drill out the holes previously marked with a much larger drill bit, fill the holes with milliput, grease the door pivots and ends to act as a mould -release then simply push the ears over the door pins ensuring proper alignment as I did so. Bolted the ears down and left it overnight to cure. Hey presto perfectly aligned doors

Sitting nice and flat- The doors look terrible as I’m halfway through removing a black coat that went wrong!
I got impatient and tried taping and blacking the doors on the same day.

I’ve also improved the rear catch shape and moved it in board as it was in the wrong place!

That’s it for now
Wow what a journey you’ve had there! That’s not a job I’m looking forward to myself but thanks for providing a detailed record of how you overcame the alignment issue - very, very helpful indeed. Good job! I can see how you got excited with getting them painted up and warning stripes applied, that would be the first thing I’d want to do, but a bit of patience will get them looking right lol 
The vents look great - I guess it would make it look more authentic to have the slits cut all the way through the cartridge but I could live without that personally…did the real thing actually have them cut right through as well however?
It’s been one of the most challenging parts to be sure, but the doors have to run smooth without resistance so as not to break the servos so it had to be right. I don’t mind sharing how I did this stuff, hopefully it will save you a bit of time on your build I think people should show all their mistakes and missteps on a project as others may encounter the same problems and knowing what they are beforehand has to help!
The originals ae actually dummy, with recessed slots that don’t go all the way through. I was just toying with the idea of hooking up the smoke so it actually comes out of the vents !
Thanks a lot! It certainly looks difficult so I will take note, and take my time with that area when I eventually get to it, and of course post my own progess! Re. the vents, hooking up the smoke sounds pretty cool, if you can pull that off I’d say do it, it’ll look awesome!
I’m looking forward to seeing you start your build I must say
I may have to test it to see where the smoke goes once it comes out the vents as really it should billow out near the top of the cartridge to look right I think. I’m going to finish up the trap and get some paint on it first though. It looks a bit like something you’d throw away at the moment with all the patching up and chopping I’ve done to it. Kind of hard to picture the finished article in the state it’s in!
Thanks damster, I am too - just need to save up a bit at the moment, that’s all; I still have the main trap kit plus the electronics kit still to purchase, which on top of everything else I have collected for the build so far, including tools, adds up to a hell of a lot. I still need to address the drill press situation as well! Having other hobbies going on as well as this one also doesn’t help lol. Plus a big holiday I’m saving up for. It’s not easy!
I’ll be very interested to see what you come up with for the smoke system. Can’t wait to see it painted up! I know what you mean - you’ve done quite a bit of work on that so far, but it’s definitely gonna look like a trap when it’s done
I can certainly understand that, this build has become far more involved than I imagined it would be when I started it!
I have a rudimentary smoke system rigged up to experiment with. I’m going to borrow an idea I saw in another trap thread and have functional front knobs, controlling the amount of smoke and airflow. I started on the knobs today, took ages to get the placement how I wanted them. Once I’d drilled the plate I screwed it back on and used it to mark and drill the hole locations for the knobs.
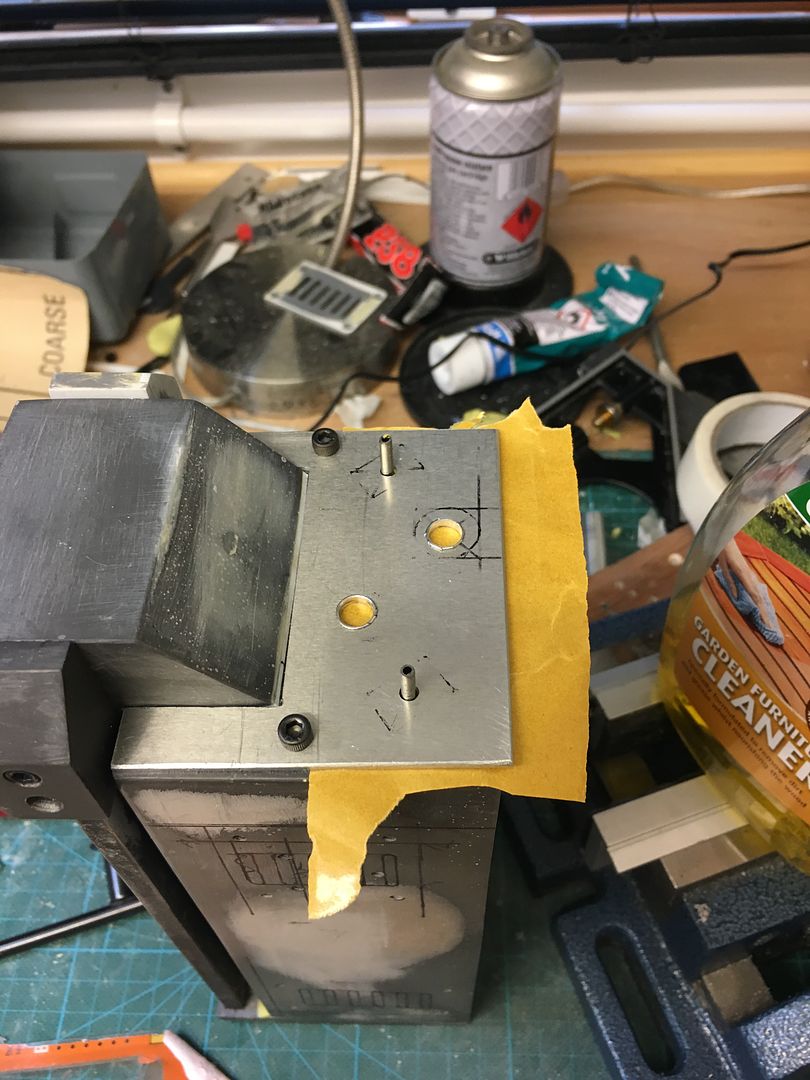
The outer square ones will have fixed pins and won’t turn. I’ve just epoxied in steel spring pins for these. The larger holes will accommodate the shafts of switching potentiometers which will turn on/adjust the smoke
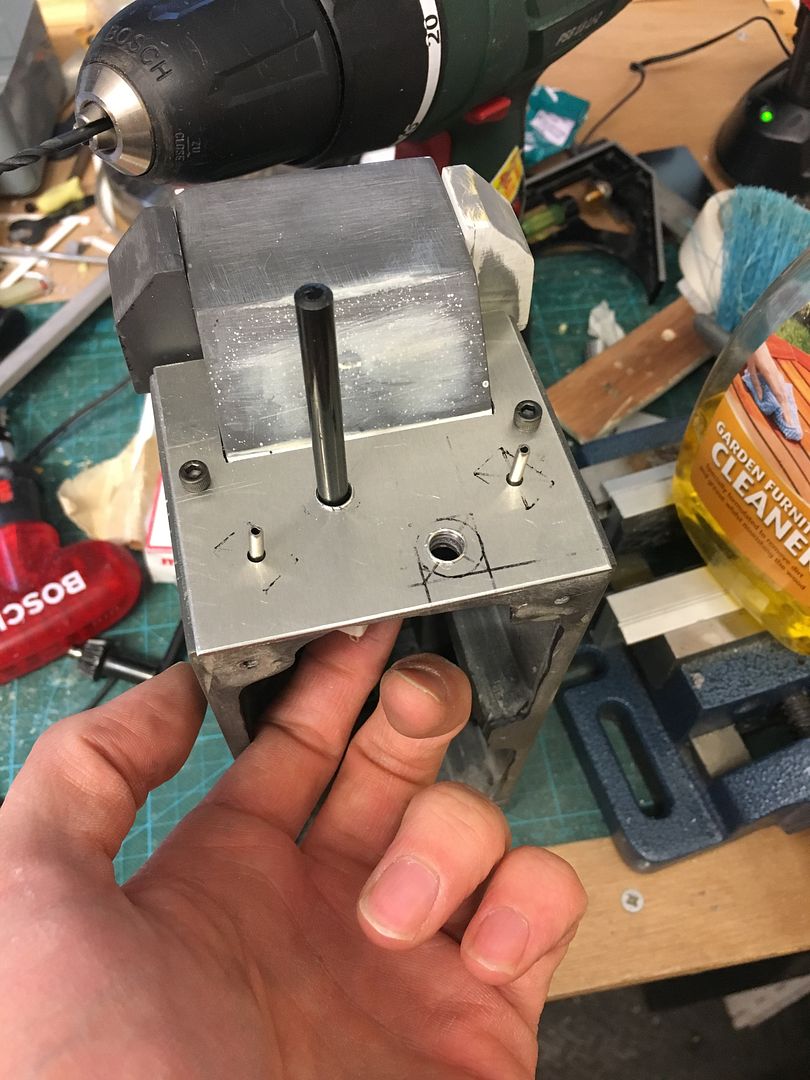
The pots are quite large but they are the only ones I could get hold of that also switch. I’m going to mount these to a cut down PCB board screwed to the back of the cartridge inner corner “posts”. I had to Dremel and file this area out to flatten it out enough to fit the board.
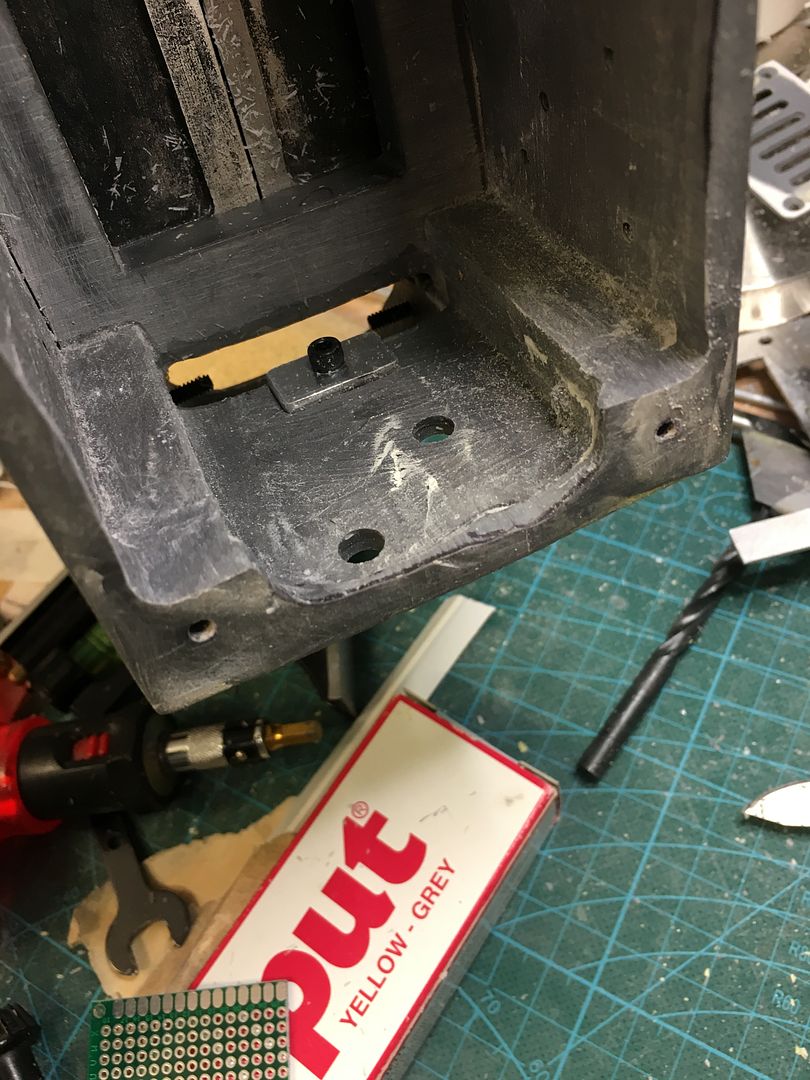
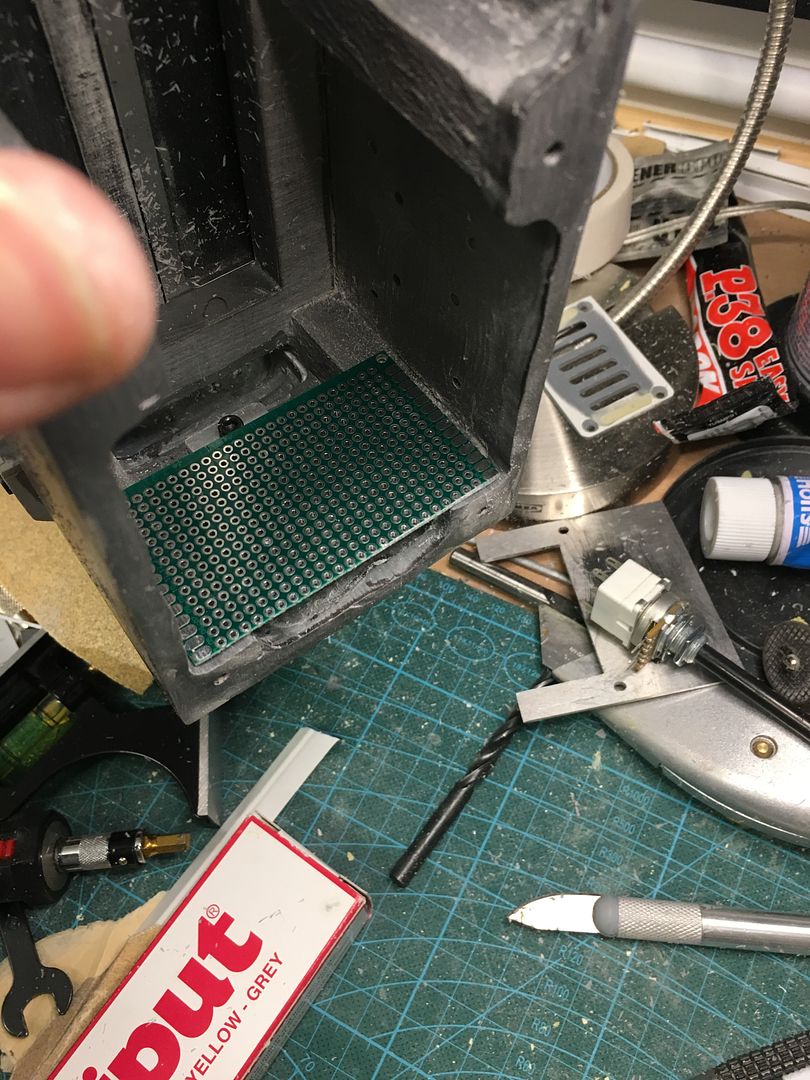
Something like this
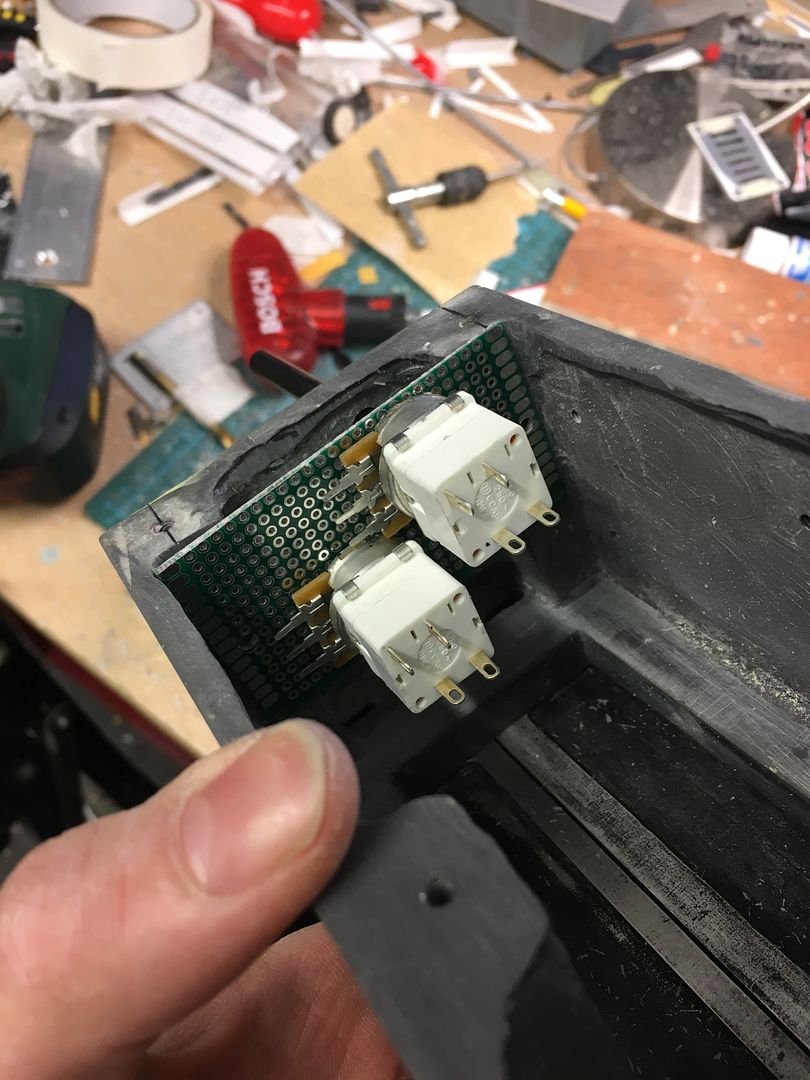
“Smoke control board” fitted! (Please excuse the mess in the background!)
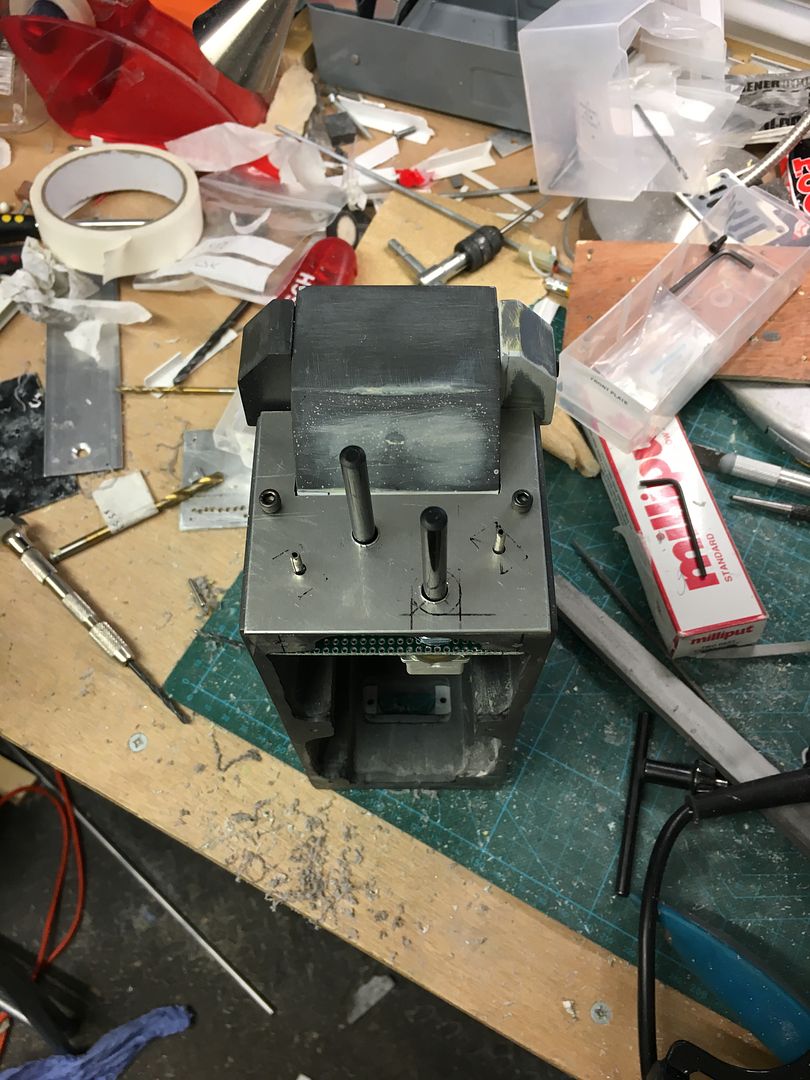
Pot shafts trimmed down ready for knob fitting
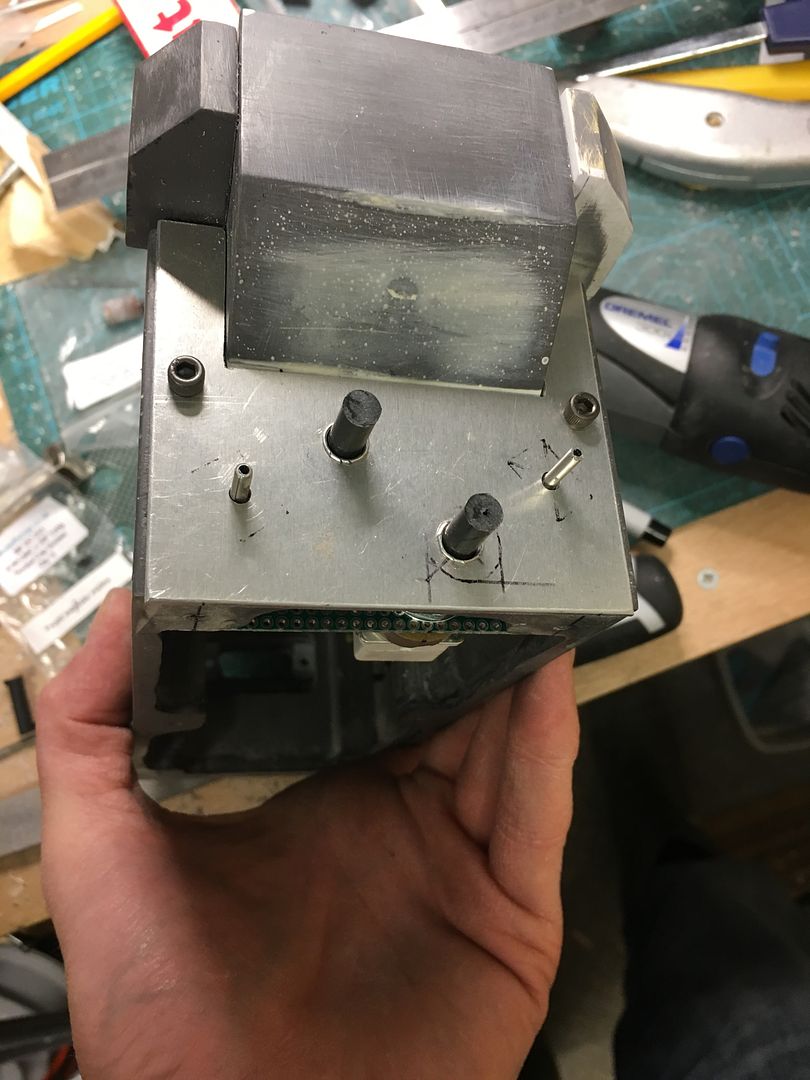
Wow this is really impressive work, interesting ideas and another area to consider when I get started myself. Knob placements look spot-on Looking forward to the next update…
Man do you make these for sell?
I didn’t make this trap kit I’ve just done a lot of modification to it. It’s based on Nick’s mk2 trap kit available from http://www.nickatronprops.com/products-page-2/ghost-trap-parts/trap-kit/
Thanks I’m quite pleased with them. I’ve just got to decide on the knobs I’m going to use- The Propbay trap, although GB1, seems to have GB2 style front knobs on it. There’s no way of knowing if this is how it was originally, or if it was altered for but not used in GB2. I have a set of resin ones to go on there but I’m always on the lookout for the real items. Like most parts for GB stuff they’re impossible to locate so far!
I did a little bit more work after the last post, it’s not much but I may as well share it before it’s finished!
Cut the final version of the release catch from a piece of aluminium plate. I just used a standard wood mitre saw with some WD cutting fluid to lube the blade. It cuts Aluminium very easily. It only took a few cuts and a little bit of chain-drilling to form the basic shape
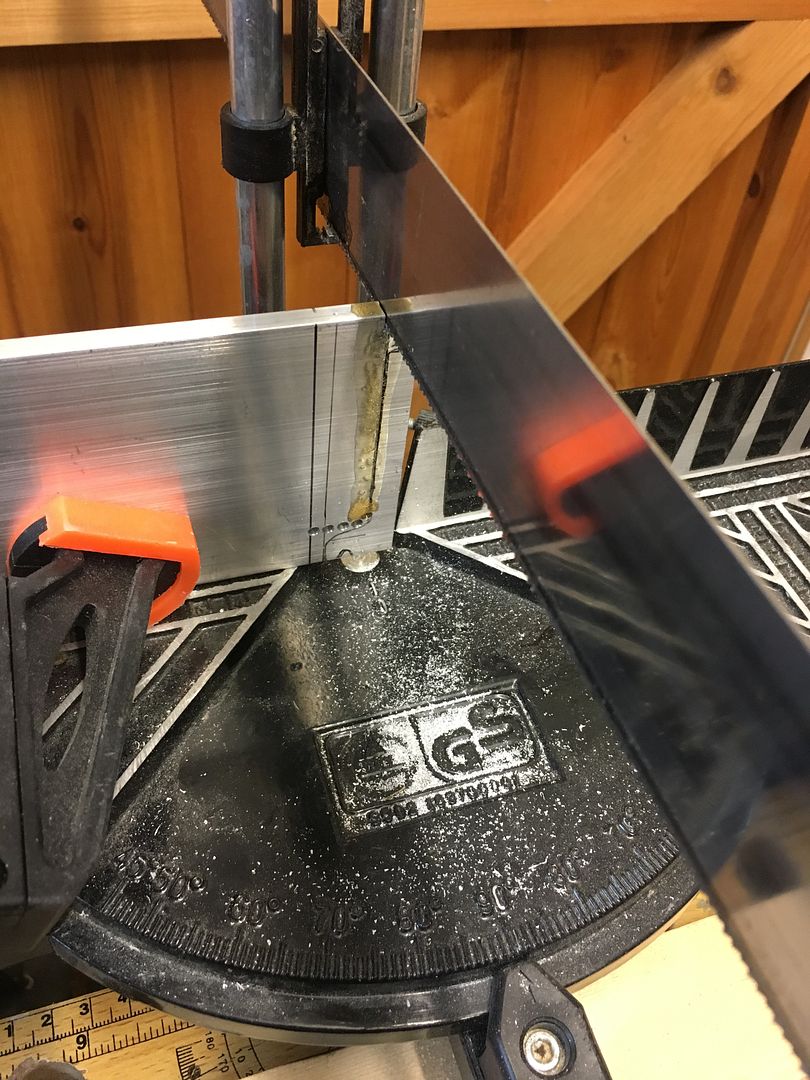
Cleanup and shape with hand files…
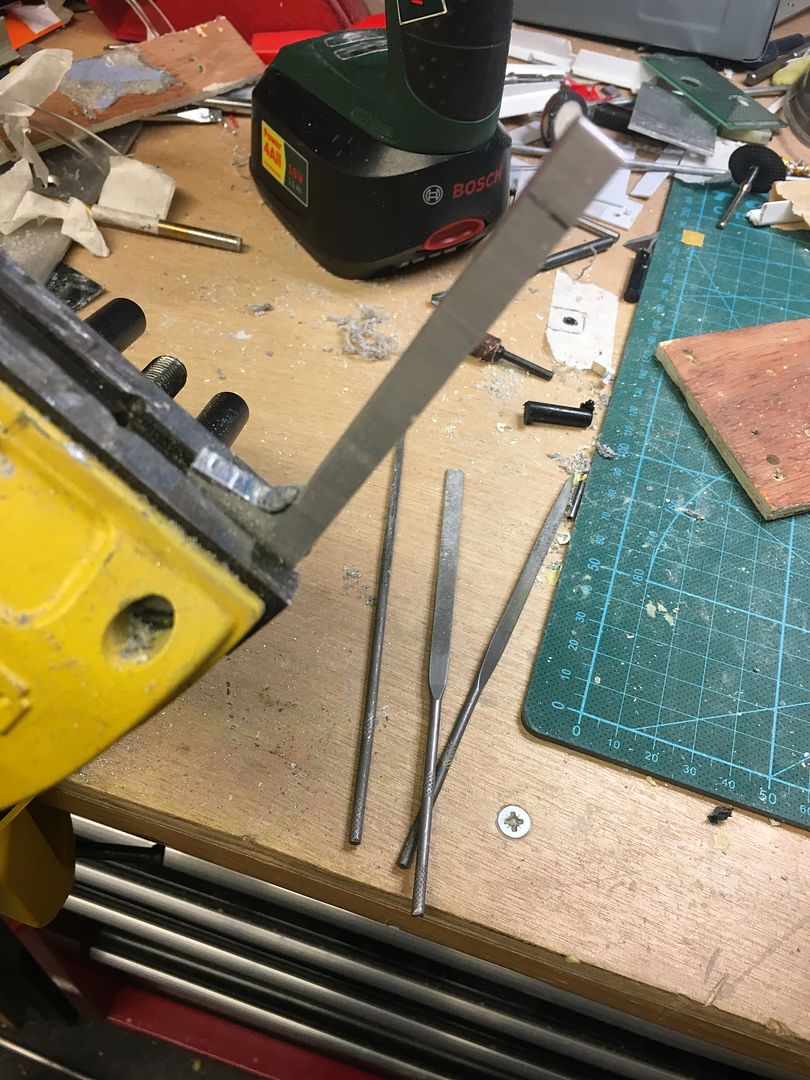
and drill pivot hole. Nearly there!
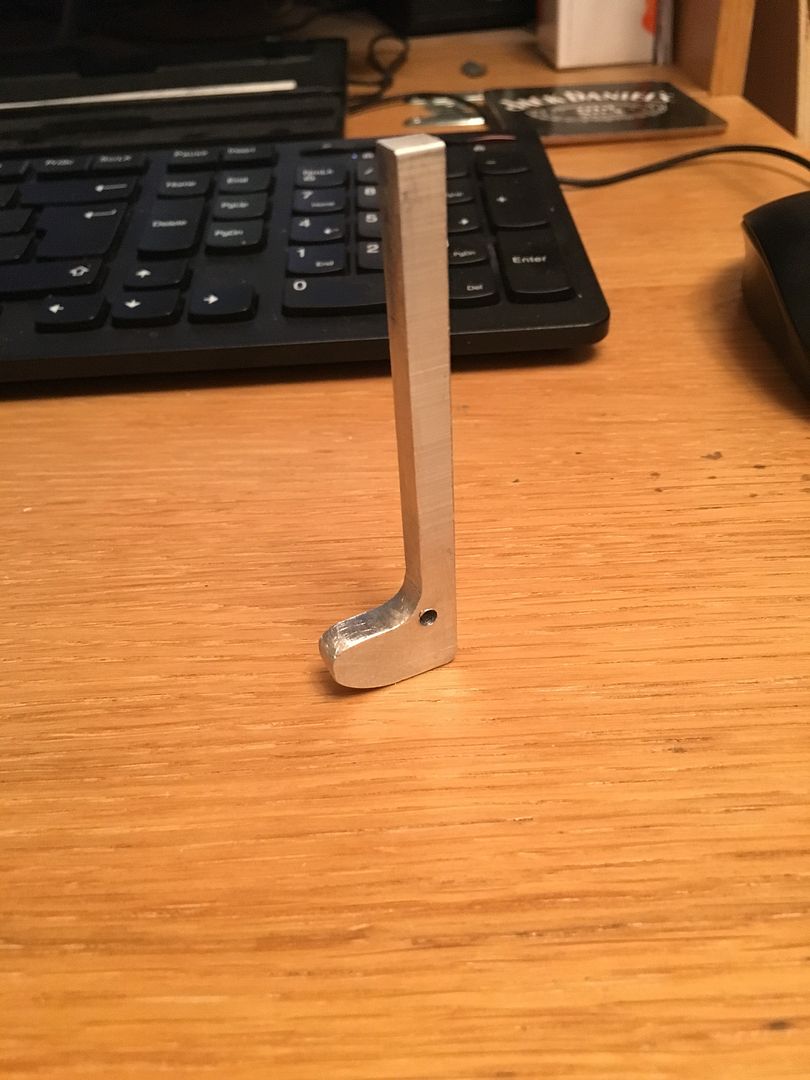
Making sure it fits in the handle!
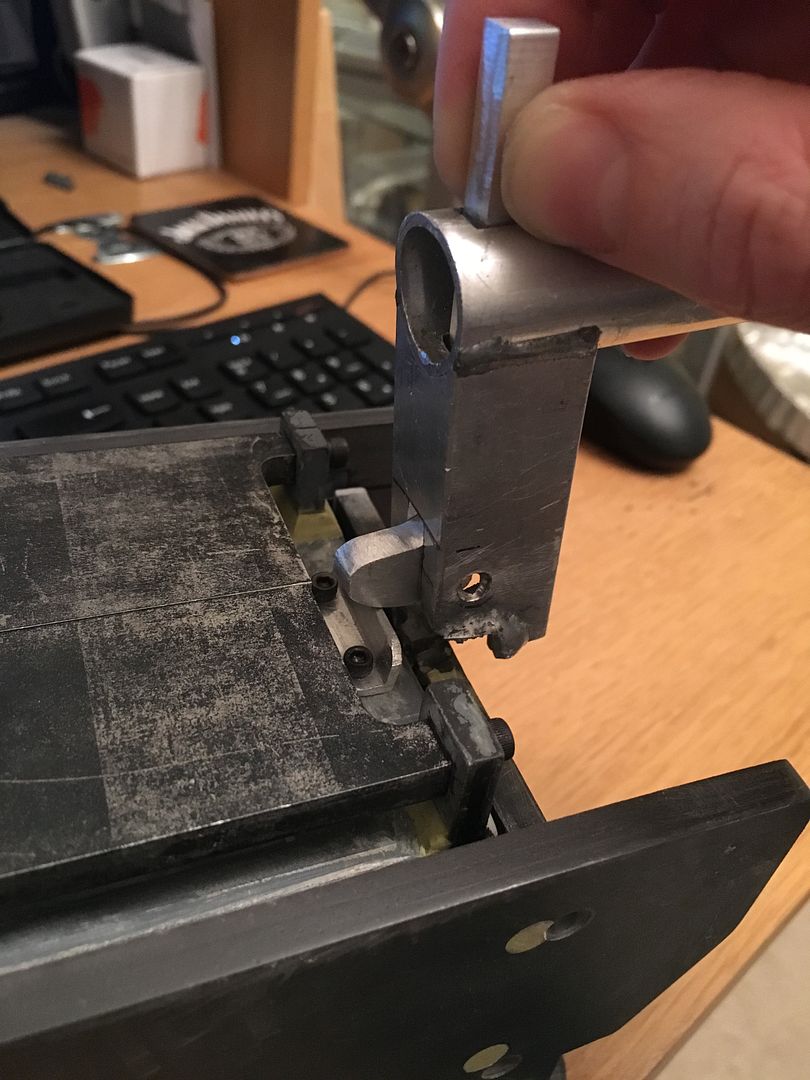
You may have noticed that I’ve removed the repair panel added to the handle earlier in the build. It just wasn’t strong enough and bent out of shape under load from the handle. Long time followers of this thread may guess what’s coming next…
Yeah you got it, if in doubt copy the real prop! More aluminium!
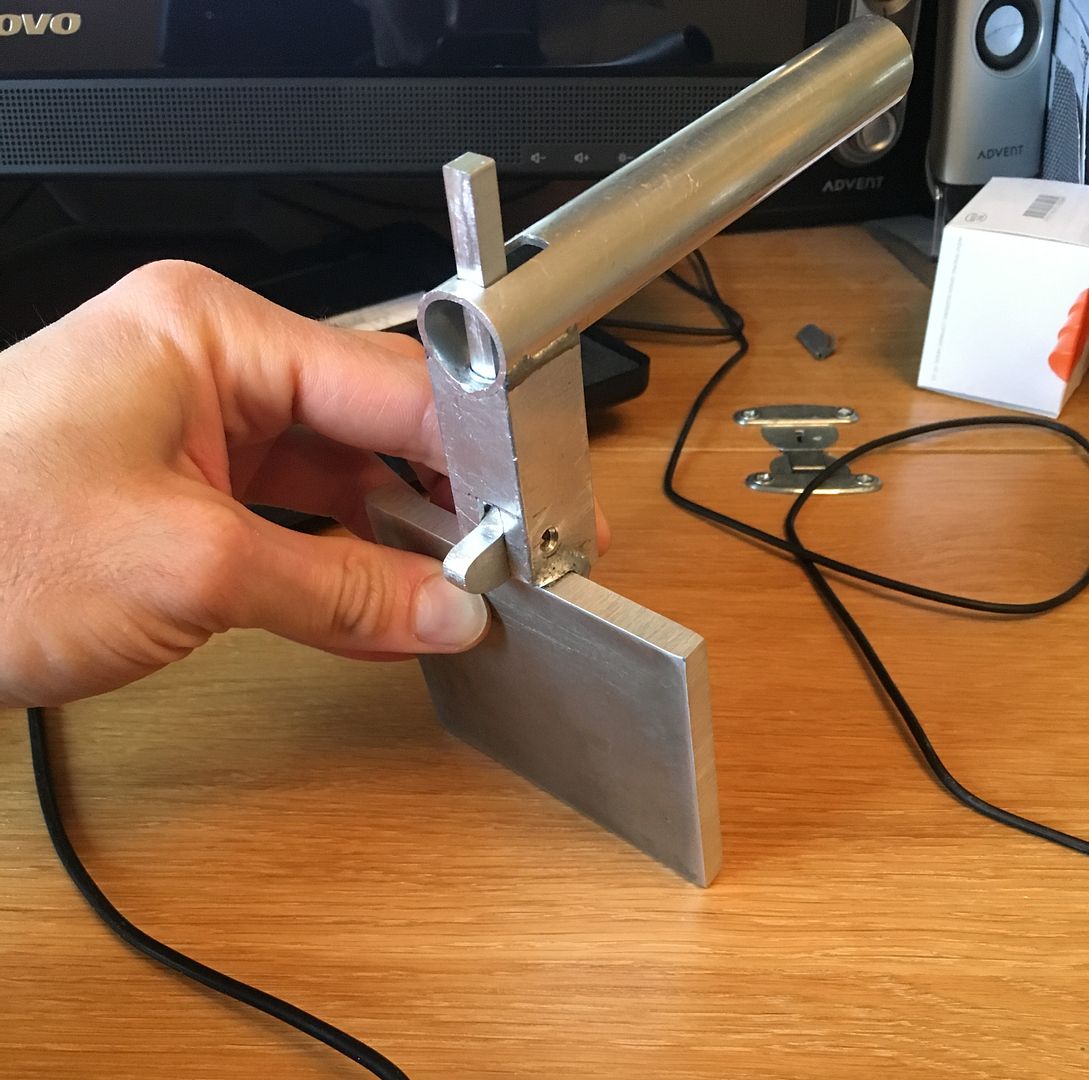
It’s all a bit rough at the moment. Once the catch is finished and bolted into place the handle can be welded on. Need to cleanup and drill the new metal back plate fixing holes and also the cutout for the d-sub connector, then it’s onto the spring pins to eject the cartridge!
More superb work! The release catch is another area that I’ve not fully understood, these detailed steps are again extremely helpful Loving this build. With the front knobs, I’d use the resin knobs until the real thing ever shows up, and then just switch them out for those. I still need to get onto Chris for the side rods - I’ve not forgotten, but just need to save up again at the moment. On that note, I’ll assume that we’ll use the measurements for the rods based on Nick’s resin kit dimensions?
Thanks I can’t find the knobs anyway so the decision has kind of been made for me! Yeah I think with the side rods it will be best to stick to the same dimensions as the resin ones.