Slimee's Scratch Build Pack

So I’ve been away from the GB community for a little over a decade I definitely recognize a nice portion of names on here from back in the old GBC/GBN days though. Dunno how many people remember me, though! For at least the past 8 years or so, I’ve been wanting to do Ghostbusters for Halloween, but I never have the spare money to make it happen. Finally the stars have aligned, and my dream is becoming a reality. At first I thought I was only going to do the uniform, but then the more I was combing through this website looking through various threads for resources, I started seeing a lot of great information on “budget packs”. Seeing what other people could do on budgets under $300 is jaw dropping. It didn’t take much self reflection to decide I was going to build a pack along with my uniform.

I found Gareee’s Gang Box/Foam insulation pack to be a great inspiration, and like many people after him, am modeling my proton pack after his glorious design. I’m making my own little changes here and there, taking bits of tips and tricks from his build, and a few of the people who used his design as well. Between my busy work schedule, and back to back hockey games this weekend, progress has been slow. After spending about a week gathering various materials, I finally got some actual work done tonight after the second hockey game. I’m really cutting it close for halloween (on top of the busy work schedule I leave for a one week vacation at the end of this coming week and will lose that whole week in terms of build time).

My goal is not 100% screen accuracy. I’m shooting for something that’s clearly recognizable, but won’t break the bank, but won’t look horrible either. This is my first build, and hell, it’s really my first sort of “build something yourself” project ever, so I’ve got my fingers crossed this continues to go somewhat smoothly.

Still waiting on several objects ordered from various websites to arrive (the parts I ordered from GBF won’t be here till after my vacation, so at least I won’t be twiddling my thumbs that week wishing I was working on my pack).

Am always open to helpful pointers and tips and tricks. I’m currently sitting on about 25 Chrome tabs opened with various threads and pictures for reference material (and because my ADHD makes it hard for me to close tabs, because hey, you never know when you’re gonna need that tab again!)

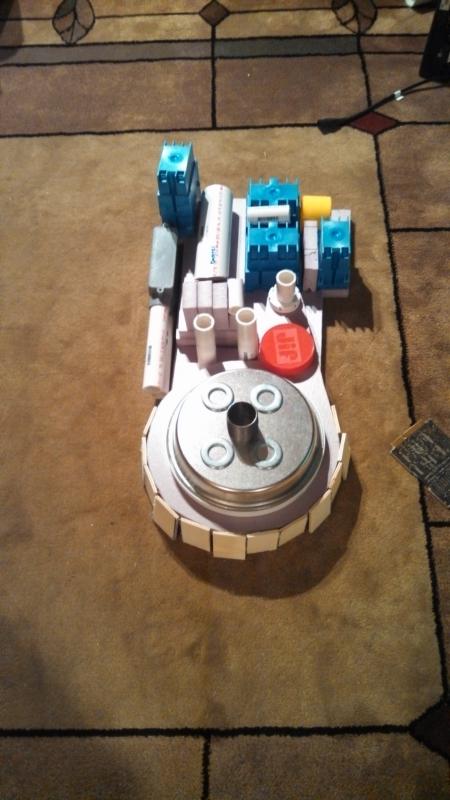
Anywho, tonight was Foam night. I found a great salad bowl that was 12" Dia, so I grabbed some poster board, traced a circle, cut the circle, and used the circle as a tracing guide over the foam board. I then found some other circular objects that were as close to size as possible for the upper part of the SyncGen. Traced and cut them out too, and then placed them in the proper places over the foam board, and with a ruler, drew my lines. It was a lot of effort to get the shape as right as possible, but I’m glad I did it because I think they came out great. Then it was time to Jig. I sawed the first layer of the SyncGen. After popping it out, I then used it to trace an identical one and sawed that out for layer 2. The foam is 1" thick, so I plan on doing the bottom layer in a way similar to what TravisCook did with his Gareee style pack, with the bottom circle by itself, and then the cosmetic plating for the remainder. It’ll come to 3" thick, which is a little over, but once again, we’re not shooting 100% here.

Here’s where I stand after night 1:

My first pack was a scratch build on a budget, as long as you get the iconic shapes pretty close it will be good looking.

and even a basic light kit without sound will really bring it all together.

I’m still debating lights. I really don’t know anything about hooking up lights, or wiring them to a central place… May be something I end up having to forgo sadly

The gbfans cyclotron and power cell lights only need a 9 volt battery. No splicing wires or anything. I haven’t done the electronics in mine yet, but I did duct tape those in temporarily and it makes a world of difference. AND you don’t even have to know anything to plug in a battery! :wink:

Good luck, looking forward to more photos.

To echo what Jay said the GBFans kit is just plug and play. Easy. I am an electronics noob and even I had the full kit set up in 10 minutes. Deffo worth having a look at the Pack lights kit

Ok so I think I’ve been convinced to give lights a go. Hopefully AJ gets em in stock before Halloween! I exchanged my Gearbox and Generator Gangboxes for a slightly different style of gangbox, and went with a more oval shaped Powercell (using the same PVC box that BG used, except I bought ovally ones instead of square…didn’t even realize there was square ones…although I didn’t see any, so hopefully they didn’t have any and I don’t have to feel too silly. Overall I think they look fine, especially considering the fact I’m using gangboxes for everything else. A few more pic updates, finally got some free time (and a brand new Jigsaw after the old one bit the dust). Got some more foam cut, including the third and bottom most layer of the Sync Gen (I wasn’t happy with the section above the bottom circle, so I’m going to have to reshape it, hence why it looks a wee bit wonky in the mockup. I also just tossed that cardboard box in at the top right to hold the spray paint lid onto the gangbox. Picked up a few washers and a ■■■■■■ while I was shopping as well. I feel like I’m at Lowes or Home Depot at least once a day.

But here’s the latest mockup pictures as I progress along. Still haven’t sanded anything either, so plenty of rough edges to touch up and even out in terms of the layers as well.

![image](http://www.gbfans.com/images/pb/Macy44/Proton Pack WIP_IMG_20140917_220745_7091.jpg)

![image](http://www.gbfans.com/images/pb/Macy44/Proton Pack WIP_IMG_20140917_220700_790.jpg)

Woohoo, Pack Electronics from the GBF shop were restocked, just nabbed a set. Total lack of updates, am on vacation for the week, but it’s going to be Christmas when I get home… I think there’s going to be like 6 or more packages waiting for me at the post office when I get back

Looking good! I’m still trying to track down the pictures you asked about.

One suggestion I have is that I think a bumper adds a ton to these packs. I made mine out of a really thick bit of wood I had lying around - I’ve seen wood that’d work at the local habitat ReStore, too! Other have done cardboard (with some reinforcing). I took the thick wood, cut out the ‘center’ of it to give me the general shape, then used a jigsaw to make the ‘platform’ that the shock mount/bellows attaches to. (Pictures would help with this - i’ll find them!).

There’s a method of making the bellows that I think looks really, really good and is cheap! Check out this thread for the general idea: Cheap and simple Ion Knob/Shock Mount - Proton Packs - GBFans.com - there are a ton of ways to ‘cap’ it. I went with a smaller washer and a round head screw personally.

My local ace hardware was a godsend - rows and rows of things you could buy one or two of without a whole package.

Yeah I’m still trying to figure out what I’m going to make my bumper out of. I don’t have a router for getting those grooves in, I’m planning on asking a friend to help me out with that when I get back home. I’m thinking I’m best off making it out of wood, since I am using an actual metal ■■■■■■ for the shock mount and it’s probably a bit too heavy for anything else

I made a reasonably accurate bumper with nothing but a pair of scissors, glue and some styrene.

I just used a heat source to shape the styrene. Once glued, sanded and filled in with some putty here and there, I think it’ll look OK.

Scroll to the bottom of the thread.

Finally got a bit more work done, latest mockup, Next is to get all the foam layers glued up, using spray adhesive for that. Afterwards I’ll start sanding the layers to even everything out. Managed to find a rectangular Carlon box for the powercell like BG used, now I don’t have to use the oval ones… the place only had one left, but said he’d have more on Monday, so here’s to hoping. I also managed to pick up a good portion of my fittings for all the coloured hoses and looms, but I’m a bit of a ways off from getting them put in, will have to paint everything first. Still haven’t decided what I’m going to do regarding the bumper yet

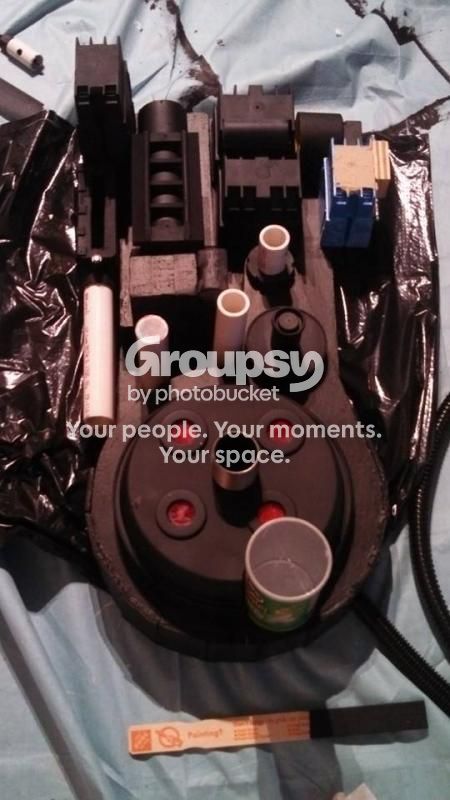
Haven’t gotten a chance to upload pics yet, but have gotten all the insulation foamboard glued and sanded. All the pieces are put together. Then got the hole drilled for the main hose to go into the bottom of the cyclotron, got all the wooden squares glued to the bottom of the cyclotron, filled the gaps with some putty, and have gotten a few coats of paint. I sadly didn’t remember to put some putty on all the “layers” of foam to cover to lines that show the multiple layers, however a couple coats of paint have made them all but disappear. Hopefully one more night of painting will completely obscure them and give it a real tough exterior. Dremeled all the excess stuff off the gang boxes, and puttied the dimples on the tops of them, should be getting the gangboxes painted tonight or tomorrow. Ultimately decided to just buy a resin booster frame because time’s getting away from me, and hoping to start on the particle thrower next

Found out Dremel has a router attachment, so going to go pick that up tomorrow so I can get to work on the bumper. Also gotta get my hands on a mini can of pringles for the N filter

So far so good. Pics tomorrow

Foam with first few coats of paint, still working on more

–

image

Got most of the boxes painted, and the cap.

–

image

image

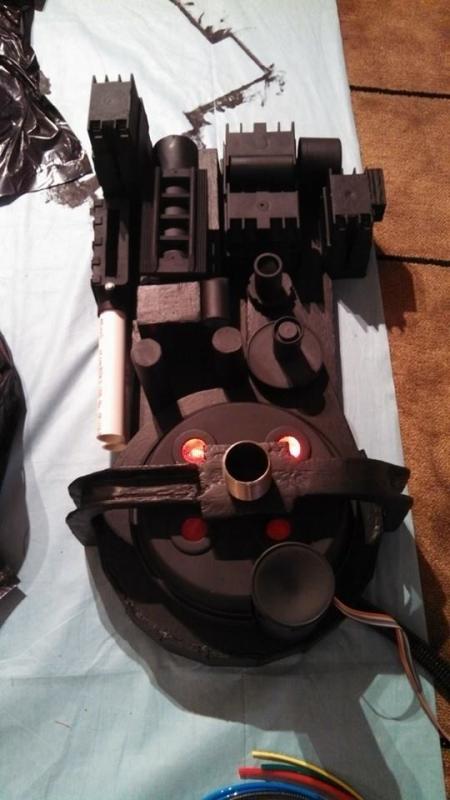
Got some more work done, hoping to get all the little hoses and doodad’s attached over the weekend. Gonna try and dedicate tomorrow to figuring out how to put this Dremel Router thing together and get the bumper shape drawn out on the 2x8. I’ve never used a router before, or even know what I’m doing, but I’ve got enough 2x8 to screw up a lot. Anywho, here’s a picture update on the continued progress

Looking very nice!

Thanks! I got the light kit hooked up to a switch too. I had absolutely no idea what I was doing there, I know nothing about that stuff, tried searching all over the forums but couldn’t find anything with visible diagrams so I took to google to figure it out. But I got it working, and I feel so accomplished after having done it haha

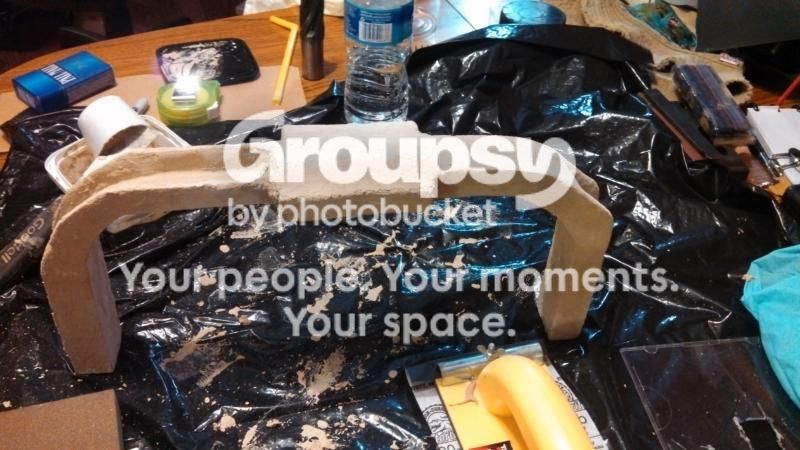
Got the bumper done at long last. Still needs some sanding but it got to be too late to do that outside without being a nuisance to the neighbors. Came out well alright!

cyclotron lights installed, Bumper finished. Managed to get myself back on schedule, gonna cut the MoBo out tomorrow, start attaching doo-dads, and begin sketching the shapes for the gun box on some wood for cutting. Where did the time go? 11 days…