I am hopeful that in the near future one of our more resourceful Ghostheads will scan the original back and fix that hole and offer a 3D printed replacement back panel. :sigh:
I have been thinking/wishing the same.
did your buddy ever fix his meter? same thing happened to mine. I was delicate as possible taking it apart, removed the clip and reassembled it and now it doesn’t function at all. I’ve checked all the solder points and they all look fine.
EDIT: well, I tried it this morning and everything was working. Not sure what the deal was with it. Upside is that at least I got the belt clip off it. Gonna put some new, good batteries in it soon and then give it a bit of weathering.
EDIT 2: so I think the screen on this thing needs some work so I’ve set out to fix it. I took some playdoh and smashed it onto the screen to get a really good, accurate imprint of the screen and then measured it. I recreated the screen size in photoshop and gave it a darker green background with lighter green grid lines on it and set it to about 80% opacity. I am having a page of clear decals printed to size and if it fits on my meter and looks good then I’ll have a small run of screen decals I will sell if there is any interest.
Hoodaman I’d be 100% interested in screen decals for my spirit PKE definitely would add more accuracy to the thing
I am down…
I’d be down for a screen decal, as well.
sweet. The delivery date on those is Oct 11. I’ll post pics of my meter after applying the decal powered on and powered off so you guys can decide if you still want them.
Cool. Hopefully I can get my hands on it before the 20th lol
Probably be down for 2-3 decals.
I’m interested in a couple of those decals
I’m gonna have to shut down this talk of offering up screen decals for sale… As soon as Hoodaman has sorted out a Supporting Membership, he’s more than welcome to advertise them here via the Marketplace.
Took mine apart and it stopped working for a few hours. Best guess it was the oil they use to assemble shorting it. I cleaned it off and it works like a charm now.
Sorry to say the decals came in and they are too small. I’ll need to get them resized. They cover most of the screen area but not the entire area. Unfortunately I probably won’t be able to get them done in time for halloween. Sorry guys.
Here is a pic of what it looks like after it’s applied (it doesn’t look bad in the dark or from a distance but still)

If anyone is still interested in any of these I’m giving them away for free. Just PM me your mailing address and I’ll put them in an envelope for you.
I’d also be interested in a decal for my PKE.
Here’s the mods I made; I took out the brightly colored “buttons” and replaced them with ones that sit a little more flush. Then I took the nipple off the back and re-sculpted the ridges. Finally I re-painted the whole thing with Valspar Matallic Oil Rubbed Bronze.


How did you make your replacement buttons?
It’s really easy actually. When you take it apart the upper ones come out like this:

Just cut off the buttons and put the screen back:

then just trace the foot print on to a piece of clear plastic and paint with clear model paint. Here’s the lower set of buttons:

I was also able to put a grid on to my screen with the same clear plastic.
Some graph paper to get the size right:

Then I used a knife and a ruler to etch the grid lines in (the original had the lines physically etched in too):


TA-DAA!

Very nice, thank you, I love how easy it is to take it apart and work on it.
Update 30Oct2018- Warning Requires delicate hands, patience Do not pry on wire pin conection It could lead to breaking of the conector.
Detection arm wire switching made easy.
First the connection pins are vary small and the wire is small to that makes cutting and splicing them back togother a bad idea. I have found a simple and easy way to de-pin the 8 wire conection the only tool you will need is a fine or small sewing needle.
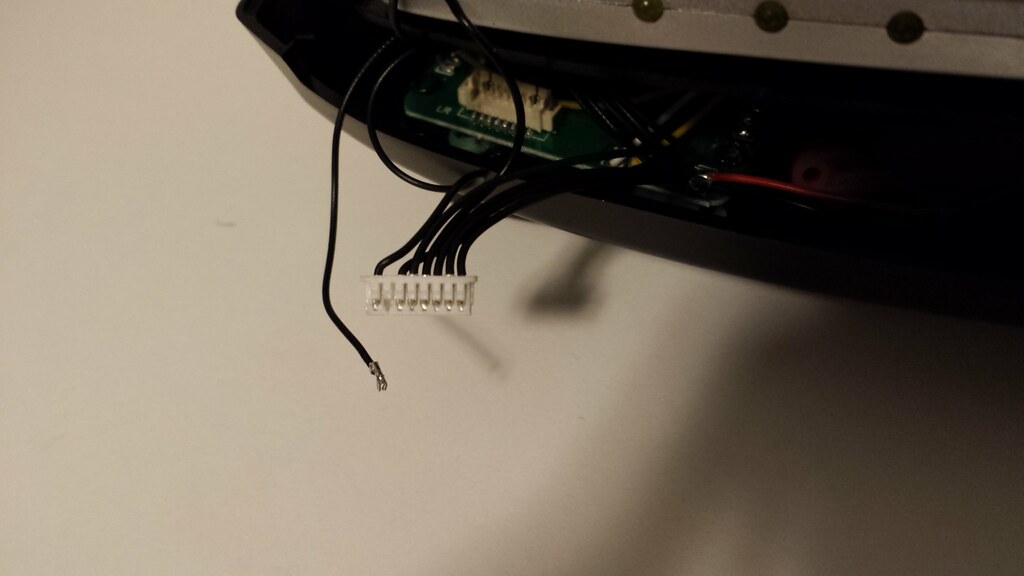
the wire pulled is the right Detection Arm number one LED from the inside out. When pulled the first inside LED does not work while the rest keep going. With 7 LEDs we have one wire for each LED and a shared power or ground wire.
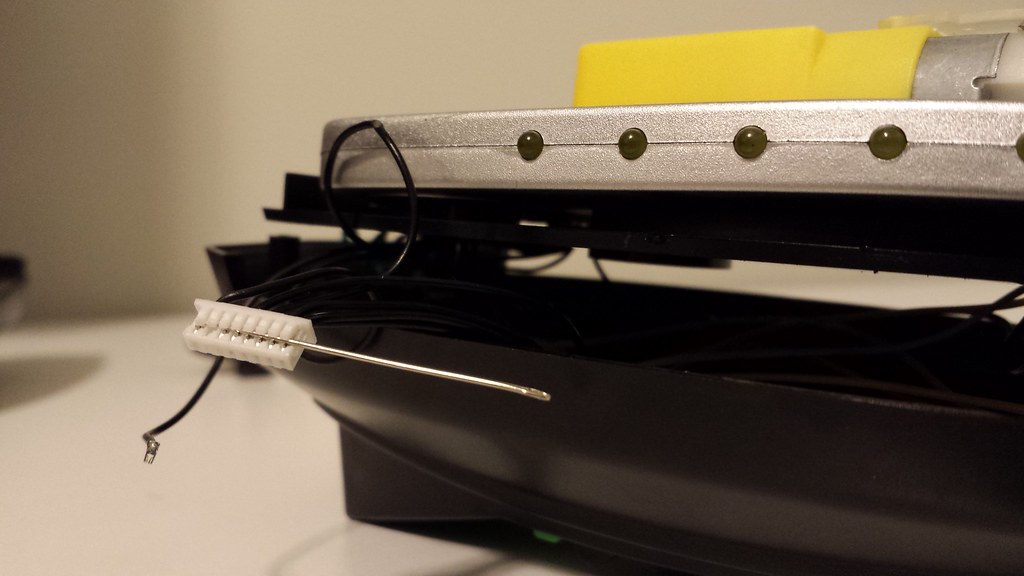
As you can see in this picture of the connection to the main board, I have used a sewing needle to slightly lift the holding clamps slowly remove needle “DO NOT PRY” Let the sewing needle do the work as you cerfuly/gently pull the wire from the conector allowing the wires to be swapped.
So, I did this, but I need to give a warning – it requires a very light touch. I accidentally pulled off one of the pins from the wire when I did it yesterday. I’m trying to figure out a fix for it, but nothing really is satisfying yet. On the other hand, 13/14 lights is a pretty high success rate. I ordered a second one and I think I’m going to rewire it to use the GB2 light sequence to go with my GB2 suit.