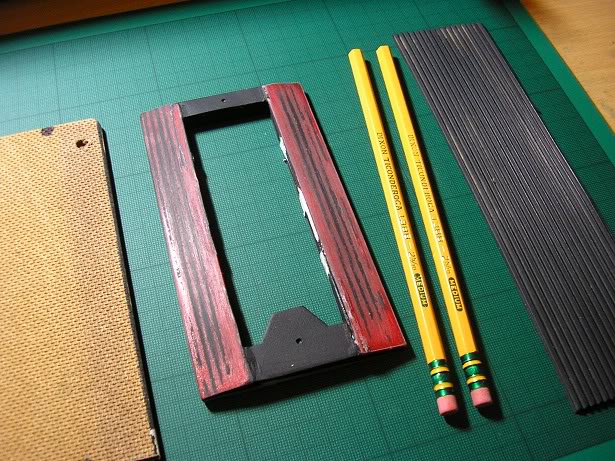
In my neverending quest for even more accurate parts it was time to turn my attention to the booster frame. Thanks to some very helpful members I was able to get ahold of the correct rubber mat, DIXON pencils and masonite board. I was going to start from complete scratch but seeing as i was totally happy with the overall dimensions of my current frame, stripping the master down and re-building it up seemed a better option (dont worry I have a resin master kept aside).
The "brick" pattern rungs will be made by building one, casting it 3 times and inserting them inside the frame. Keeps them identical and saves on time :) Im also thinking of casting the pencils before chopping them up for piece of mind and to hide the lead inside.
Heres a quick shot of my parts collection. Will be updating this thread as the build progresses
I’ll be doing this as well in the coming weeks, I look forward to seeing how yours comes out. I can’t tell from the glare on them but do you have the correct large-font, large-dash 1388 pencils or the newer small-dash style? I’m still looking for a second vintage pencil. :sigh:
Looks great Nick seriously can’t wait. Quick note im sure you just laid it down however for the pic but you have the Masonite pattern vertical in the picture, for the correct pattern you’ll have to turn it horizontal. I marked it along the edges with marker which way the pattern should run. It’s tricky thats what I did it, the pattern is only accurate one way from what I noticed. Look forward to more progress Nick.
The 3.125" for width that chapter listed is right in line with my notes with my overall height being closer to 5.875" in the center. (based off the PH pack) The boosters themselves vary ever so slighty with certain measurements partly due to the warping and what not.
Stefans .75" specs for the outside edge portion (mat and pencil area) are very close.