For Sale: Charlesworth Dynamics Muon Trap (Modified)
- J Walker
-Sooke, BC, Canada
-$480 CAD + Shipping
- PayPal Preferred
Back in 2001 I decided to purchase my first 3D printer and to celebrate I decided to build a Ghostbusters Muon trap. After some research I came across the Charlesworth Dynamics trap.
I set out to print the files and acquire the real world parts and about six months later I had a trap that was about 90% complete. I decided at that point that I was looking for something different from the prop and set down a long road of modelling my own… but that is a different story.
For years this trap has been sitting in storage with an uncertain future. I decided that perhaps it was time to let it go to fund other projects.
Now, to be completely transparent. This isn’t a complete trap. While it contains many of the parts you’ll need, you will need to source some additional parts. It has also been heavily modified from the original design to incorporate more accurate details found on the actual prop.
The post below will detail those changes, what is included, and what you’ll need to complete it.
I am asking $480 or best offer. I’ll explain my rational at the end.
Here is the original build thread if you’re interested in seeing the history of this trap: 3D Printed Trap: I love this plan! I'm excited to be a part of it! Let's do it! - #15 by imperialwalker - Ghost Traps - GBFans.com
The Trap
All the main 3D printed parts required to build the trap are included. They have been sanded, filled, and painted in aluminum color ready to have masking fluid applied for weathering and painting. Everything was printed in Hatchbox PLA.
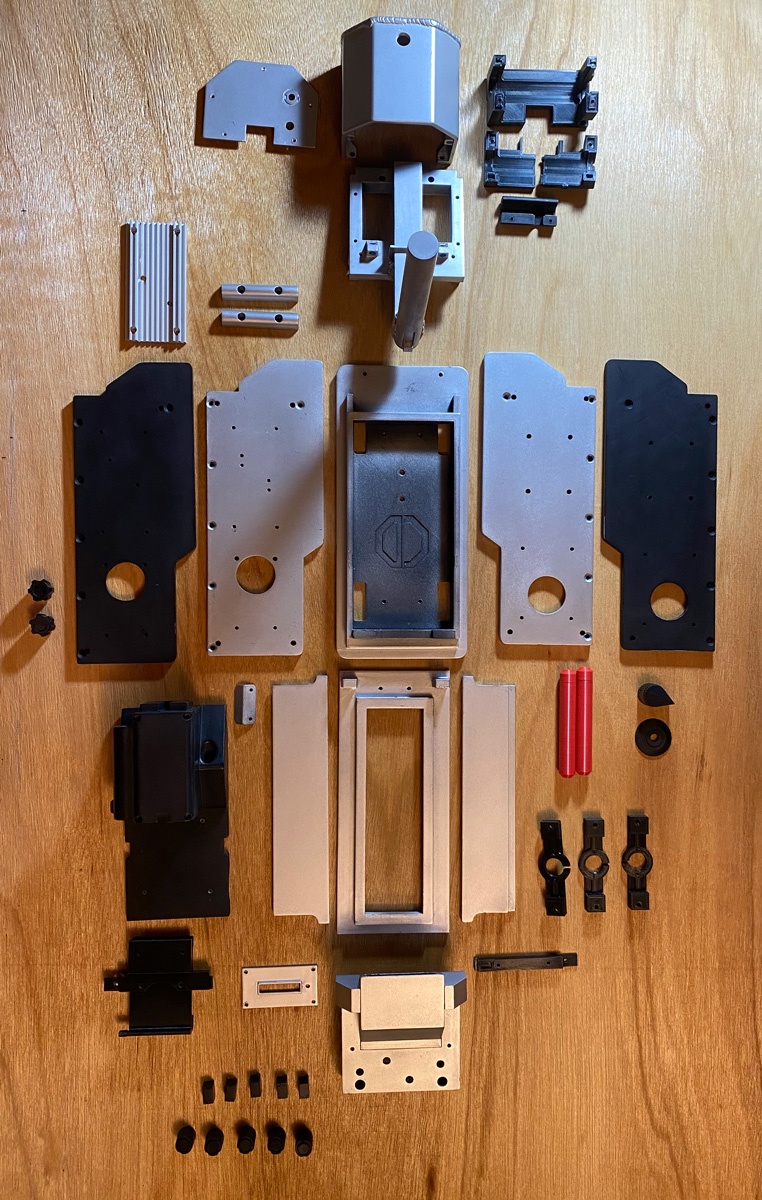
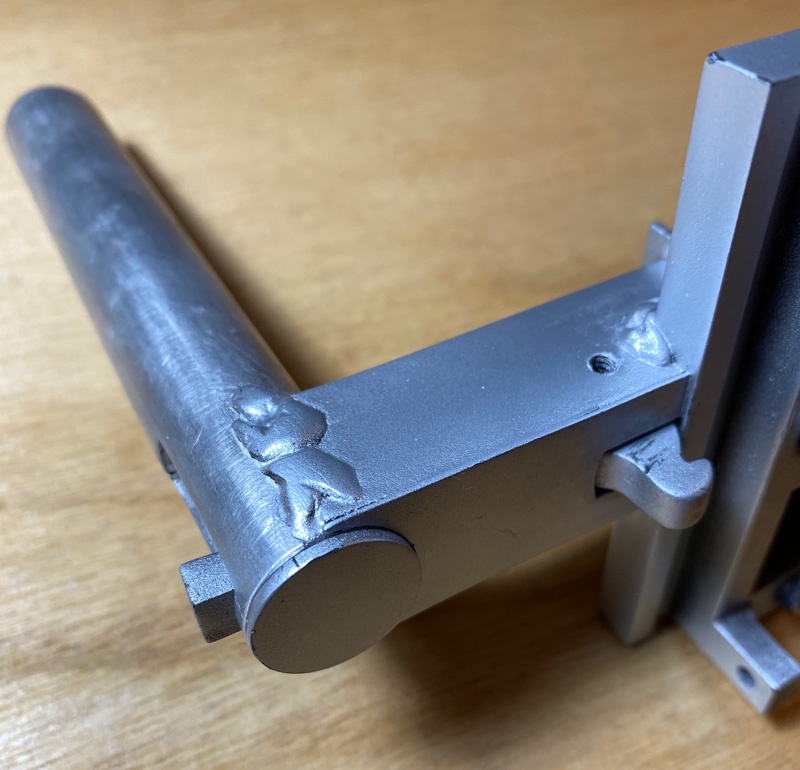
Some parts have been modified to more closely resemble the actual prop.
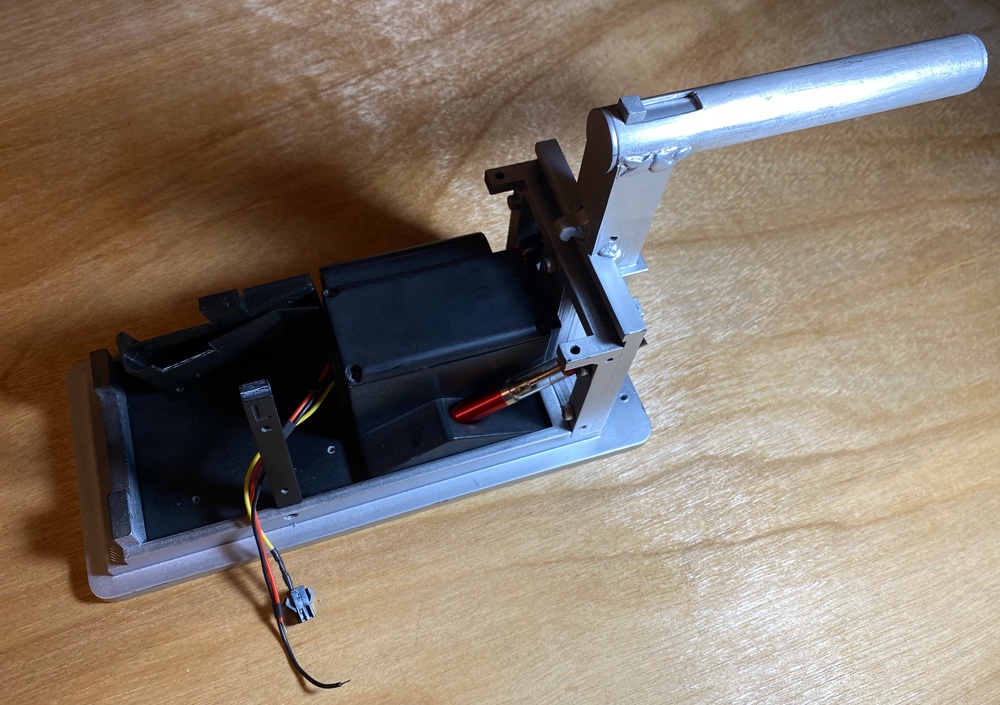
The handle is completely custom and contains an aluminum handle, faux cartridge mechanism/hook, and faux welds made from 2-part epoxy. The handle also contains an internal bolt to add enough strength to lift the trap without the handle breaking in two.
Note: This does not function. There is no removable cartridge in the Charlesworth trap.
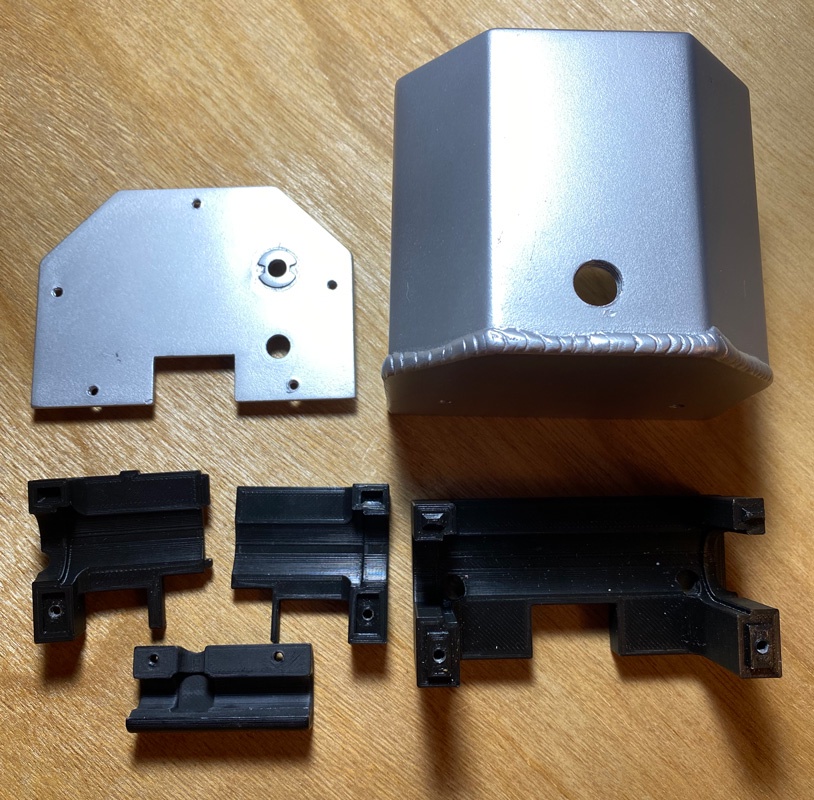
The rear box has also been slightly modified. A faux weld was added as well as an internal battery/hose mount. I designed this mount to try and prevent the battery from rattling around and to keep the hoses in check. It isn’t the greatest design, but it is available if you would like to use it.
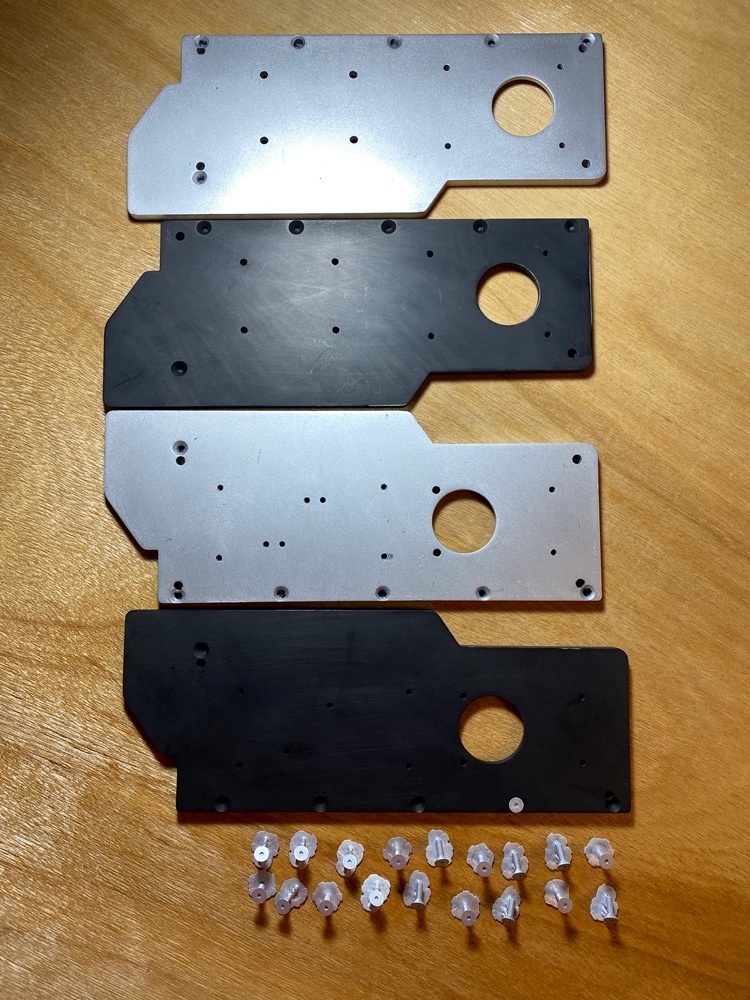
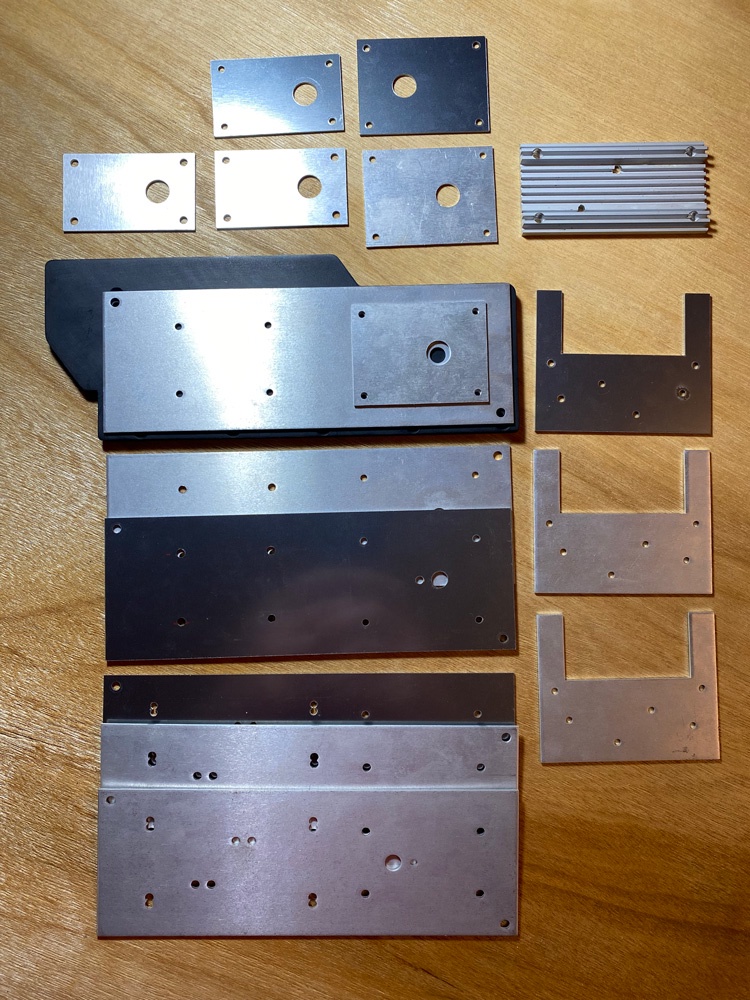
The original panels didn’t have much detail. The aluminum versions below have holes along the bottom that I drilled out to replicate the holes on the original prop. These aren’t the most accurate. The black sides are my complete remodel that contains more accurate placement as well as an internal mount for the bargraph PCB. These would need to be painted aluminum if you intended to weather them like the rest of the trap.
I’ve included some resin printed 4-40 “screws” that are meant to be glued in place and painted along with the trap to give the illusion of having real screws. If you can source genuine 4-40 screws at the correct length, you can of course opt to use those instead.
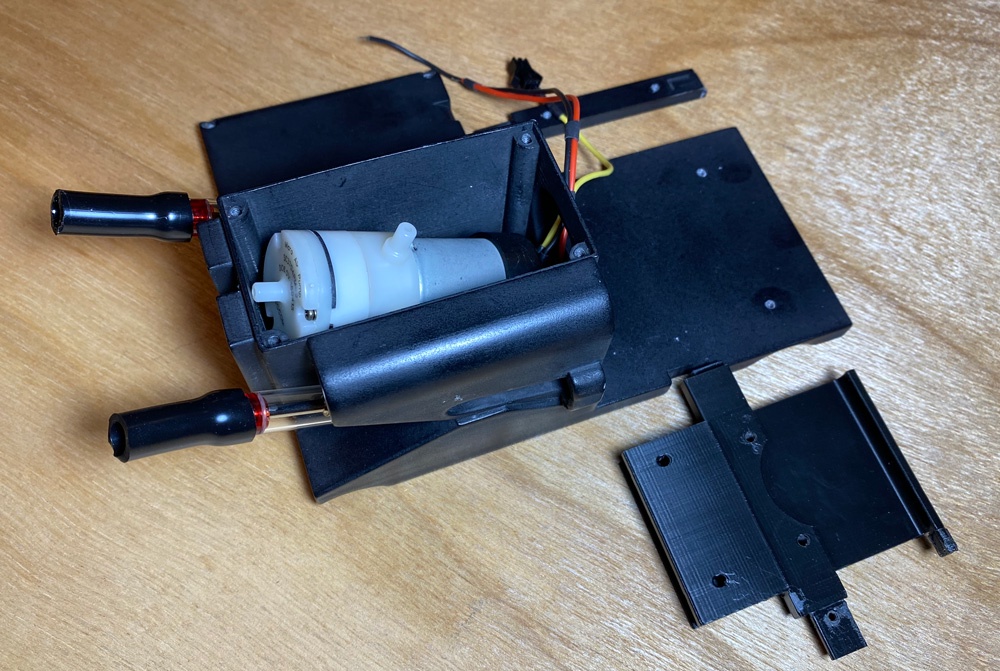
In an attempt to eliminate the internal rats nest of cables and to try and cut down on the noise of the air pump, I designed this elaborate internal structure. It is without a doubt over-engineered, but it does help keep everything a bit more tidy. The air pump mount comes with foam which cuts down the noise of the pump by a few decibels.
This is also designed to mount the e-cigs to make them less likely to leak and for easier access.
Genuine Metal Plates
Included are genuine aluminum plates that were purchased from SendCutSend. There are two of each plate so you have some options for weathering and other mods. There are also a set of faux acrylic panels that are lighter than the aluminum versions.
A genuine vector plate is also included. The CAL-R resistor is not included, but I could be talked into printing a resin version that you can paint yourself if you really need one.
Knobs and Buttons
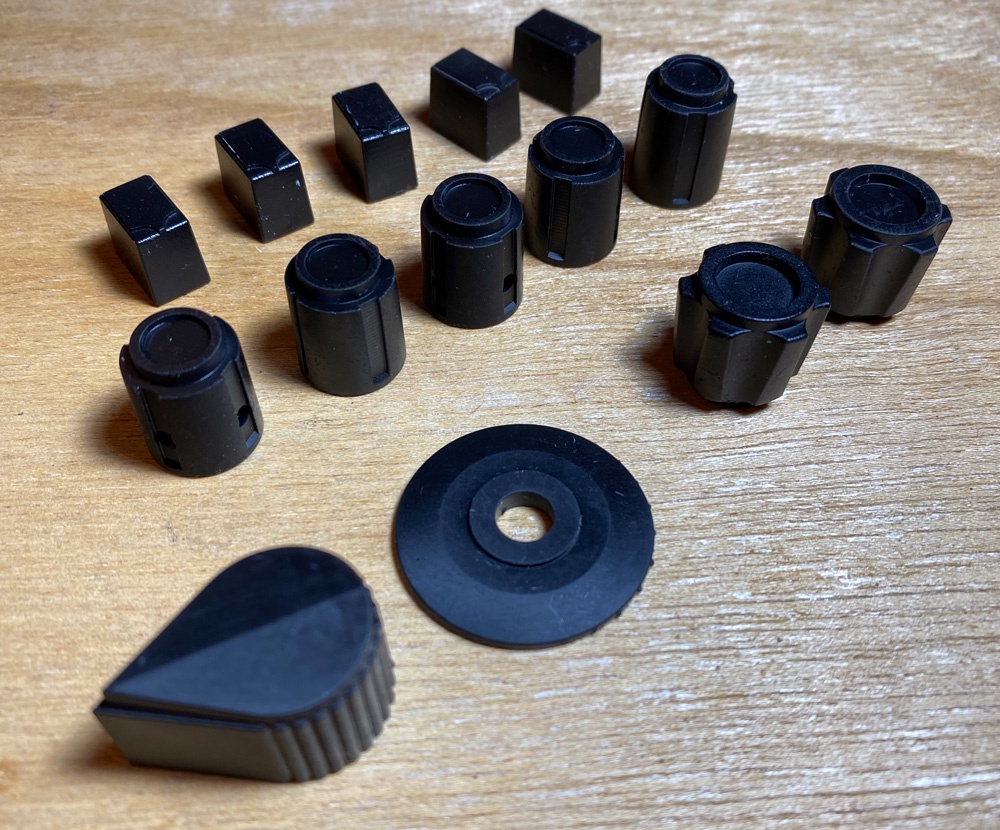
These knobs have all been modelled from scratch using reference from genuine parts and resin printed in black tough resin. There are a lot of extras so you can choose the ones you like best and for any replacements. You may need to do a bit of sanding and painting as these are raw resin prints.
Stripes and Filters
A sheet of vinyl stripes an internal mesh, and a red filter are also included.
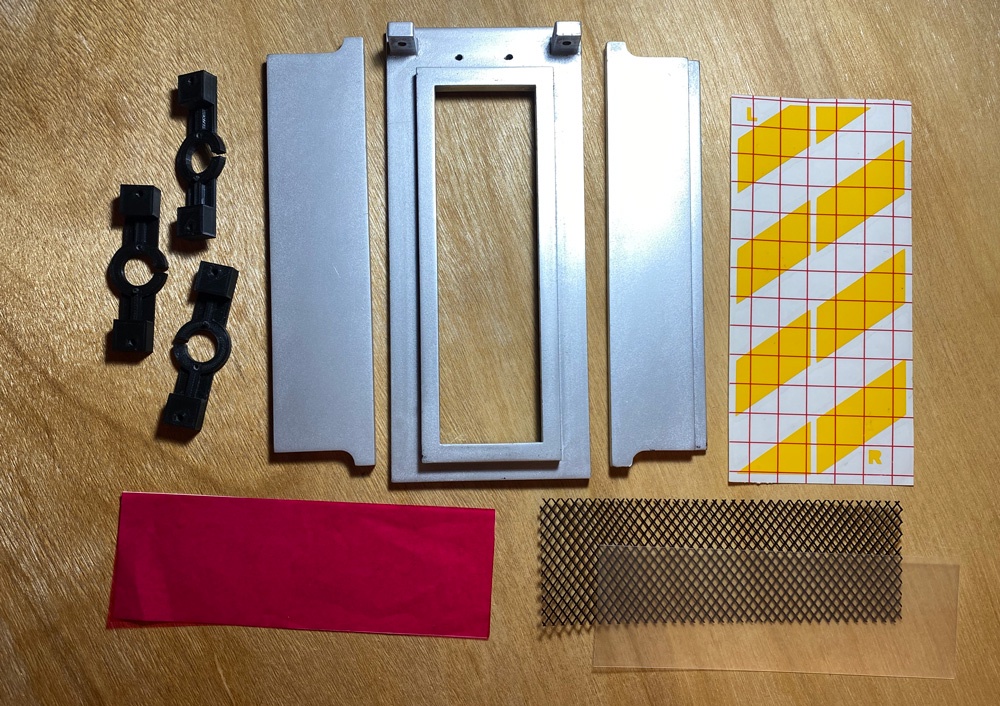
Included Parts:
3D Printed Base
3D Printed Sides (modified)
3D Printed Sides (remodelled and modified)
3D printed red rods x2
Aluminum Vector Plate
Axels x2
Handle (modified with aluminum handle)
Rear box
Rear box lid
Internal Battery/tube mount
Heathkit knobs x2
3D printed custom internal pump / electronics mount
Faux hook plate
3D Printed top
LED mounts x3
Doors
Door stripe vinyl stickers
Aluminum side/front plates x2
Acrylic side/front plates x1
3D printed side knob (resin / black)
3D printed front mount
3D Printed Bargraph cover
3D printed front knobs (resin / black)
“Wheels” x4
Grill and Red filter for internals
Electronics:
Most of the electronics components are included aside from a few mentioned below.
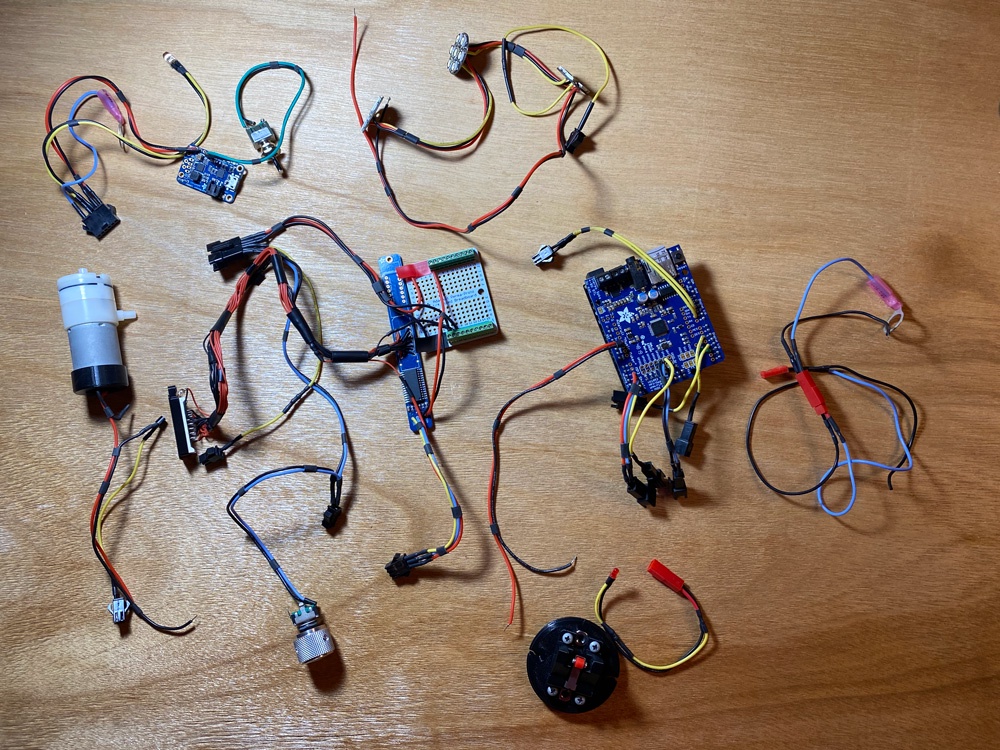
Most of the electronics are wired and ready to be plugged in. As mentioned below there are a few things that you’ll need to find and test, but it was tested previously and did function correctly in its original configuration.
A lot of effort was put into assure that every wire was soldered properly with heatshrink, cut to an appropriate length to cut down on clutter, and wire managed. All the wires have JST plugs on them so they can be connected/disconnected for testing/replacing.
Parts Included:
Bargraph / LED / Power Rail / Side knob (GB2) assembly
Adafruit Metro / Uno
Neopixels x3
Air Pump
Power / Battery charger / LED / Power Switch assembly
Pedal Switch / LED assembly
E-cigs and chargers x 2
Banana Plugs (for your hose) x2
Speakers x2
The Pedal
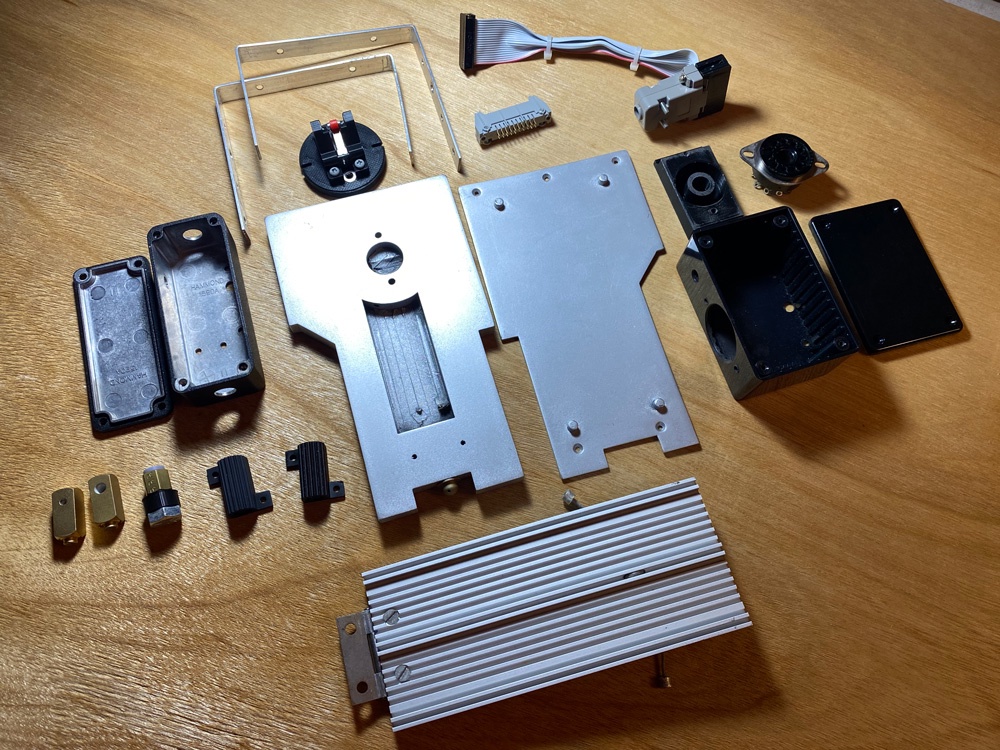
The pedal is also modified to be more accurate. The original Charlesworth model didn’t include the resistor space or the resistor on the pedal base. I remodelled this and printed it.
It was also modified to take a bullet catch which is on the original prop. I’ve included a resin printed version, but you should be able to add in a genuine one.
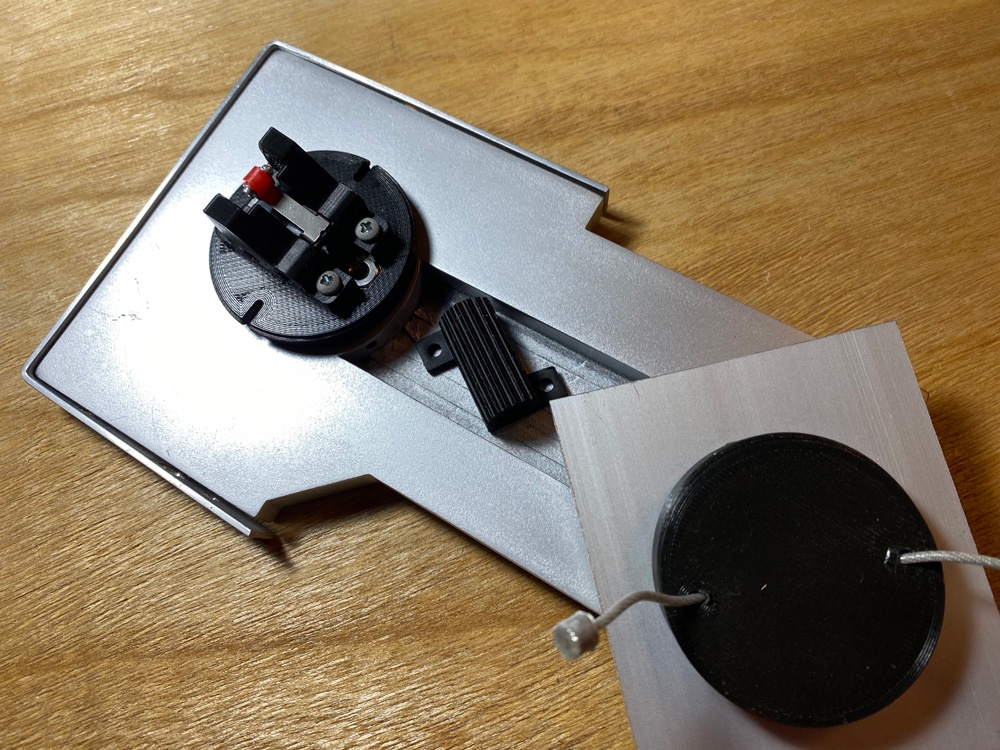
The mechanics have also been modified. The original were very flimsy and would cause the vector plate to twist when stepped on. There was also no way to keep the plate from swinging up which is why I added the aircraft wire like the original.
I’ve also included a wired red LED that when paired with the modified code will blink along with the trap.
Included Parts:
3D Printed Base
3D Printed Base Plate
3D Printed Sage Resistor (Resin / Black)
Aluminum Vector plate with hinge
Hammond Project Boxes (holes drilled)
3D Printed Legris Banjo
Metal tube connector
Aluminum “bumper”
3D Printed “Bullet latch”
Relay Mount
D-sub / Ribbon / Header assembly
Switch, LED, and wires
What is NOT included:
Fasteners:
Unfortunately the fasteners (screws) are not included. I don’t like to be stingy but in Canada it can be difficult to course Imperial hardware and so they’ve been used in other props. I am happy to help you figure out what you need though and will include what I can.
Servos and Chains:
The servos and plastic chains were pillaged for another prop long ago. This means that you’ll need to source these parts if you want the door mechanics to work. I am sure Charlesworth still sells them, but they can be sourced independently as well.
Battery:
I have the battery, but adding a battery to shipping adds complexity. Shipping batteries in the mail can cause issues depending on the destination and customs. I am happy to send it separately if you would like to pay for the battery and additional shipping, but it is probably best to source it locally.
Relay:
I used the pedal relay for my other trap so it isn’t included. There is a mount and one of the original parts to create the GB2 variant of the pedal, but you’ll have to source a relay.
Foster connectors:
The Foster connectors allow the trap and pedal to connect via the hose. These aren’t included as I used them on another trap.
Hose:
The hose is a whole separate beast that requires a lot of time, effort and materials to make function correctly. I want to keep mine as I finally nailed it. I will provide banana plugs so you can make your own as I have extras, but you’ll have to source all the parts. I can help if you need.
LED covers:
There is a red LED cover for the pedal and the back of the trap. I got genuine ones and never purchased the alternatives. These will need to be sourced.
Pedal Vector Hose:
You’ll need to source a genuine hose. GBFans has them for sale in both the GB1 and GB1 versions.
Pedal Hoses:
The red and yellow hoses that run from the project box to the sage resistor under the vector pedal are not included so you’ll have to find some.
Pedal Feet:
These are apparently easy to source in the USA, but they are becoming rare in Canada, so I am unfortunately holding onto my extras. I can help you source what the genuine ones are.
V-Hook:
Sorry, the V-hook is in another castle.
Issues and Considerations:
For full transparency I want to be honest about a few things so you don’t feel duped.
-
All of these were printed in Hatchbox PLA. This is not an ideal material due to its tendency to warp in heat. This just means that you will need to be especially careful to not expose the trap to high heat (don’t leave it in the car in the summer).
-
This was my first 3D printed project and while I’m a perfectionist there may be slight imperfections in the prints such as rounded corners, layer lines, and various artifacts. I was still learning my printer so there may be parts that aren’t as crisp or post processed as they could be. They’re still really good in my opinion, but I just want to be clear this isn’t a professionally printed kit.
-
Charlesworth opted for screwing right into plastic. I design my models with integrated nuts, but for this model there are a lot of instances in which screwing right into the plastic was the design choice. The last time I checked all the holes were still tight and holding the screws well, but there could be some that don’t have many assembly/disassemblies left before they strip. Care should be taken to not overtighten any of the screws.
-
The electronics are not vanilla. A few months into the project I found someone on the GBFans forum that modified the code to make the trap function more accurately. This also required some modification to the original wiring plans. I’ll provide the link so you can follow along. I’m not sure how far I got before I abandoned it, so there is likely work to be done to get it to function correctly.
– The red side rods are a raw print. Early on I opted to get some aluminum ones machined, I never finished the originals. These will need to be sanded and painted.
-
This is not an accurate trap. If you’re looking for a screen accurate GB movie trap, this isn’t it. Charlesworth has stated that his goal was to make a hybrid GB1 / GB2 trap with some artistic liberties. It will make a great looking trap, but it isn’t screen accurate if that is what you’re ultimately looking for. It is why I decided to model my own because my brain strives for accuracy and won’t give up. So this trap progressively triggered me.

-
The smoke mechanism is a pain. Charlesworth did a great job developing a compact system, but in reality it isn’t a great user experience. Firstly, in order to refill the e-cigs, you have to remove them from the trap. This isn’t easy due to the way it was designed, so don’t expect a quick turn around if you’re at a convention. The tube system is also super tight and a giant pain. I tried to source silicone tubes so they wouldn’t kink, but I was unsuccessful so the tubes are constantly a pain. My solution was to attempt to create a mod that would keep the tubes in place, but needless to say it is a giant pain. Sorry, it isn’t how I would have designed this.
Another thing is that the tiny e-cigs are not designed to have sustained draw. Most humans I know don’t smoke by breathing in for like 50 seconds straight. This means that while it may be tempting to run the trap over and over, it could result in burning out the e-cigs. I believe that the modified code allowed the user to turn off the smoke, but I can’t quite remember. Also, if you run the e-cigs dry, it will likely damage them, so you HAVE to refill or remove them.
- The pedal contains a 3D Printed base plate. It works great and holds on the feet (not included), but it has no stability. The base is printed with nearly 99% infill and something like 5-6 walls to try and keep it strong, but it will flex if stepped on too hard. If you were to add an aluminum base plate ( I think I have a DXF file for getting one cut) it would likely reduce the flexing, but it is something to be aware of. You have to be a bit gentle… The original was wood.
Why the asking price?
The answer is partly because of the time put in. Partly because of the electronics included, and honestly just because it “feels” like a reasonable price.
The cost of the materials included on their own are worth a fair amount. Most of the parts are included from the Charlesworth deluxe kit which I paid $460 Canadian for. Add into that the time and materials for the 3D printed parts, and the fact much of the soldering is done, I think it is a fair asking price.
I am however willing to entertain reasonable offers. 
It has the potential to be a really nice trap and I think this is a great start. I’m happy to answer any questions and provide additional info / photos if you need. I’m also more than happy to help you as much as I can with information, build tips, and such as you build your trap.
Thanks for your interest!