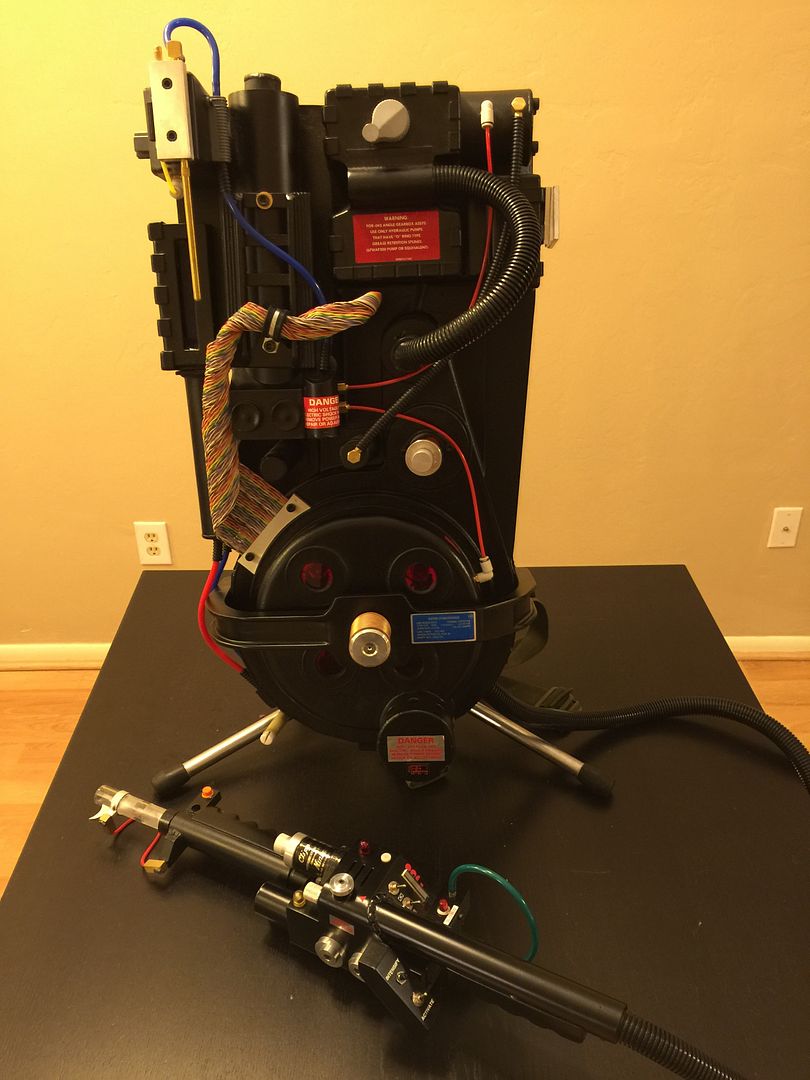
Hi all, this is my first attempt to post my progress on my pack build. To give you a little background I caught the GB fever January 2015 when I stumbled across GBFans and realized that a life long childhood dream could actually come true…to build what I have always thought to be the coolest prop in movie history, my very own proton pack. There was soo much good information that what seemed overwhelming actually became possible. I set a goal of having it functional by Halloween. It took every bit of last year to pull it all together and I had a blast on Halloween.
But as another great member on here says “ghostbusters is for life not just Halloween”, so I am ready to kick it up a notch with your help. I would consider my set up to be about 70-80% finished. I would like to have your suggestions on improvements I could get done in the next month before Megacon in Orlando. I will start other threads on my other gear soon also. I appreciate your help and if I am posting something incorrectly please let me know.
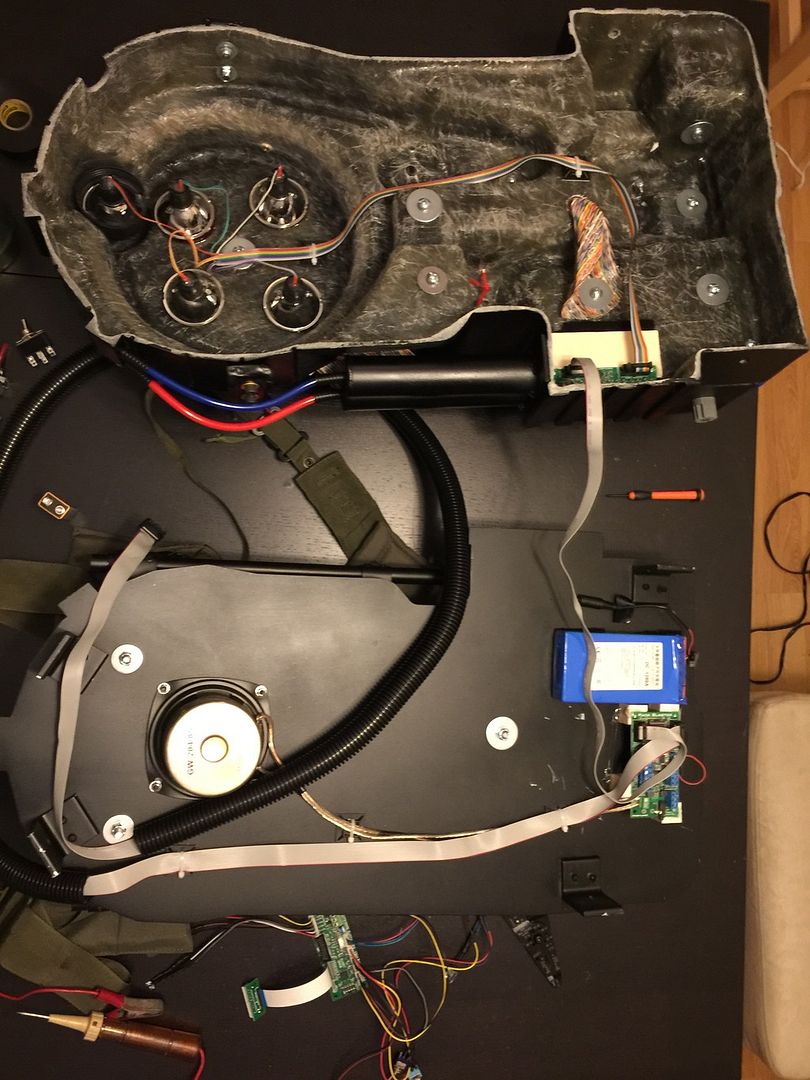
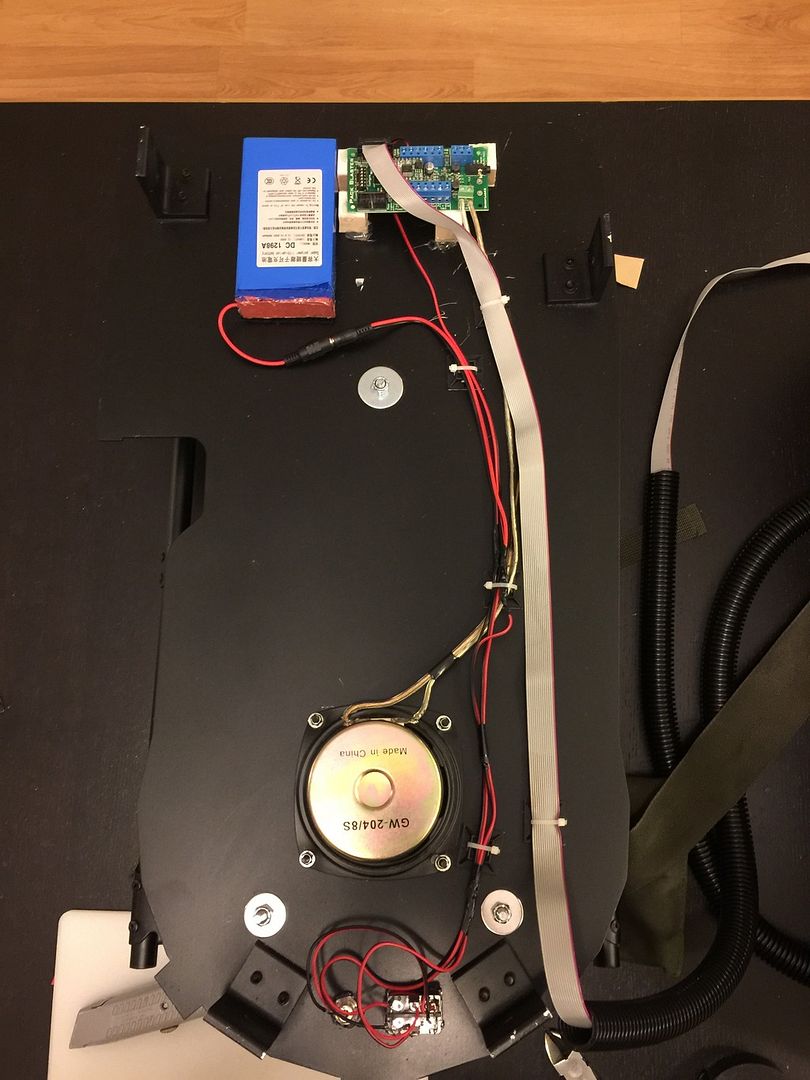
This is what the internals look like:
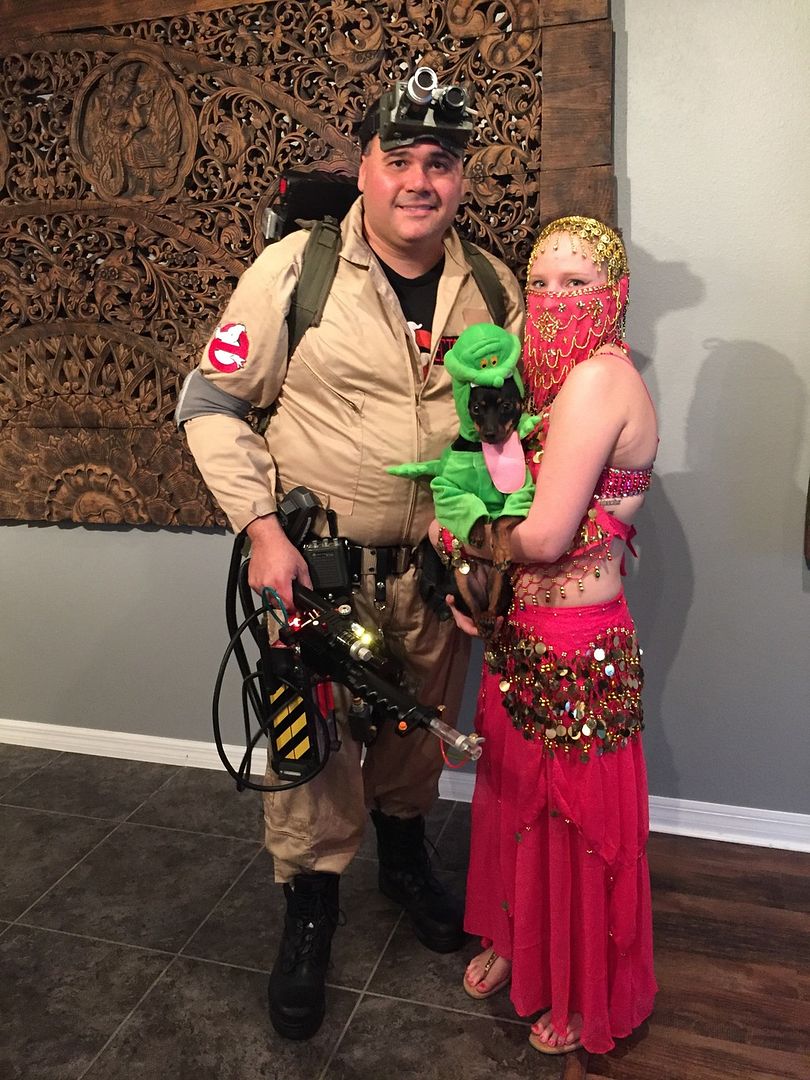
Here is a pic from Halloween with my pup Slimer, and my very understanding wife…lol:
The shell and mobo are GBFans, the electronics are from crix, the resin parts are from HeavyProps, and a TC thrower.
Thanks
EctoRalph
Pack looks great and the internals look nice and clean. Good job!! Think I recognise the signature reference also 
I agree with Venkman’s Swagger, your internals look really nice and clean. Great job
Thanks for the comments guys. Mr. VS I remember reading up on your build a few times when I got stuck, you have a great tutorial. And Rob I read somewhere you might be getting a 3d printer and cant wait to see what you do with it.
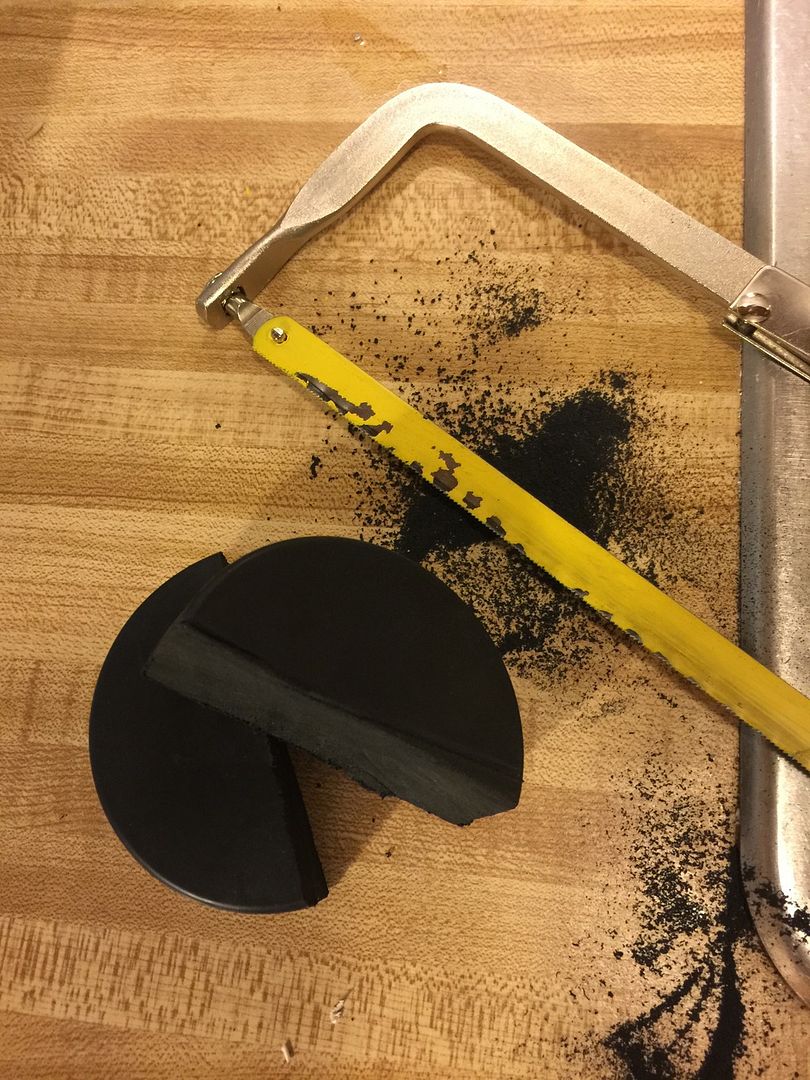
This is how I did the “hockey puck” spacer. I think it was a simple addition that makes it more authentic. Cutting that sucker in half with a hack saw took some time:
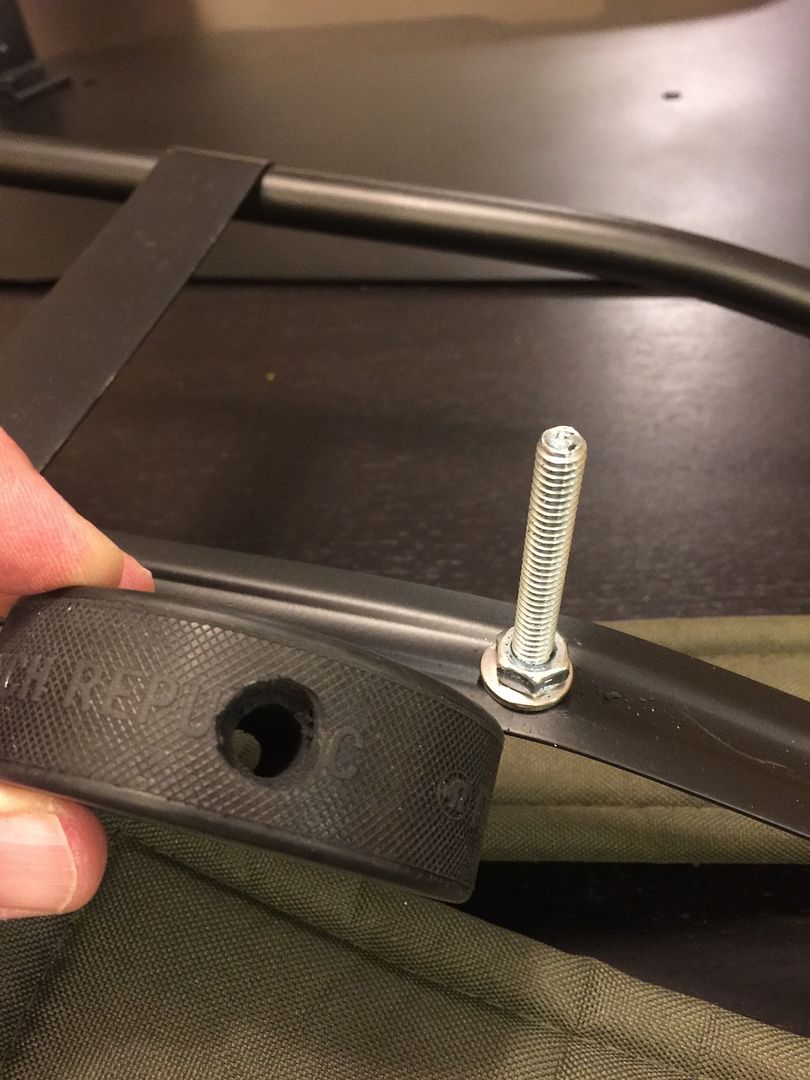
Then drill the hole and make a countersink for the nut:
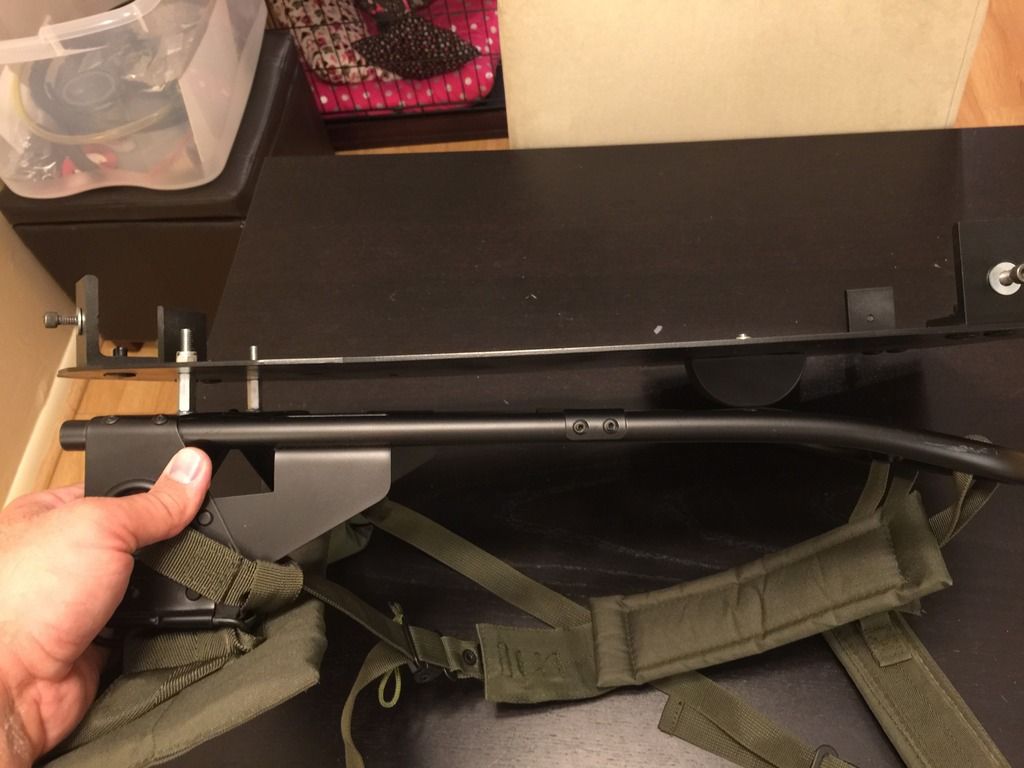
This is how it sits, I will probably tinker this this eventually because I don’t think I have the angle right:
Thanks for the kind words buddy. Glad I could help someone in any way possible. Makes posting updates well worth it.
Yeah, I am in negotiations with my wife for a 3d printer. I used to be a CAD drafter for over 10 years so hoping to start designing stuff again. I also put hockey pucks on my pack, but I used a compound miter saw. It worked out great. Just make sure to watch for flying rubber.
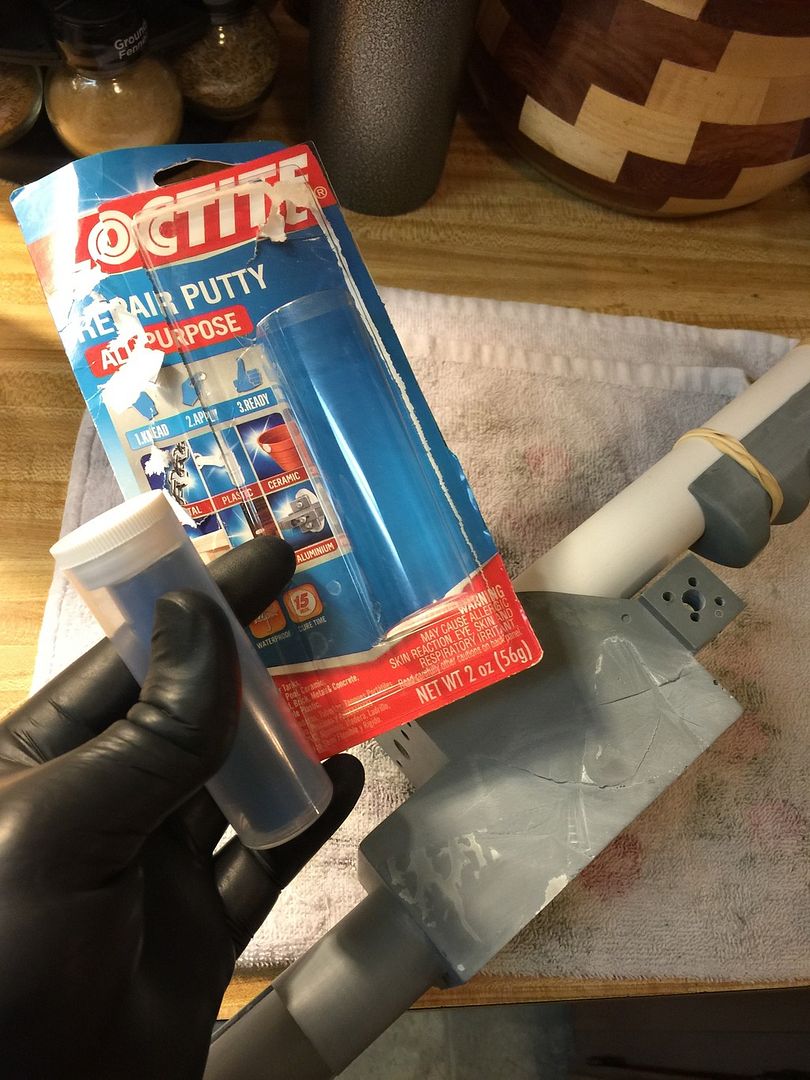
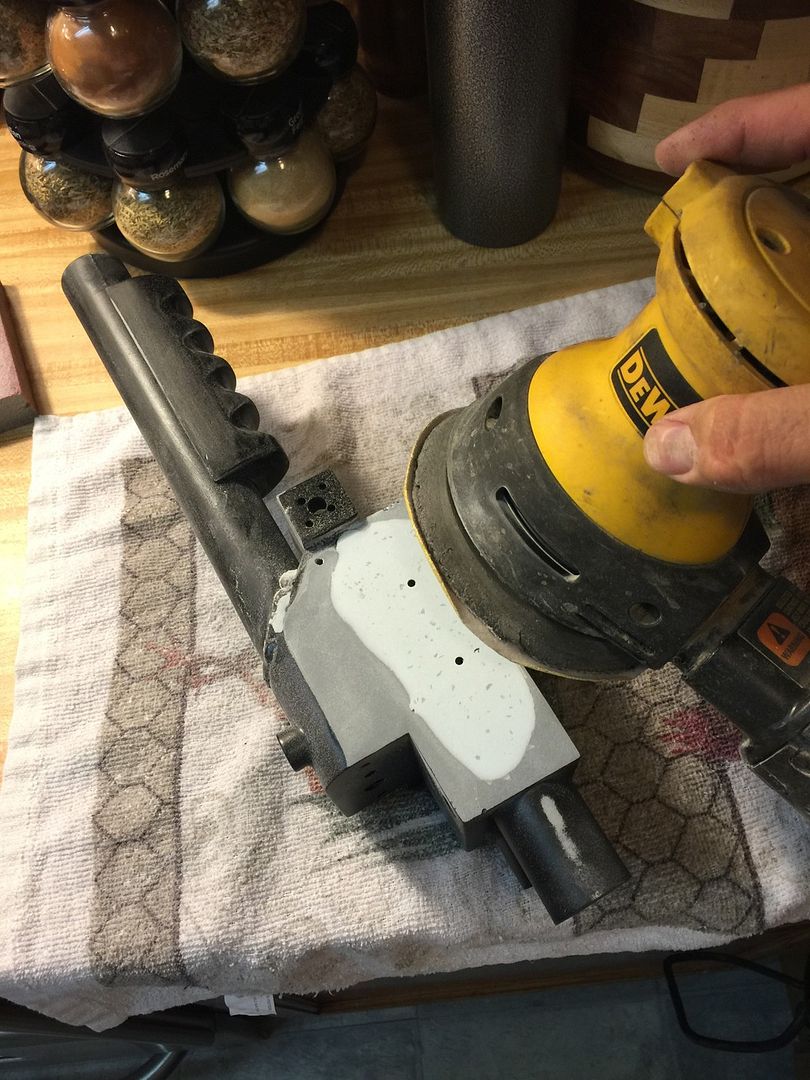
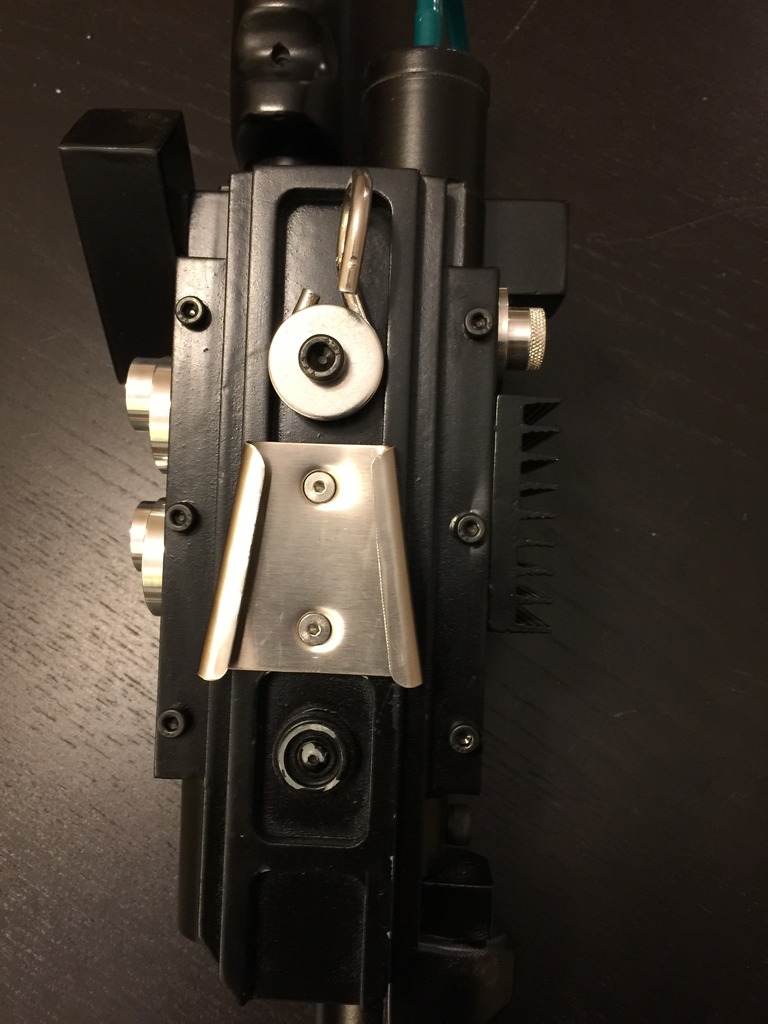
I wanted to post a few pics of how I added the metal side discs on the thrower. I like it when the knobs and buttons on props actually turn and work. I will tell you it was real hard to take a flat cut saw to the TC thrower, it is just a work of art on its own.
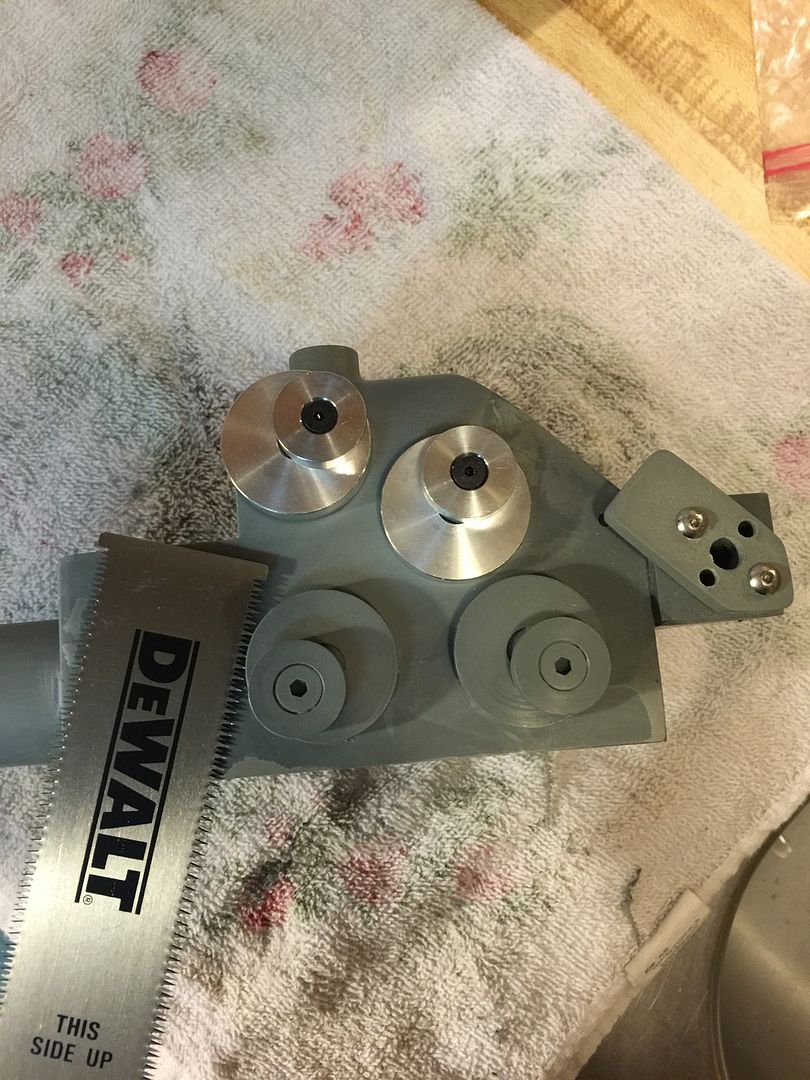
It did not cut as flat as I hoped so I added some putty and sanded it down, then painted it and it still was not flat enough so I hit it with the orbital sander and that did the trick.
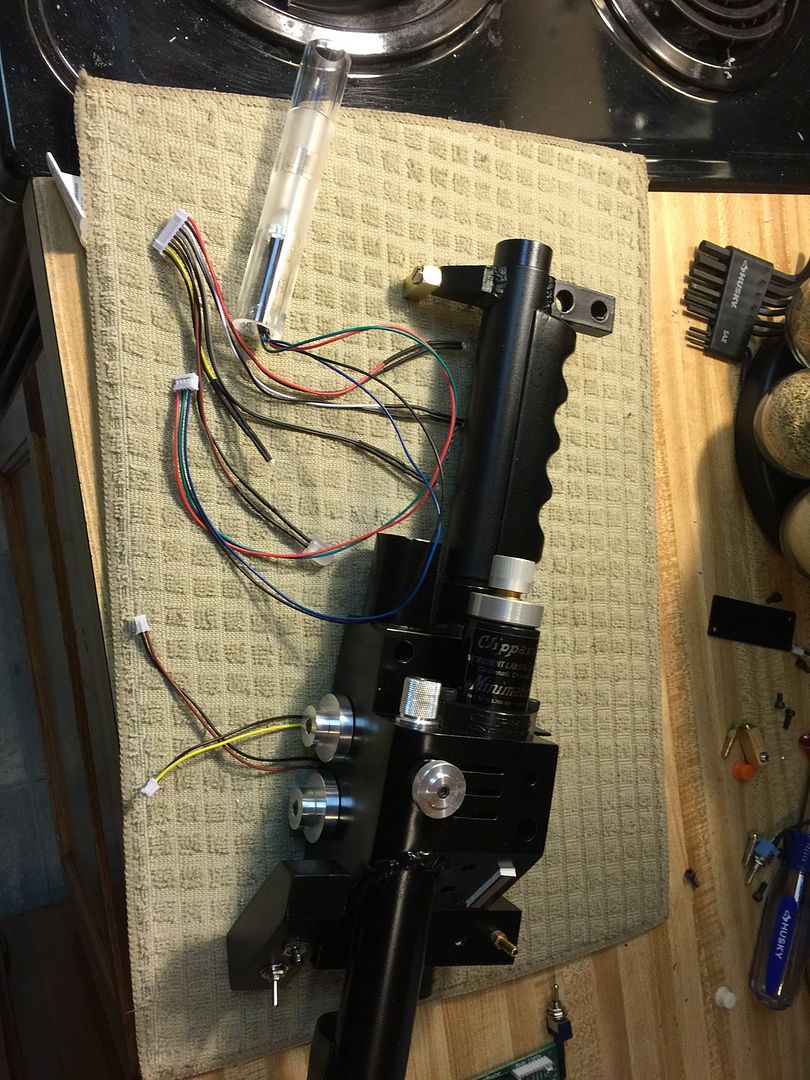
I then also added the top disk and front knob before wiring:
Well, its the day before going to my first convention and I wanted to post the progress I made so far over the past few days. I didn’t realize how much I had to do and how much more I still want to do. I’m thankful for all of the great tutorials posted on gbfans, I learn something new every time.
I started with adding the screen and pin stripe to the N-filter. Not sure what I am going to do with the rest of the screen roll…


I had to put hot glue on the tip of the screw driver to get it to where I needed in the n-filter recess:

I think it came out nice but really shows how off my holes were drilled. I think this will push me to eventually replace it with an aluminum one.

Next was to add the neck foam. I am waiting for the gaffer tape to come in because I could not find it in town.

I also thought that since I would be walking around the con looking at cool things I must touch and buy…it would be good to do the S-Hook addition so I can hang the thrower from my belt.
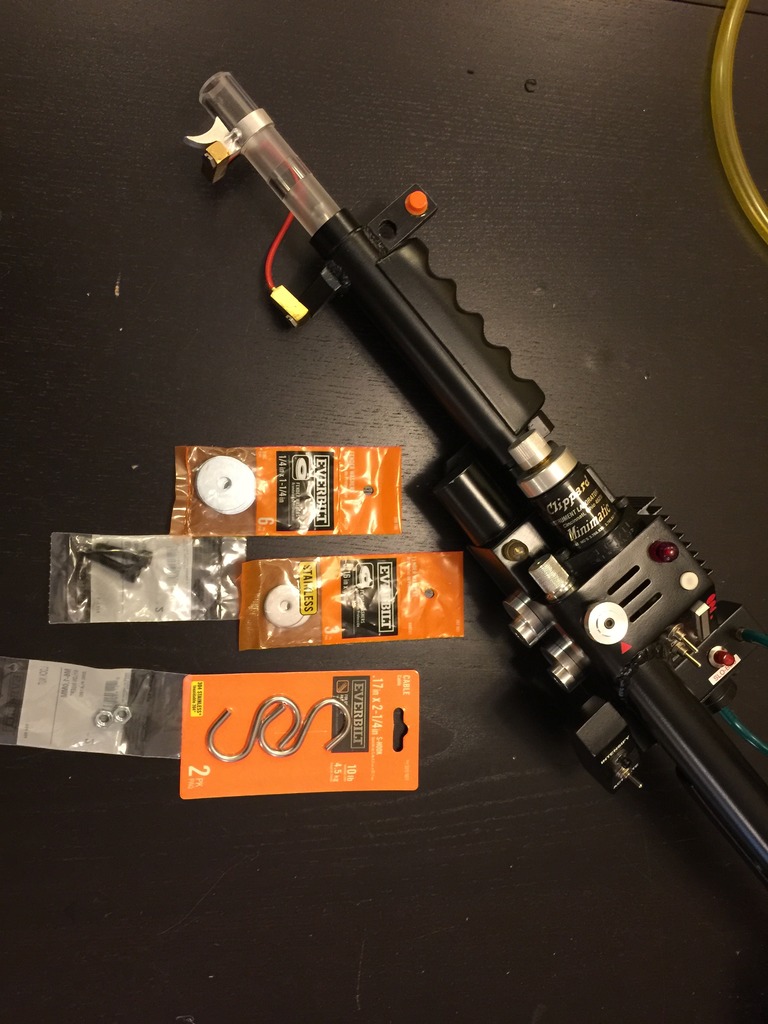
I also upgraded the bolt that hold the cover on since they would be weight bearing now.
Looks great man. Nice job
Can you share a pic of you switches on the under side of your pack. I like how clean and simple it looks I might copy your layout.
So here are a few pics of my charging port and switch set up. Originally I thought I would do this temporarily until I got a Venkmen plate, but once I got it done and actually used it while wearing the pack I don’t think I am going to change a thing. It is so easy to reach back and flick it on. The switch is an on-off-on which was out of stock at radio shack so I ordered it from amazon: AC 250V/10A 125V/15A DPDT 3 Position ON/OFF/ON 6 Pins Toggle Switch by Amico. The nice thing is that it isolates the electronics when charging and acts as a master cut off.
Here were the switches I considered:

The only tricky thing was that for some reason the wires were opposite of the switch position:

The finished install is nice and clean:

Thanks you for the pictures.
After 3+ months and a 100 bucks later my padded straps finally arrived and just in time for Megacon Tampa Bay in one week! I have been looking forward to this upgrade as I plan to attend all 4 days. This is a comparison of the original strap and the padded strap:

However my excitement turned into a little bit of frustration when I realized the straps don’t match and one of them did not work since the snap did not line up.

Since there is no time to return them, I figured this would be a good opportunity to learn how to do snaps. I drilled out the original snaps and replaced them with heavy duty Tandy snaps. I had to do both in order to have them match and also the new snaps were stronger overall. Here is the process:


Here you can see the difference between the original and the heavy duty Tandy snap.

After ironing the bump out of the strap from the old button, also had to use the soldering iron to clean up some loose threads. This is what the fix looks like.

I will let you know how it goes once I get a chance to try them out next week!
That snap came out great! Nicely done


](http://s1378.photobucket.com/user/doctortapia/media/EctoRalphProton%20Pack/IMG_6626_zps5has6lje.jpg.html)
](http://s1378.photobucket.com/user/doctortapia/media/EctoRalphProton%20Pack/IMG_6628_zpserjrzvpf.jpg.html)
](http://s1378.photobucket.com/user/doctortapia/media/EctoRalphProton%20Pack/IMG_6631_zpsmn0izm4j.jpg.html)
](http://s1378.photobucket.com/user/doctortapia/media/EctoRalphProton%20Pack/IMG_6632_zpsw4ojrjvp.jpg.html)
](http://s1378.photobucket.com/user/doctortapia/media/EctoRalphProton%20Pack/IMG_6533_zpskfirflxi.jpg.html)
](http://s1378.photobucket.com/user/doctortapia/media/EctoRalphProton%20Pack/IMG_2789_zpsuslieh0u.jpg.html)
](http://s1378.photobucket.com/user/doctortapia/media/EctoRalphProton%20Pack/IMG_2793_zpsw8jidrap.jpg.html)
](http://s1378.photobucket.com/user/doctortapia/media/EctoRalphProton%20Pack/ac33a84f-a732-4d82-b3bf-1cf3728f324c_zpskq1kwckw.jpg.html)
](http://s1378.photobucket.com/user/doctortapia/media/EctoRalphProton%20Pack/IMG_8013_zpsuvnbhxja.jpg.html)
](http://s1378.photobucket.com/user/doctortapia/media/EctoRalphProton%20Pack/IMG_8016_zpsp5ycqrdp.jpg.html)
](http://s1378.photobucket.com/user/doctortapia/media/EctoRalphProton%20Pack/IMG_8019_zpspgwhicsq.jpg.html)
](http://s1378.photobucket.com/user/doctortapia/media/EctoRalphProton%20Pack/IMG_8018_zpsvcwmkuyf.jpg.html)
](http://s1378.photobucket.com/user/doctortapia/media/EctoRalphProton%20Pack/IMG_8021_zpscge8sl29.jpg.html)
](http://s1378.photobucket.com/user/doctortapia/media/EctoRalphProton%20Pack/IMG_8025_zpsto6258rl.jpg.html)
](http://s1378.photobucket.com/user/doctortapia/media/EctoRalphProton%20Pack/IMG_8032_zpsbse2txmb.jpg.html)