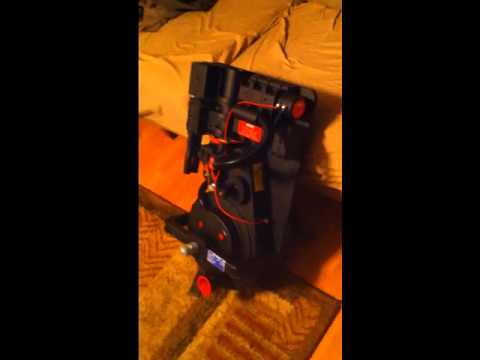
Been lurking these forums for a while now. Me and a buddy decided to be a Slimer/Stantz combo for Halloween a bit back. I’ll be Stantz. So, I’ve been looking at plans, and reading all the build threads, paying special attention to Gareee’s build.
I’ve decided to work with plywood. We have all the tools handy and a cool dad who will gimme a big hand. Im a strapping young man, so I’m not too worried about the weight. Anyway… this is what I have so far…
Gonna study some more reference photos and see what else I could add. Im not going for screen accuracy, as you can tell… mostly just something that when the normies look at it they know exactly what it is.
I dont know how im gonna do the gun. I bought a crappy Star Wars clone blaster to use just in-case I dont have the time to build a proper one.
Any suggestions are always welcome. You guys are one of the best communities I’ve encountered in my years surfing the tubes.
I hope you can make it. My packs have taken me forever, and I started back in July. The gun alone took me 2.5 weeks to complete. Then again, I work a full time job, M-F. Keep posting pics! Good luck.
Well… been at it for awhile. Finally got to the painting stage.
Here is a pic of the kinda almost final mock up…
and a pic of the multitude of pieces being painted.
Gonna start tacking items to the motherboard tomorrow, and hopefully get to the lights. After that I just got to add the various cables and hoses, and slap the stickers on.
Then its on to the thrower.
Anyone know a good place to pick up a rainbow ribbon or something that could work as a rainbow ribbon?
Here is a blurry bonus pic of my buddies progress on the slimer costume.
Cripes, I feel like a hydra now, with 10 heads! Glad to know my build style, and documetation is helping a lot of new ghostheads out. Check out Bradster’s thread for ideas as well, and of course Norm’s plans. I used both as well as real pack references for our builds.
Once you guys get the fever, you’ll want more gear, better gears, and even more!
Painted and mocked up… although now im regretting not putting in some cosmetic plating under the beam line and booster. But the pack is looking good. Overall I’ve spent maybe $40 on the pack so far, but I had a fair amount of wood on hand.
As you can see, Im just going to poke LEDs through the holes in the power cell. And I have to think about how to do the ion rod.
Put lights in the cyclotron and power generator… its looking good. Fixed up the N-Filter, added the ■■■ to the bumper, mounted the SG to the motherboard and mouted the alice pack with removable carriage bolts. Glued various pieces together. Going to look for some proper fittings for the wires tomorrow, as well as get some good screws to mount items on to the mobo.
So, the pack is finished… Here is a pic, and a short vid showing off the lights.
And a pic of my attempt at weathering a little bit.
Also a pic of the goggles.
And a very early pic of the thrower in progress…
The thrower is tough! I used a solid block of wood to make it, so I’ll only have lights going through the tube… I found a nice LED light coil I can feed in there, and put the power box under the heatsink. I’ll update with pics of the finished product.
All in all, its a pretty decent pack considering my time constraints… It is HEAVY though… 30 lbs. Halloween weekend is gonna be murder on my back.
I’ve definitely caught the build bug, though. Thinking about ordering a shell and gun kit and taking my time with a proper build for next year.
I like it! She’s very heavy, but I bet she’s solid.
I’d try to throw in a couple of tubes, red and blue, from the injector tubes, down to your cyclotron. It’s the detail I most miss when I see your pack. (aside from the thrower, which is in progress)
What I used was clear tube from the hardware store (Stine) and I just painted it blue and red with modeling paint, which chips horribly, but will get you through the week. If you can ge the paint on the inside of the tube it’ll last much longer.
I think I can do that. I have off all day tomorrow with no child watching duties, and the thrower is 80% finished. How thick are the tubes generally? Should I cork the injectors and feed the tube through that?
So, took out the pack last night for a little test run at some bars… went fine for an hour or so, then the pack fell off the alice frame! GAH!
The fall from about 3 feet off the ground ended up busting off the ion rod, the pvc hose connected above the gearbox, and one of the washers on the cyclotron. All in all, not to bad. I set those up to glue last night when I got home.
My only problem is figuring out a way to connect the alice pack and have it hold the 40lbs of pack securely. I used carriage bolts last time, then drilled/hammered in fasteners to the motherboard. I made it this way so i could remove the alice pack easily enough. But the fasteners ended up popping out under the weight. I had 3 in total… 2 in the bottom, 1 the middle.
My SG is 3 inches thick of plywood, so I think I’ll just end up getting some very long very coarse screws and drilling them into that.
Most people bolt the mb to the alice frame with spacers between the pack and the frame.
The easiest (best IMHO) to color the clear hose “wires” is to buy those cheap tubes of paint at walmart. squeeze them into the tube, and then plug each end of the tube with a bit of dowel rod that fits. That way you have the color, it won’t chip, and you also have the hose specs printed on it, which gives it a more “realistic” look.
So Halloween is done. I fixed the pack up real nice. Put some giant lag bolts in it… its never coming off the alice frame. Pack stayed solid all of Saturday night, even through a bunch of people touching it and walking through very crowded bars. I got so much attention, people we genuinely impressed. I loved it when people asked where I got it… and I followed up with a “I built it!” and they oooed and ahhhhed.
Thanks for the help, guys. All the forums have been a huge resource for me. And they will continue to be as I build my next pack.
Here is a pic of our group. I wish we had more Ghostbusters, but maybe next year.