Sound Module Battery Eliminator + Distort Fix
Seller Info:
- Doug Keithley
Boise, ID USA
Doug @ GhostLab42 . com
Hello fellow builders,
This little 2"x2" board came from the desire to run all of the lights, the sound module and an audio power amp from a single battery; 9.6V, 12V or even up to 24V.
It addresses problems both I and others were having and is documented over in GBFans.com
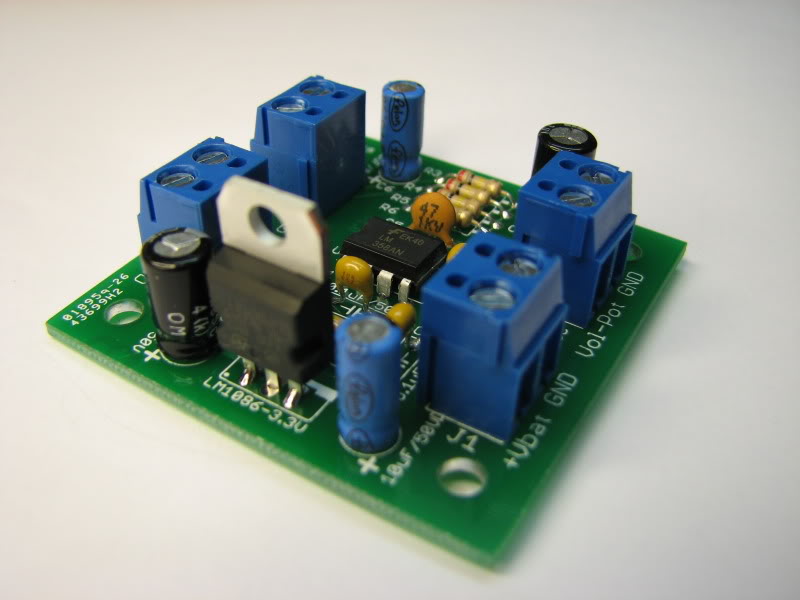
Attach this board’s +Vbat/GND screw terminal connectors to the main battery that is also used to power the the amp and light kits. This board has separate screw terminal connectors to provide power to the sound module (I used Crix’s sound module) and also separate connectors to receive the speaker driver output from the sound module. This board converts the sound module’s output to a standard Line Out level signal so it can be used with just about any audio amplifier without the distorted sound you may experience if you connect the sound module directly to the amplifier.
V1.1:
There was a potential issue when using the higher voltage batteries with the V1.0 of this board that has been fixed in V1.1. The pre-amp bias is now reference from the 3.3V internal regulator so will not provide higher than desired bias voltages when left unconnected, and will not be able to reverse bias the sound module’s speaker outputs.
PRICING:
Ready-To-Go: The price per fully Assembled and Tested board (as shown in the photo above) is
$30 SHIPPED within the USA.
$35 SHIPPED anywhere (just about) worldwide.
Bag-O-Parts Kit: is no longer available..
The Bag-O-Parts Kit does require you to load and solder the components on the printed circuit board (PCB). The PCB is a high quality 2 layer board with plated through holes, solder mask on both sides, and a silk screen showing parts values and placement information.
AVAILABILITY:
In stock!
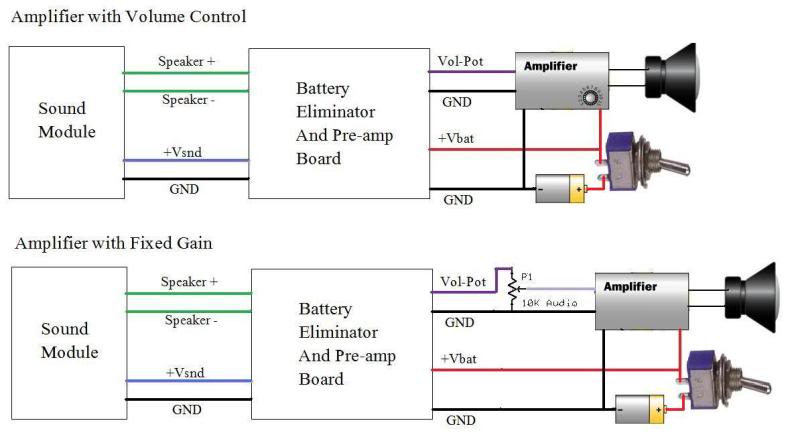
Here is the wiring diagram:
And if you use a battery that provides a voltage that the light kits also can use (check with the light kits makers to see what voltage they can handle), then here is a diagram showing where to connect the lights into:
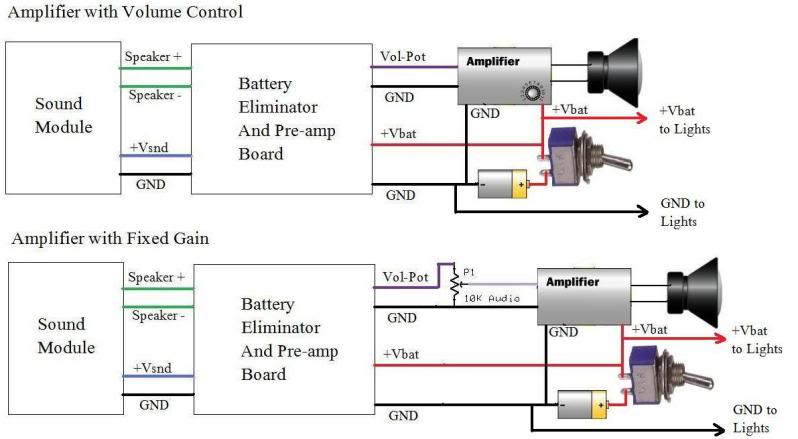
Depending on the lights you have, you may want a separate power switch between “+Vbat to lights” and the lights power connection so they can be powered down separately from the amp.
And here is the circuit diagram for those that care:

And here is a link to the V1.1 Bag-O-Parts Kit build instructions:
https://www.onlinefilefolder.com/2skKzXqAjmlORw
And also a description of how to modify a V1.0 board to V1.1:
