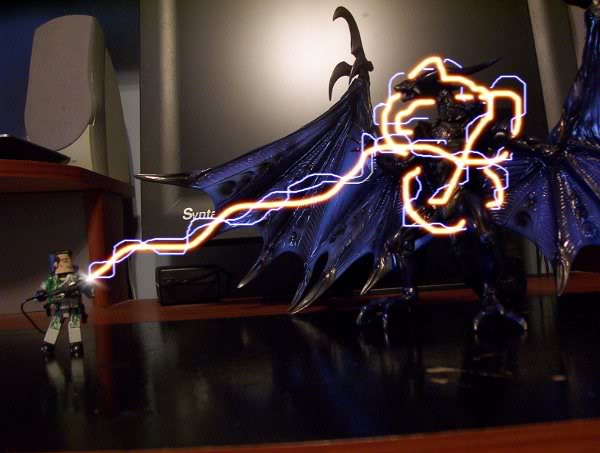
Third time’s a charm for this method. This time I kept “Preserve Luminosity” on and using a different Ghostbuster… :sigh:

Third time’s a charm for this method. This time I kept “Preserve Luminosity” on and using a different Ghostbuster… :sigh:
:shock: Wow, that’s perfect great work! Keep it up.
Im gonna mess with this when i get home today i think.
OK, some clarification was needed on my part that I got in #gimp on freenode. Anyways, the screen mode is in a drop down on the Layers, channels, path, etc window on the layers tab right below where it says layers.
for the ripple change it to vertical orientation. set the period up high (distance between lows) and set the amplitude is the height of them. its a simple sine wave, but till i found that you needed it to be vertical it wasnt working for me. i will edit this with more clarifications that i come across.
Here is my offering done with the gimp, not gimp shop. you should make a tutorial for gimp as well. seems some things are different. Like when doing the color adjustment I had to merge down the layers, starting with the most blurred working my way down or else I would lose the bluring. If i deselected maintain luminosity then it turned the entire picture a color too.
anyways, here it is.

You just brought something into the light for me. I forgot to mention that you need to merge the various layers, I will re-edit my tutorial when I get the time.
BUMP!
Woot! I got the tutorial updated, I will do more updating to it later with examples of the work I do with gimp, just a few.
I’m sorry, but after Three months ago, i’m totally forgotten how i keep that black away from the flare :oops:
Alright, the window where your proton stream image is in, open a new layer, on the screen that pops up select foreground color and press ok. Now hold off on setting it to screen, on the left side where all of the paint tools are go under file and open a new image, the proton flare. Now the image will open up in a new window, go under edit and use the cut option now close that window. In your proton stream image, go under edit then paste; just make sure that you’re pasting the flare on the new layer that’s all back. Now anchor it to that screen by right clicking on the layer over at the right, there in the layers box, and right click to choose to anchor it. That should be it.
Please, can you explain with some pictures how it works again?  :-? I’m sorry for that
(and because my English is not so perfect, when i must read the tutorial, but i understand already the streams and the others :mrgreen:
Alright, but It’ll take me a little time to get the images together.
here is my first attempt 
Better then my first, good job. But keep working on your lightning.
Great tutorial!
I had to try it out for myself.


Jeremy
Great job man, glad you liked the tutorial.
Do a trap effect to. 
Still trying to come up with a concept for that, not been able to come up with a good idea.
GB Ty thanks for making an easy tutorial, i can’t stop adding beam effects to my pictures (even ones without a proton pack) Heres My try, get better with every picture, Thanks again.
Wow, nice streams man. And thanks greatly for the complement.
I dunno if its because im a Newb at it or I just couldn’t find the damn thing but man that was tough, I finally gave up after i couldn’t find " screen mode " nor could i find the tool to make a straight line, all i could find was the paint brush tool, then when i hit " ripple " it rippled the entire pic!