How To - Spray Paint & Modify GB Style Elbow pads

How to Paint Elbow Pads

Things you will need

  • Century Judo Knee Pads

  • Charcoal Grey Vinyl and Fabric spray paint

  • Elmer’s Med Tip Black Paint Marker

  • Hot Glue gun with glue sticks

  • Razor Blaze or Exacto knife

  • 1 2in black Elastic strapping

  • Lighter

  • Scissors

Step 1 - Ordering and removing logos from your new Pads

OK so you just orderd your first set of Judo Knee pads that you will be converting to Ghostbusters Elbow pads.

For those of you who do not know where or what to get, please check this link out. Kind2311 was nice enough to

write a “Where to get your Elbow Pads”. Here is a link to that thread.

Once you have made your decision as to what you will get, order them and wait. I opted for the nicer Century knee pads.

Here is the package they came in.

![image](http://www.gbfans.com/images/pb/pvellos/Ghost Busters_IMG_1927_zps4a212ebb.jpg)

Notice I ordred youth size. I am about 5’6 and 130lbs soaking wet, so anything bigger would have just looked silly on me.

Well the first thing you will notice (if you ordered Century pads) is that they have a logo right on the front of the pad.

Here is pic of that logo on the pads:

![image](http://www.gbfans.com/images/pb/pvellos/Ghost Busters_129435298-260x260-0-0_centurycenturypaddedmmakneepads_zpsa8571a11.jpg)

So using an exacto knife or razor, slowly and carefully scrape and pull off that logo. It’s just a small sticker type patch

that can be taken off. The reason I say be carefull, is if you go crazy and just start to rip it off, you will leave

a lot of fuzz and ruin the intgerity of the material. When completed they should look like this:

![image](http://www.gbfans.com/images/pb/pvellos/Ghost Busters_IMG_1922_zps3886fb7c.jpg)

**Step 2 - Removing excess material from the knee pads. **

Now you will notice that there is lots of extra material on the knee pad that needs to be removed. Some opt to cut

it off, while accurate, I just did not want to go and cut up the material and possibly ruin the integerity of the

knee pad. (making it weaker or have frayed threads where I cut). So I opted to hot glue the extra material on the

inside of the pads.

Here is a good pic of how much extra material there is on the pads.

![image](http://www.gbfans.com/images/pb/pvellos/Ghost Busters_IMG_1923_zps4992d653.jpg)

Cut of your lables

![image](http://www.gbfans.com/images/pb/pvellos/Ghost Busters_IMG_1967_zps91ff7e52.jpg)

Hold out your pads, like so

![image](http://www.gbfans.com/images/pb/pvellos/Ghost Busters_IMG_1966_zpsde928882.jpg)

And begin to fold them in like so. Repeat to both sides.

![image](http://www.gbfans.com/images/pb/pvellos/Ghost Busters_IMG_1968_zps4681903f.jpg)

![image](http://www.gbfans.com/images/pb/pvellos/Ghost Busters_IMG_1969_zpse3890652.jpg)

![image](http://www.gbfans.com/images/pb/pvellos/Ghost Busters_IMG_1970_zps09575e25.jpg)

once your done folding both sides in, it should look like this:

![image](http://www.gbfans.com/images/pb/pvellos/Ghost Busters_IMG_1972_zps8d619a75.jpg)

![image](http://www.gbfans.com/images/pb/pvellos/Ghost Busters_IMG_1971_zpsc7acf62a.jpg)

Now get your hot Glue gun out. Make sure to plug it in with a glue stick in, so that it gets hot

and is ready to be set. (takes about 3-5min)

![image](http://www.gbfans.com/images/pb/pvellos/Ghost Busters_IMG_1965_zps3db7673f.jpg)

Now fold out your folds out just a bit, so that you can get the hot Glue in place like so:

![image](http://www.gbfans.com/images/pb/pvellos/Ghost Busters_IMG_1973_zps8bf9b343.jpg)

![image](http://www.gbfans.com/images/pb/pvellos/Ghost Busters_IMG_1974_zpsf29aeb92.jpg)

Be quick about it, as the HOt glue will cure fairly fast.

Once you have it in place, fold the fold back over to the inside and press down. Try using your

hands to spread out the glue and push down hard so that the material sticks nice.

![image](http://www.gbfans.com/images/pb/pvellos/Ghost Busters_IMG_1975_zps0c39b689.jpg)

Repeat to the other side:

![image](http://www.gbfans.com/images/pb/pvellos/Ghost Busters_IMG_1976_zps895f905e.jpg)

After both sides are glued in place, you may want to check for any open spots that are not glued down

Get to them and add more glue as you dont want it to snag on anything while putting them on.

This is what I am talking about:

![image](http://www.gbfans.com/images/pb/pvellos/Ghost Busters_IMG_1977_zps9fccf55a.jpg)

ONce your done it should look like this:

![image](http://www.gbfans.com/images/pb/pvellos/Ghost Busters_IMG_1978_zps7ac64eec.jpg)

![image](http://www.gbfans.com/images/pb/pvellos/Ghost Busters_IMG_1980_zps606155c0.jpg)

![image](http://www.gbfans.com/images/pb/pvellos/Ghost Busters_IMG_1981_zps76ba9db8.jpg)

Test Fit them and make sure you are happy!

![image](http://www.gbfans.com/images/pb/pvellos/Ghost Busters_IMG_1982_zps9539a2b4.jpg)

![image](http://www.gbfans.com/images/pb/pvellos/Ghost Busters_IMG_1983_zps272ada30.jpg)

**Step 3 - Painting Pads with Spray Paint. **

While some opt for the Dyeing method. Here is a great link for those who chose this route.

I again chose something that I am familure with (being a car guy).

I went with the Spray paint method and being a customer at automotive shops, I new about the VINYL and FABRIC

spray paints that Duplot have come up with. They are great and do not leave paint marks as this paint is intended

to be sat on and touched my hands for car interiors.

![image](http://www.gbfans.com/images/pb/pvellos/Ghost Busters_IMG_1986_zps660d2b75.jpg)

Some have suggested to use grey primer, I knew there was a grey in this type of paint too, But when I got to the

store I saw that there was a darker grey (Charcoal) and knew this was the color I wanted.

![image](http://www.gbfans.com/images/pb/pvellos/Ghost Busters_IMG_1987_zps010ad265.jpg)

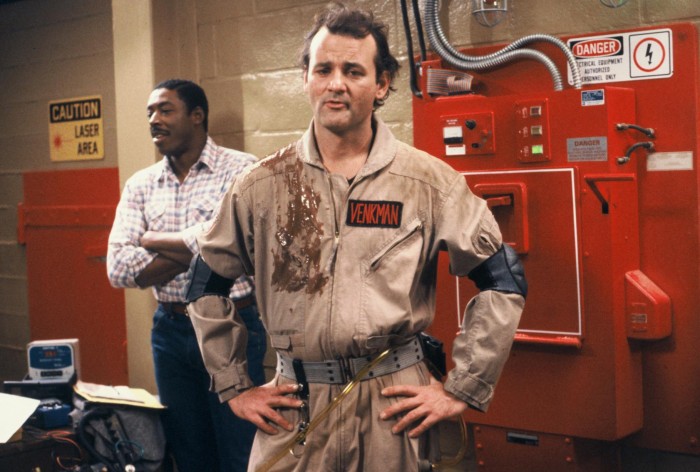
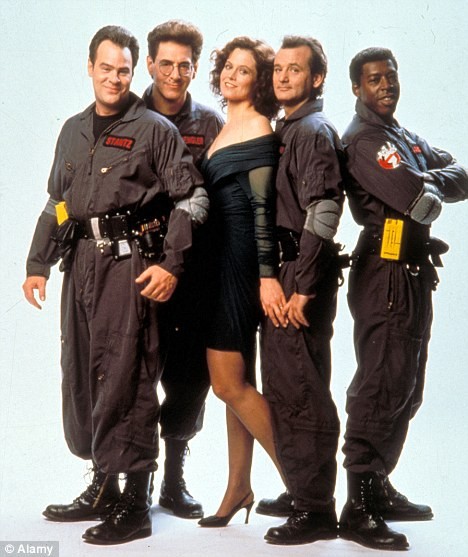
*---- Side note (my opionion ONLY) but to me, the regular grey is more for the GB2 style flight suits, as the darker

suits made the light grey color pop more. The Darker grey is more like a the GB1 color and makes the light tan suits

pop with the darker ones. Yes I know that both movies had differnt shades of pads, but I am using the

Venkman pic on the Wiki section (of gbfans) of the uniforms as my reference. What do you think.*

GB 1 -

- Darker grey
GB 2 -

- Lighter grey
Again this is just my opinion, as I am sure there is someone more versed as to what is correct and what is not.

That being said, I went for a GB1 style and more specifically a Venkman shade of color.

So get your newly glued pads and find something wide to wrap them around in. This will do 2 things:

1 - It will open up the fabric so that the paint gets in all the tight spots. Otherwise when you put them on

you will notice the white.

2 - It will allow you to spray the paint more evenly and at once.

I used a piece of Gaffers tape role.

![image](http://www.gbfans.com/images/pb/pvellos/Ghost Busters_IMG_1984_zps2f5fad71.jpg)

![image](http://www.gbfans.com/images/pb/pvellos/Ghost Busters_IMG_1985_zpsa491b6a6.jpg)

Lay it down like so.

![image](http://www.gbfans.com/images/pb/pvellos/Ghost Busters_IMG_1988_zpse7b95c98.jpg)

and give it its first LIGHT spray.

![image](http://www.gbfans.com/images/pb/pvellos/Ghost Busters_IMG_1989_zps90e4eaa1.jpg)

Coat 2

![image](http://www.gbfans.com/images/pb/pvellos/Ghost Busters_IMG_1992_zpsf64edd10.jpg)

coat 3

![image](http://www.gbfans.com/images/pb/pvellos/Ghost Busters_IMG_1994_zps31124173.jpg)

Now make sure to paint the back and more importantly the corners as well.

![image](http://www.gbfans.com/images/pb/pvellos/Ghost Busters_IMG_1995_zps5dd7eedb.jpg)

You can see some of that white I was talking about.

SO hit it again with a light spray

![image](http://www.gbfans.com/images/pb/pvellos/Ghost Busters_IMG_1996_zpse7198681.jpg)

and more time

![image](http://www.gbfans.com/images/pb/pvellos/Ghost Busters_IMG_1999_zpsdba0a1a3.jpg)

![image](http://www.gbfans.com/images/pb/pvellos/Ghost Busters_IMG_2000_zpsef06dc6a.jpg)

Here is what it looks like when complete.

![image](http://www.gbfans.com/images/pb/pvellos/Ghost Busters_IMG_1998_zps7f672165.jpg)

Step 4 - Detailing

Now its time to get the details in . To me this was my favorite part as it really gave it depth.

You will need an Elmers Med Tip Black Paint pen. This is not a marker, but a pen with paint. The

color is much richer than if you used a marker (I.e Sharpie)

![image](http://www.gbfans.com/images/pb/pvellos/Ghost Busters_IMG_1962_zps754b306f.jpg)

Using your marker start with the creveses of the pads.

![image](http://www.gbfans.com/images/pb/pvellos/Ghost Busters_IMG_2003_zpsf2a64513.jpg)

![image](http://www.gbfans.com/images/pb/pvellos/Ghost Busters_IMG_1964_zpse88bc7a1.jpg)

![image](http://www.gbfans.com/images/pb/pvellos/Ghost Busters_IMG_2004_zpsc61a8db8.jpg)

Repeat to both top and bottom crevases.

![image](http://www.gbfans.com/images/pb/pvellos/Ghost Busters_IMG_2001_zps83b8c17d.jpg)

Now work on the outer edges

![image](http://www.gbfans.com/images/pb/pvellos/Ghost Busters_IMG_2005_zps35c8136b.jpg)

![image](http://www.gbfans.com/images/pb/pvellos/Ghost Busters_IMG_2006_zpsf4b88eed.jpg)

When you are done with the outer rim, it shoudl look like this.

![image](http://www.gbfans.com/images/pb/pvellos/Ghost Busters_IMG_2011_zpse73802b8.jpg)

**Step 5 - Black elestic Patch on inner part of pads. **

So if you are trying to go for a even more detail and cannon accuracy on your pads, then you will want

to add the black peice of cloth that is seen on the inside of the GB Movie pads.

So first get your self some 2 inch elastic material. You can get it at Michale’s or Joann’s stores. I was

lucky and had some strapping left over from my Shadow Trooper build this year, and opted to use that.

So I cut to length. (not sure what the correct size was, so I eye balled it)

![image](http://www.gbfans.com/images/pb/pvellos/Ghost Busters_IMG_2013_zpsc2de3de9.jpg)

using a lighter, light the ends up and melt the cut lines, as you do not want the material to fray.

![image](http://www.gbfans.com/images/pb/pvellos/Ghost Busters_IMG_2014_zps951fdcc0.jpg)

Without gluing, figure out where you want to place it.

![image](http://www.gbfans.com/images/pb/pvellos/Ghost Busters_IMG_2016_zpse71a47c1.jpg)

Then get your Hot Glue gun and place glue on the black material like so

![image](http://www.gbfans.com/images/pb/pvellos/Ghost Busters_IMG_2018_zpsfa8d1759.jpg)

Place it on the back of the pads (quickly as it sets fast) PUsh down hard and spread glue evenly

![image](http://www.gbfans.com/images/pb/pvellos/Ghost Busters_IMG_2019_zps7c5634aa.jpg)

Here is what the complete set looks like when you are all done.

![image](http://www.gbfans.com/images/pb/pvellos/Ghost Busters_IMG_2020_zps734a9765.jpg)

![image](http://www.gbfans.com/images/pb/pvellos/Ghost Busters_IMG_2021_zps518ada6f.jpg)

For those wondering what it would look like without the Detailing, here you go.

![image](http://www.gbfans.com/images/pb/pvellos/Ghost Busters_IMG_2002_zps5646f6d3.jpg)

Thats it folks. I hope this helps other n00bs out there, and the vets see this is an example of how

others can give back to the community.

1 Like

Those look pretty good - I’d be worried about using hot glue the way you do, unless you’re not planning on wearing those too often. Elbow pads tend to get beaten up the most out of all the parts of my uniform (the clothing parts at least). Hot glue can pop apart or off pretty easily - you might want to sew the portions that you glued to reinforce them, just to be sure!

Thanks for compliments. Yeah, the one thing I can say is that these suckers have not been field tested yet. I will wear them around and report back if indeed they do start to fall apart on me. Hopefully they won’t :sigh:

Looking good man. When I saw these in person they looked great.

I used normal thread to loosely sew the black inner arm patches.

Still holding strong after quite a few outings.

You could probably use some type of elastic thread as well.

Also, make sure the patches are in the correct orientation so the elastic can stretch when you slide them on.(horizontal)

Great tutorial man! Those pads look awesome! For mine, I too rolled them in and hot glued them But instead of using the black paint marker I lightly misted the pads with some flat black to give the gray some depth.

Hopefully newbies will check out this thread!

Thanks everyone. Well I can report that 3 days of wearing them at Wondercon this year, they held up great and looked great. So its safe to say that this method works (for now) :stuck_out_tongue:

do the pads get stiff at all? the first pair I wore I spray painted and they got really stiff and hard and uncomfortable to wear. nice tutorial though!

I dont have anything to compare them too, but for me they dont feel stiff.

Awesome tutorial man!!!

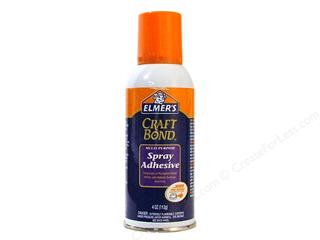
One thing I did to these pads after I removed the logo was I sprayed some of this on there as I patted down the part where the fibers were pulled. I also did the removing over steam to help the separation. I was happy with the results.

Followed your tutorial today and it made the whole thing easy as pie. Thanks so much!

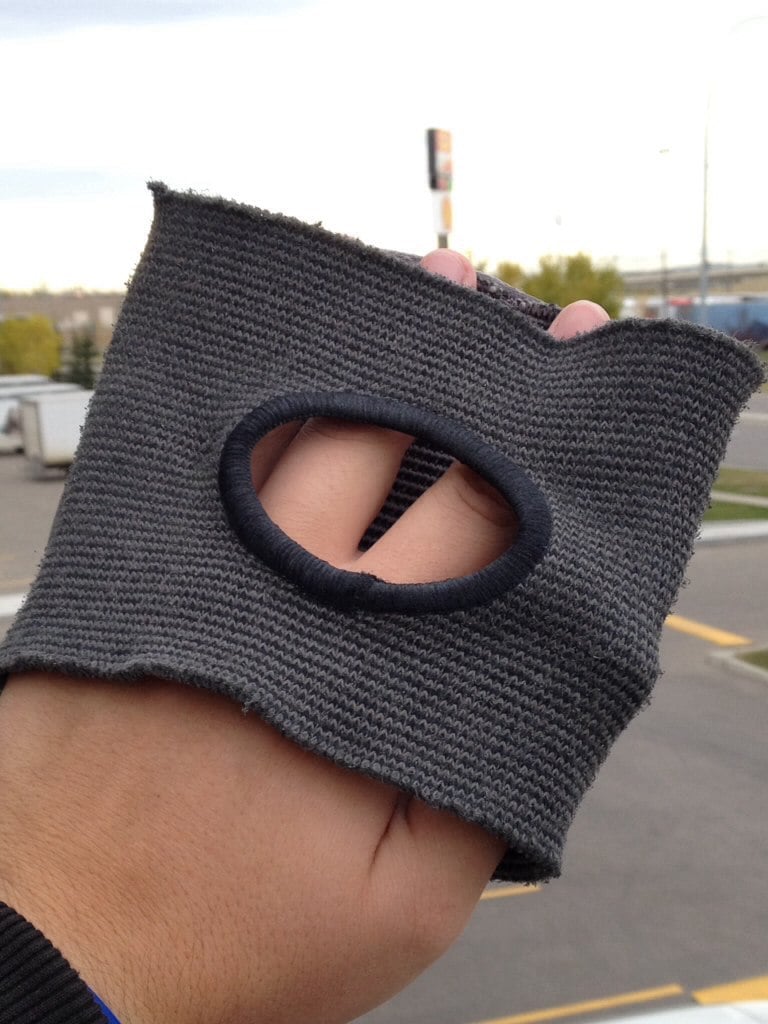
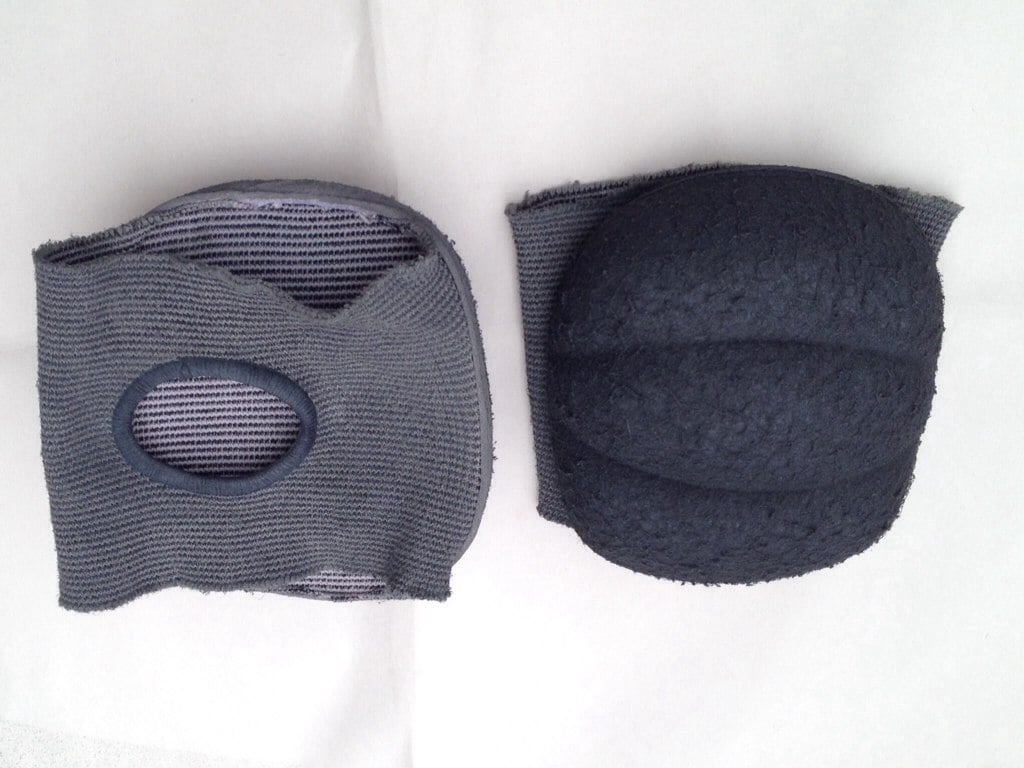
About the only hiccup was the GBFans pads I bought have a hole inside the elbow. Not a big deal really, I’ll just glue/stitch the elastic over it for that added accuracy.

image

Let’s try this again, Tapatalk just crashed in the middle of my response…

This is a great how to thread. Here are my results and I’m looking for some feedback and thoughts.

I first tried to dye them with a whole bottle of rit black dye and it came out horribly.

Yikes!

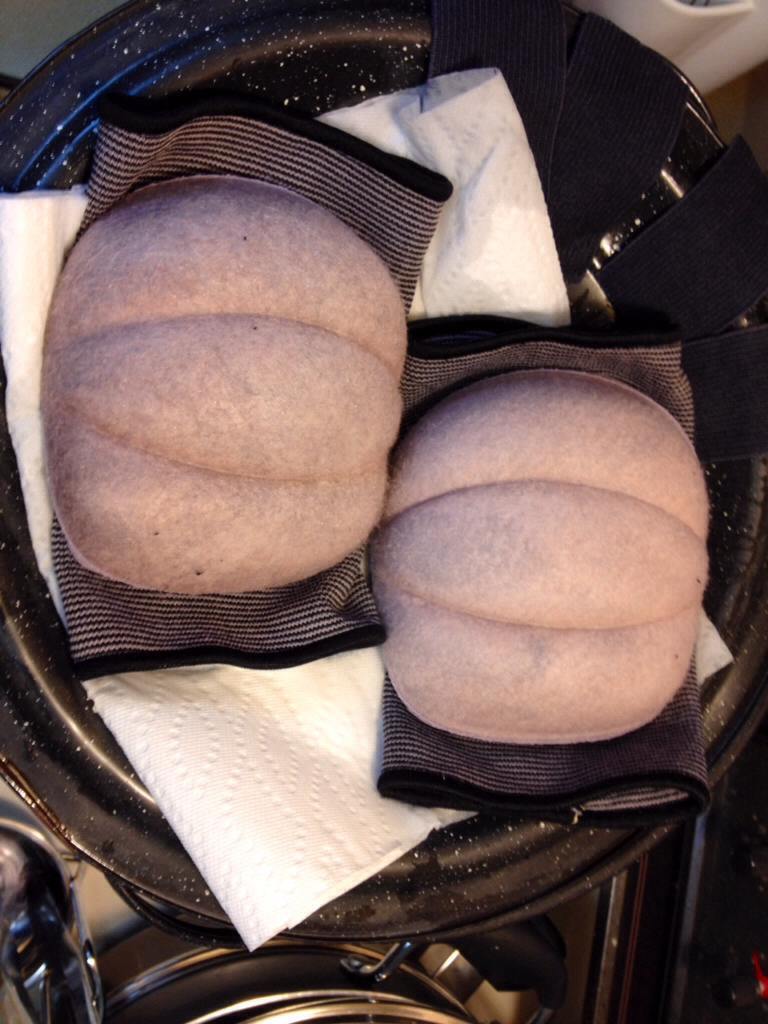
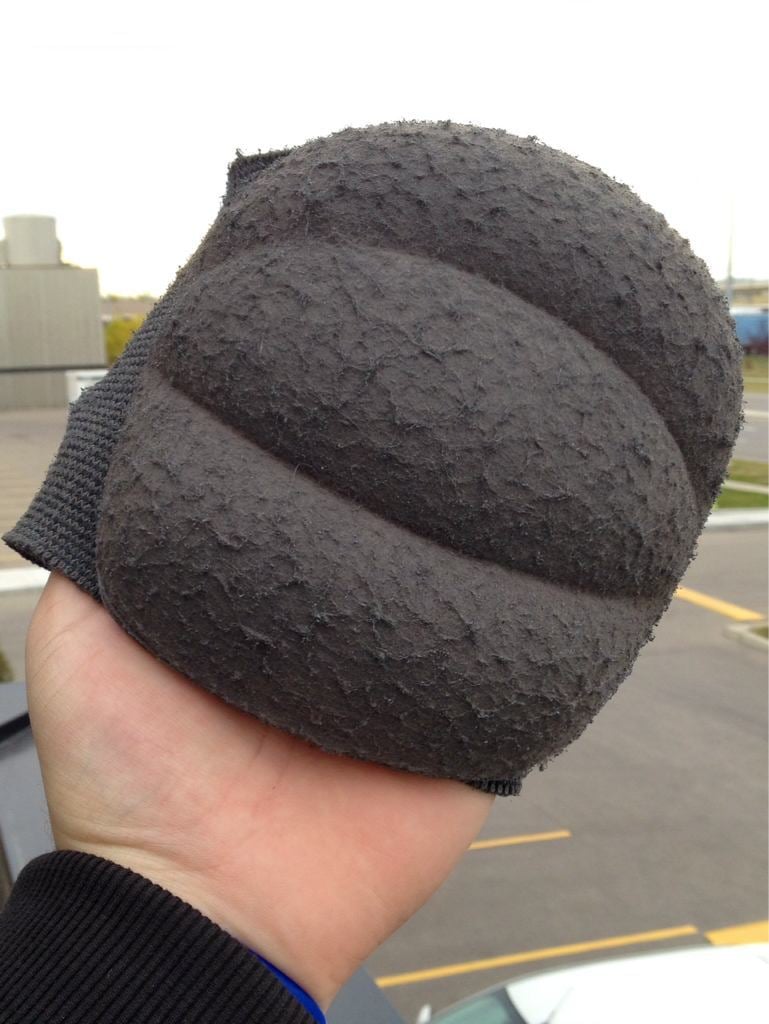
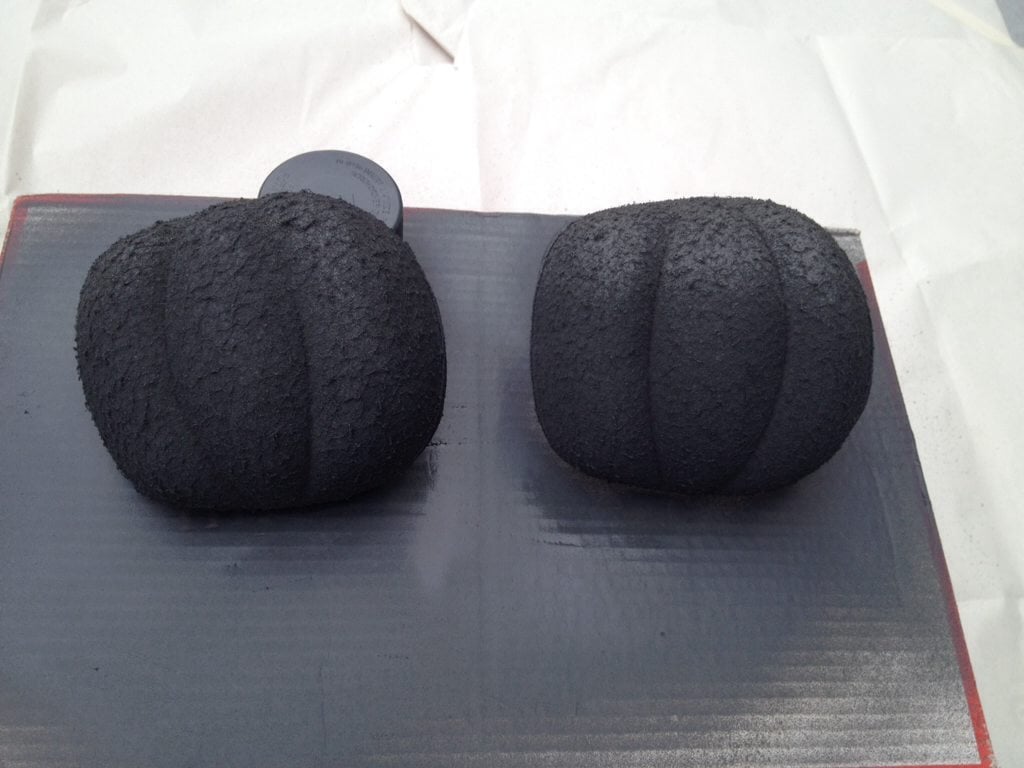
So I decided to spray them like I should have done from the beginning. I found two greys. A medium grey and that charcoal grey. It looked to me like the pad is darker and the strap is lighter. I sprayed the whole thing with a few coats of the medium grey and got this.

Then I did a few coats of the charcoal on the pad part only and got this.

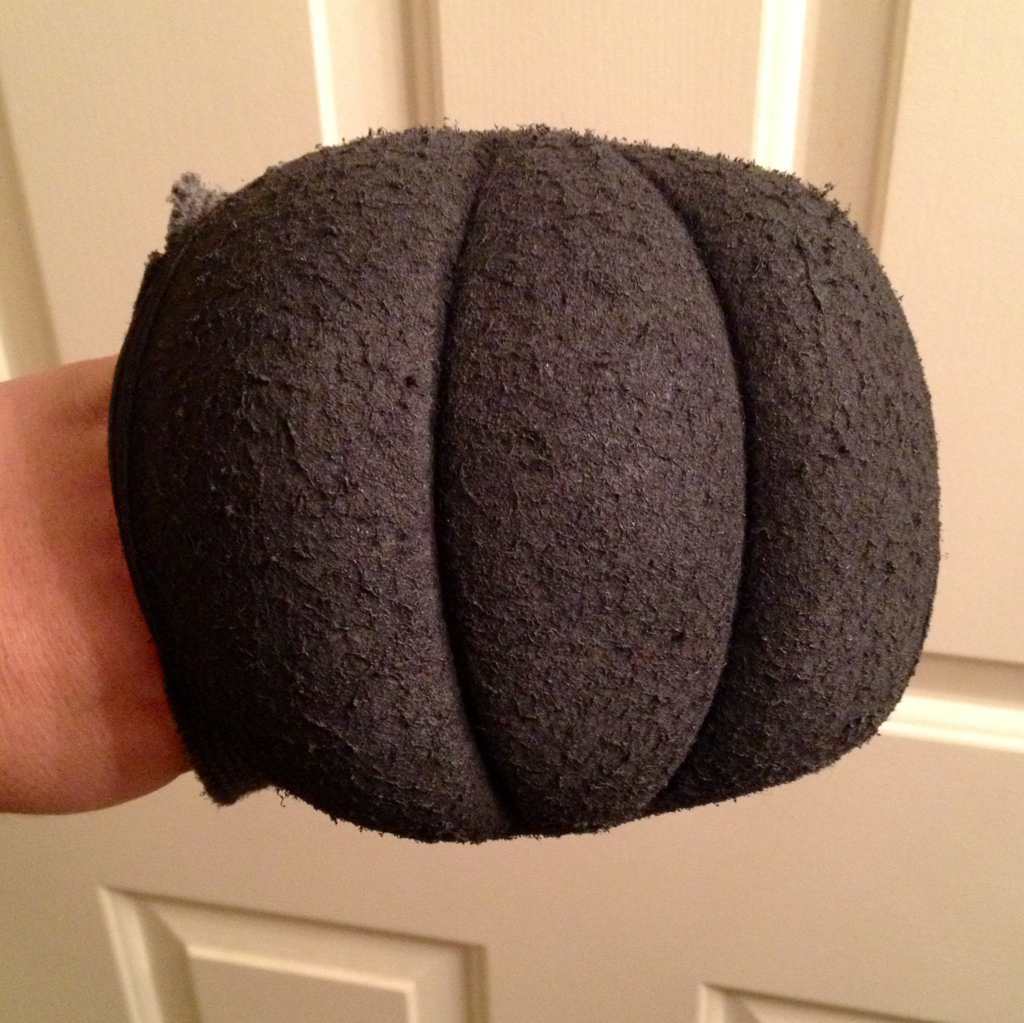
A comparison shot of the front and back.

Are these too dark do you think? I almost think I needed to find a light grey and the medium grey. I still need to add the line details and see on the black patch. I was going to use some black leather. Might look good. I couldn’t find any black stretchy material like you put on, only white and it didn’t die well like the pads.

I do have another set coming from the gbfans store I ordered after panicking from how the dye turned out. My try with the lighter grey.

Any thoughts or opinions?

I don’t know, I was just watching GB1 in HD again the other day and it seemed like they were pretty dark on the pad and a tad lighter on the strap which is basically what you’ve got. Mine are a bit lighter overall and I kind of wish they looked like yours!

It looks like they got darker throughs the movie, I’m watching it now (and sort of getting some work quotes done) and they look lighter overall at the hotel scene and darker when they pull up to Dana’s apartment building at the end. Haven’t watched in HD though. Just bought that the other day but haven’t opened it.

What color did you go with? You could spray the pads with the charcoal and leave the straps lighter if you like my look.

Well I did use the charcoal but I think I could use an additional coat or two on top to make it darker. You can see mine a few posts up.

I thought you used a different colour. I had picked up black as well and thought if it wasn’t dark enough I would do 1 coat of black as a “primer” and then the charcoal. I did 3 coats of charcoal on mine but I never did the black.

Yeah, I only did the two coats and they appear to be pretty light. I’m guessing had I done a third or thicker coats they’d look more like yours.

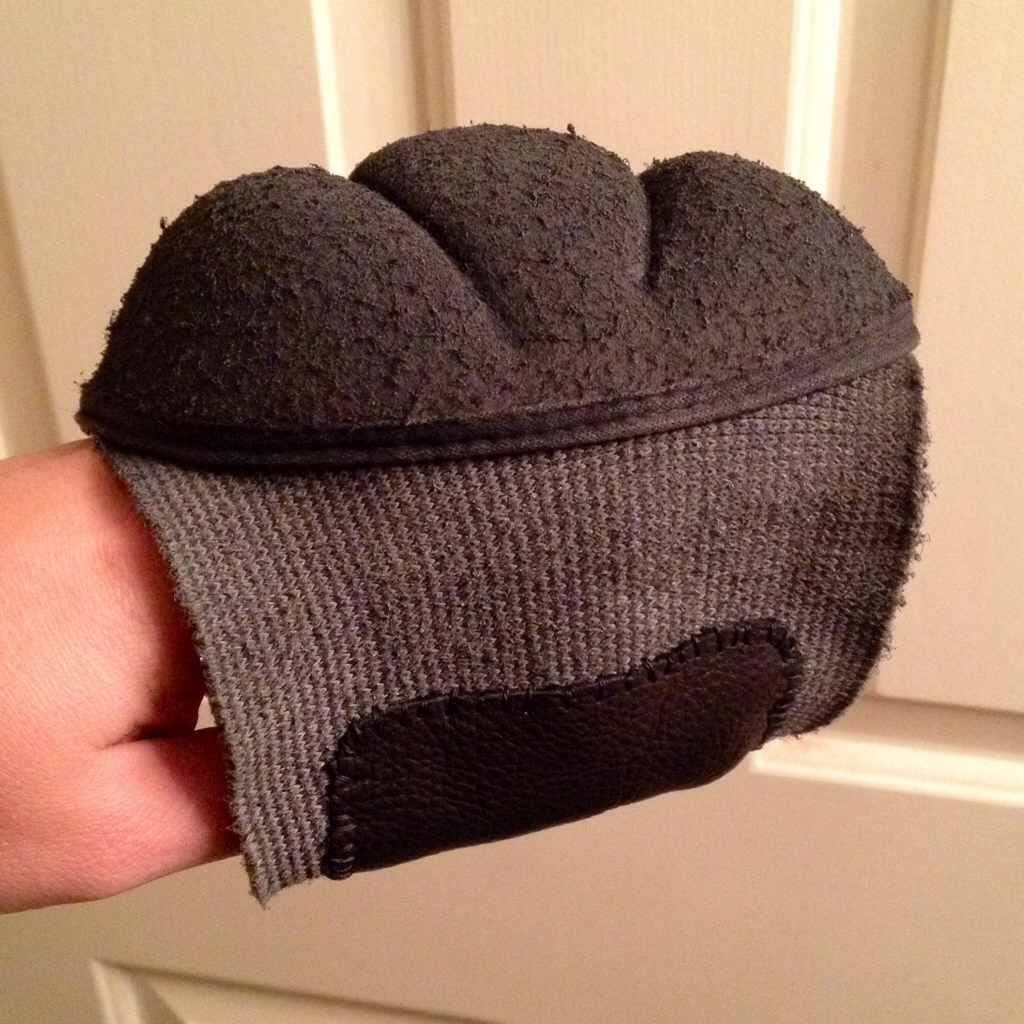
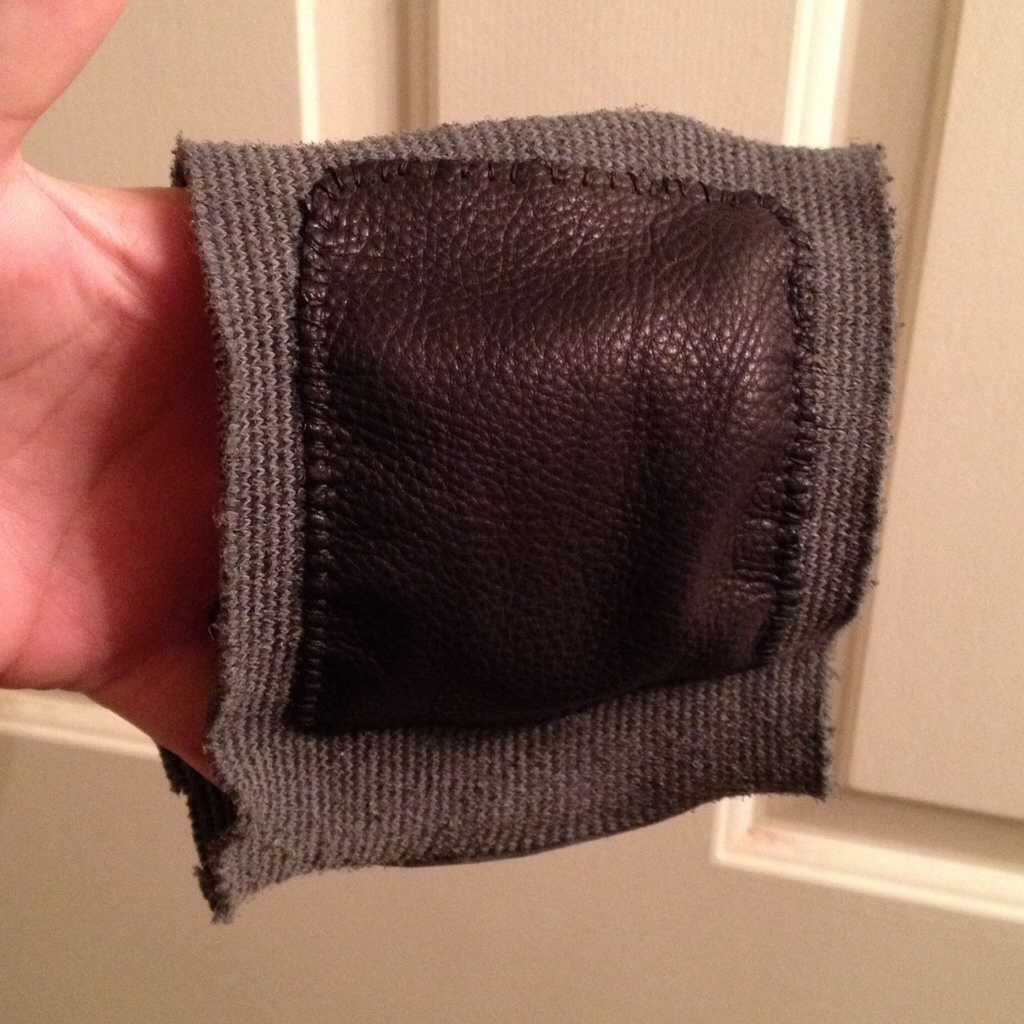
And a finished one with the black paint pen for the details and I did go with the black leather patch on the inside.

Thank you to the OP for the great tutorial!