I've discovered something about the Markwort kneepads...

I was able to get some Markwort KP-226’s from a supplier who had one pair left, and they arrived today. I assume they’re the ones that were used in the movie, because they’re Markworts, and the bubble looks right, and they’re listed as discontinued on the Markwort website.

But after taking them to two tailors and having both tell me they couldn’t take in the sleeves because:

A) Their machines were like big tables, and there was no way to get the pad into a good position to sew around it, and

B) They couldn’t sew something elastic like that because their thread wouldn’t stretch.

I chose to cut them and attempt to use fabric glue to hold together the seam. Bad idea. The fabric glue got really hard and stretching the pads around a tube as it dried meant the middle of the band could get smaller while the outside edges of it could not, so the elastic bowed out in a U shape when on my arm. Furthermore they were hard to cut and frayed like crazy, so the elastic ended up looking kinda screwed up.

Then I attempted to dye them in boiling water with peal grey dye. As expected the pads appeared to dye, a light gray, but the dye came out immediately when washed. Not expected was that the fabric glue decided to disintegrate, and the elastic somehow became charcoal in color.

It was then that I noticed something. Stripes. The elastic when stretched, had vertical stripes on it of varying widths. And you don’t see that in the movie.

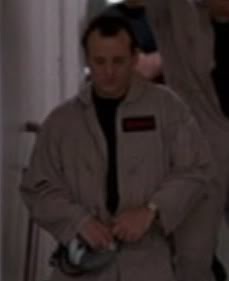
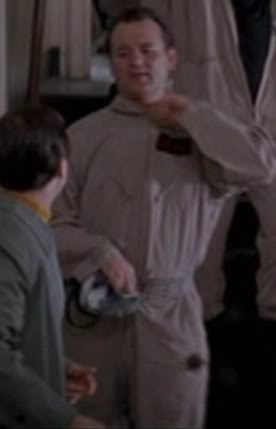
So I took another look at my reference images that I captured from the movie, and lo and behold, there’s no stripes to be seen, or even any elastic texture. The armbands on the pads appear to be fabric.

I now believe that when they tried to dye the pads they had the same problem I had with the elastic displaying vertical stripes, and rather than try to cut it, or get it tailored someplace that can tailor elastic bands, they just replaced the bands with a smooth gray fabric with a black patch on it in the middle.

Take a look for yourself:

image

I’ve sharpened and color corrected these images to remove the color cast present in them, and show any textures better.

As you can see, they gray color of the fabric on the bands is uniform. There is no visible texture, and no color variation like the stripes that resulted from the variations in the stitching.

I’m not sure what I’ll be doing with my pads yet because I don’t have easy access to a sewing machine and having a tailor make me new armbands is likely be expensive. Maybe they sew small things for you at fabric stores, I’m not sure. But I don’t want to spend another $10 on fabric and $20 to have it sewn on pads that cost me $17 and which I’ve already put another $5 into with dye and fabric paint (to make the pads charcoal colored). Maybe i could sew them by hand, but that would be time consuming and I’m not sure how well the stitching would hold.

Thats probably because they wernt dyed… They were painted.

If you want to glue the hem, use hot glue, but do it in sections, like dots of glue, and then the elastic will still stretch around the glue

Lawrence

Painted? I assume you mean with fabric paint because spraypaint would definitely crack.

I couldn’t find any medium gray fabric spray locally for some weird reason, but but even if I had some, if I put on enough fabric paint to cover the texture of the fabric, as seen in the reference photos, I doubt it would stretch with the armband. It would be more likely to tear or form ridges.

The dots of glue, are a good idea though if I decide to salvage the armbands.

And where did this come from? I have seen no conclusive proof they were not dyed, nor anything to suggest they were painted either…

Spray paint wont crack there isn’t a bug enouch surface to cover for it to crack just put it over a 4" tube first.

As for my opinion to what they did in the movie is dye them, paint, and then add the black elastic portion.

Honestly I have doubts as it being elastic or at least not functional, just look at Venkman’s pads, in most scenes he doesn’t even have the black patch on one of his pads… IMO it was merely a cosmetic application with no purpose except to fancy up the look of the pads…

As for the edges of the pads being cut and hemmed from what I see that is exactly what was done, the hemming isn’t exactly crisp and smooth… It’s actually rough and broken and or separating if you look close…

One must also remember this was a major production, they had an experienced wardrobe staff with experience tailors doing the costumes, it’s not hard to assume they had someone that knew how to do it “right” rather then the at home DIY methods…

The pads CAN be dyed, painting isn’t the only option… Maybe some weathering effects with paints, the grooves look airbrushed… But I suspect nothing less then with an experienced wardrobe staff they were able to dye the pads…

RIT dye is simply not the right dye or process, it’s a consumer grade at home general purpose ‘safe’ dye process, there is so much more to professional textile dying and trust me RIT isn’t even part of it…

Dyed with what?

I boiled them in Rit Dye for 15 minutes and 90% of the dye came out just rinsing them under cold water. I’m sure they CAN be dyed, but to get them to be almost black you’d either have to use some nasty dyes or boil them for like five hours.

[edit]

Oh, I see you now said RIT wasn’t the right dye to use.

[/edit]

As for airbrushing the grooves, I don’t think they did that.

I’ve applied a charcoal colored fabric paint to my pads and they look great, and really close to the film. The ones in the film clearly arn’t an inky black.

And in regards to the grooves… in a few days I’ll be getting my fuller’s earth in the mail, and as soon as I apply a light dusting of that to the surface of the pads, the grooves will take on that darker appearance. Take a look at Bill Murray’s pad in the third photo, and how the color of it is non-uniform.

Perhaps they did simply hem the armbands, but if they did, then they must have dyed them a lot more carefully than I did, because like I said, I got black vertical lines on mine that you’d clearly see if they were there in the film. And maybe they were sloppy about it, but I’m not trying to recreate the costumes, I’m trying to recreate the look of the costumes in a way which looks good in person. :slight_smile:

To that end, I have found some dense gray fabric at Walmart which should be the right shade, and if not I have a gray dye bath sitting around which I can use to give them a quick dip to darken them up once I’ve finished sewing them. And as luck would have it, the fabric I found turned out to be four way stretch. So it’s like a rubber band almost but looks like a tight weave cotton. In short, it’s perfect for this application. Now I just need to borrow my sister’s sewing machine and figure out how to sew a stitch which can expand when stretched. I looked at the armbands when stretched out, and the seam on there is like this: VVVVVVV I think if I sew like that then it’ll still stretch, and that would be pretty awesome.

But before I do all that sewing, I’ll mask off a square in the middle of some fabric and use my fabric paint on that and see what happens when I stretch it out. Cause that might be a good way to make the black square on the back.

Zig zag stitch is the best to use when sewing elastic because it “gives” more. Some machines have a “stretch stitch” which is a zig zag stitch specifically for elastic. If the elastic needs to stretch along the place you are sewing, stretch the elastic out as much as you can as you sew, this will also give the elastic more stretch/“give”.

I think you are placing TOO much emphasis on having the ‘same’ pads, it’s 25 years later there has inevitably been some manufacturing and probably material changes over the last 25 years regardless of model number or manufacture…

I don’t care if they’re exactly the same, I just want them to look good.

And all I’m trying to do is warn folks that if you do get a pair of Markworts and dye them with RIT dye, they’re not going to just come out looking like the pads in the movie.

To get that movie look, you’re going to have to either replace the elastic material, or dye them very carefully so as not to overdye them and get those black vertical lines I got. And you’re going to have to use fabric paint to get the padding to be that charcoal color. (Nasty professional dyes few people would have easy access to nonwithstanding.)

Here’s some pics to illustrate how mine ended up after cutting the armbands, dyeing them in pearl gray RIT dye, and then painting the pads charcoal:

image

image

image

See? Ugly black vertical lines. The bands look almost like a reverse of the movie’s. So, I’m gonna be unstitching the band material and sewing some new material on there to make them a bit prettier, cause right now they look rather homely.

just give it 2-3 light coats of grey primer. Very light coats, more like a misting infact. I dont have proof hat they were painted to hand.

But I can get some later.

Lawman

Nope!

First, I’ve seen what spraypaint does to a plastic up in less than 15 seconds. AND it ate through one of the hinges on my ecto goggles.

Second, I’m certain it’ll make the material feel rough.

And third, I already removed all the stitching that was holding the armband on the pads. So no matter what I have to sew, unless I wanted to fabric glue it back on, and I ain’t doing that. :slight_smile:

You are using the wrong kind of paint. They sell spray paint in all kinds of different varieties now, some formulated specifically for use on plastic. The spray paint you are talking about probably contained chemicals designed to eat away at contaminants on metal and was never intended for plastic. I have used several spray paints over the years (not model spray paints but the ones sold in the hardware aisles) on resin, model kit styrene and other plastics with no problem. Choosing the right kind of paint is key.

I used Krylon Camo paint for the goggles, and it says on there it’s for plastic. But the paint I put in the cup was semigloss rustoleum which is what I plan to paint my pack with.

I don’t suppose that can melt resin, can it? Because I don’t think I’ll find a semigloss plastic paint, and neither full gloss or flat paint looks right.

What were the hinges on the goggles made from? Krylon Camo as you stated is advertised as a general purpose paint so I am unsure as to why it dissolved the hinges on your goggles. I’m not saying it didn’t happen, but I am trying to better understand why it is that the hinges dissolved as you stated in your previous post.

Also, before painting the resin pack I would suggest using a primer suited for plastics, as always testing on a small area first. The primer should serve as a nice barrier between the resin and the paint and should help to avoid any melting or other damage.

The best advice I can give you before painting is to test whatever paint you are going to use on a small hidden area and allow it to dry. If the surface appears scarred or damaged in any way, do not use the paint. I remember using Rustoleum paint as a kid on a model and I literally watched the paint eat a hole through the body. I know this is not possible in all situations but in the case of the model, I always test my paint on one of the trees or a spare part that will not be used. I also had a jacket which was turned into a vest and then dyed. Before dyeing I took one of the scrap sleeves to test the effects of different color removers. In the case of your pack where there are not likely to be scraps, testing a hidden area (such as under the mounting point for the ion arm where it will be hidden after the arm is attached) is recommended.

Hope this helps. Good luck with your project!

The hinges were made of a hard plastic. They’re part of the front visor. The main google boddy is made of a softer rubber. They didn’t melt exactly. To be more precise, a thin part on one of them cracked, which released the pin the front swivels on. I didn’t open and close them more than like three times or put any stress on the part, but I suppose it could have just been a ■■■ set of goggles. But I did notice some of the paint on the rubber stayed tacky for over a week and didn’t seem to be getting any less tacky. Also I put several coats on the goggles, and the paint on the hard plastic decided to wrinkle up after the third coat in one area so I had to wipe it off and repaint that part. I probably should have used primer, but who knows what that would have done.

As for those plastic cups, I had a close call with those. I was working on my ion knob and needed some paint to put in some of the crevices, so I sprayed some paint into a cup and took it inside. 15 seconds later paint started dripping as the bottom of the cup melted. By sheer luck I was over newspaper at the time.

Weird is: i’ve seen some that was heavily sprayprimed, and nothing was wrong with them. Except that it took a long time to dry.

Most paints and rubber do not react well and have that tendency to stay sticky after long periods of time. Some around here have suggested using a paint or primer designed for rubber bumpers with the final coat on top of that. Another member suggested hitting the paint with a matte finish for charcoal drawings. I found several threads with different suggestions on how to get paint to dry on the rubber part of the goggles.

As far as the hinge cracking, I’ve never seen paint disintegrate plastic with a sharp clean break. Usually when I’ve seen paint disintegrating plastic it’s been a slow melting process that eats a hole into the surface. In other words, it wouldn’t be something you could glue back together. Of course, if I am still misunderstanding that part of your post feel free to correct me.

The paint wrinkling sounds like a curing issue. Spray paint has recommended recoat times. Basically you can either repaint within a certain period of time or after the paint has fully cured (which then the directions state to sand and apply another coat). If you paint in between those two time frames you risk the paint wrinkling up.

And while you have probably figured this out, spray paint in disposable cups as a rule of thumb is not a good idea. If you do decide to try it, do it outdoors where spilled paint will not be a big issue. If you want to dip a part or have some for brush application, either purchase an actual can of paint with a lid or a small glass container. I admit I’ve gotten desperate at times and sprayed into the lid of my spray paint can but as I said if the paint or the propellant is corrosive enough you may not have much of a container left to work with.

Just a note to mention that I’ve posted some pics of my progress on the pads in my pack progress thread in the proton pack forum. The armband came out pretty good. I just need to take it in a little to make it a bit tighter and dye it and it’ll be perfect.

Heres my proof that the pad’s are painted… I cant say what they were painted with, but this proves that they were painted!!

Now… My ones are painted using regular grey primer. And they look great (IMO) more accurate than any dye job I’ve ever seen… Aslong as you dont go mad with the paint (which I imagine is happening if it is cracking) then they will still stay soft and remain fully flexible.

Lawman