Thought I’d share the gallery of images of my Proton Pack scratch-build using found items and recycled materials. This is not to be confused with my other recycled items/trash-pack build… which I may or may not have mentioned here before… Anyway… here’s a teaser…
I’m using items of sizes similar to pack-parts found in the trash at work (such as computer-box packing materials, toner cartidges, buffet-trays and platters and such from multiple events in the building (I work for the PBS affiliate here in town… ALWAYS having buffets for events), and household trash/recyclable items such as food containers for cheese, berries, Chinese take-out, etcetera. I lack a bumper and bumper-guard, but I already have answers for those missing elements. I also have a lot of wires, loom-hose, and resin greeblies from the first proper Proton Pack kit I got off of eBay and built up (seen in the pix), and will make the other add-ons that I don’t have from whatever I can find that looks close by shaping them to look “the part” (get it?) with my Dremel-style rotary tool.
I’ll fill the flimsy-er materials that don’t have a lot of tensile strength with the expanding foam material (that you get in a can) to firm them up, glue it all together on a foam-core motherboard, prime and paint it all up, and maybe even put lights in it. I have a second ALICE frame to mount it too already, I’m trying to keep it lightweight so my girlfriend (who has rheumatoid arthritis) can wear it comfortably. Also, so I can wear it when a standard pack would be too much, or in jeopardy of being broken… opportunities to wear a true stunt pack.
Having collected the materials for over a year, I decided this afternoon to lay out all that I had, and realized, “it’s time to start this project for reals”… and so… it begins.
So far, costs for the Trash/Stunt Pack is around $20, and that’s just for the Motherboard material (of which I need to pick one… and I remain un-decided. Any advice on which to choose and use..???):
A) $12 for 2 sheets of black foam-core board (20"x30")
Haven’t had much time to do any actual work on the build, but the ‘piece-gathering’ has continued…
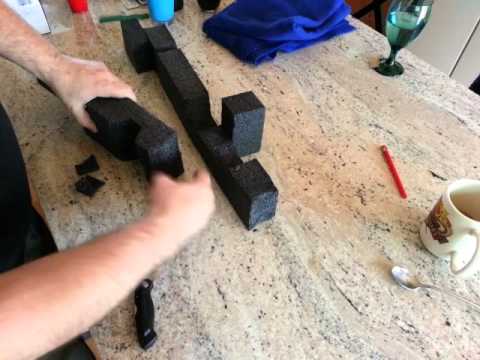
Styrofoam, cellulose foam and rigid foam… mostly for inserts to fill space (as the cellulose will desiccate over time), but will be augmented by expanding foam and such. The piece in the back remains the one that will become the “base form” of the Proton Pack
More cosmetic plating and such. The piece to the left will become the ladder assembly. Primed plastic from a container, as are the rest of the white pieces here… previously clear plastic forms, prior to priming
9-inch ‘to-go’ containers which will become the cyclotron base, and the lids which will allow me to take out the depression, if I feel the need to (I do), and clear-red prescription pill bottles for the red cyclotron lenses
…back up pieces to ‘flatten’ the facing of the cyclotron … or if the containers from previous pic are too shallow…
Thread spool and/or pill bottles (for Clippard), toner cartridges (HGA, booster, N-Filter), sea salt and yogurt containers (Clippard base on pack, above right of cyclotron), brass elbows, and various caps for PPD accents… just a bunch of stuff, with plenty of extra to allow for mistakes…
Also have black-in-black foamcore board for motherboard, but that photographs like ■■■■… so, whatever.
I fully expect this pack to come in well under 5 pounds…!
Well, forging ahead, I did my glue tests, testing the glues named in the above picture, and one other, inadvertently left off the earlier pic and thread; Gorilla Wood Glue. I conducted the tests rather scientifically, not having ever really attempted to previously bond any type of foam to anything. I did it in three ways, to mimic what I hope and/or might have to bond this foam to in the process of building the lightweight ‘stunt’ Proton Pack.
The three ways: 1. Foam to foam 2. Foam to paper 3. foam to cardboard (same as paper …but not really). The Results are as follows:
SUPER GLUE(GORILLA BRAND) : Utter disappointment… Did not bond to anything. NOT recommended for this task at all.
WOOD GLUE (GORILLA BRAND): High disappointment. Formed weak bond that pulled apart under moderate pressure, on all surfaces. Also, was still gooey, even after over 48 hours. NOT recommended.
GORILLA GLUE (their ‘regular’ formula): Surprisingly effective. Even though I forgot to moisten the surfaces to be bonded, as Gorilla brand recommends, this stuff still formed an effective bond that adhered to all surfaces. However, high-stress causes some of the bonds to weaken. Can be used for the task ahead… but may not hold up under high-stress conditions.
HOT GLUE: BEST of the BEST!! This stuff is basically plastic, melted and then when it cools, forms the strongest of bonds because it becomes very like the material it’s joining together… and the “hot” aspect doesn’t hurt either. It DID appear to melt the foam in one spot, which was probably where I first glopped it on, but holds fast at the point, so whatever. This will most likely be the method I will employ in all aspects of the Stunt Pack’s construction. Unless I find something better at Home Depot…
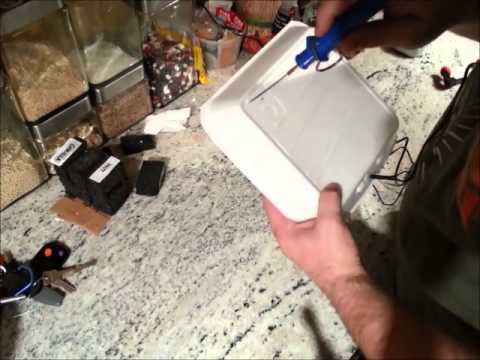
ALSO: Got my “hot element” styrofoam/foam cutter tool. Check out my test video:



](http://s16.photobucket.com/user/MadKidJedi/media/Ghostbusters%20Stunt%20Pack%20Build/20140404_174350_zpse73ea4a7.jpg.html)
](http://s16.photobucket.com/user/MadKidJedi/media/Ghostbusters%20Stunt%20Pack%20Build/20140404_174256_zpsc48c107d.jpg.html)
](http://s16.photobucket.com/user/MadKidJedi/media/Ghostbusters%20Stunt%20Pack%20Build/20140415_180726_zps5f35b9dc.jpg.html)
](http://s16.photobucket.com/user/MadKidJedi/media/Ghostbusters%20Stunt%20Pack%20Build/20140415_180837_zps6dbf923e.jpg.html)
](http://s16.photobucket.com/user/MadKidJedi/media/Ghostbusters%20Stunt%20Pack%20Build/20140415_165154_zpse143fa98.jpg.html)
](http://s16.photobucket.com/user/MadKidJedi/media/Ghostbusters%20Stunt%20Pack%20Build/20140512_123925_zps9de0e041.jpg.html)
](http://s16.photobucket.com/user/MadKidJedi/media/Ghostbusters%20Stunt%20Pack%20Build/20140512_124826_zps352b2e27.jpg.html)
](http://s16.photobucket.com/user/MadKidJedi/media/Ghostbusters%20Stunt%20Pack%20Build/20140512_133926_zpsf2ae15c6.jpg.html)
](http://s16.photobucket.com/user/MadKidJedi/media/Ghostbusters%20Stunt%20Pack%20Build/20140519_120336_zps641bf7a1.jpg.html)
](http://s16.photobucket.com/user/MadKidJedi/media/Ghostbusters%20Stunt%20Pack%20Build/20140519_125533_zps0498fe57.jpg.html)
](http://s16.photobucket.com/user/MadKidJedi/media/Ghostbusters%20Stunt%20Pack%20Build/20140519_125600_zps3c7de9b5.jpg.html)
](http://s16.photobucket.com/user/MadKidJedi/media/Ghostbusters%20Stunt%20Pack%20Build/20140519_143731_zpsdd372022.jpg.html)
](http://s16.photobucket.com/user/MadKidJedi/media/Ghostbusters%20Stunt%20Pack%20Build/20140519_144955_zps082ae14b.jpg.html)
](http://s16.photobucket.com/user/MadKidJedi/media/Ghostbusters%20Stunt%20Pack%20Build/20140519_145232_zps20330d5a.jpg.html)
](http://s16.photobucket.com/user/MadKidJedi/media/Ghostbusters%20Stunt%20Pack%20Build/20140519_153320_zps3259378b.jpg.html)
](http://s16.photobucket.com/user/MadKidJedi/media/Ghostbusters%20Stunt%20Pack%20Build/20140519_154344_zpscbec1470.jpg.html)
](http://s16.photobucket.com/user/MadKidJedi/media/Ghostbusters%20Stunt%20Pack%20Build/20140519_160229_zps88f03022.jpg.html)
](http://s16.photobucket.com/user/MadKidJedi/media/Ghostbusters%20Stunt%20Pack%20Build/20140519_162103_zpsa76f67c5.jpg.html)