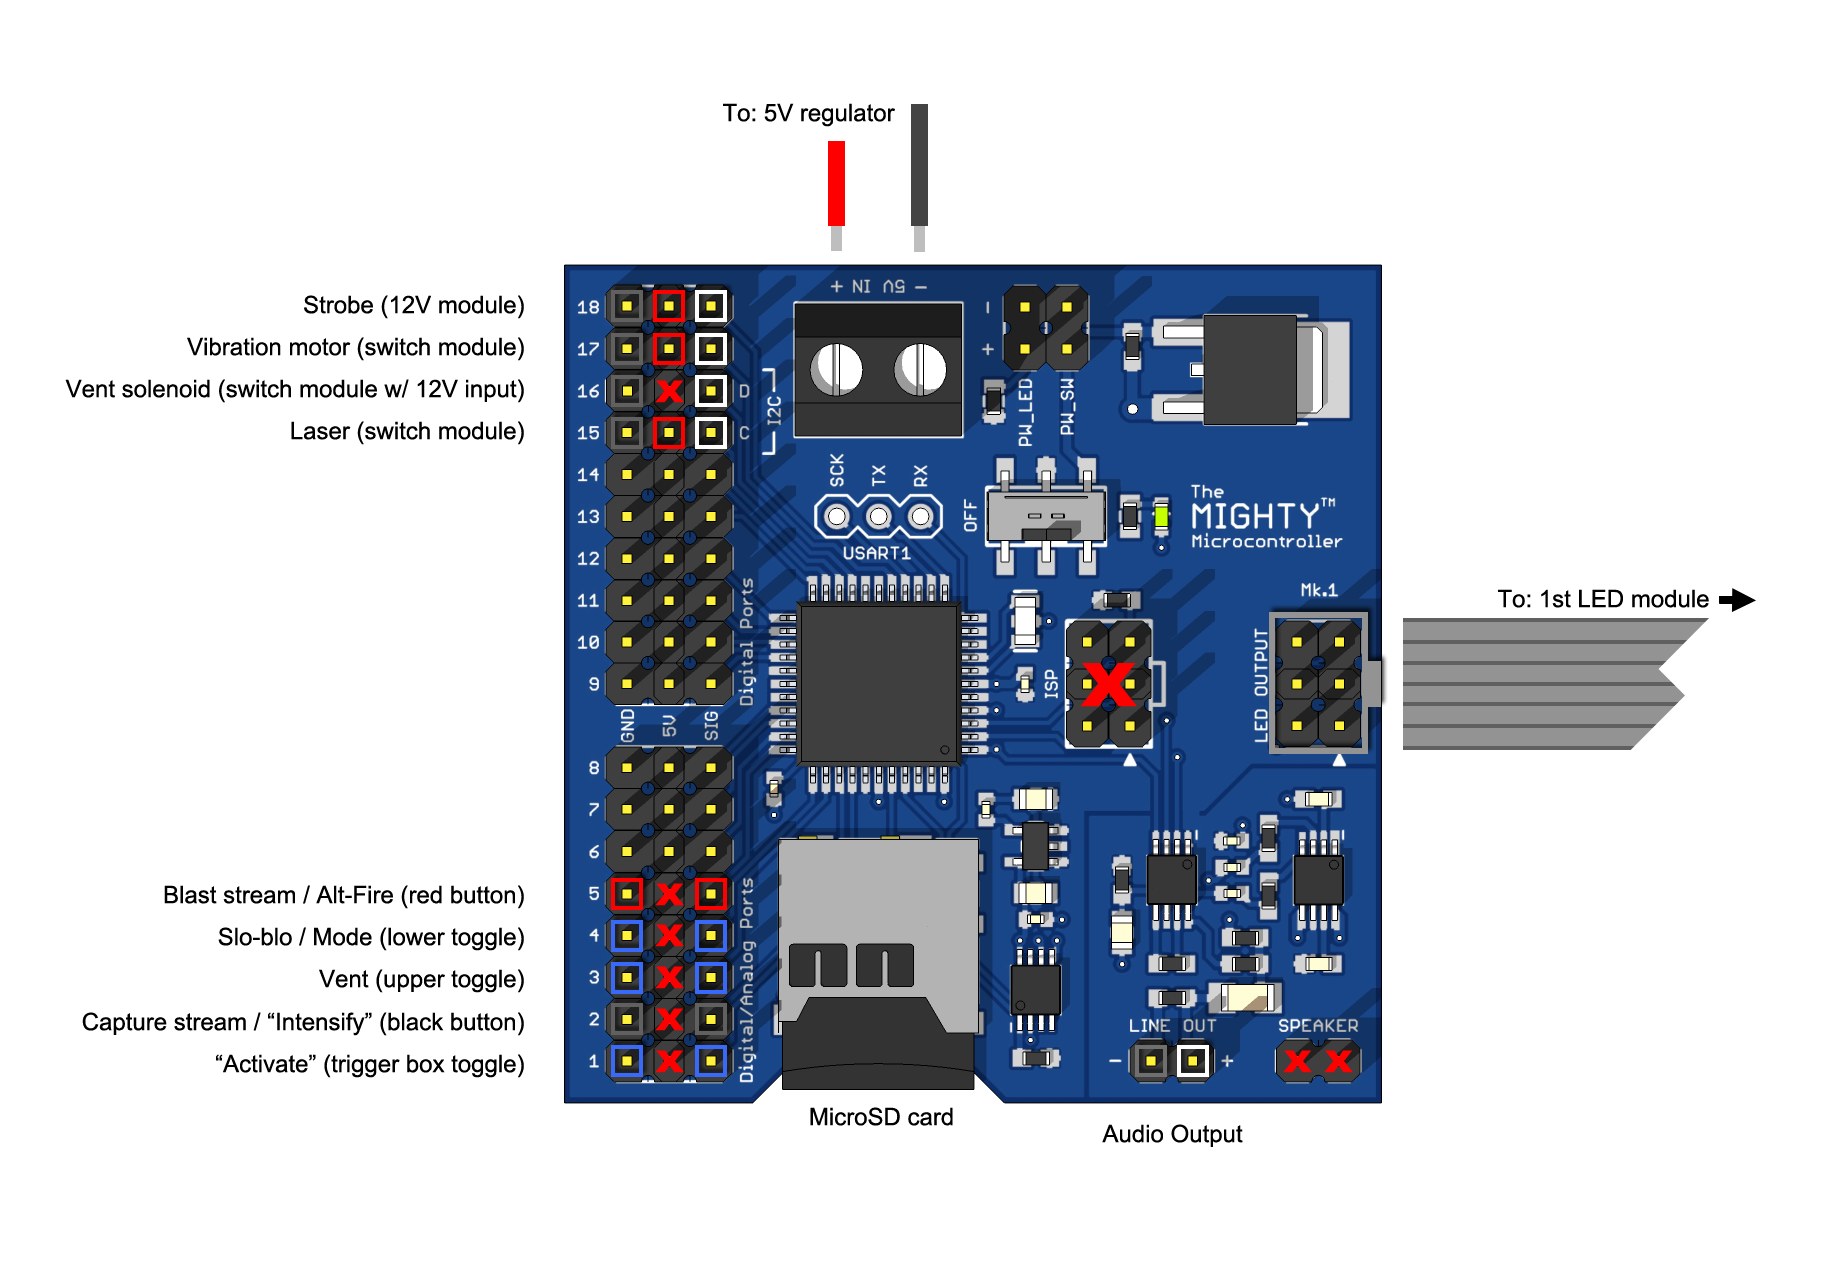
Does anyone have a consolidated source of information for building out and installing the Mighty microcontroller? What battery, amp, and speakers do you recommend?
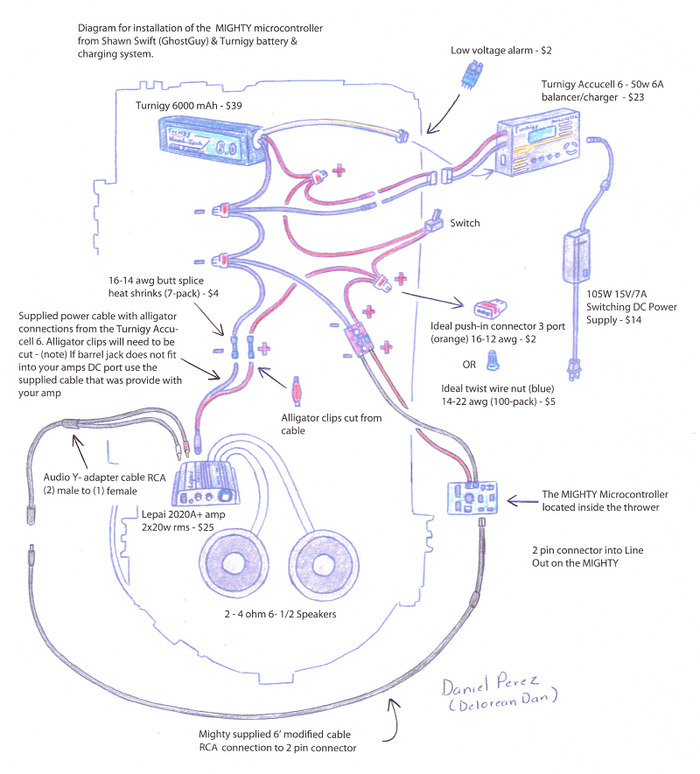
I have a wiring diagram that was designed by one of the guys in a southern florida GB fan club. It is leaps and bounds easier to understand than the one on Shawn’s site (Shawn sent me the diagram). As for parts, here is what I used:
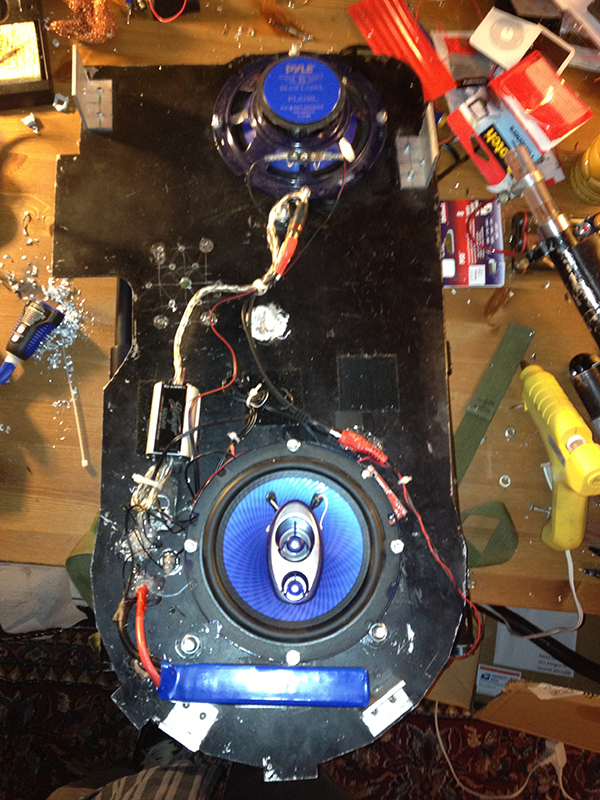
I use two Pyle speakers in my pack, one 4" and another 6 ½". The 4" sits next to the Power Cell LED display and faces the motherboard. I then have speaker holes drilled in the same spot for the sound to come out. The bigger speaker is facing the shell.
For the amp, I use a Dayton DTA-2 amp. This is also the one used in the diagram. I have it wired to my crank knob controls the amp.
You will also need a 3.5mm Ground Loop Isolator, as well as a 3.5mm stereo to mono adapter so the audio plays out of both speakers. (This only applies if your mighty’s output wire is 3.5mm on the one end. If its the older RCA connections, you need a different ground loop isolator)
For the battery I use a “blue brick”. The GBFans one is 9800mAh, but I used a 6800mAh I got off eBay.
Shoot me your email and I will gladly send over the newer diagram. You can also check out my build thread as I show of most of my wiring there.
I concur with not using two 6" speakers as Shawn notes. Also with the blue brick. The battery he suggested died after the second charging. That and the fire hazard just makes not something you want in your pack.
This is pretty much verbatim what I have setup, except I did use the LiPo battery suggested. It’s worked fine for me thusfar, but it is a bit of a hassle to charge. You can get by much cheaper with the blue bricks.
I like the blue bricks because the have a dedicated DC jack. In my case, I didn’t want to crack the battery open, so I wired up a DC panel jack to my on switch. That way the battery sits outside the pack and I can remove it whenever I need too.
Also, the Pyle speakers are on the cheap end of the spectrum. Any 3-way, 4-ohm speaker will work. The cool
Thing about the Pyle’s is they generally come in pairs, just another excuse to build a second pack
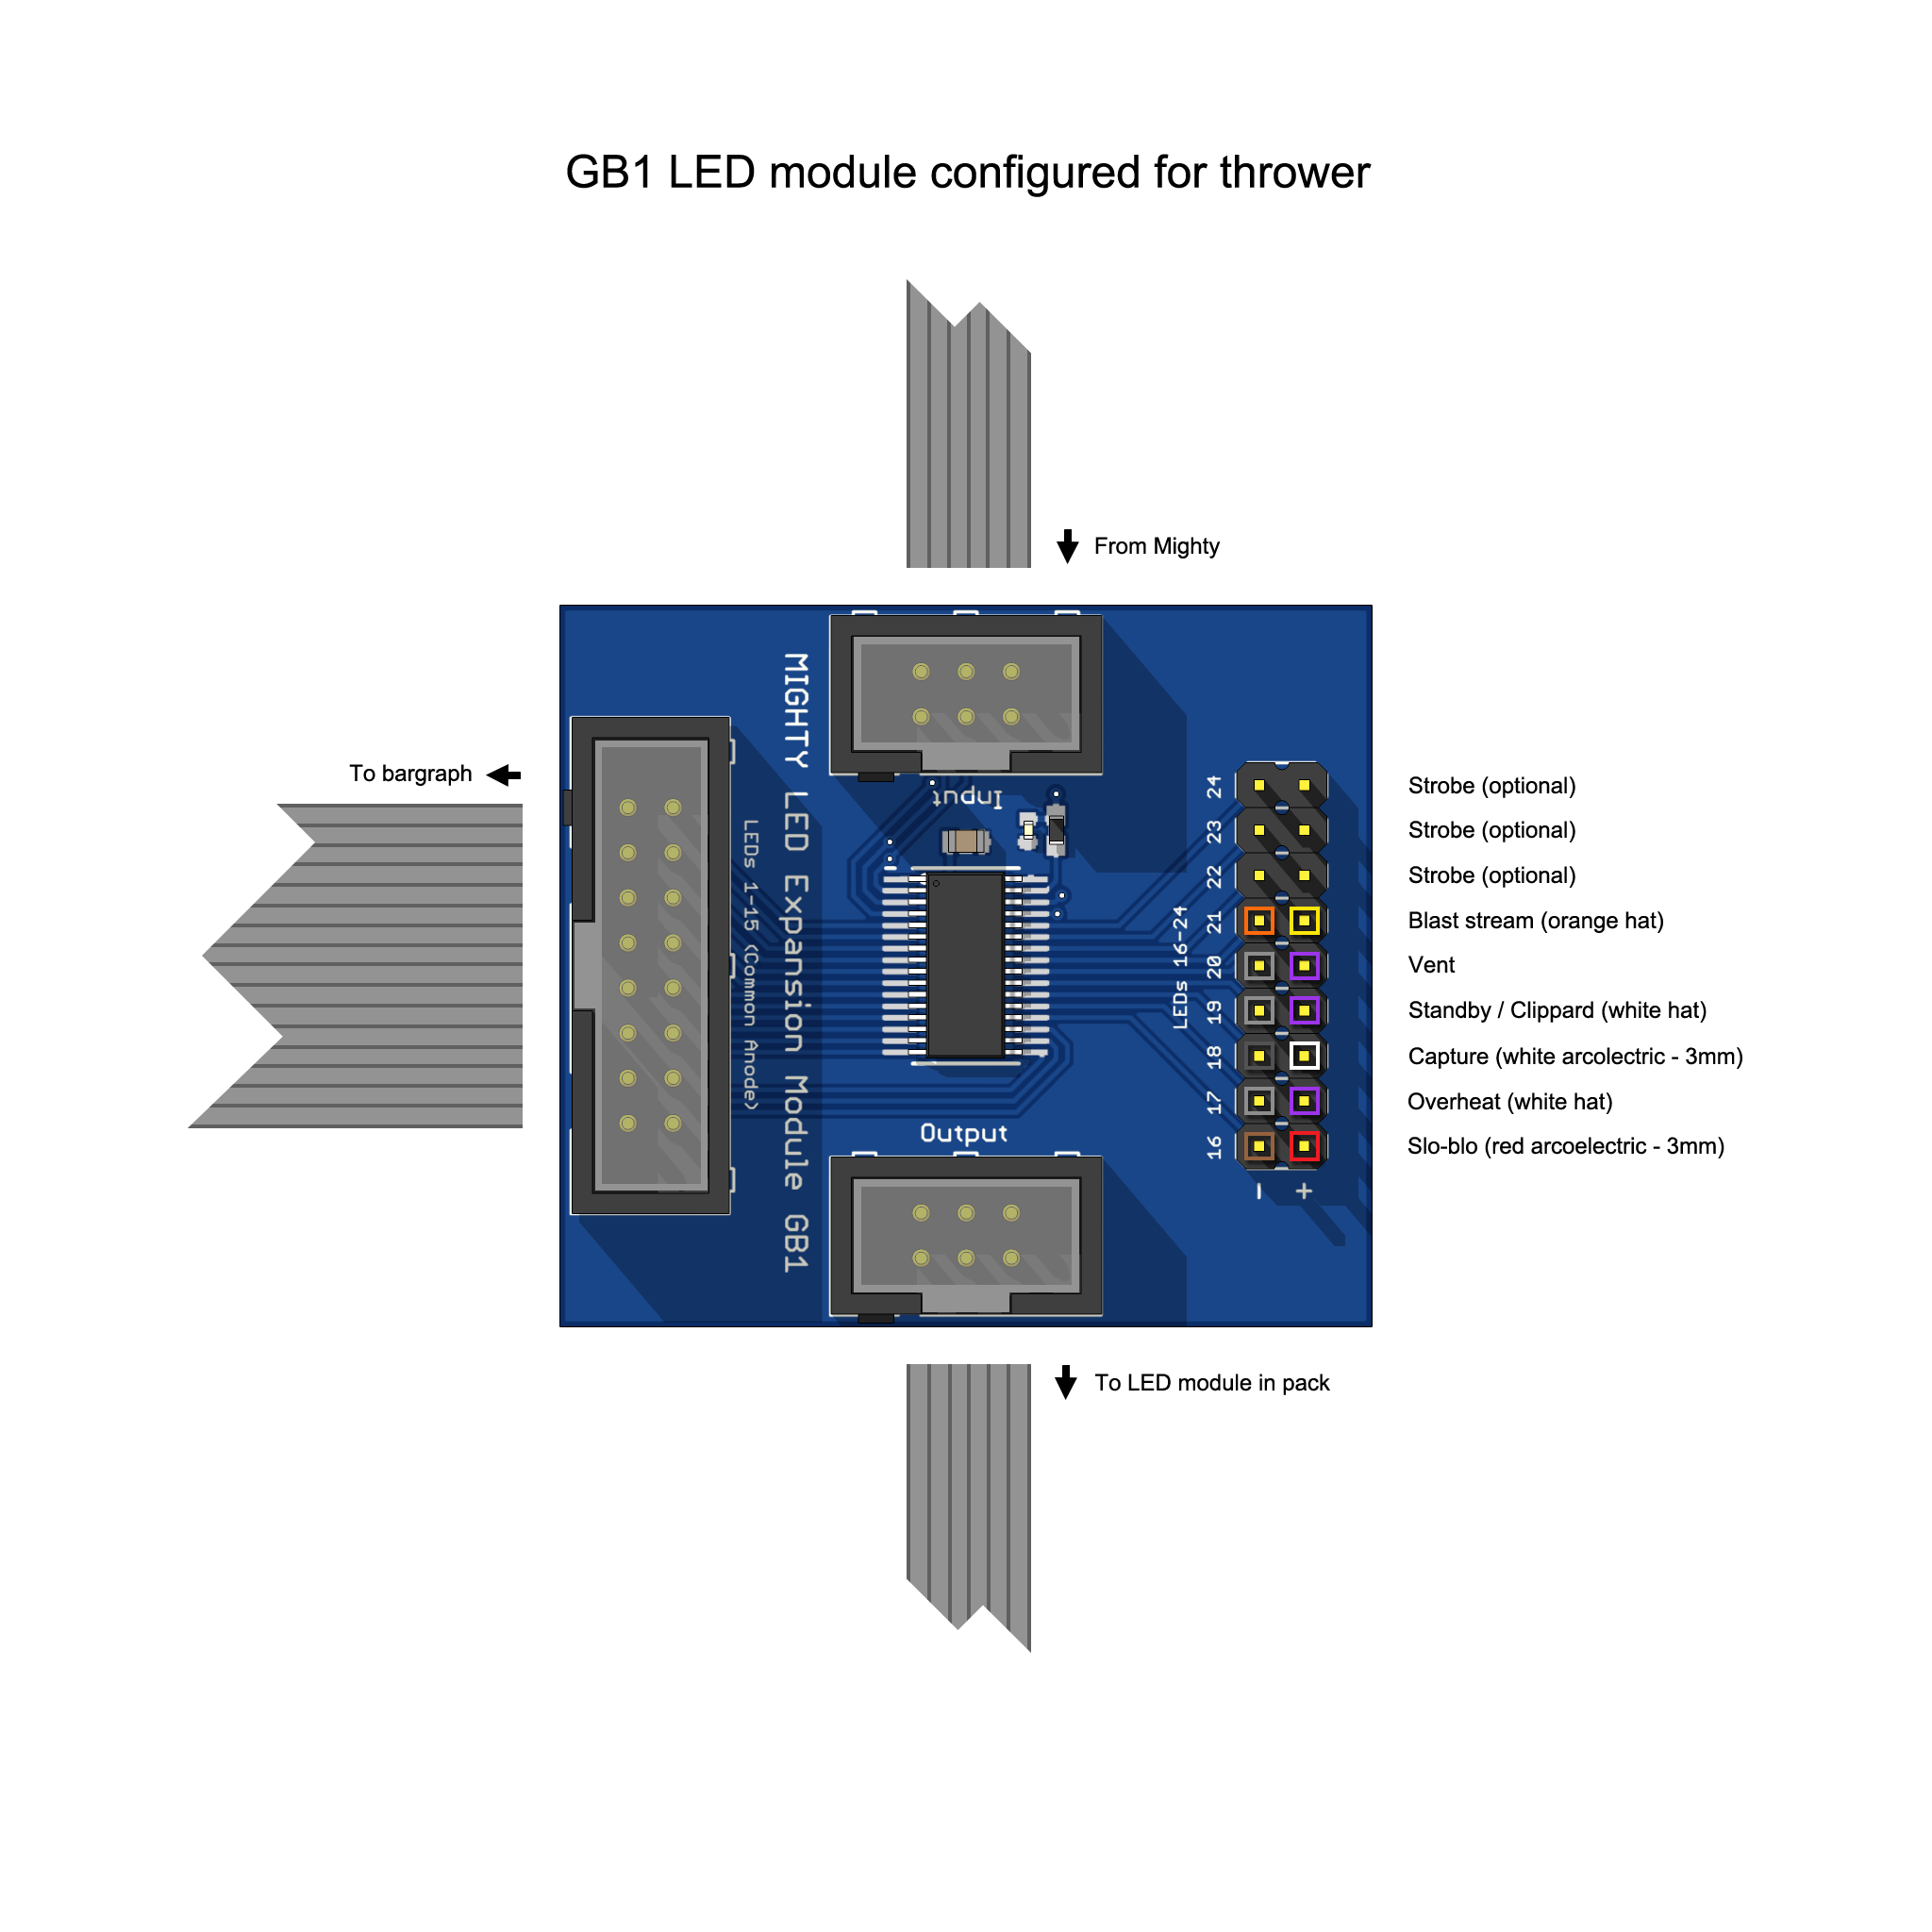
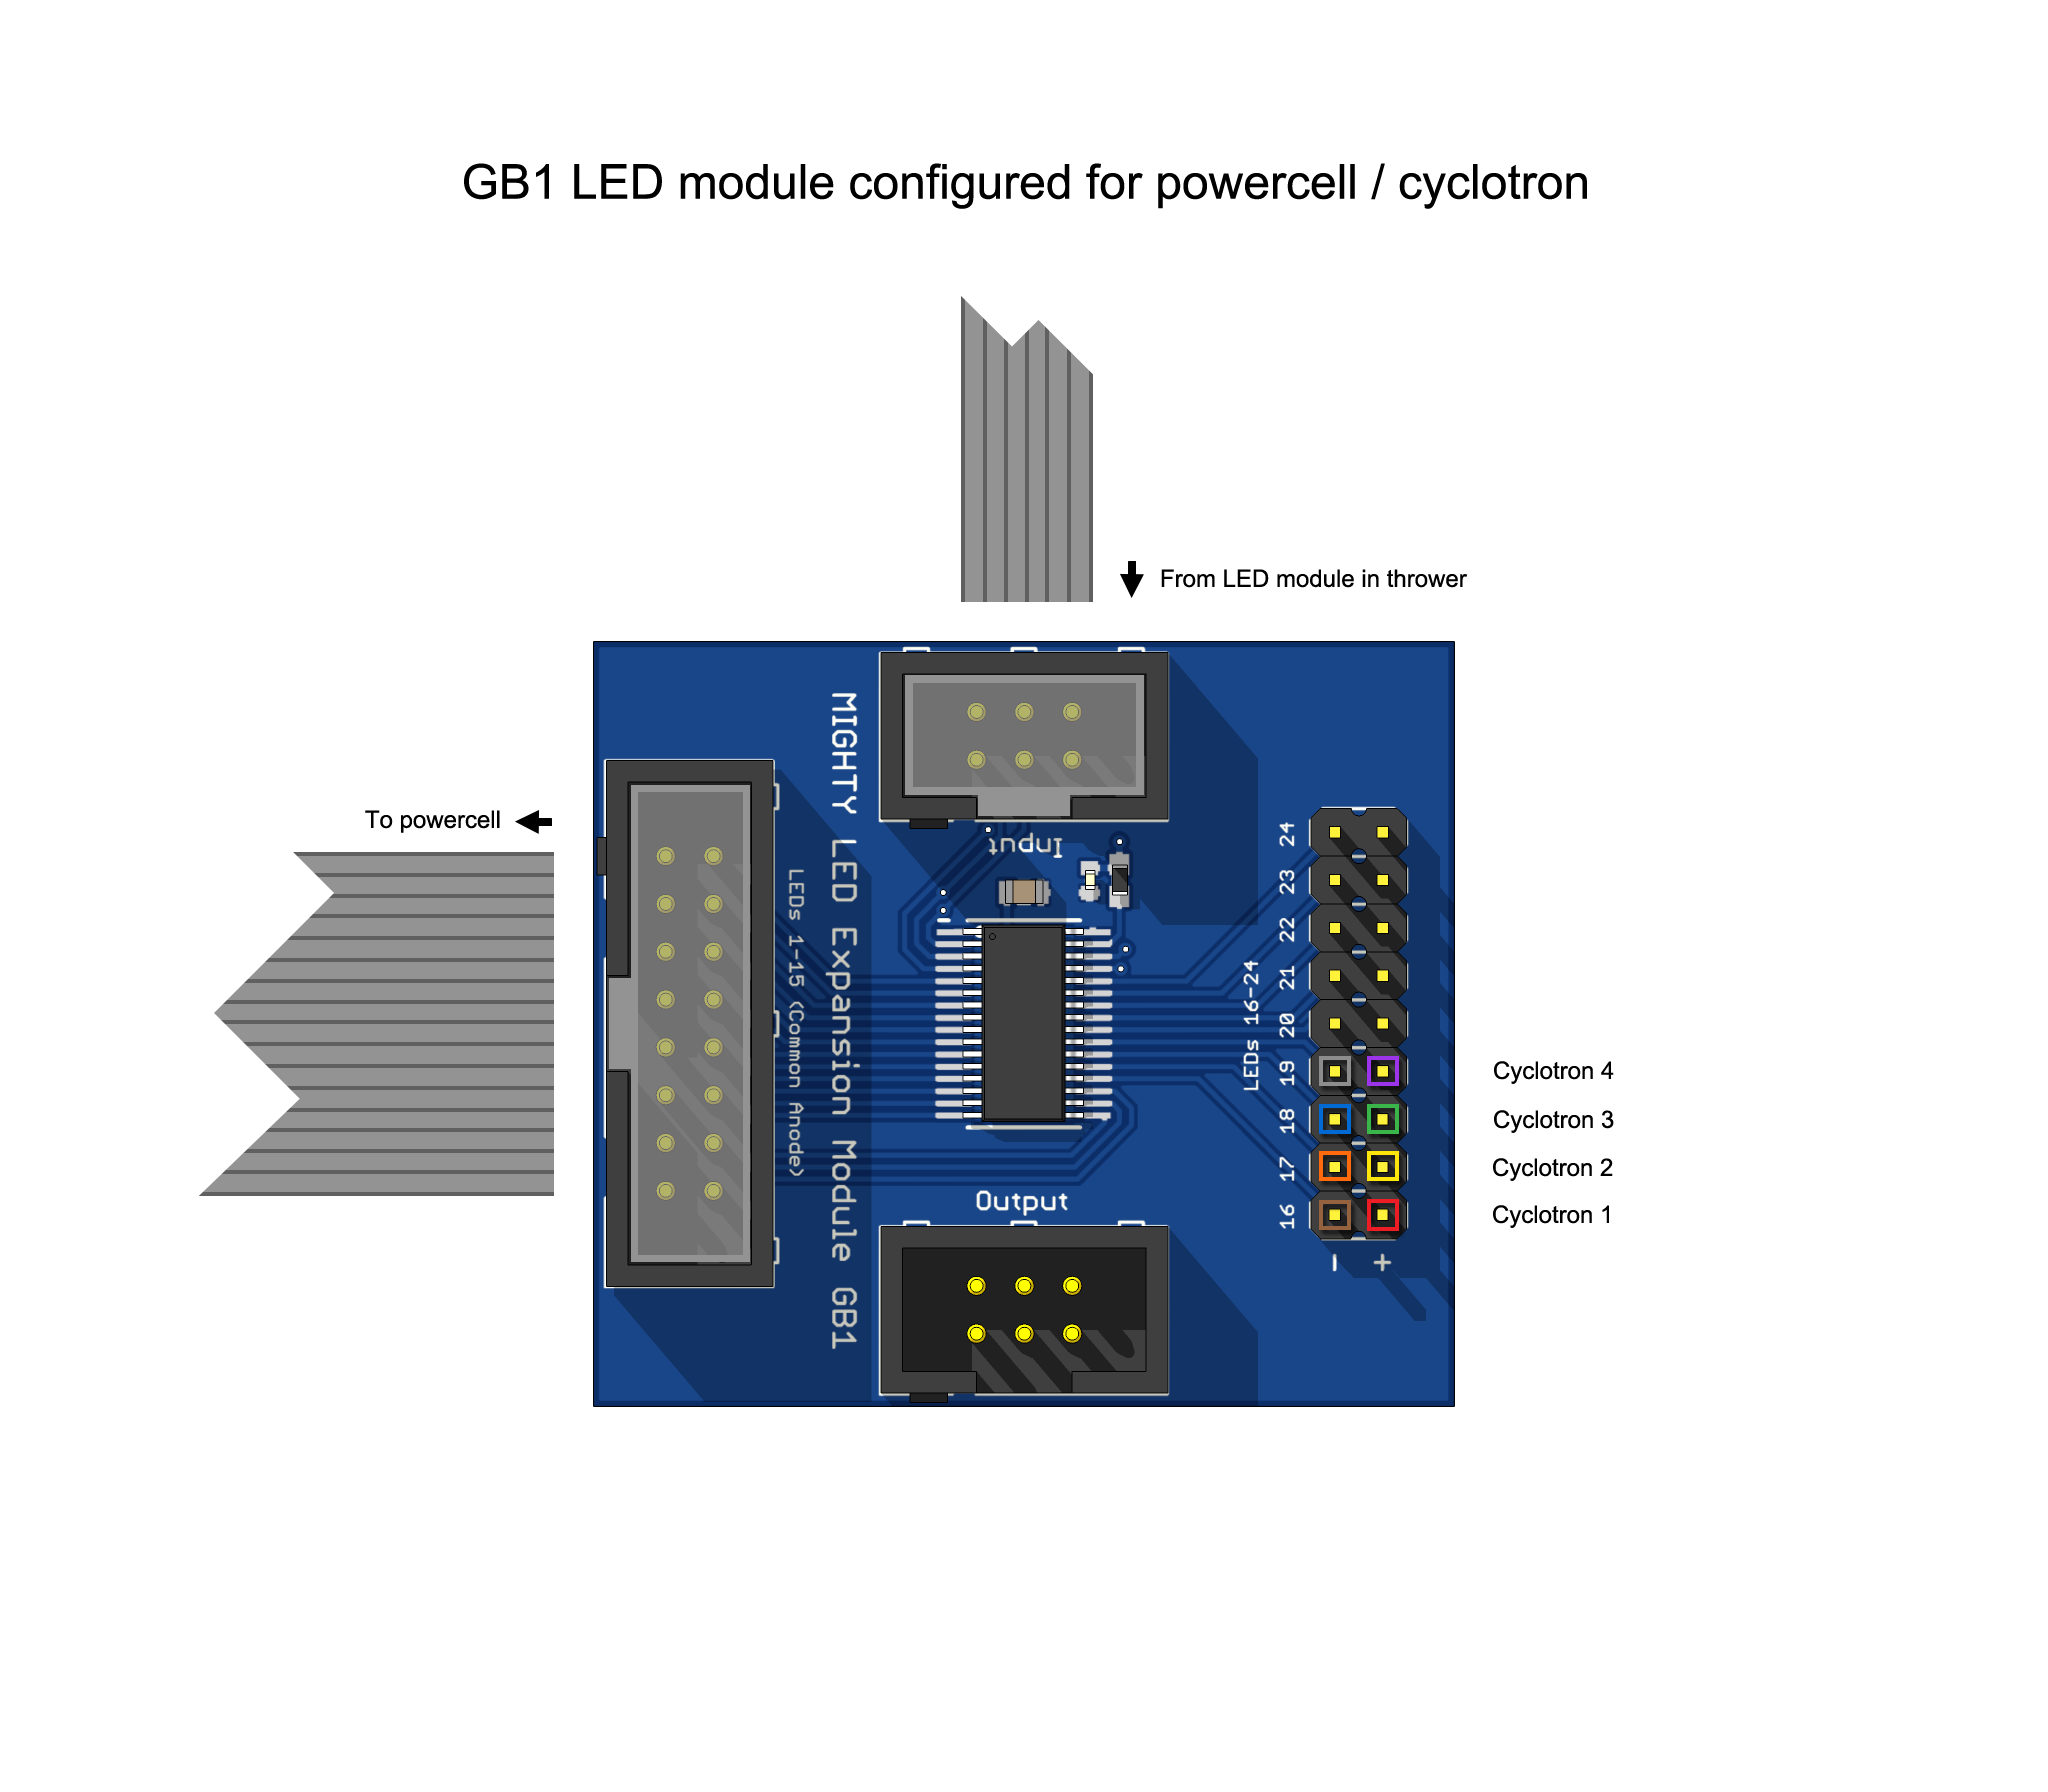
Here are some various images I have that may help. Some of these are kind of crude, but should help. I’m happy to help anyone out with their microcontrollers if they have questions.
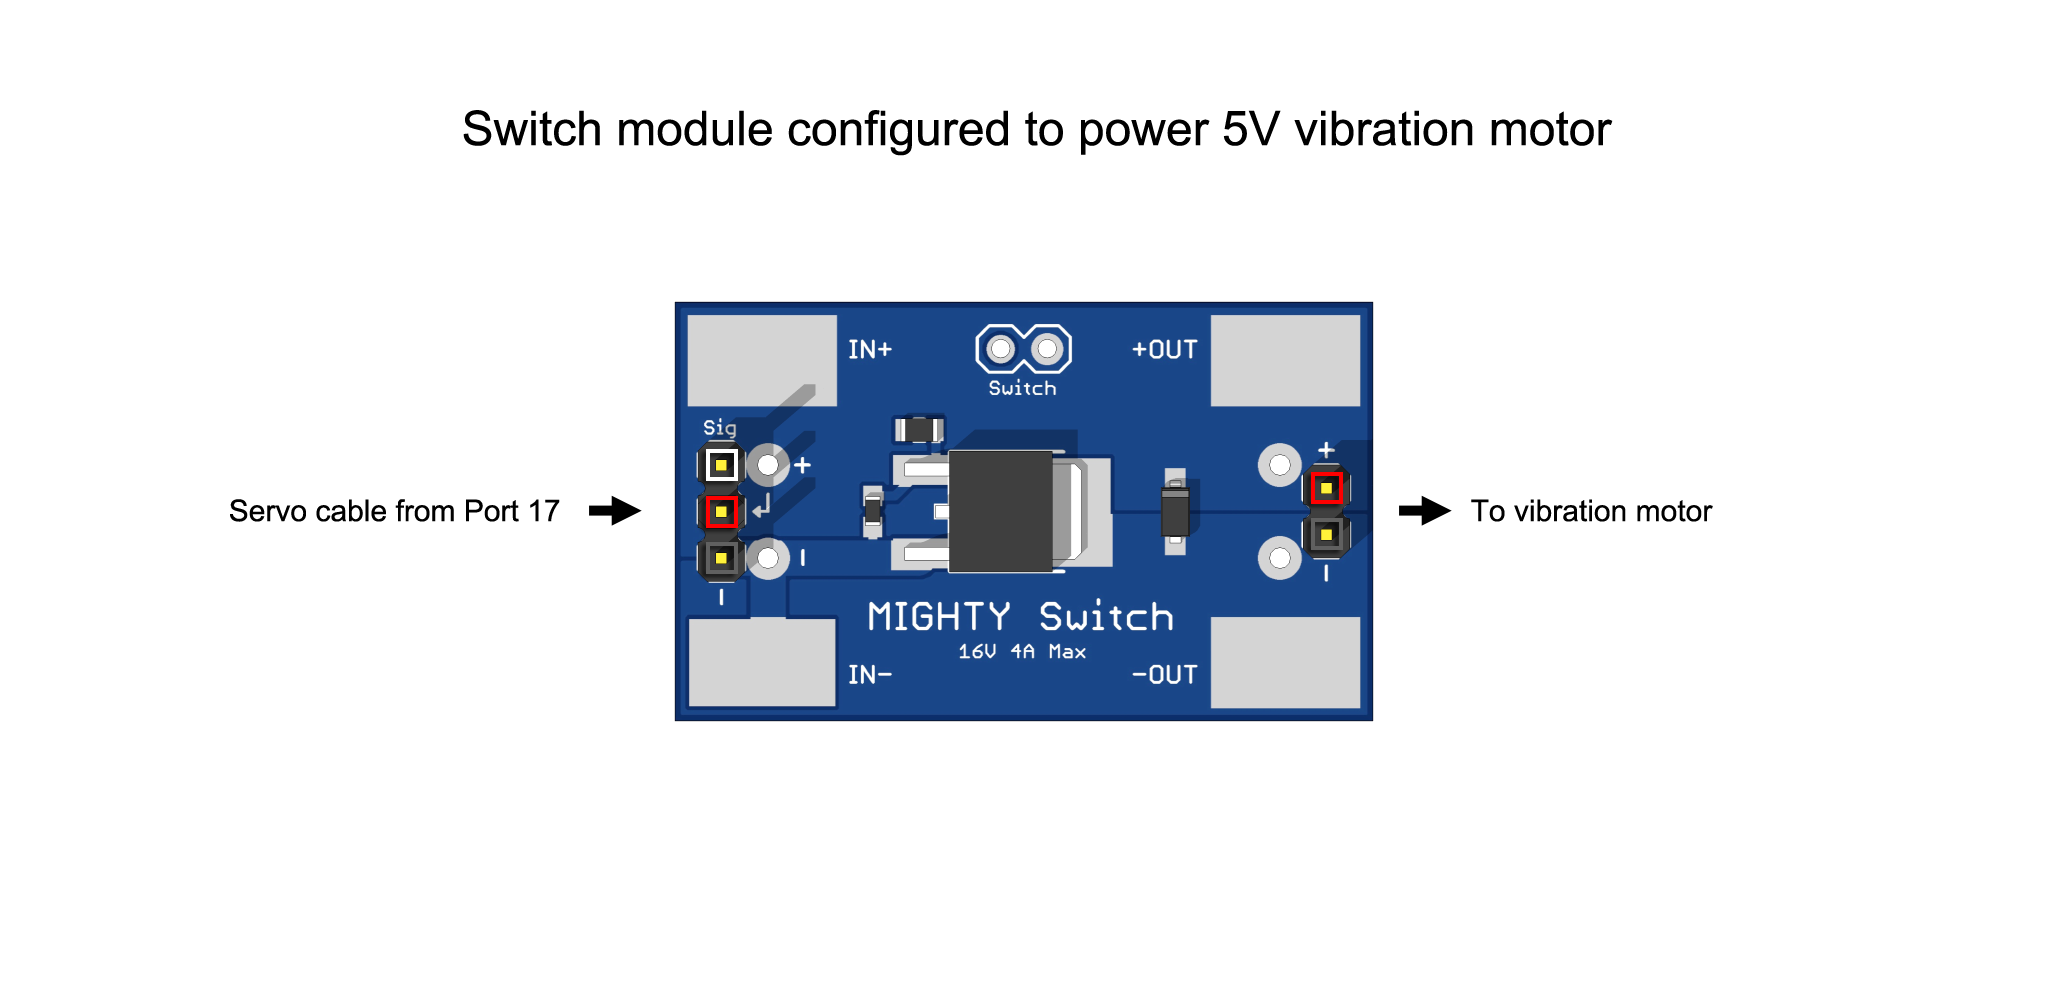
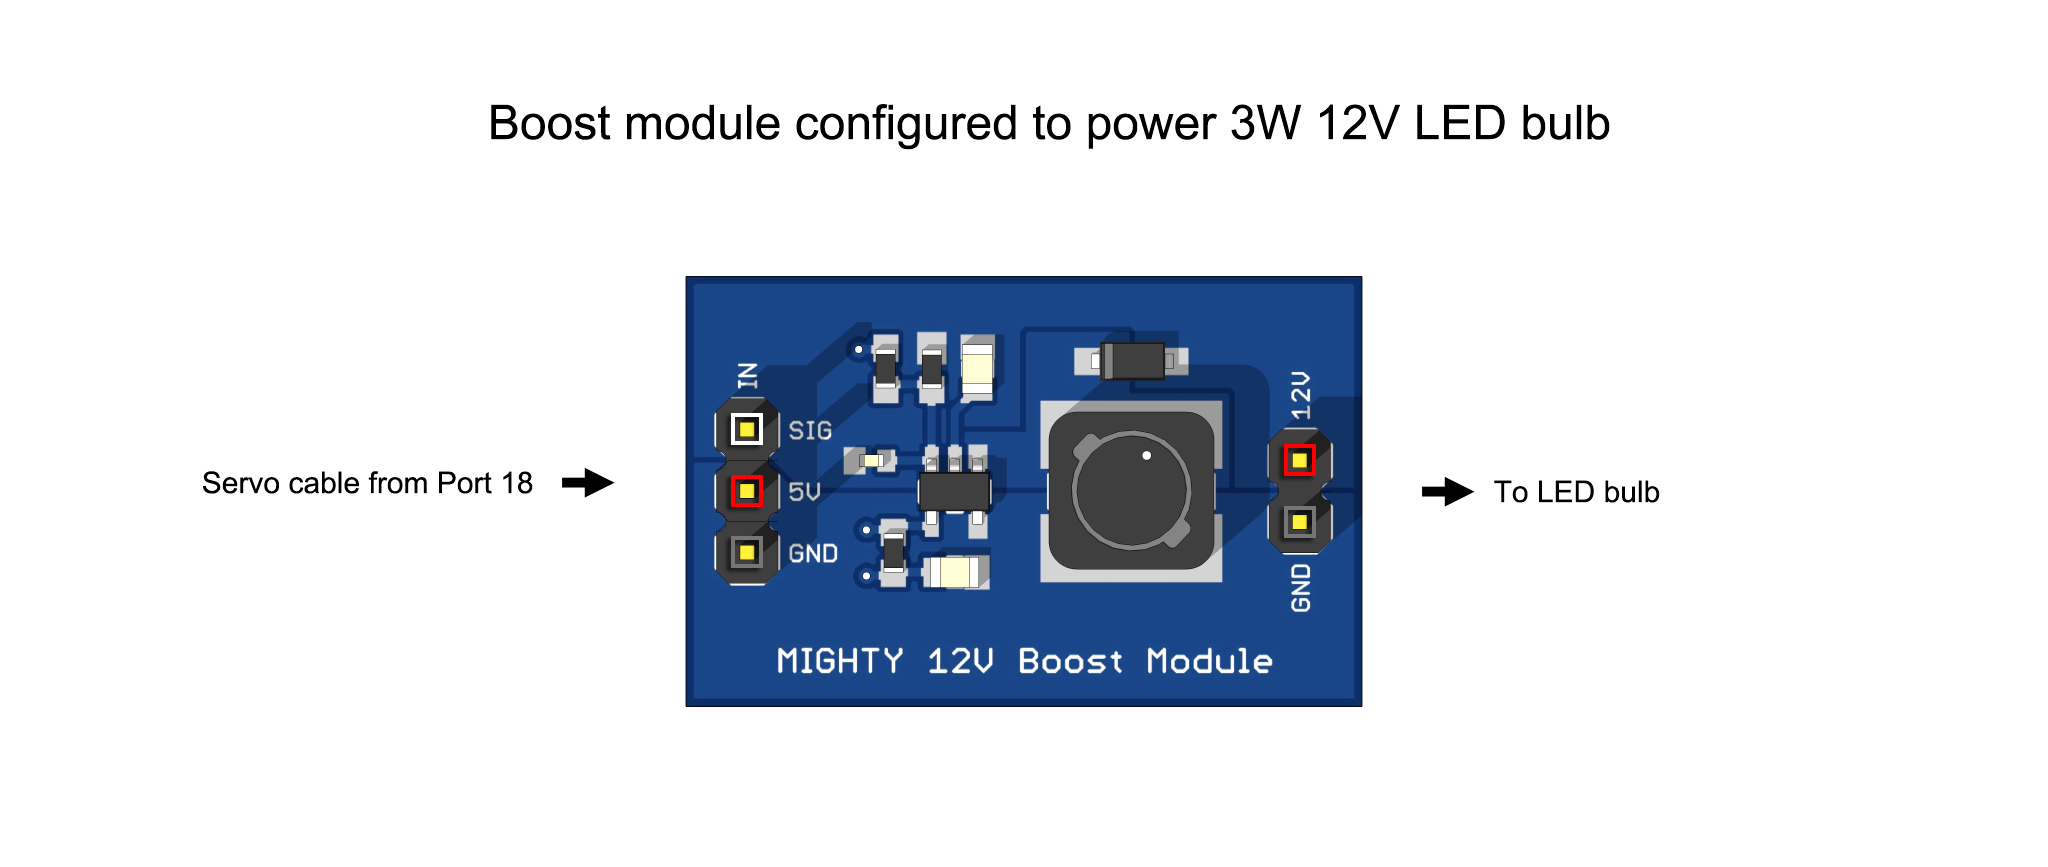
Wiring instructions:
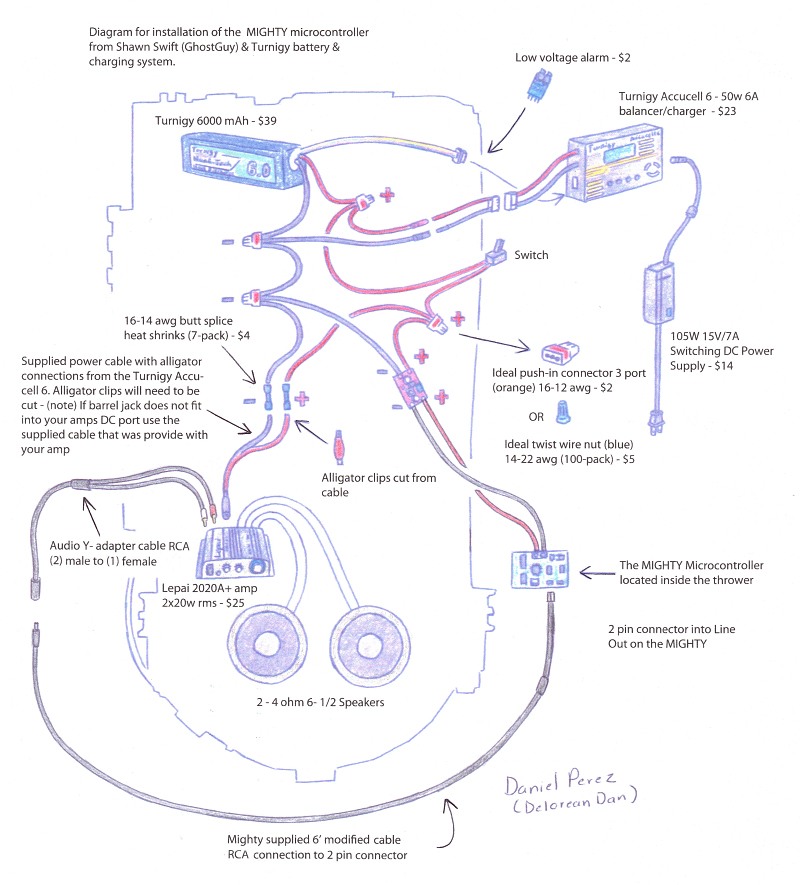
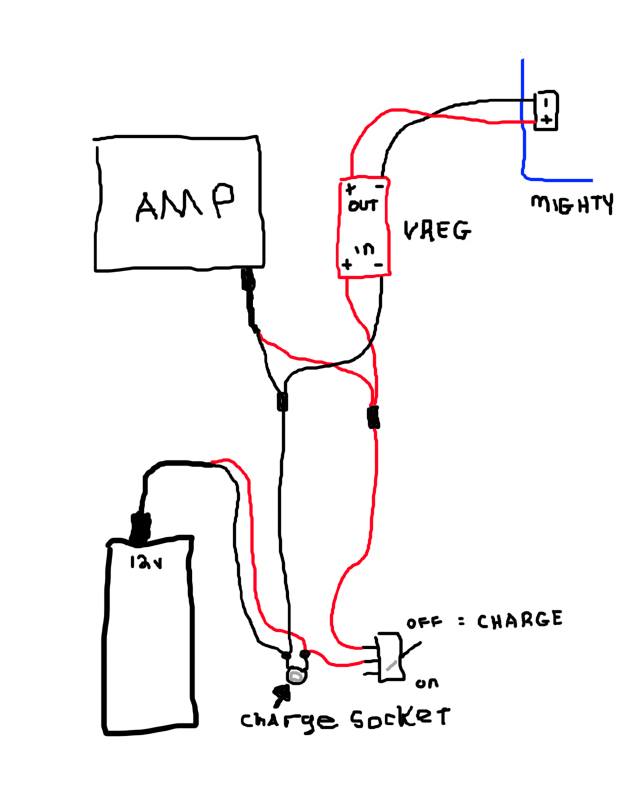
Wiring diagrams:
With Lipo battery:
With a standard 12v rechargeable battery:
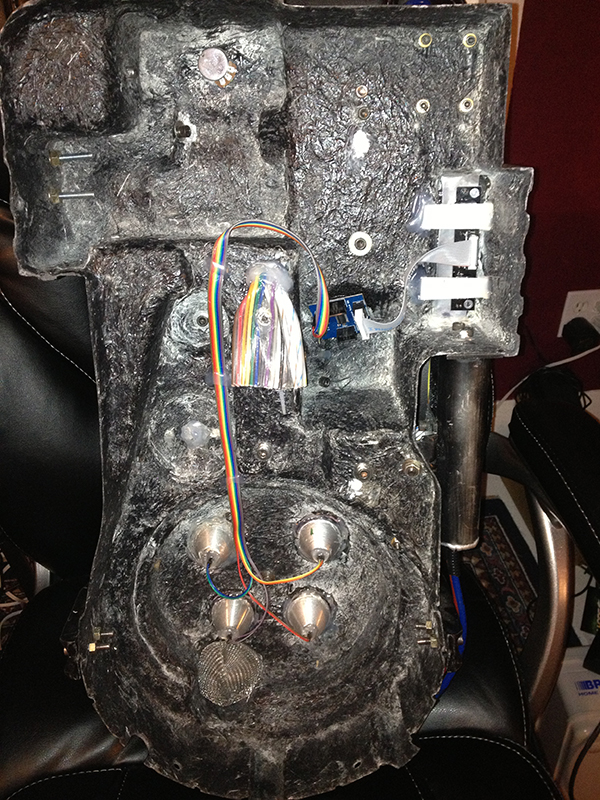
Old shots from inside of my pack:
I’ve had great usage out of those blue Pyle speakers, and the Lepai amp is pretty decent, though I didn’t have room to mount mine inside of the pack (it’s between my mobo and frame, so I can control the knobs).
I can definitely NOT recommend usage of those Turnigy lipo batteries - I went through a few that went below their charge, which rendered them unusable. While they charge quickly, it only takes one mistake to trash them. The standard blue brick or those black batteries from China work just fine, as far as I’ve seen.
Keep in mind this is for the Mighty with extension cable set-up… if you don’t have the extension cable, switch the placement of the LED modules (I.E., it should go from the mighty, to the gun lights, THEN to the pack lights).
Also, I substituted the ‘distribution block’ in this diagram with the 3-port push-in connectors outlines in the original diagram.
It should be noted there are two kinds of “blue brick” batteries. On is a high discharge LiPo designed for RC cars. Those are the kind that are dangerous and need to be closely monitored during charging. The other kind is a LiIon (or maybe it’s LiPoIon). This is the kind AJ sells, and they are MUCH safer. They’re similar to a lot of phone and laptop batteries.
Dolorean Dan’s guide is helpful, but I think its incorrect for the charging set up. Those Lipo batteries are charged through the little port you where you attack the low voltage alarm. In that diagram, you would just need to branch off two wires instead of three.
So . . . I just hooked up the mighty since getting my replacement thrower extension cable. I used Nathan Stevic’s guide along with the guide on Shawn’s site. I am using firmware 102. I plugged the battery in (with the voltage regulator, of course) and all of the lights were fully on and didn’t move. After about 30 seconds, the “Input” chip on the cyclotron / powercell board sparked and started smoking.
The strobe and rumble motor were plugged into the correct ports - am I just f***ed at this point? Should I ask for a replacement expansion board?
Get a hold of Shawn. Are you sure the polarity of your wires were correct coming out if the regulator into the mighty? It sounds like they weren’t and the chip blew.
This is all great (if somewhat intimidating) information. I guess I’ll get down to it one connection at a time and hope mine doesn’t spark into a cloud of smoke too! Any specific recommendations/links on amps, speakers, ground loop isolators, etc for this system? I do have the extension cable for the thrower.
I used 2 Pyle 4-ohm speakers, one 4", one 6.5". The amp is a Dayton DTA-2. Nice and small, and has a separate volume pot that acts as a power switch for the amp as well so if I want just lights and no sound, I can do that. The ground loop isolator is a standard 3.5mm isolator I got from parts-express.com. Depending on the age of the mighty and the audio out wire you have to go to the amp, depends on the isolator you need (RCA or 3.5mm) and whether you’d also need a 3.5mm mono to stereo adapter.
It may seem very tedious but the end result can be very nice