Nice lens fix up, Filandrius.
I’ve been pondering the same lens install dilemma. I smoothed the inside of my shell some, but not that much yet.
Looks good!
Nice lens fix up, Filandrius.
I’ve been pondering the same lens install dilemma. I smoothed the inside of my shell some, but not that much yet.
Looks good!
They are, ain’t they? 
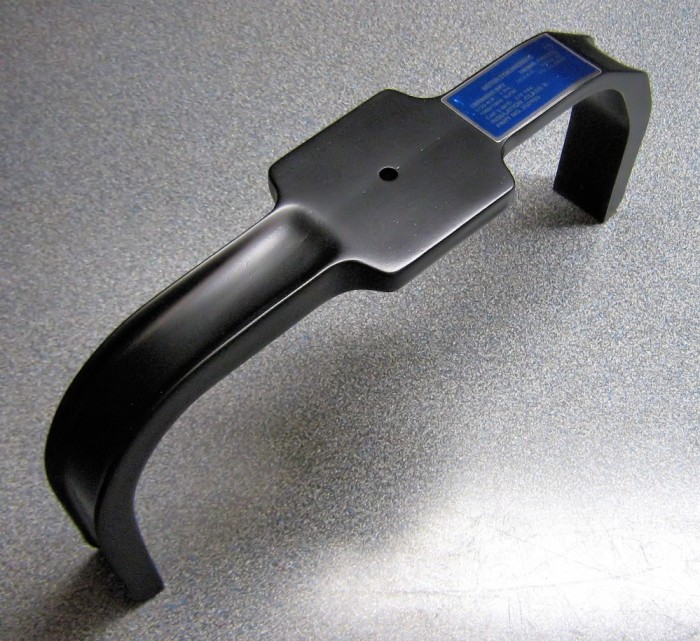
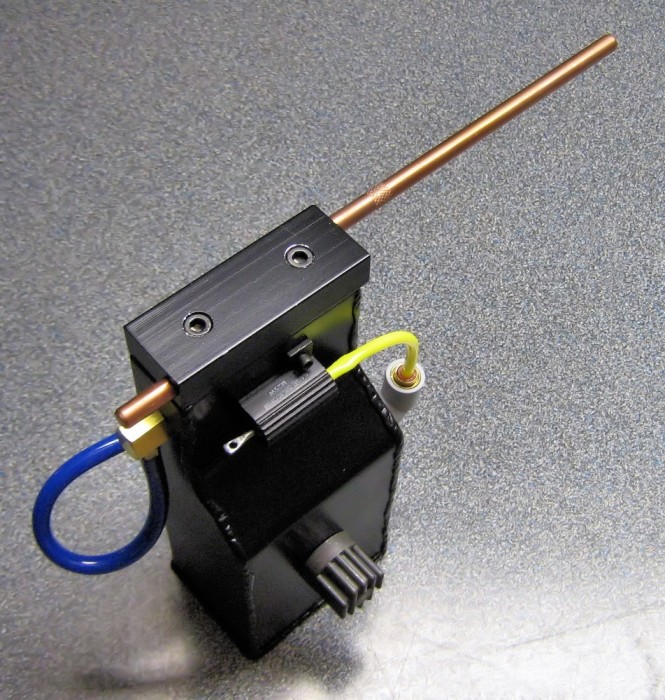
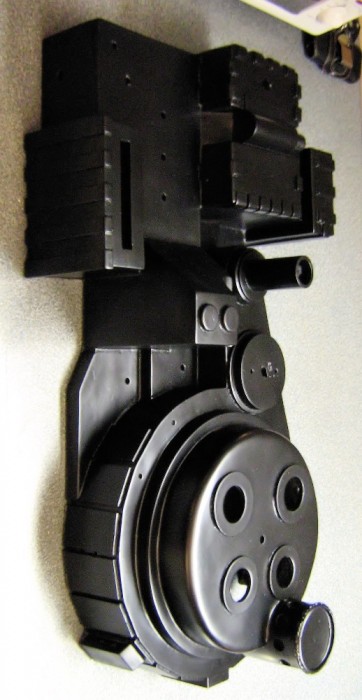
Like I said earlier, the Bumper and the Ion Arm are completed. Here’s some pictures:
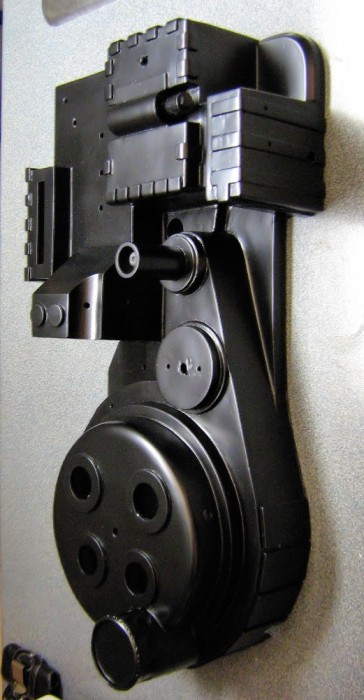
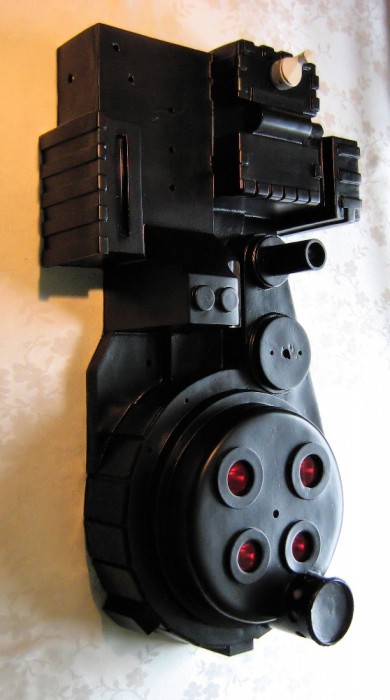
Resin Bumper by Exoray. No much to do on it, it’s already almost perfect when you get it. Sanded, wet sanded, painted silver, then black. Metallic label by theonlytexaspete (Sold out! Sorry! :P)
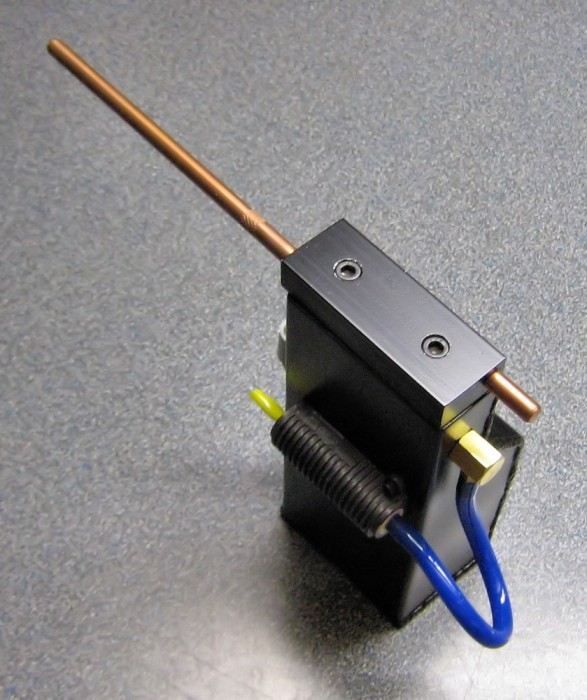
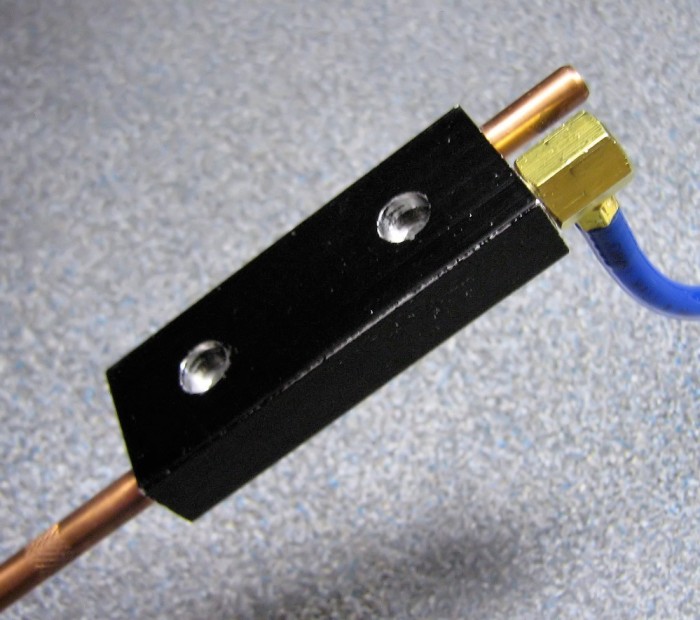
Resin Ion Arm by Exoray. Same quality. Aluminum/copper cap by jpa35, Legris elbow from masteryoda, resistors and tubing from Colin. Everything is screwed in place, in tapped holes, with Teflon tape on the threads.
Now before anyone (or everyone :P) tells me that it’s not yellow tubing that goes on the bottom of the resistor, let me explain a little trick I found: For the yellow 5/32" tubing, I dipped it in boiling water then I slipped it on the resistor. I couldn’t do that for the blue 1/4", until I realized that the ID is around 5/32". I dipped 5/32" tubing, slipped it on, cut it, dipped the 1/4" and slipped it on the 5/32". Very tight fit, tougher than glue. That yellow bit is waiting for the PPD tubing.
That’s all for now! 
Man does that look good!
Is the Krylon silver you’re using an actual primer or just regular paint? I’ve been wondering how to paint my pack and I wanted to do the silver for weathering but don’t want three or more coats on it. A silver primer and black top layer would be perfect. Also, is that a matte/satin/flat black?
My silver paint is Krylon Fusion for Plastics - Metallic Shimmer - Nickel Shimmer. As far as I know, I’m the first to try this to paint the whole pack, including the fiberglass shell. I choose this method for the exact same reasons as you. According to the website, Fusion bonds easily to most plastics, PVC, resin and more (including fiberglass) dries fast (within 1 hour) and is fully chip resistant after 7 days (that’s why I wait that long before the black paint) No need for primer, and if I bump into something and it chips, it won’t chip to the fiberglass, only to the silver coat.
For the black paint, I’m using Krylon BBQ & Stove Paints - BBQ & Stove Black. It gives a tough, scratch-proof, satin-black metallic finish that’s really realistic for anything that’s supposed to be metallic and black. I’ve used it a lot in the past, and it never failed me. I’ve painted blasters, airsoft guns, my pulse rifle, and now I’m painting my Proton Pack with it. Plus I love the color. Really nice shine without being gloss. I’m also using it without any primer on my aluminum parts.
Hope that helps!
This is looking really, really good. Great photos!
I’m still not 100% convinced I will go with the silver underneath the paint for mine, as I’m still a bit old school with my weathering techniques. However I have a feeling the further you progress with this… the more of a believer I might become of that method.  Keep up the great work!
Thanks! I’m getting the hang of it. It’s been a while since I took props pictures. 
Yeah, that’s what I thought. Dry-brushing ot simply silver paint with a sponge will do pretty well to simulate chipping. But the beauty of the silver coat is that when you bump into something, or if you chip the black paint by accident, the pack will weather itself! That’s what I really like. I used this method with great success on my pulse rifle, except back then I used primer and regular silver paint, which was kind of a bitch. Fusion is giving really great results this time! 
Yeah, that fusion might be the game changer! I think I tried this method on a gun once too and had the very same issue of normal wear and tear chipping the black AS WELL as the silver. UGH!
Anxiously awaiting your progress.
Outstanding! Love that sheen on the black. Looks very realistic.
It helps a lot! I think I may have made up my mind (or seriously narrowed down) on my painting options. I really love how your bumper and ion arm turned out. Looking forward to seeing your pack painted with the same finish.
Hey Filandrius,
What type Dremal bit worked best to thin out your lighting holes. Or a mini-saw blade?
I really want to thin mine, before the lenes go on.
Great work you’ve done on the Pack!
~Steve
Thanks for the nice words guys! I do love that metallic black finish, I litterally swear by that paint. I use it on everything except on my cat. OK, that’s a slight exageration.
AS for the Dremel bits, first I used this:

Dremel sanding bands. It exploded on me after about 3 seconds of sanding. NOT made to sand fiberglass.
After that dubious attempt I used this:

Dremel grinding stones. Much slower, but much, MUCH tougher and a lot more precise.
It’s a lot of work, I won’t lie to you. But it can be done! Oh, and be sure to wear a mask and keep that shop vac running.
Major update! Having secured a GB1 ribbon cable for my build, I 've now decided to make a GB1 pack! The problem is that I had a GB2 in mind, so I’ll have to replace a few parts. The Spectra strip, obviously (good riddance! Couldn’t stand that brown piece of ■■■■) Colin is going to send me a Sage Silicohm 50 to replace the Dale RH-50, and I’ve repainted my resin crank knob a nice shade of light grey, which I had at home (Krylon Pewter Grey)
The real problem was that I’d completed my ion arm with all the greeblies. I had a GB2 ion arm! Well I’m in the middle of this right now. I’ve already modified my GB2 ion arm cap to accommodate a Clippard elbow, thus turning it into a GB1. I’ve drilled and tapped the hole, and it was a real chore, believe you me… Especially since I don’t have access to a lot of tools (it was me and my power drill) But now it’s done!
Next step: filling the hole that I had drilled on top of my ion arm. The putty is drying right now, I’ll do the sanding and painting tomorrow. I’ll try to post pictures later!
Mini update: the putty is taking longer that I thought to dry on my ion arm, so no progress there. In the meantime, I kinda applied the black coat on my shell. Turns out that Krylon BBQ is tricky to apply evenly on a large surface (I had problems with the motherboard, and I thought that it was the primer. I was wrong) So the jury’s still out.
Plus, the metallic finish really exposes the flaws (as least as much as the silver paint) so there’s a lot of little things here and there that would be really hard to fix at this point. I mean, it’s not that bad, but my shell won’t be perfect by a long shot. Maybe I’m being difficult, I don’t know. I’ll try to post pictures later, my digital camera is acting up.
Sorry about your setback with the painting. How many coats of the Krylon BBQ did you apply?
Let’s say two big coats, applied in several little coats. One last night, one this morning. I came home from work tonight and it was dry. It wasn’t as bad as I remembered. Anyway, here it is:
■■■■■■■■■ shiny new shell! By the way, it’s really hard to take a picture of something that big and that black, especially with the flash. I have to take pictures outside in the sun.
The other side. Like I said, it ain’t that bad. It’s really a little less shinier when in person (again, flash pictures) and there’s some little flaws here and there, but… I think that flaws give it personality. I mean, just look at the reference pictures and the HD screen caps! A real proton pack is a hand-made, hastily put together mess. And that’s the charm!
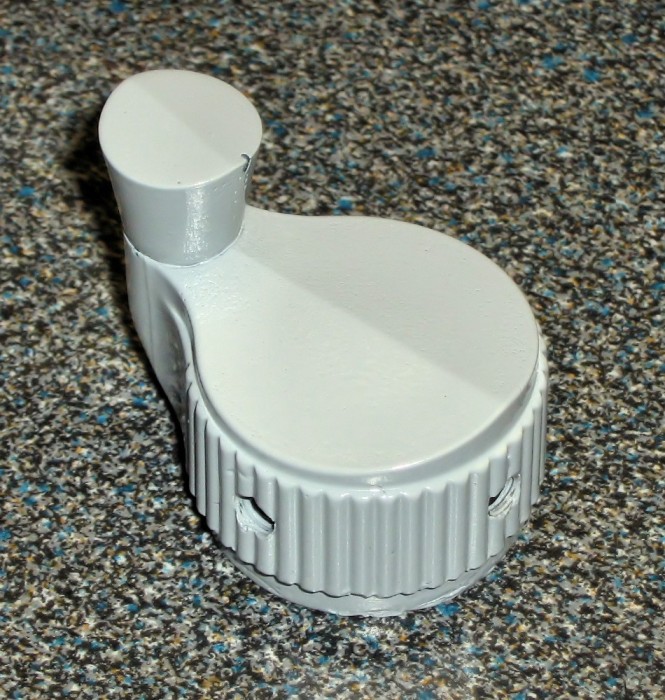
On another topic, here’s my repainted, gloss grey crank knob. High quality by Nick-a-tron. I even drilled and tapped the two holes and put set screws in them. No, it’s not 10 inches wide. 
My new ion arm cap, modified by yours truly. Didn’t do a bad job, methinks.
That’s all for now! I’m going to go slow on the assembly, don’t want to botch it. Next step: plastic weld the lenses (as soon as I can flip the shell without chipping the paint :P)
EDIT: I took some new pictures of my shell, this time without the flash. That’s because the other pictures, well, sucked. and didn’t show all that well how the shell looks in reality.
New update! Installed the acrylic lenses last night, and I had to take new pictures of my shell. It’s incredible that something so simple as a couple of colored lenses transform an acrylic shell in a Proton Pack. I love it!
Took these pictures this morning, without the flash. Really shows how my shell looks. Alkaline makes pretty things!
I love taking pictures of all angles, can you tell?
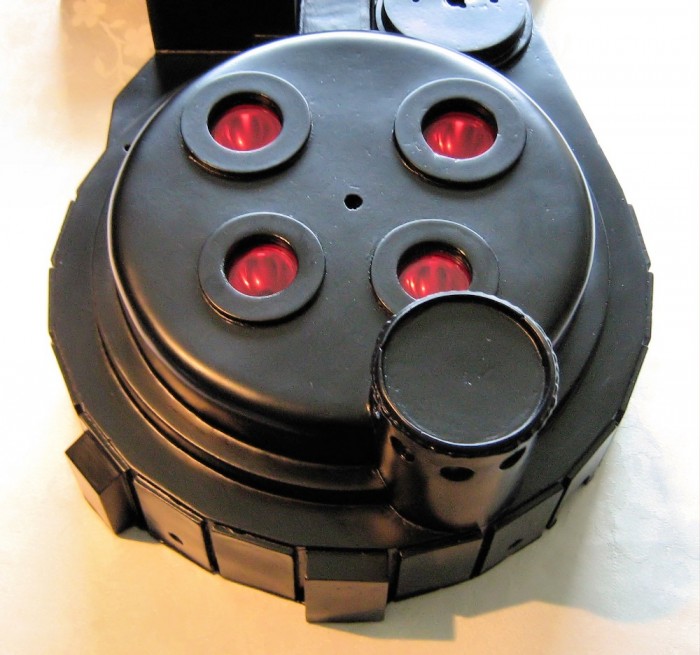
Easily the most recognizable part of a pack, the cyclotron (well that and the ribbon cable) I still can’t grasp how my shell was transformed by the lenses. And the reflectors I’ve put behind those really do the job. Yippee! 
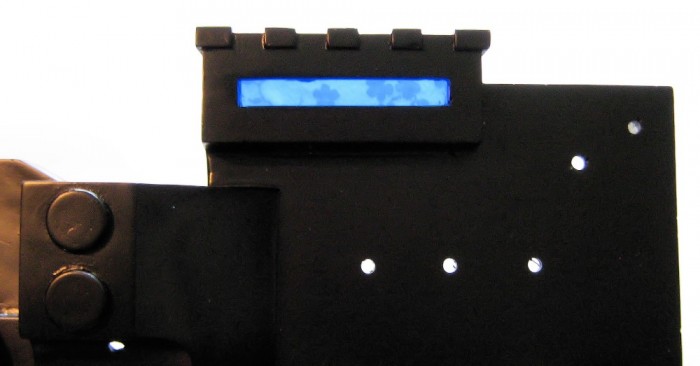
New power cell lightning, devised by me. Projects flowers. I think it will revolutionize proton pack building.
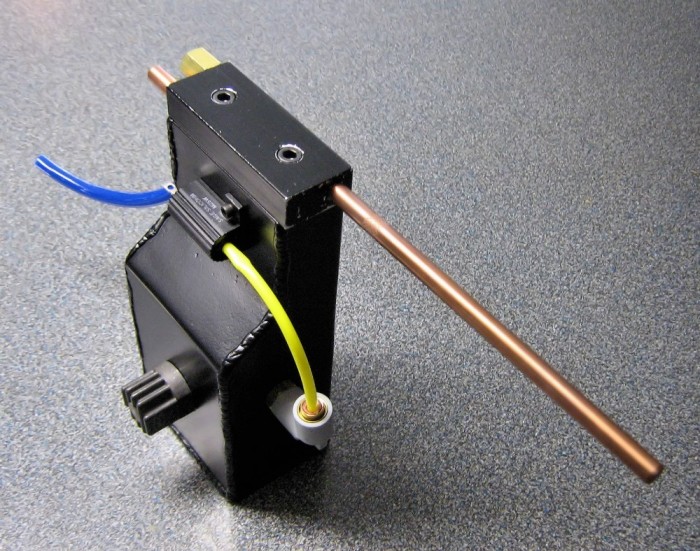
My new “completed” GB1 Ion Arm (well almost, I’m only waiting for my Sage Silicohm 50)
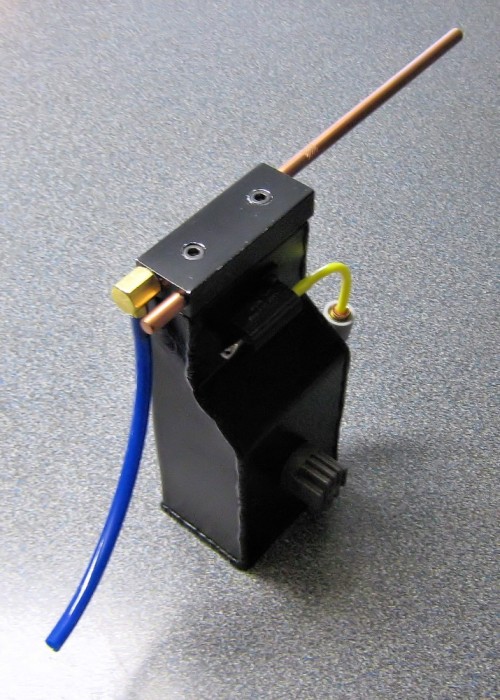
The top side. You can kinda see where I patched the hole under the blue tubing.
That’s all for now! Stay tuned!
Lookin’ good!
wow this is looking really really good! Can’t wait to see more and keep taking those photos!
Yeah great pics… Love seeing Alky’ builds.
I bookmark this thread in anticipation of my first build with an Alkaline shell.