Totally Sweet! I think I may make one…But I think Id want it to have some other function, perhaps storage, as well as being an awesome prop!
Okay, time for an update… this time, with VIDEO!!!
I used real light bulbs in my unit, but I modified them to use LED guts (thinking about power draw and heat generated… remember, my fixtures are plastic). I cut the bulbs’ bases off using a Dremel cutoff wheel. I wrapped the line to be cut with tape first, then cut slowly… the glass cut like butter (wear a mask and goggles).

Here’s a shot of the nearly finished unit open. You can see the white light emitting from the trap chamber (2 white LEDs), lighted buttons, working power meter, and lighted bulb up top.

Here’s another shot of my nearly finished unit with the door closed.

Now, here’s a video of the unit in “operation.” Enjoy.
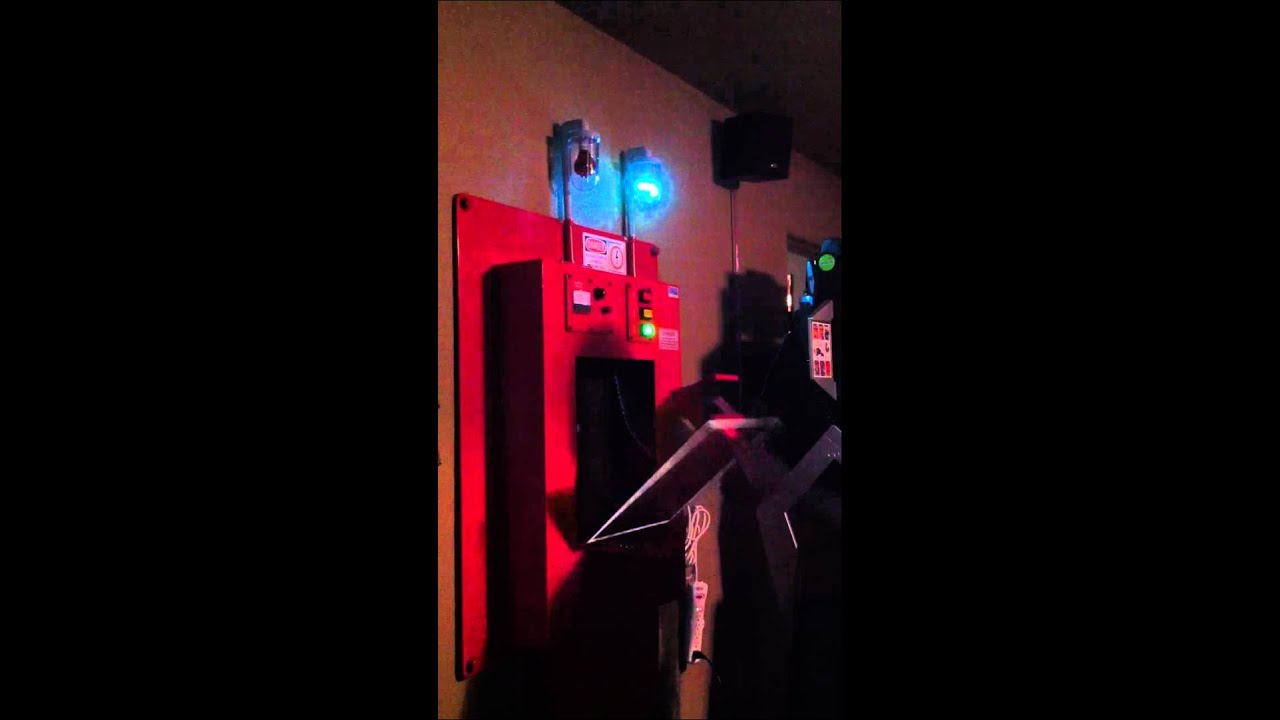
I really like how you modded the lights. As soon as Im done building my 1/6th scale one, I’m going 1:1!
OMG This is the most amazing thing ever! I am so jealous of your skills! Well done!! Thank you for posting all the pics
Okay, it’s been a while since I updated this thread with my progress.
Since my last update, I’ve added some trim to the ECU… and I’ve started building the “display wall” for us to use at conventions and events. The thing I’m most proud of is that the “display wall” will also double as a storage/transport crate! When I remove the “dump handle” from the ECU, the unit will attach to the inside of one wall panel, and the other panel will close around it protecting the ECU during transport and storage.
Here’s a shot showing some of the trim work added inside the door. I gutted an old SCSI cable for the small wires and steel braid. The black “boot” is also installed behind the chamber in this shot. I need to add a couple more decals (one to hide the inside of the handle pin, for sure.

I’m really proud of how well this trim work turned out. I used electrical fittings (thread by compression) and some split loom to make these. I just used a 3/4" drill bit and then threaded the fittings into the wood.

Here’s a shot of the wall (face down). It’s bolted together to make one big 8’ x 8’ wall. One half uses 2"x4" frame and the other half uses 2" x 6" frame… this gives me enough room to store the ECU inside as a crate without adding unnecessary weight to the assembly.

My wall halves are match marked, and drilled for 5/16" bolts.

Here’s a shot of the carriage bolts, washers, and wing nuts.

Here’s what the crate looks like closed. When painted, I’ll wrap this closed crate in a drop cloth and band it with ratchet straps.

Here’s the bracing system I worked out. It consists of 2 boards (one 5’ and one 8’), a hinge, and a platform where weight can be set. It’s held to the wall by two 5/16" carriage bolts (one top and one bottom). When about 30# of weight is set on this brace, the wall can be pushed forward from the back… and won’t tip over at all. I’m planning on covering/hiding the back of the wall with either a drop cloth or dark tarp attached with staples. This will hide the ugliness and provide our team with a place to store a few things.

You can see that I made sort of a socket for the brace to fit into at the top. The upper and lower pieces are attached to the wall frame with long screws, and the carriage bolt goes through all 3 boards for a secure fit.

I fit the ECU to the display wall using two 5/16" machine screws. It’s very secure.

I got the primary color applied to the wall. It took 3 coats to get rid of most of the wood grain… I only applied one coat where the ECU goes to help with splinters and such. I used a long nap roller to give the paint some texture. (Yes, that’s a 4" square hole cut in the wall for me to run the power cable from the ECU out of the back of the wall.)

My next step is to paint the cinder block “seams.” I bought 2 small cans of paint… one lighter and one darker. I’m going to use a dry brush technique to apply the lighter color first, then the darker color… to give the illusion of mortar seams. We’ll see if it works out.
This is awesome beyond words.
One more update…
I added 3 more decals to the inside of the chamber. Two “Danger High Voltage” and one “Ghost Trap.” Yes, the yellow one isn’t entirely accurate, but it’s on the toy… and it hides the pin/hinge for the door handle.

Horizontal lines painted. Drybrushed using one lighter color, then one darker color over.

Vertical masking. I made single tape runs every 8", then using a razor, I sliced alternating segments out, and used the sliced out segment to create the 2nd border for each mortar seam. This went pretty quickly.

Masking coming off.

Closeup of masking and finished mortar seams… I think this will do just fine.

The wall is all DONE! (except for the holes I need to drill to mount the ECU securely INSIDE it for traveling when the wall is in “crate mode.”

I do have a cool “Laser Area” decal I’m going to put on the wall, too… but I’m going to wait until it’s setup at Con, so it doesn’t get boogered up.
Optional “to-do” list left:
-
paint or mold lines on big red & green bulb domes
-
add conduit (2 lines)
-
add ribbon cable to top left corner
We’ll see if I get around to these final items before Phoenix Comicon. 
are these similar to the lights:
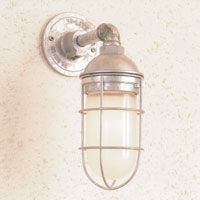
I found them here:
http://remodelista.com/products/atomic-topless-wire-guard-wall-light
Kind of close, but these aren’t accurate either… and mine only cost $3 each.  I do kind of need to either fashion the guards from wire, epoxy, or just paint them on… it needs to look more finished.
Really nice work.
I just have to say, this thing look awesome! Can’t wait for an update.
Okay, I’m finally done with this project (unless something strikes me that needs doing). I hope everyone has enjoyed following along as I constructed this fun prop. I’m available if anyone has any questions on building one of their own ECUs.
Here’s the update where I dressed up the light globes, added the ribbon cable, and added an ID tag to the finished unit. Oh, these are also the first photos showing the finished ECU on the finished display wall… all assembled as it will be shown at our events.
I took Apoxie Sculpt (gray) and made the “cages” for my Magic Bullet blender cup light globes. Yay!

I also used Apoxie Sculpt to make ends for my homemade ribbon cable (made from GB1 cable scraps). I molded them, let them cure, then I ran them through the bandsaw and sanded to make the ends square. They’re not perfect, but they were practically free, and fairly sturdy. The ends are held in place with Goop and 2 screws on each end.


Here’s the ID plate for my ECU. I felt that this made the unit look more finished, as any industrial equipment is typically tagged.

Here’s a shot of the finished unit on the display wall.

Finished shot of the unit, red light on, door open.

Finished shot of the unit, green light on, door closed.

This week, I will be packing the ECU for its journey to Phoenix Comicon… PhxCon is in just ten short days… it kicks off next Thursday. We hope to see many of you there!
Really nice work.
Well, I finally had some time to take measurements of the completed ECU to share with the class.
[](http://www.gbfans.com/images/pb/coryalex/Ecto Containment Unit_?action=view¤t=ECU_drawings_by_coryalex_Page_1.jpg)[](http://www.gbfans.com/images/pb/coryalex/Ecto Containment Unit_?action=view¤t=ECU_drawings_by_coryalex_Page_2.jpg)[](http://www.gbfans.com/images/pb/coryalex/Ecto Containment Unit_?action=view¤t=ECU_drawings_by_coryalex_Page_3.jpg)
I know you’ll find some dimensions are missing, as I did these rather quickly. But remember, I built mine based on best-estimates (my scale for everything was derived by using the size of a standard cinder block as a starting point).
I hope the progress photos and dimensions will help any ambitious builder with creating an ECU of his or her own.
I also have the dimension sheets available in PDF format, if a mod wants to post them somewhere more permanent.
awesome. very nice build.
This just looks fantastic. Wish we had a place to put one.
WOW! Sick Awesome stuff!
AMAIZING! Great woooork!!!
WOW!!! Thia is so freakin awesome.
That is some very impressive work sir! I especially like the door handle made from a luggage handle. Also the wall/travel case is very well done.