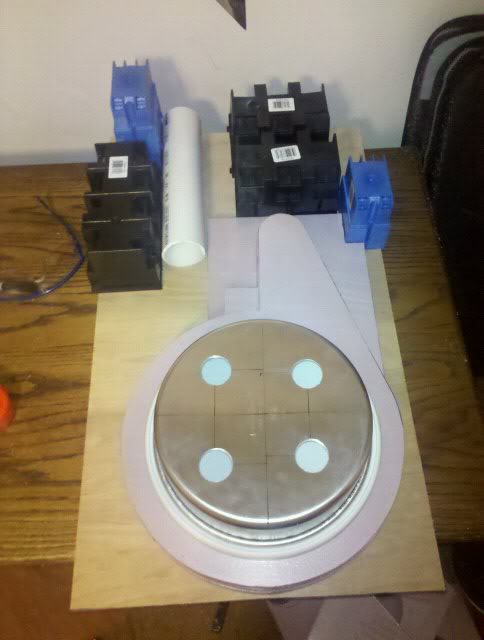
Hello all. Joined the forums a few days ago, been a long time lurker though. A friend of mine and I have finally decided to get off our butts and build our first proton packs. Kind of cutting it close this close to Halloween. My friend met Gareee at Dragoncon and talking to him and seeing his pack gave us the motivation to get started. We started mocking a pack together this pack weekend. I’ve been going mostly by what Gareee did. We’re using the electrical boxes and the insulation foam. There are still a few questions popping up here and there but hopefully we can find the help we need here. Gareee has already been a huge help answering some of the questions we had about the build.
We pretty much have everything we need at this point. The only thing we’re really having trouble finding is a solid Cyclotron light solution. I’ve seen a lot of suggestions on here over the past couple of days, so I should be able to have something by the time we start cutting foam.
Right now I’ve spent the past day measuring and recutting stencils. Right now I just need the booster base measured and cut then I should be able to start cutting and playing with the foam. Hopefully I’ll have the foam cut by the weekend. But anyway, here’s a picture of a mock we need last night. Any suggestions or comments are always appreciated.
Accept the fact that you are going to make a lof of mistakes and learn from it. First builds always seem the hardest but I assure you it gets easier.
Use the search feature on this site. There is SO much great info that has been shared here starting from the most basic budget ideas to advanced building techniques.
Ask questions (after you have used the search function). This place is filled with some great builders that could help you out in a bind.
Take you time. Rushing a build will show in the final results.
We’re definitely having fun with it. We can’t help but work on them with huge dumb grins on our faces.
I’m not rushing it by any means, but I am spending tons of time on it. Definitely spent close to a couple of hours just measuring the stencil for the bottom layer of the synch generator. My schedule for the past few days has been: go to work, come home, Build, sleep, repeat. I’ve definitely looked over the site a lot. I’ve definitely looked over a ton of the builds on here though. Hopefully we’ll be able to work on a more accurate build near the first of the year.
We’ve done other projects before, we just kept procrastinating with the packs. The last big thing we did was the Mini-gun from Team Fortress 2. So hopefully we’ll be just as pleased with the packs.
Nice to see someone walking in my own footsteps I left two years ago here. And two years from now, someone will be walking in your build footsteps as well!
Enjoy the ride, because once they are done, you’ll miss working on them. (Except when you are doing upgrades or repairs.)
Yeah thanks again for the inspiration Gareee. Seeing yours and your wife’s packs at DragonCon was just the thing I needed to get the project started. And I can promise we will definitely enjoy the process, its been a blast so far.
Cut out the Synch gen a few minutes ago and put all the layers together. Went ahead with this so I could get an accurate measurement and stencil for the layers of foam for the booster mount, eda and attenuator. Very happy with it so far.
And yes I know the Cyclotron is turned wrong my bad.
Having not posted on here atall but being a member on here for sometime now it has prompted me to ask you my fellow ghostbusters fans if you can help me by providing me with clear instructions on building my own proton pack.
I’m a very keen ghostbuster but I need as much info to achieve as close to a 100% looking proton pack so any help and advice is welcome, thanks.
Nice attitude, way to welcome a new poster to the forum… :sigh:
Undrtkrbob, welcome to the forum, though you say you’re striving for accuracy, obviously using the project boxes is going to affect that somewhat. I’ve found that with these (and I’m hoping I don’t bring on the wrath of Gareee by saying this) “Junk packs”, packs made from found parts, is that so long as you have parts similar and in roughly the same location, cyclotron at the bottom with red lights, powercell top left with blue, gear box top central etc, you’ll find that joe public really don’t know the difference. You’re after plans to make your pack, however using found parts can make this tricky. Norm’s plans may help you find pieces you need to build seeing as it is a junk pack you’re making, you’ll find those in the reference section, click “equipment” at the top of the page. I also recommend reading Gareee’s build as he started off building with very similar materials to what you have. If you’re after real screen accurate parts, again in the equipment section, you’ll find under each piece of equipment a list of all the parts used to make them (or most of them). Some replicas are offered in the shop and some you’ll need to trawl ebay and google for. Hope that helps, and good luck
Fuck that, man. He’s been here since '02 and STILL doesn’t know how to look in the Props or Plans section? People who are ACTUALLY new here, it’s understandable.
I probably should have used my words better. Maybe not so much accuracy, but I want it to be the best it can be with what we have available to us, in both time, money and parts. I’ve looked over all the pics in the equipment section, read every post in gareee’s thread as well as several other build threads. As well as downloaded, printed off and read over all of Norm’s plans. I’ve read where to get screen accurate parts, as well as molds, wires, knobs etc. For now this is what we wanted to do given the time. After the first of the year we’ll start working on different packs. This definitely isn’t our first rodeo, just our first rodeo with Proton Packs.
And thanks for the welcome Everyone has been a huge help so far.
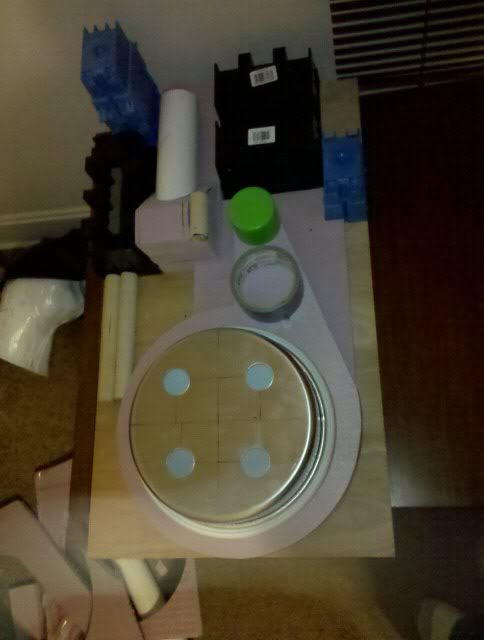
Little bit of an update tonight. Got the booster fitted and a few of the dowels cut. Also got the led necklaces working for the power cell light. Thanks to Gareee for the tips there. One thing I had a question about is the booster frame. Norm’s plan mentioned using the foot wiper thing from restaurants and what not. Where do you find those things? I’ll end up making one tomorrow if I need to. Just can’t seem to find any posts mentioning where to find it.
Pic of tonights work. The paint cap and duct tape are just place holders.
I used paint caps on two previous packs. I just trimmed the outer wall, leaving the inner section for fitting into a hole on the spacer. If you use one from flat black paint, you don’t even need to paint it!
No worries at ALL about “junk pack” build comments. I’ve always been a scavenger at heart, and recycling is good! I keep considering making more accurate packs, but when we go to events, we get so many compliments that we forget accuracy. I could tell you how many times, inaccurate as our packs are, that I’ve hear “These are the best packs we’ve seen at the con yet!” from non ghostheads. We’ve got some extra bling on our gear, and I think the colrs and shiny lights dazzles people.. LOL!
I made our booster frames from wood strips, and then slices of craft foam layers in steps on the sides.. that came out great I thought.
The best clippard mount disc I could find was the lid from the large $4 jars of garlic walmart carries.. they even havew some ribbing detail on the side.
I found a smaller similar smaller diameter jar lid for the top one. Mount a wood block inside them, so you can then easily glue that to the sync generator.
totally man, i saw 2002 as his join date which is why i originally responded, and there is no way someone thats been here for 8 years, let alone ON THE INTERNET for 8 years, and NEVER CROSSED PATHS WITH PROTON PACK PLANS. jesus, my first day on the internet ever in 1998 i typed “proton pack” in aol netfind, and i got norm’s first plans. gavin obviously is not a very keen ghostbuster as he leads himself to believe.
dear bob wobbaz
maybe bob it would benefit you to read a thread and the information within before you think to yourself “i wonder what hijinks that curmudgeon protoncharger is up to again! i better yell at him!” i suggest you get yourself checked like that other guy thats been here for so long and doesn know how to work the blatant obvious machine.
enough thread jacking for me too, because its just going to be dumb people bickering with me. im looking at you bob and gavin.
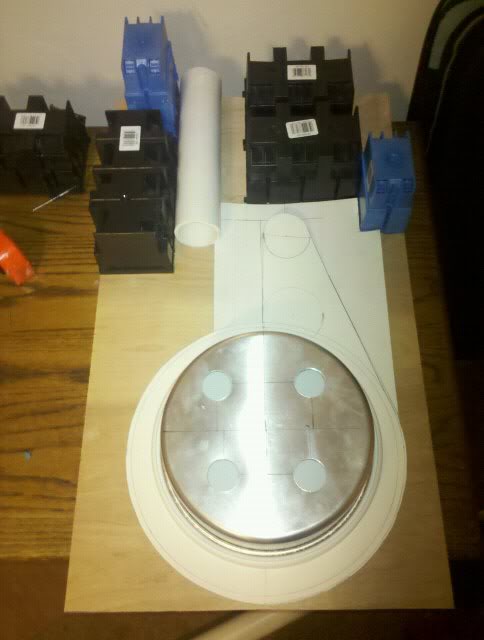


 my bad.