The resin handle post on the nick-a-tron kit needs to be replaced in order to fit the release mechanism for the cartridge, as I felt it would be too weak to support the weight of the trap with the metal tracks fitted if I cut a slot in it. I wanted an aluminium one but money is a bit tight so I thought i’d try to make my own!
I started with a piece of aluminium box section and copied the curve from the resin handle post onto it, then chain-drilled the shape out.
Then I ground it out smooth with a dremel and it turned out quite well
My plan was to epoxy the resin handle in place and simply drill through it to put the release catch in…
but I soon realised that it would be difficult to drill out the resin for the return spring which would be needed to operate the catch. I decided to make an aluminium one to replace it. As I can’t weld I was going to epoxy it in place but I was worried about the strength of the handle with the heavy weight of the trap. My brother came to the rescue with a bright idea- as neither of us can weld he suggested an alloy repair product which can “welded” with only a propane torch.
Here’s the result:
One side is blobbier than the other but I quite like it! It needs a tidy up with a file in this pic.
And here it is with the spring i’ve sourced to operate the lever
Considering I have no metalwork experience and only limited tools i’m pleased with the end result! I just have to finalize my tracks in order to work out positioning for the release catch now.
Thanks for the vote of confidence Nick, I’m kind of making it up as I go along! The kit itself is great it’s given me a really good base to start from. Once I received it I knew it was worth trying to add all the hero features to it as I think the kit warrants it!
P.S thanks again for the front knobs I really appreciate it as real ones don’t seem to be available. (The free Ghostbusters sweets with my pedal base was a nice touch too! )
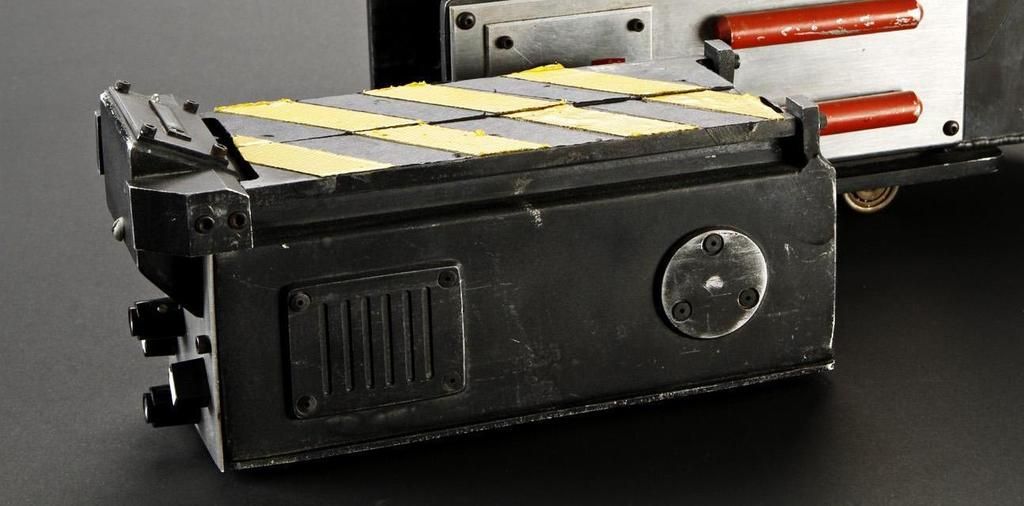
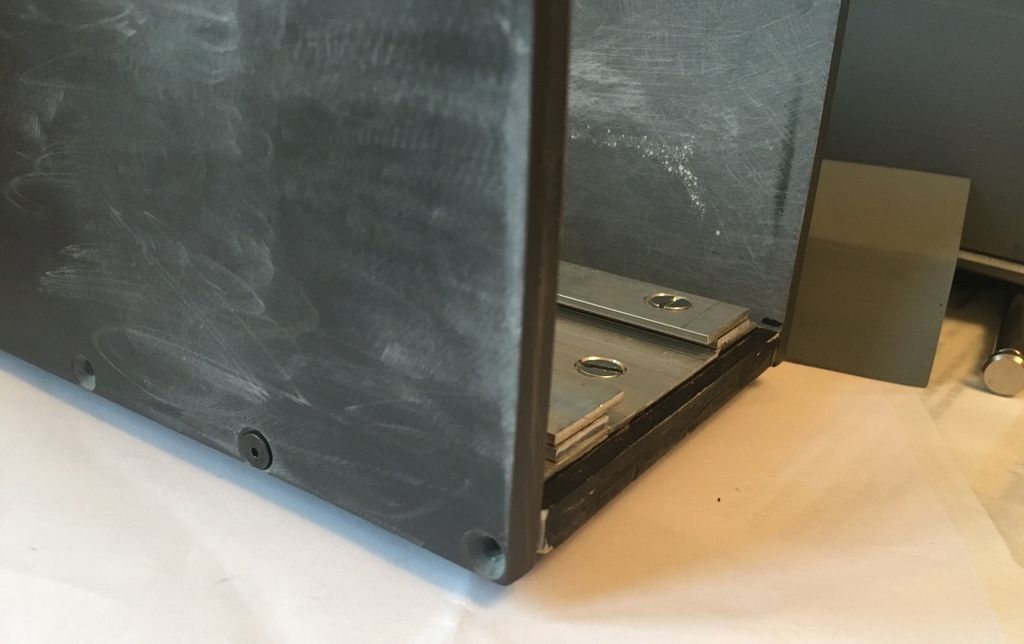
Progress has been a bit slow lately but I’ve just done a bit of drastic chopping which I thought I would share! As I’ve mentioned the plan is to install electronics in the trap which I’ve kind of been dreading as access to the trap cartridge interior is a bit tight. It’d be like trying to install servos and boards through a letterbox! I took a look at the hero trap again and you can see the trap cartridge has a separate base:
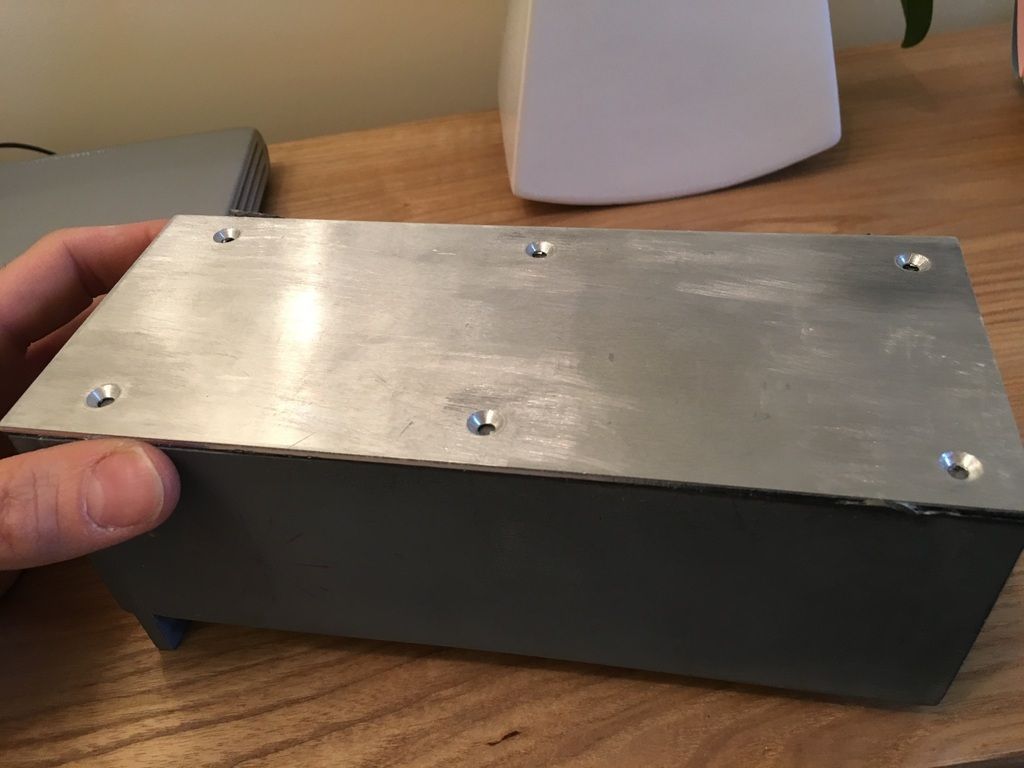
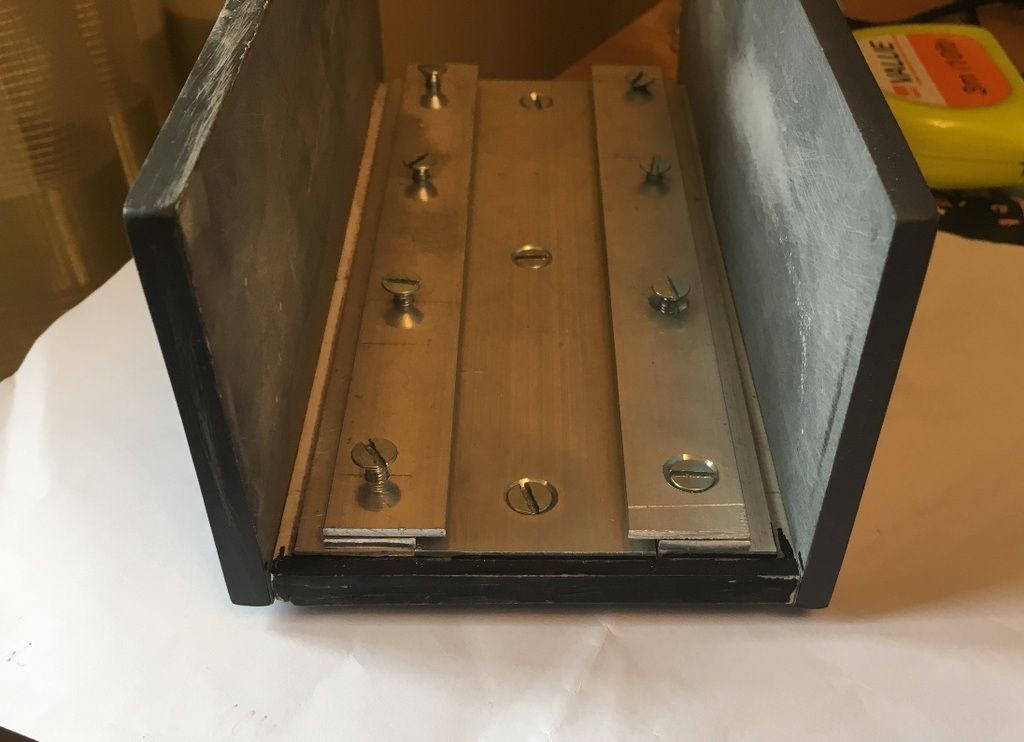
This got me thinking.. If I do a similar thing on my build I can use the base as a “motherboard” to install my hyperdyne boards, servos and smoke with plenty of access allowing neater installation of cabling etc. Then I can simply install the cartridge outer over the top of the completed assembly. That’s the plan anyway! So it’s chopping time again which left me with this:
Yeah I know the screws probably aren’t accurate, but we’ve never seen the bottom of the screen used cartridge (which is probably welded anyway) and it helps to have the accurate look of a separate base, not to mention saving me scraped knuckles during the electronics phase later!
I’ll be revisiting the tracks next. I’m still not sure whether to shift them all forward a little or not. I’ve coloured the trap base in with black pen for better clarity- what do you guys think based on the pics below? Ok as is or would it look better moved forward?
Thanks guys I appreciate the input That’s two votes for leaving the tracks as-is then.
Thanks for the kind comparison to nosliits trap I’ve gazed at his build thread in awe while researching the ghost trap! I’m not sure I’m in quite the same league as him, mines kind of a semi-hero to his full metal hero!
The new base is now fitted after a fashion but needs some tweaking as the cartridge isn’t quite square. Anyone tried heating resin to bend it slightly?! The tracks are now pretty much finished and I managed to improve the badly countersunk hole using a new countersink bit. I didn’t get any pics today as there’s not much different to show.
Next up I’m going to be fabricating the release lever and catch, mounting the handle to the back wall, as well as the sprung pins needed to eject the cartridge. After that I’m going to paint and assemble the main trap body and fit all the cosmetic detail parts (still need to get some side rods) before moving on to the wiring etc.
I took your advice and went with sanding and gentle persuasion! I have the cartridge running in the tracks now, added a shim to the tracks to improve clearance and make it a smoother action. Gave tracks a polish to make them slick too and made sure all the screws we’re countersunk properly- it’s surprising how deep you have to sink them to stop them catching the tracks at all!
Just go to round those base corners off and that’s the base done until i’m ready for electronics. I’ve made and fitted the retaining catch to the cartridge. It’s not 100% accurate ( it isn’t a bent piece of metal plate) but I had an off cut lying around that I thought I’d use so it’s recycling really
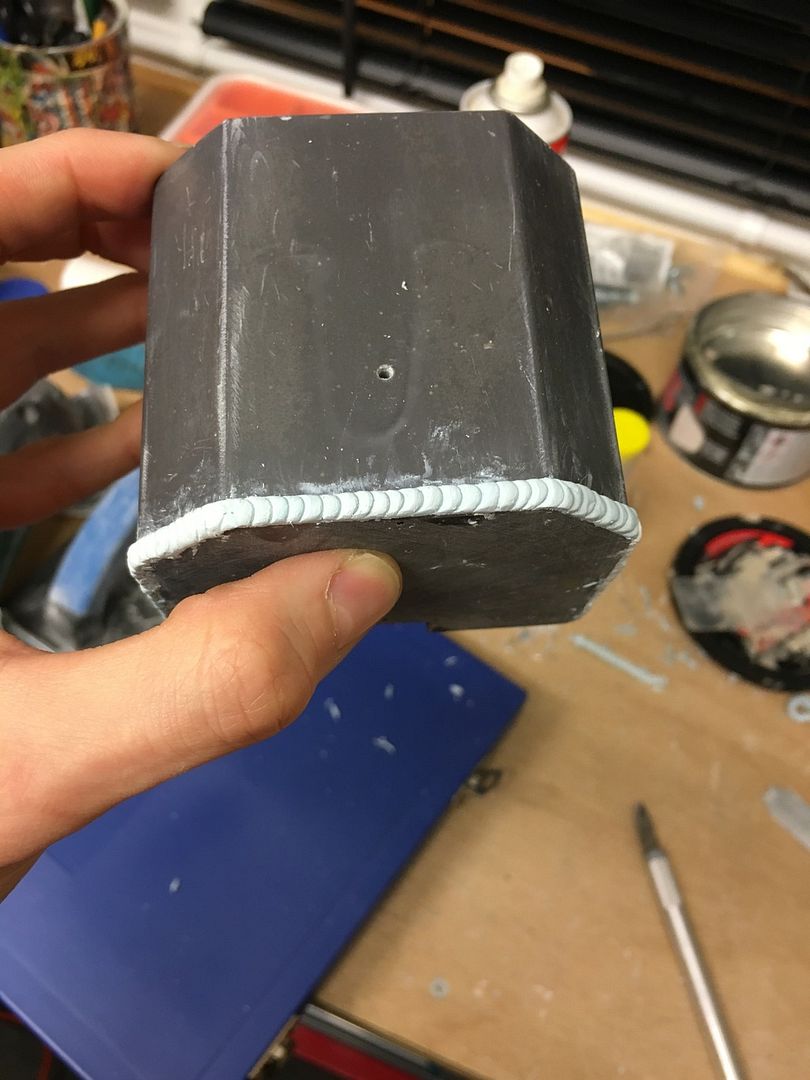
Just to give me a break from all this metal work I had a go at doing fake welds on the battery box. Not fantastic, but messy welding is screen accurate after all. May redo/remove this if it looks rubbish when painted later.
Well, what with Christmas and all the bad weather in the UK this year so far i’m sorry to say I haven’t made it to the shed much to work on the trap! Apologies! I’ve not been completely idle however- I decided to re-do the epoxy weld lines on the battery box after all:
I’ve done it a little lower profile which I hope you’ll agree looks more realistic and less ‘pie crust’. Thanks to Santa i’m also getting set up to paint in the confines of my small shed with this new paint booth with extractor fan.
During my down time I sourced the rest of the parts I needed to start work on a must have trap accessory. Sorry absolutely no prizes for those who guess correctly what it is!
It’s a mixture of correct found items, replica parts and a few “close enoughs”. Looking forward to starting this bit!
This is coming along beautifully damster! I look forward to each new post to see how it turns out next!
One a side note, have you found anywhere to do the metal plating? I can get the side plates easily, but I’ve struggled to find cut plates for the battery box, indicator and front plate. I could obviously cut it to size myself, but I’d rather have the better finish of a laser cut panel, for example.




 That’s two votes for leaving the tracks as-is then.