Nice to know you’re thinking of my humble build Nick  Thanks for the kind words!
It’s got a fair way left to go yet so no worries on that score!
Nice to know you’re thinking of my humble build Nick Thanks for the kind words!
It’s got a fair way left to go yet so no worries on that score!
Had another bit of a setback…

Dropped the back plate on a concrete paving slab with the handle attached. Aluminum 1, resin 0. Tried to rebuild it with epoxy resin and milliput but it’s just not strong enough. Working on a fix now. Aluminium may be added! ( just a side note - you can see here I’ve reshaped the trap side plates to more closely resemble the propbay trap, and also the filled holes where I’ve shifted everything back)


Ouch! Thats painful to see but now you can make it even stronger!
I know  it was a moment of slow motion terror as it fell to the floor! I uttered a stream of expletives I can tell you! I think I’ve got a fixed worked out though. I’m going to braze it to the aluminium piece I’ve cut and attach this to the back plate with screws hidden by the battery box. I’ll cut an access hole underneath the handle for the release catch to pass through. Works in theory!
You’re welcome [emoji4] Well worth the effort of re-doing that part, no doubt about it. Handy that it has made the trap lighter in the process!
The vents are a great find, they are a pretty good representation nonetheless [emoji4][emoji106]
I’m surprised that the Spongeface bargraph isn’t more widely used, it is perfect and I’ll definitely be getting one to use for my project as well.
I’m exactly the same when it comes to detail, I think it adds to the satisfaction of the build plus having the real parts just adds quality as well as being obviously more authentic. It’s great how you are taking such effort, my build will be slow too, I’m still in need of the kit itself plus the odd metal parts; not to mention all the tools I need to get! A great build and very helpful to see each stage covered in such detail. Keep it up! [emoji4][emoji106]
Damn! Just read this part…glad you have a solution in hand. Another area to modify! Hope it works
Well at least it gives me the opportunity to have a fully welded handle! Yup, still trying to look on the bright side here 
The vents just need filling in either end to make them six slot, and I need to file a bevel all the way around. Cost me £10 which is a lot for a small part but I did have to buy 2.5 metres of the stuff!
You’re right about using real parts, they instantly improve the look of a build. Thanks to your research and generosity, my trap will have a genuine side knob and skirt Still looking for the rest but after seeing Bromies’ GB1 trap I know the resin ones can be made to look very close to the real deal.
I’m glad you’re finding my updates to be helpful! I’ve made a conscious effort recently to try and show how I’m doing each step as it isn’t always obvious how to go about things- certainly wasn’t to me! I did take a lot more pictures during the early stages, mainly for my reference, but I don’t mind posting them if there is anything specific people would like to see more of.
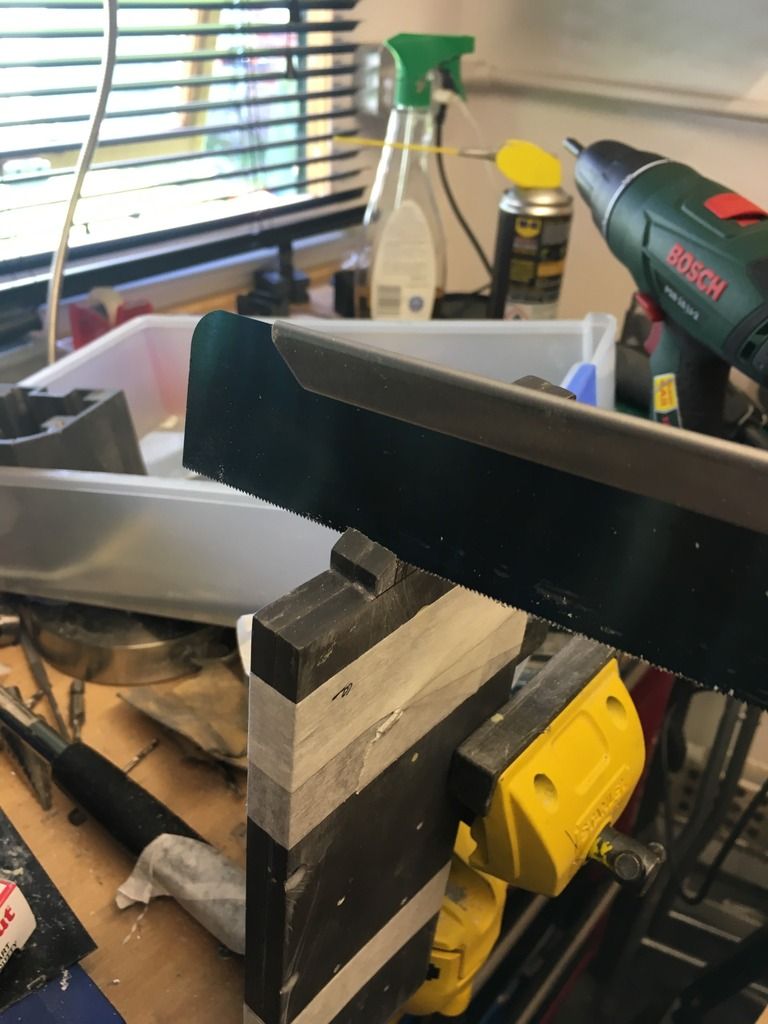
Oh and you might need to add a Tamiya razor saw to that tool list. It’s worth it’s weight in gold when it comes to cutting the trap sides neatly! Don’t think I posted pics of that actually. Here you go. Actually chopped a little bit more out than this in the end but it pays to be cautious on your first cut.
Lol. The fully welded handle is an option I’d like to have as well! £10 is a fair amount but the results will be worth it - 2.5 metres? Means you have some going spare  I’ll buy a piece off you lol!
Re. the skirt/side knob - it’s a pleasure and really glad it helped out with your build Real parts just make it look like the real deal, yeah - totally worth it. Especially when so much work has gone into it. The remaining tricky parts seem to be the side rods and doors; still need to see if aluminium ones can be sought. Your updates are a massive help and are providing a lot of areas for me to consider when I get to mine. The additional pics of the build stages may well come in handy - if I get stuck I’ll ask, thanks!
And many thanks for the info on the Tamiya saw - added to the shopping list! Very helpful.
I’m not sure the welded handle is all that great tbh! I’ve been struggling with it all day and I’ve had trouble with the joints not holding. Worked out that it was due to the blowtorch running low on gas and as a result not getting hot enough!
I’ve been trying to source alloy doors for a little while now from momeraths24, been sending messages back and forth but I think he’s just too busy to do them as he’s not getting back to me. The main reason for getting alloy doors is to get the accurate hollow backs really. Whilst I’d much prefer metal ones I took a punt on trying to adapt CountSpatulas 3D printed ones to fit (I need slightly longer than the originals anyway due to the position I’ve fitted the ears ). Whilst I think they can be adapted to fit ok, I was disappointed to find that they are inaccurate, with the join off centre when the doors are closed.
It’s a shame as it would’ve been a quick and cheap alternative!
The same with the side rods, can’t find anyone doing them so I thought I’d try the 3D print ones. Unfortunately they’re a fair bit shorter than Nicks originals. Not sure if it makes much difference as I’ve yet to “offer them up” as it were.
I’ve got plenty of soffit strip so I should have some spare. I have one more thing to make using it and then I’ll send some over! I’ll probably trim it down a bit first as its not flat until you cut off the extra box section mouldings that are not needed. If you like I can mark out the vents and bolt holes for you.
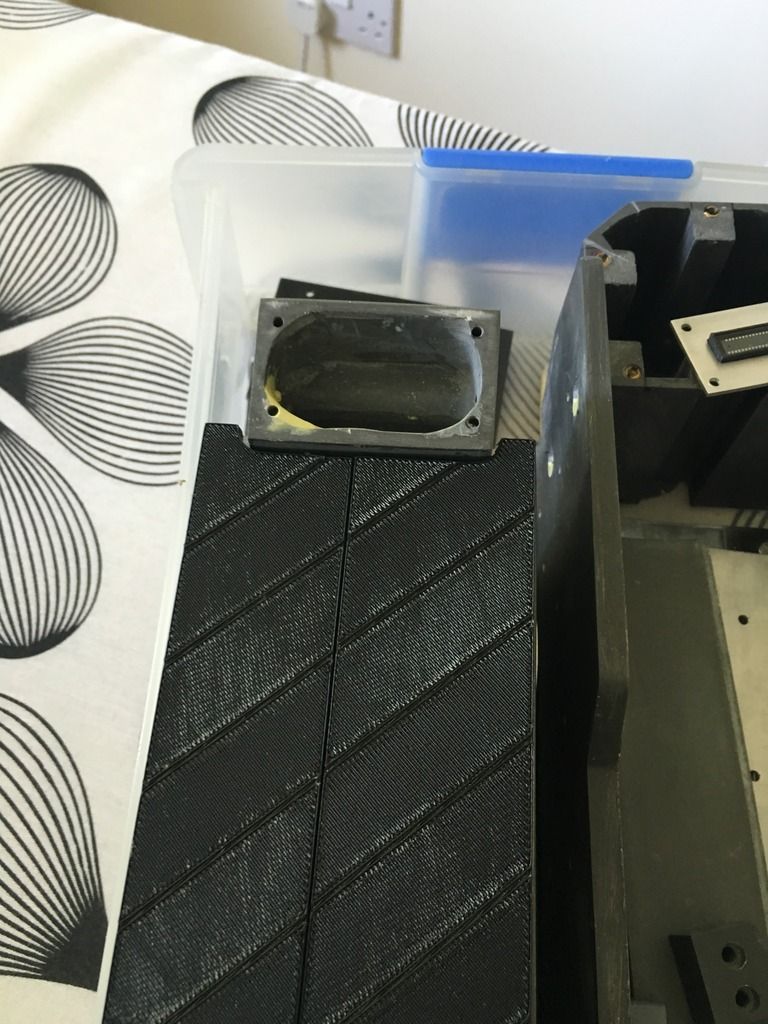
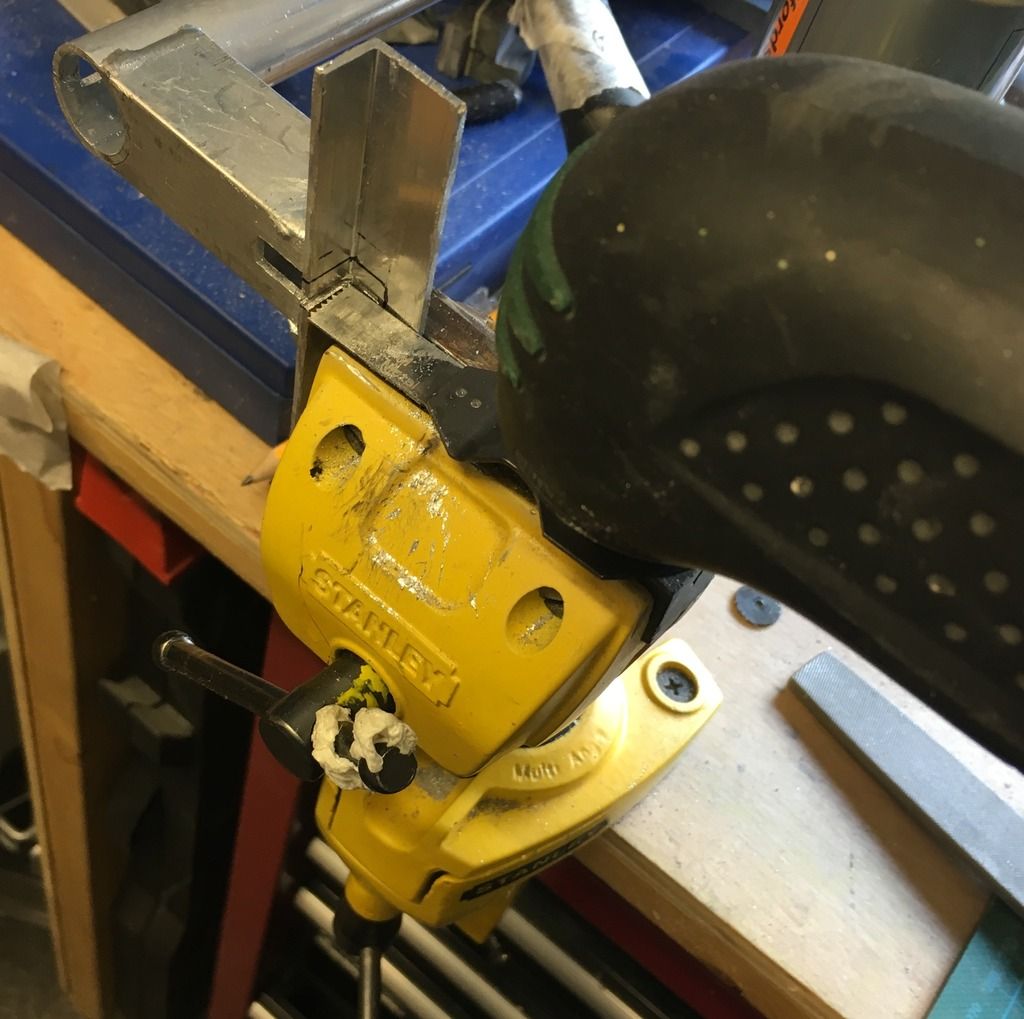
Ok so Here’s my repair progress so far:
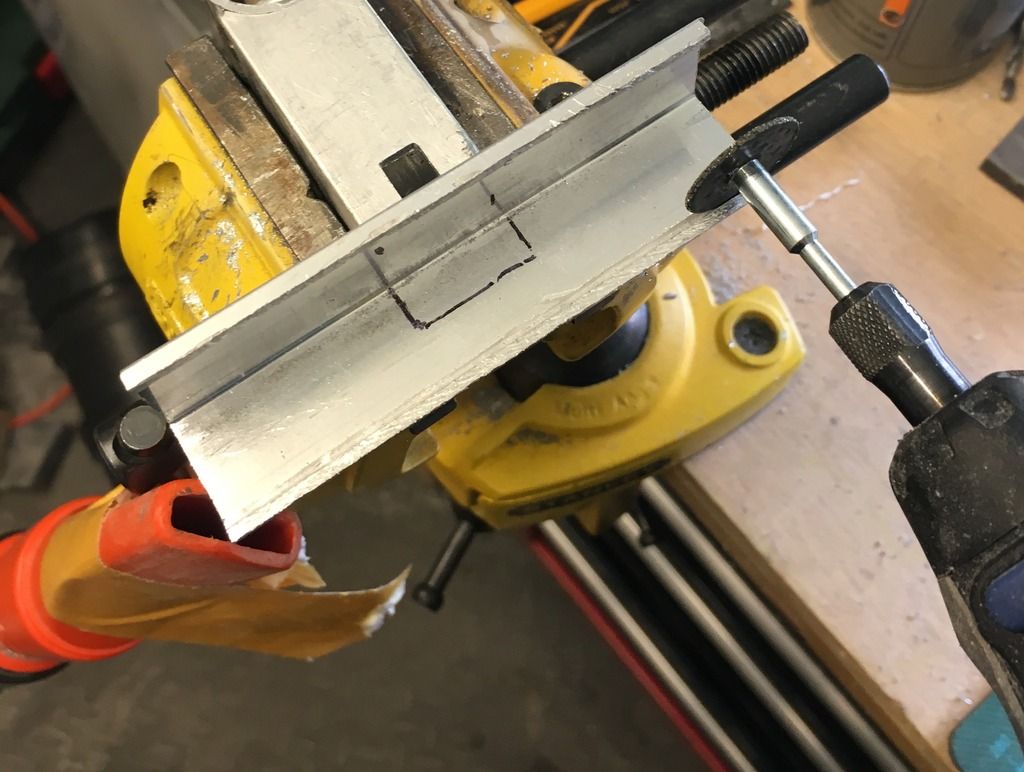
Trimmed repair piece down from a piece of square tube with fibreglass cutting disc (nearly worn out they’re usually bigger!)
Started cutout for release catch. Will extend and clean this up with jewellers files later
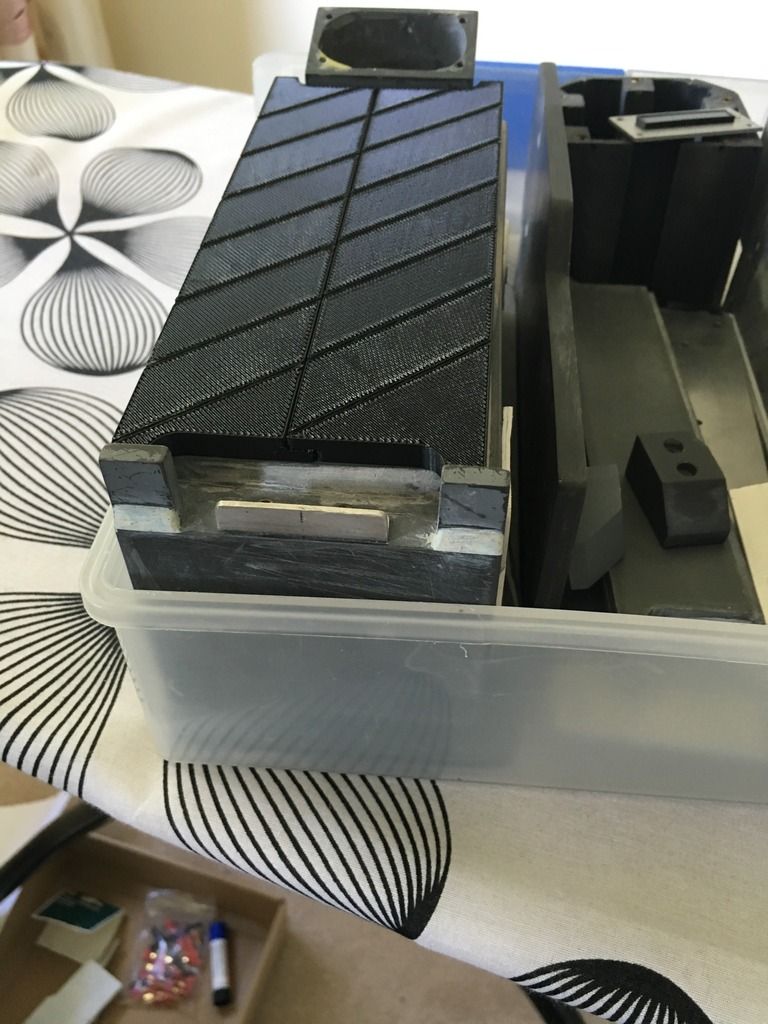
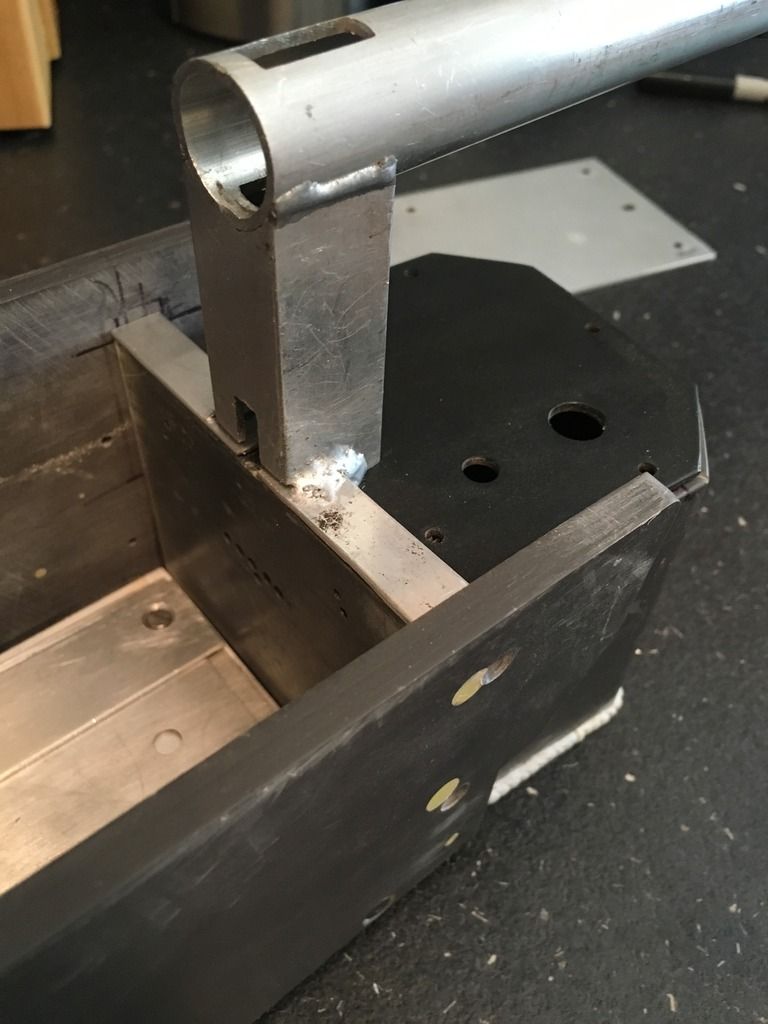
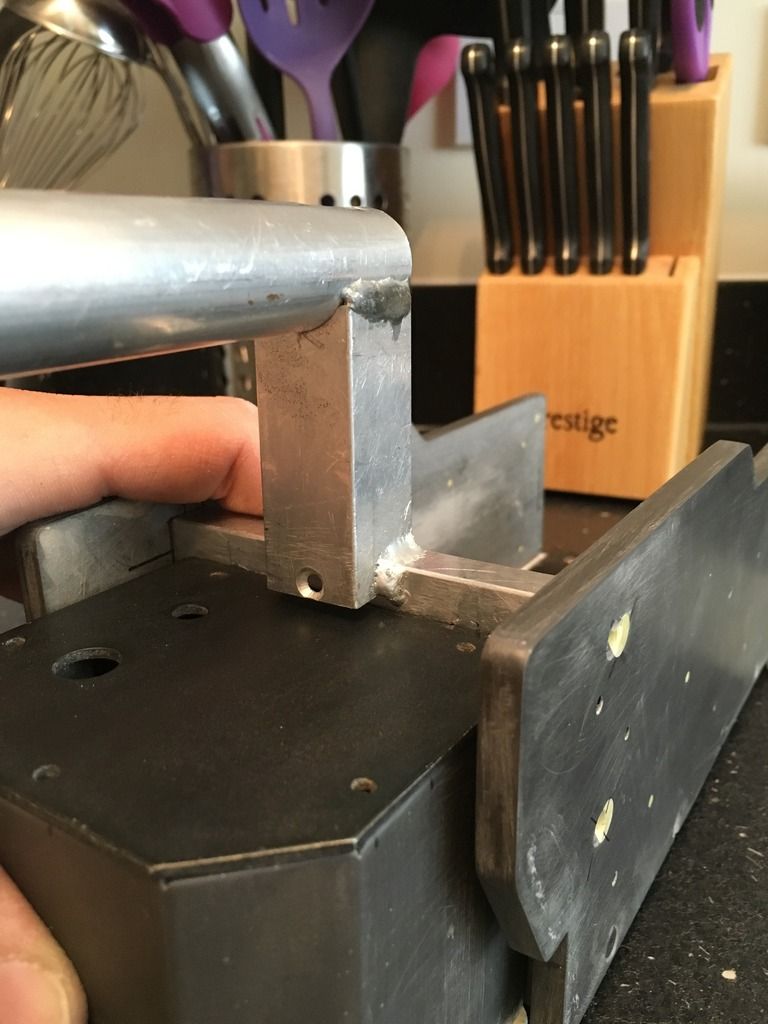
So here it is welded to the handle and bolted in place. I’m not sure what I think of it as it has added thickness to the back plate, which now doesn’t look right, and a join at the front to deal with. Am I being too fussy?
I’m also left with a redundant hole in the handle. I could attempt to fill this in with brazing rod, but I’m worried about heating this close to the handle welds, especially given the trouble I had doing them today. I could just use filler but that stops me using aluminum black as I’d planned.
Wow, the welding has really been a pain by the looks of it…but you appear to have done a good job in the end. I think a correct screw head placed in the redundant hole, then filled in to disguise it if you didn’t want it to show, may be another way? The join is a very tricky one - you’d need to make an extra bit to fill in that gap but attaching it to the alloy handle nice and flush may be very difficult, especially as welds are already in place…and then the join would have to be hidden somehow…raising the surface would be the easier solution if you can live with the resulting difference in height…although it would have to be a pretty thick battery box cover needed to do this from what I can see there…maybe other experienced builders can chime in as well!
The 3D doors are definitely no good with the off-centre join - shame - as for the side rods, I’ll be sticking to the resin kit for these parts if the alloy counterparts are not a possible option. I’ll do the same with the doors as well if all else fails. Momeraths24 is definitely fully booked at the moment, I checked out his thread earlier and saw how busy he has been of late. I’m having positive results with my aluminium plates however, as CPU64 is in the middle of producing these, with 45-degree beveled edges to boot! I should ask if he can run up some doors and rods for us as well perhaps?
Thanks so much for the soffit strip - marking out the vent and bolt holes would be very helpful indeed; just send me a PM when ready so that I can cover you for it
I’m feeling a lot better about the repair this morning. Sleeping on it sometimes helps the OCD! I showed it to my brother who loves GB but isn’t a member here (he’s’ a bit forum shy!), and he thought it looked fantastic! He loved the new welds, and he thought the extra thickness wouldn’t really show once finished.
I’m not sure what you mean here- I think we may be talking about a different join, the gap underneath the handle seems to be present on the hero so i’m not too worried about that.

I’ll have to fill in the cutout made for the release catch however. The join I was referring to is the one between the two materials:

I can fill it but it means paint must be used rather than alu black. I may try masking the edge and painting the front panel, with the metal parts still being blacked. As they are on different planes, it should make the difference in finish harder to spot.
Yeah it looks like i’ll be doing likewise for the moment as they will look the part when closed. The best way to get the side plates accurate bevel wise is to have them shear cut. My battery box lid and L/H side plates were both shear cut and it’s not a constant 45 degrees. It tends to be slightly more at either end and less in the middle i’ve noticed. From studying the reference pics zoomed in, i think the hero ones were shear cut AND filed to smooth them out; So that’s what I’ve tried to match. I’m deliberately going for the hand made look the hero has though, you may want yours a bit tidier!
It would be great if you could ask him about doing us a mini-run The door dimensions i’ve arrived at with the ears mounted GB1 style (further forward) are:

Nicks standard ones will be a bit rattly in there without spacers as his kit is normally built with the ears in a more GB2 position, mounted further back.
No problem at all. Us Brits have to stick together as it’s that much harder for us to pull these projects off on this side of the pond! lol
Lol yes I was referring to the gap which I’ve now learnt is the cut-out for the release catch (where the handle base sits above the battery box cover?) I didn’t realise what that was for and thought that was the gap you were talking about! I see what you mean now, thanks to your reference photo. These are very small details - I would never have realised! I could live with those minor differences however, but I know you are trying to achieve a very authentic replica…
I get ya. That sounds like a good idea - hopefully should work!
I believe my plates are being shear cut as well - but again, I was not aware of all these small details - but I am not really fussed over replicating every single detail myself; as with my pack build, I’m treating the trap as a 2016 production build of a 1984 design lol. But awesome stuff - you really are taking a lot of time and effort to get yours exact!
I will do - and thanks a lot for those measurements - a massive help! Do you know what the thickness of the metal should be also? I’ll forward the info you’ve given to CPU and see what he says
Thanks so much, and I agree, we do! It’s a very difficult hobby here in the UK actually, and at times you can feel quite isolated with it, when resources are so hard to come by to make it all work.
If they are shear cut they will look great as is really- and much better than the usual laser or water jet cut with hard, square edges. I think maybe I am being overly fussy now though. I think i’m going to stop nit-picking and get moving onto the fun stuff!
I think it should be 0.25", this is slightly thicker than Nick’s originals (which are about 0.23") but would give enough depth to allow for the pocket machining in the back, which is about 4-4.5mm deep. As the hero trap sides were made from 0.25" Alu I believe, it would make sense that the doors were too. Also I have one of my measurements wrong! I just double-checked and the length of the main part of the doors should be 169mm / 6.65" and NOT 167mm / 6.57"!
BUT… we now have another option in case we can’t get these made in metal. Countspatula has added new corrected 3D files to thingiverse, with the join in the right place I’m sure that with minor modification these can be made to fit our traps. I’m quite willing to be the guinea pig for this if the need arises lol!
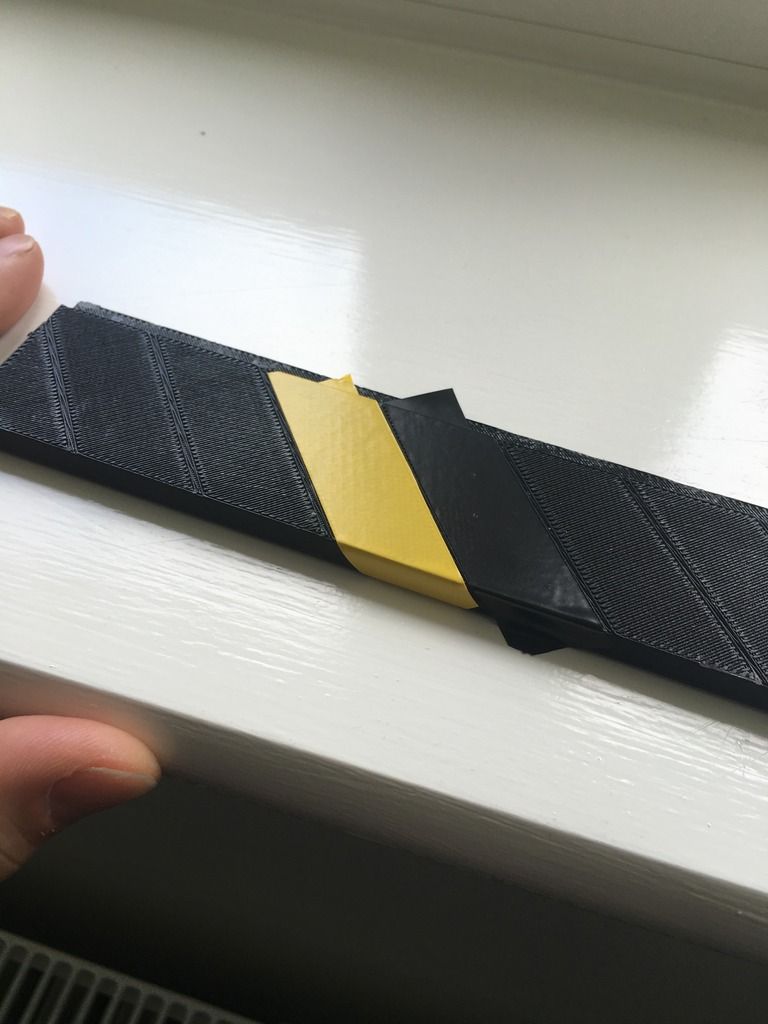
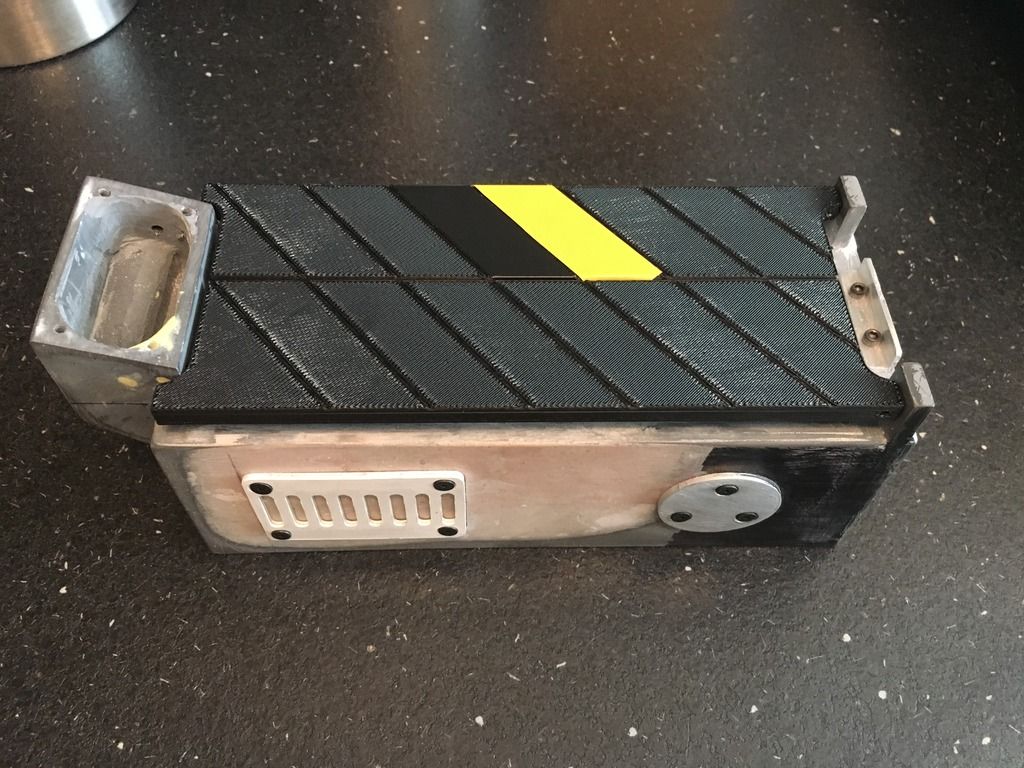
Plus there’s an unexpected benefit of using 3D doors- You get the textured tape effect the hero has!
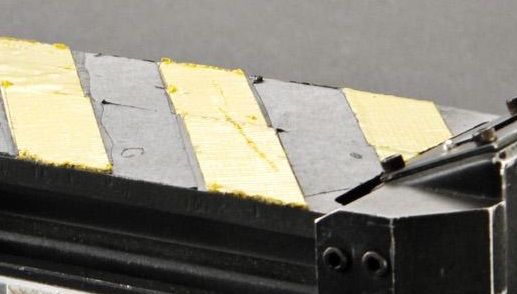
Yeah you’re not wrong. I dread the phrase “just picked it up in Home Depot” or similar! We just don’t seem to have the range of obscure stuff in our DIY chains here. Not to mention the old metric-imperial issues!
Hi! That’s cool regarding the shear cut method, it’ll be interesting to see the plates once finished. Lol this is the thing with all this - it can really make you mega OCD [emoji50] Detail after detail…
Thanks for those revised measurements: can you update the photo reference of the doors with the corrected info? As this would be extremely useful to send to CPU [emoji4][emoji106]
Regarding the 3D doors - excellent news. I’ll have to look into 3D printing and how to have that done! As that textured effect is pretty awesome - just the two bits of tape on it and already you can see the ‘magic’ lol. Great stuff!
Lol yeah, and obscure is the word for most of the original parts required. The film was made over 30 years ago, with most of the parts themselves having already been around since the 1960s-1970s, and are now pretty much obsolete, and rare. The measurements can be highly confusing as well!
Yes I can
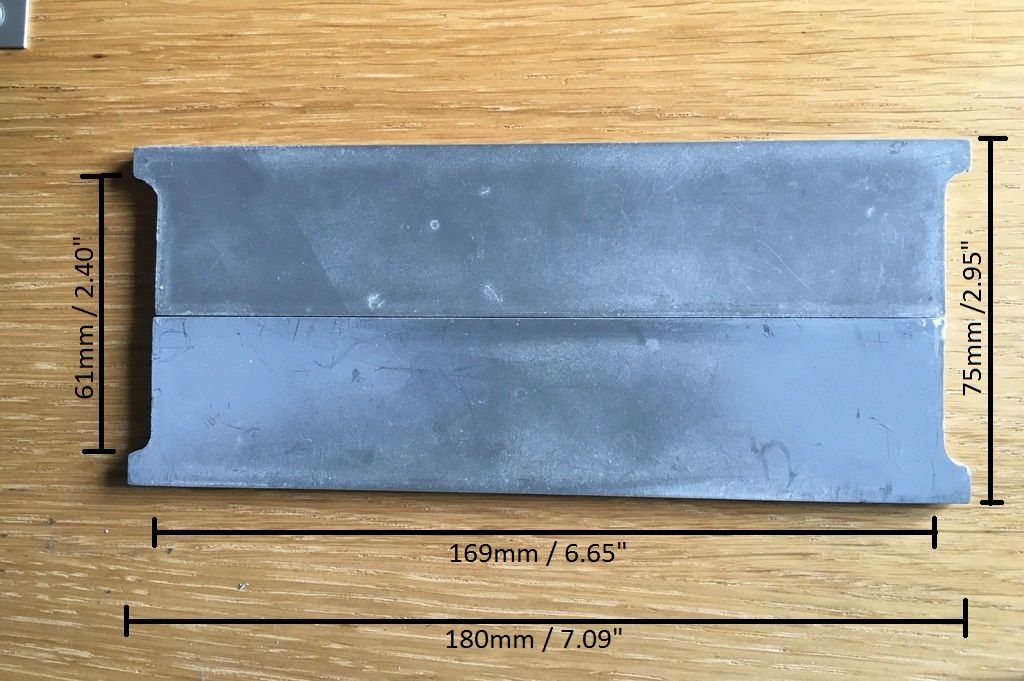
I used 3dhubs.com to get my first set printed. Basically you just upload your files and it presents you with a load of UK printing hubs to choose from. I think both doors came out at £15! I do really like the texture! The door lugs would need chopping down a little at the ends to fit however as they are about 5mm too long. The lugs are longer than Nicks originals in proportion to the doors though so it should, in theory be doable. They are also slightly wider and longer overall at 79mm, so 2mm per side more overlap. I was going to give these doors away but it might be worth trying the mods on these first before committing to getting a new set printed.
Many thanks for the revised photo ref - this has been submitted to CPU together with a very polite and hopeful request I will let you know as soon as I hear back!
Awesome - thanks for this, will look into it. £15 is very reasonable…and the mods required seem fairly straight forward as well. I’ll consider this as another back-up plan; pending the outcome on the alu ones. The texture is awesome though!
No problem my fingers and toes are crossed! Hopefully he’ll be able to make us some
If not then it’s 3D ones as plan B, and if that doesn’t work out, original ones as plan C lol!
I forgot to ask, did you need the measurements for the side rods?
Hi! Just got word back from CPU already - he is waiting to receive a set of alu doors himself, from Franchesky, who makes trap kits on his CNC (they are working on a Hero build as well). He wants to look at these and compare the measurements so he will let me know what he can come up with…I ordered a trap holster and Matty trap v-hook conversion from Franchesky last year, all top-notch, but I have seen that he has a backlog of work at the moment and has fallen behind orders, so I will wait on CPU.
Lol I will fall back to plans B & C as well!
Side rod measurements would be handy, thanks [emoji4][emoji106]
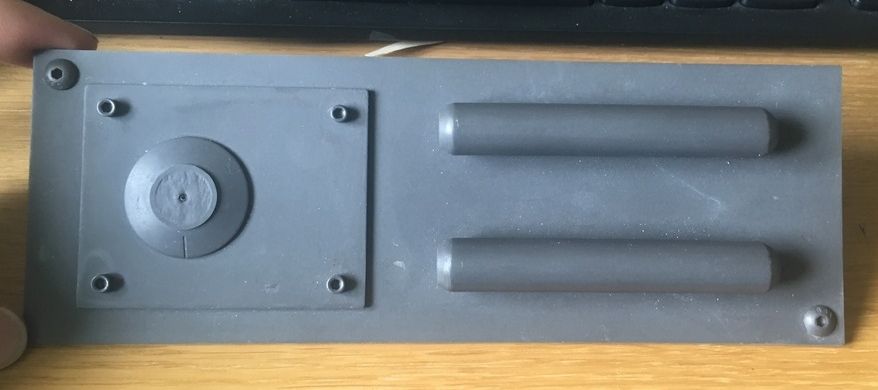
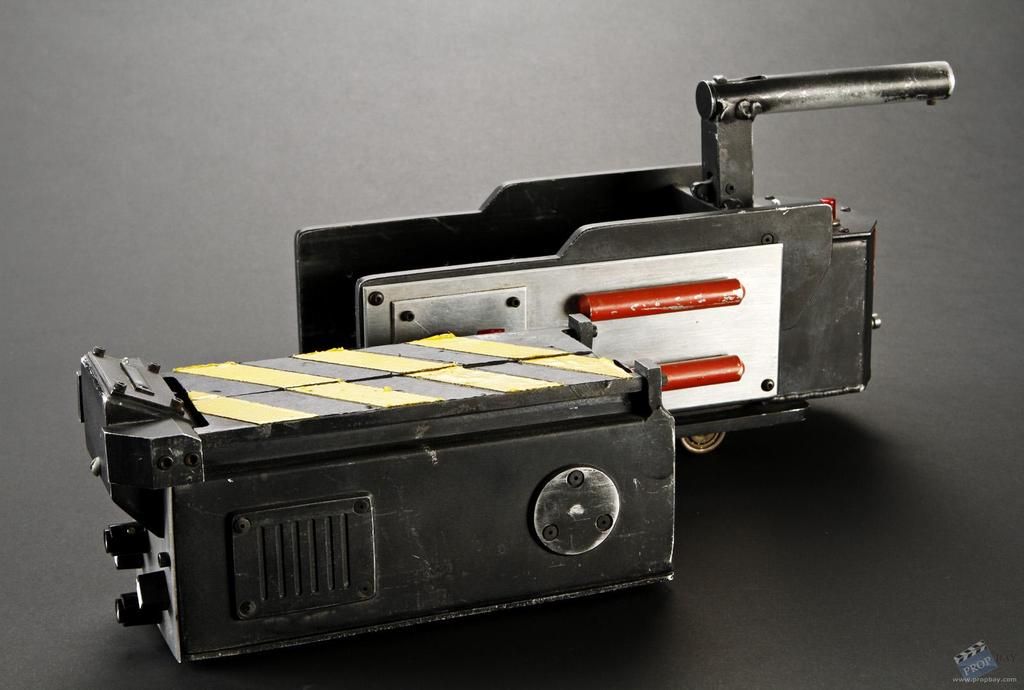
The original resin side rods measure 84mm (3.32") x 13mm (0.51"), while the 3D print ones come out at 76mm (3") x 12.6mm 0.5".
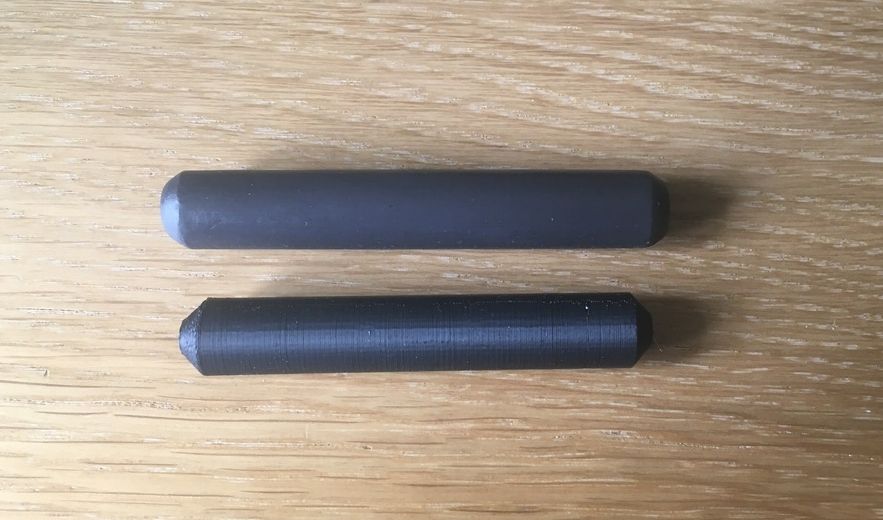
I’m not sure which would be better size wise really I’m undecided. The original resin ones look maybe a little oversized to me? I really can’t make my mind up. I’m starting to go boss-eyed looking at all these reference pics!
Resin:
Hero:
Ok that’s great Franchesky already has these measurements though as i’ve been in contact with him about doing the doors already. He did say that he hadn’t forgotten about them but it’s all gone quiet. I think he’s just a bit overwhelmed at the moment!
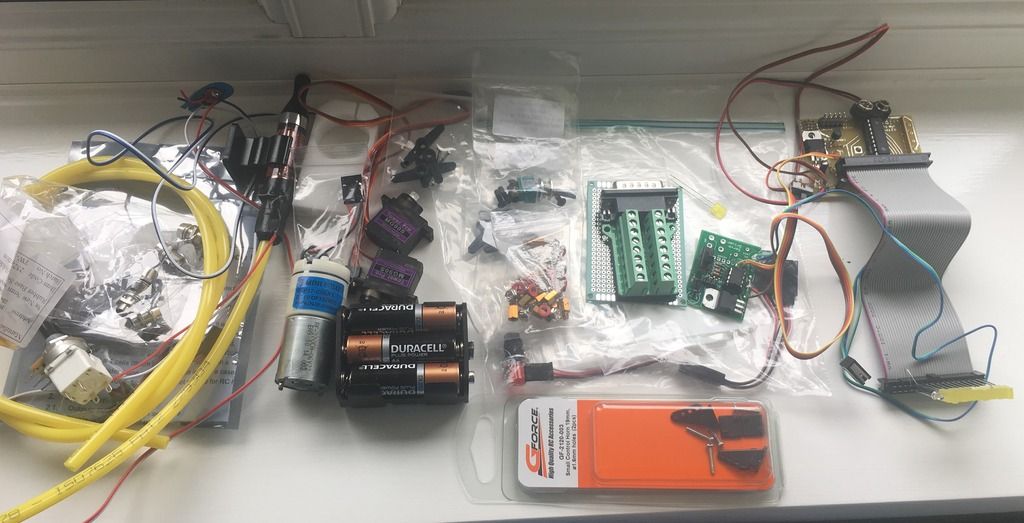
Oh well, I guess i’ll just have to work on getting this lot in the cartridge in the meantime!
Hi! Thanks for those measurements: the resin side rods would be my choice, they are more accurate (the bevelled ends are a better match I think and the size looks right when mounted on the side plate - the space either end matches well with the Hero). Definitely my choice, hands down!
I remember you said that you had been in contact with Franchesky earlier - yes he is most certainly overwhelmed at the moment, so it would be worth seeing if CPU can come up with something himself [emoji4][emoji106]
Oh wow look at all those electronics! I haven’t even covered this area yet either - I just don’t know where to start. Is there a list of parts somewhere that you referred to so you knew what bits to get? As I’m completely lost on this part. Looks like you have an e-cig kit from Spongeface in there? But all those other bits…