First off, I REALLY regret not taking more pictures of the process, but it was incredibly labor intensive so I missed a few shots. So I apologize if it seems like things were skipped.
South Florida Ghostbusters has wanted an Ecto ever since we started doing charity events. Parking up front was always a plus, and driving in the parades instead of lugging your gear for 2 miles to the start seemed like a huge bonus.
So about 2 years ago, the idea was to take this

And turn it into this

So began the long and arduous process of researching parts, saving money, and looking into ways to modernize where possible.
Naturally the first thing on my list was the lightbar. I wanted to run blue, but the officers I spoke with checked the law on the books and blue was illegal to even have on your car unless it was covered up. So I settled on amber… Ended up getting a great deal on a Code 3 MX7000 with new lenses.

This proceeded to sit in my garage for about a year…
Around June of last year, I contacted CPU64 and asked if he would be interested in welding up a rack for my project. Naturally he agreed and we got to work. The idea was to mount the rack to the existing luggage rack and be scaled to fit the Jeep. I also need to be able to clear an 8’ 6" opening for my parking garage at work.


Chris had made a custom fan box using some aluminum sheeting and vent covers that I provided.

For the tanks and side tube, we used 4" PVC with foam ball caps. These would eventually be covered in resin and fiberglass. The straps we got for free from a construction site. They were used to bundle trusses together for shipping. Chris cut them up and made some pretty inexpensive straps.


As a contingency for areas with smaller clearances, a folding Raydome stand was created. Its held in place by a locking pin.

The mad scientist at work…

Did some test fitting


Meanwhile…some goodies were waiting for me at home.

Much deliberation was made on what to use on the rack that would pay homage, yet modernize the rack. From the beginning, I new I was going to motorize the rack and have sound. So I found a kick ass off road 6.5" speaker designed to match the typical off road light. I also managed to get a good deal on this 12v strobe.

For the Propelloray replacement, I went with a remote controlled spotlight. Then I ran out to the garage and mocked it up.


Next up was actually mounting the rack to the Jeep. I decided to make it adjustable to avoid headaches down the line when trying to put it on. The bolts are mounted from the inside of the tube in the track I cut out. Each bolt will have a rubber isolator and be secured with a lock washer and wing nut.


I also knew that I wanted to mount spot lights on the rack itself for the night time events that we sometimes do. I started with one in each corner, mounted with a custom bracket. Eventually 4 turned into 6. I mounted to additional lights on the side, no picture here, but there are a few further along the build process.


Next up is the sniffer. This one is just going to be a place holder for the aluminum V2.0 that I am looking at making but this one is motorized as well. I used an electrical junction box and PVC for this one. The head is mounted to a threaded rod and bearing. The motor is from a wiper on a small hatchback. I also picked up a PWM to control the speed and slow it down.


I connected the threaded rod to the motor using a custom coupler and cotter pins that secure it from unthreading itself.

So next came the big task of controlling the rack. I knew from the beginning that I wanted to have the rack be completely self contained and only have power and ground running to it. This meant I needed a way to control everything remotely. It also meant that I would save a TON of money on wire.
So, I found this 8 channel relay that you can use an Arduino to control. Add in a $3 bluetooth module and BAM, you have a wirelessly controlled switch system. Everything you see there cost less than $25 shipped on eBay. Here is my prototype:
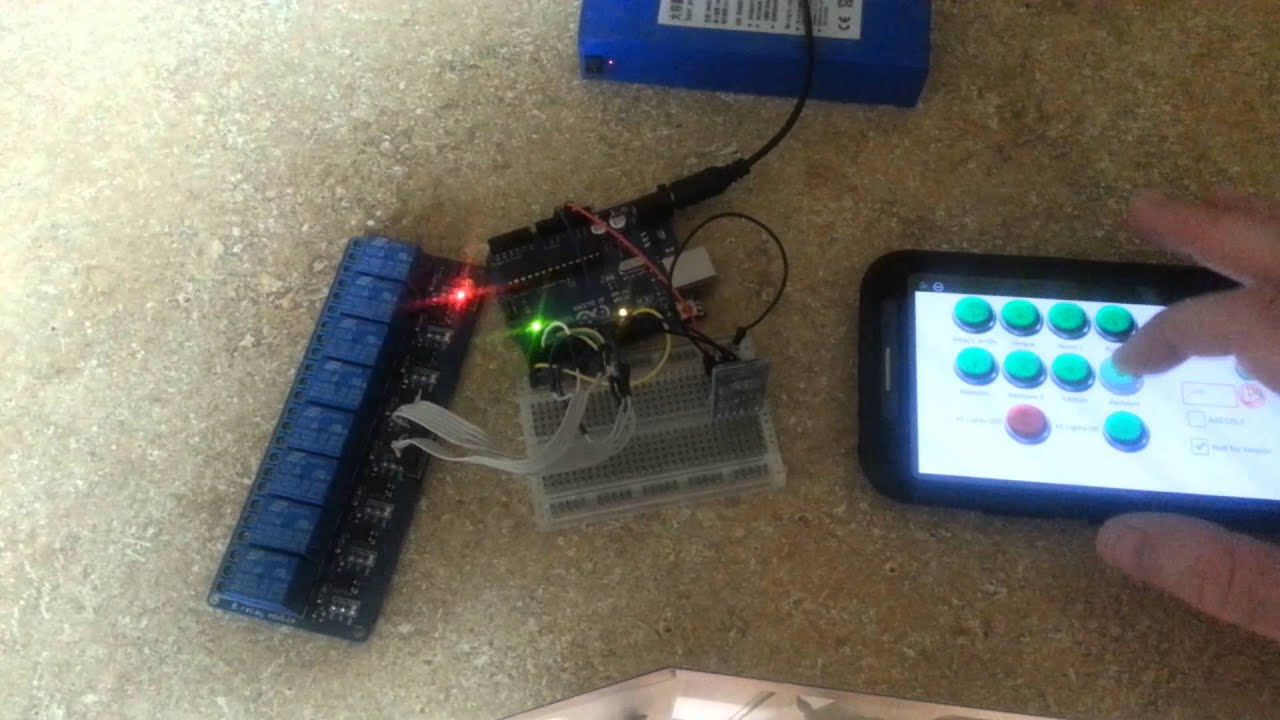
After 32 versions of the app, I finally settled on this one. I set it up so I can connect to the bluetooth adapter and control everything on the rack including the sound module.

I decided that I would cram all of this into the control box on the rack. The box is protected from the elements and has a vent fan. Amp, Relay module, Arduino, and bluetooth are shown here. I also managed to fit the PWM and the sound board in here as well.

Making my own rubber gaskets for all of the openings.

Stuff getting painted


Mounted the rack for a final test fit. It actually looks nice as an off-road style rack.

Lightbar in


For the blue hoses, I put this magnetic mount together based off of the Ecto-1X from the Suncoast guys.


And here is the end result. I am about 95% done, I still need to get some more labels made up and she will be 100%. Eventually we will look into painting it white to match the concept photo, but I kinda like the color she is now.


I am going to try and take a video of everything turned on soon. So for now this is it 
 I once tried to figure out how to hinge the sniffer and radome but man you nailed it.