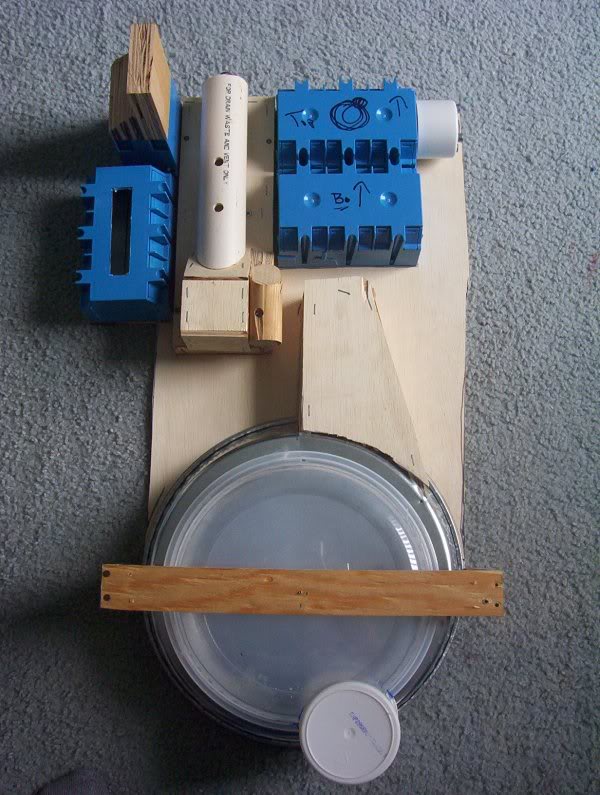
Hello from a new member but long time reader of these fourms. My first pack was the kenner toy, then about 3 years ago i made a duct tape pack, after that i started a pack but it sucked. seeing Garreee’s cheap pack idea i set off to build one before the game comes out. well heres what i have so far.
Looking good! I like the extra wood bits on the power supply!
To paint that cyclotron, you’ll need Krylon Fusion paint. Wash it throughly with dish washing soap to remove mold release, and also oils from your hands.
It’ll be dry to the touch within a few hours, but you REALLY need to wait 1 full week before the paint molecularly bonds to the plastic.
You can probably use shoe goo to glue the washers around the cyclotron holes, but any flexing of the plastic might pop them off.
I tried something similar, but abandoned it because of the difficulty attaching the washers securely to the plastic bowl. (Though I did like the holes around the edge as enhanced lighting.)
The electrical boxes can be apainted with cheap black paint.. I used the walmart brand, semi or flat, depending on what you want.It also looks like youran into the same thing I did.. your motherboard doesn;t extend to the area with the ion arm and power box.
I ended up having to redo my motherboards, if you recall, because that damned wood warps so easily.
Looking great, and I’m considering your wood strip idea instead of making my boxes all more movie accurate.
I’d like to know which model electrical boxes are used, so that I can more easily pinpoint what I need. I really like the added wooden bits on those boxes too–it just adds to the good look that the boxes already have.
The pics in my thread are pretty clear.when you are looking for the boxes, you just match up how they look.
I avoided boxes with curved indentations on the side. Its not really hard to match them at all.. someone else was electrical box shopping at the same time,. and I returned some that I had gotten for the boxes he found.
As Gareee said look at the pictures, i know that when i went to home depot they had the $5 boxes and the cheaper $1-2 boxes, i went cheaper. anyway here are pics of my thrower using a spare box i had bought.
VERY nice! Add some small detail hardware, labels and wiring and yer good to go!
BTW, DO NOT use real wiring.. its expensive and heavy. Instead just buy some clear tubing from Lowe’s plumbing, and put some walmart cheap acrylic paint inside it. It’ll still look like wireing, but is light as a feather, and much easier to work with.
To attache “wires”, pick up some matching aluminum bolts, and nuts at Lowe’s. When you select your tubing, make sure you can “screw” the tubing into the nuts, so it stays in tight.
I used a self tapping screw to make a hole, used a hacksaw, and cut the end off a bolts. (That why you use aluminum ones.. the heads cut cleanly off.)
Superglue 4 nuts together, spray paint then brass, and thread them one nut down onto that headless bolt. That leaves you 2 nuts worth of space to screw your tube “wires” into. Do on end first, and then the other.
Now screw the “hose connector” into one hole you made with the self tapping screw (or you could also drill a proper sized hole as well so you can still tightly screw that one end in.) The other end I then made a slightly larger hole, filled it with wood putty, slipped the other “hose connector” in, and wiped away the excess. Once its dry (a few hours to a day), pant any excess black to make it blend in.
I found some pvc elbow fittings that were close enough to make do, and also some brass ones as well, but those are heavier, and of course more expensive.