I cannot wait to see this stay puft finished!
Just finishing up printing all the detail bits for the pack. The clipboard valve, the resistors, the connectors.
Here’s also some shots of all the stay puft pieces. Mostly just painting left. I think I might stuff the limbs with something to help keep their shape better. The leg looks a little deflated.
Print me a Puft head pleeeaase! 
This is a really cool approach to these projects. Roughly how much does it cost to print on such a large scale?
Soft foam was the right choice for the marshmallow man. Is the torso also soft foam? I’m working on one of my own with similar materials, but with wire to help hold some of its form.
Keep it up and thanks for sharing!
Hi Pufty,
The face probably cost about $5.00 in material to print. That’s the thing with 3d printing though material is cheap, it’s the time that’s the expensive part. It took 4 days to print.
I went with EVA foam for the head and body because I was worried about it keeping it’s shape. I think if I were to redo it I’d do a smaller base shape out of cardboard and then use the soft foam over top of it.
Wire to help keep it’s shape, great idea. I’ve got a cage of cardboard inside all the pieces. It’s working alright but definitely needs something more.
Thanks for the info. The material cost is less than I expected. The cost of the printer itself is another thing.
Cardboard is an interesting thought, but it might make the torso too rigid. Chicken wire is the underlying material for my torso and head. It does a good job of holding its shape while not being too stiff or restricting movement. Chicken wire is a pain to work with though. Literally.
Next time I might try L200 or EVA as a base, like some of the original Puft suits.
I love that picture!! I had no idea that they went down that road when creating the original suits. It gives me some ideas on how I should split the body mesh up for a cleaner build. I’ll have to make those modifications before I release the pep files.
Chicken wire is such a PITA to work with. I used it on some of my early transformer costumes way back in 2000-2001, so many scratches. My only worry about using something like that would be bumping into a door or a wall edge and warping the piece.
Yeah!
That’s a valid concern. Last year, the torso I made lost some of its roundness while transporting and using the costume. Fortunately the outer foam helps to prevent major misshaping and its not to difficult to readjust from the inside.
The packs are almost finished aside from the stickers and electronics.
I sprayed my sons pack with a black semigloss last night but I really really don’t like the result. I’m not sure if I can get away with just spraying a flat black over top or if there’s a better way to get rid of some of the glossiness. I’ll post some pictures of it tonight.
Looking good.
Thanks pufty
So I picked up some flat black and re sprayed the pack looks 100 times better.
I started adding on the decals and details. I bought heat shrink tubes for the colored tubes but they have like zero bend. You’d think I woulda noticed that when I bought them. So I need to figure out a different plan for those.
Here’s some pics of the pack and a stay puft leg, hah.
Started adding tubing to the pack. I couldn’t find colored tubing so I wrapped different sizes of clear plastic tubing with electrical tape.
I’ve added a little color to stay puft. Really starts to come to life!
That Stay Puft is going to rock, and the pack is looking amazing for a 3d printed pack.
Thanks!! I try to use the printer as a tool, there’s still so many other things involved in the finishing process.
I wish I had more time left. I’d love to do up some traps as well.
I uploaded a video of the lights in the pack. Just working on getting everything packed back in
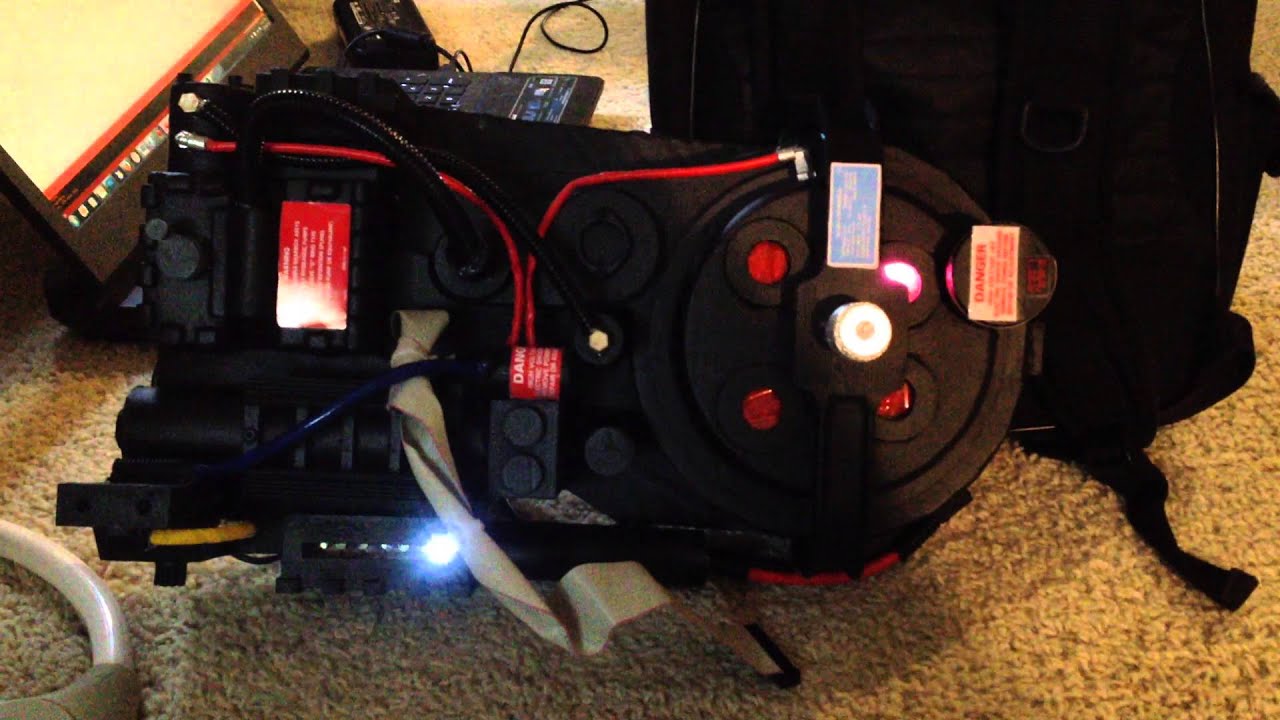
Man that came out great!!
Thanks! Still finishing it up. Added the mini clippard valve and mounted the speaker for the sounds. Just finishing up the wiring for the wand and then I can start dry brushing!
I wish I could get my wife’s pack to this level. It’s going to look pretty tame in comparison lol!
Have some bugs to work out with the wand. Totally ran out of time so I think I need to call it complete for now. I’m still going to glue down the ribbon cable and dry brush the edges though.
I’ll try to get a video of him wearing it and all the sounds. I haven’t been able to convince him to try it on yet though so not a good sign…
Ok one more day… Tonight I have to glue on stay pufts scarf, air brush some detail, adjust the strapping, and finish stuffing. On my wife’s pack I need to add the straps and any more details I can fit in.
Here’s some test shots from last night testing the fit.
Awesome!!