It took me a while, actually like 4 years… very sad i know… to finally start working on my pack, like you all know, it’s a slow process, specially scratch built ones, but i’m working on it every free minute i have, as a guilty way to catch up for being so late in doing it i guess lol
I started with the crank/gearbox, i am using Revell birch plywood for my pack, mostly because it’s light and easy to work with.
This is what my gear box looks like so far, some sanding left to do, then i’ll add the connector for the tubing.
One detail I would mention is that the series of blocks on the bottom of the gear box could’ve been replicated by taking a single piece and making the gaps with a file… I believe that’s how it was done on the buck for the original props.
that is a great idea ! wish i had posted that picture before i did make them one by one and sand them to merge with the bottom of the gearbox, lot more work than your idea !
i told her i would, and i would even make it sparkley with glitter paint and stuff and she said she isnt that hardcore of a geek like me…But i am working on changing that. She already knows who the members of the GB team are from the movies and even knows what car was used. Soon she will be at the same level of geekiness as I. LOL
Its been my experience that trying to convert someone into a hobby like this will backfire on you. Her statement about not being that hardcore a geek is a woman’s way of saying that she isn’t going to sport a pack around a convention and even if she would ..she wouldn’t spend the time and money that you would on it. Look up “the manslator” on YouTube it will help you interpret your ladies comments.
I have to agree! As much as i ooze geekness my girlfriend isn’t into that stuff much but since we have a boy she does great effort to learn about these things, which deserves much applause i think, i came to think that they might not be geeks like us but if they inquire about it a bit from time to time it shows that they care and that’s good for me and my girlfriend does wear the wonder woman shirt i bought her lol
I Happen to work in a Trophies shop, using our laser engraving machine i decided to give a try about making my own labels, i started with the Clippard R701 And R501, using a glossy very think black plastic, i think the results are pretty cool !
I aslo made the HGA label. out of thicker red plastic that engraves white.
Here’s what a long weekend does to building a proton pack, lot of work done !
i finished up the Booster / PPD ( minus the round thingies and some putty work. )
I also managed to do the Ion Arm, and yes i had to see what it looks like with the parts, too excited lolll some sanding and putty left to do.
And while i’m writing this, the glue on the power cell is drying up and so is the gun mount. Then it will be the injectors. Then the bottom part, which i fear a bit lolll
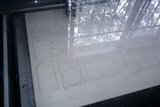
Well back to work this morning, with nothing to do, i figured i might as well experiment a bit, so i decided to try to make the whole proton gun box only using the laser engraving machine… A pretty good idea if i might be so bold to say lolll
Here’s the video ( click on the picture )
And this is what it looks like after, only need to assemble, putty up and sand. i really wish i would have thought of that procedure before, would have saved a lot of time !!!
And i also made my label for the bumper, again with the laser engraving machine on blue metal.
On the build my friend an I are doing we actually did the same thing where we cut out specific pieces for all the stuff on the front. Whether it was done original or not doesn’t bother me, when they’re individually cut you can see a harsher look to the edge and I like it that way.
I agree that i also like the ‘‘rougher’’ look of my pack so far, but i also agree that doing it in one piece is a time saver and less chance of cutting off a finger doing those little pieces lolll
Hey guys ! sorry for the late update, little trip and planning my little boy’s 1st birthday party ! but i managed to work on my pack a bit and i am now officialy on vacation, so i’ll have more time to work on it !!!
here’s what i’ve done, mostly did the HGA, and lot of sanding and finishing up the top parts of the pack, i’ll post pics of that later.
Using the rods that i use at work ( to put up ytophies together, i managed to attached it to the crank box.


 i did make them one by one and sand them to merge with the bottom of the gearbox, lot more work than your idea !
 maybe that will help her change her mind.