Stantz 718's GB1 Pack Build

I finally have time to post an update on my GB1 build. First off I want to say RIP to Prince Rogers Nelson a musical genius and a musician’s musician, you will be missed.

Finally got around to finishing getting the brackets riveted to the motherboard and painted. I used Rusto’s Universal Paint/Primer Satin Black and then Rusto’s 2x clear coat

Spacers (not shown) Courtesy of Nickatron

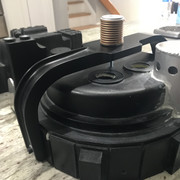
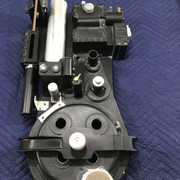
Starting to test fit components on the pack…

Some nice tubing courtesy of Hijacker, thanks so much dude !

Splitless loom courtesy of GBFans

Resin Booster Frame courtesy of Heavyprops

Did the Gb1 packs have 1/8" rivets inserted in the discs? If so I will go about putting rivets in

Have some apoxie work to do on this disc

More putty work to do…

Annnnnnnd more putty work to do..

Question, does the 3/4 splitless loom go into the pack under the crank knob area? If so what length of loom is accurate for GB1?

Vintage Legris Straights. I seen on another users post (sorry can’t remember his name off hand) that there is glue involved. Is the glue GB1 accurate?

Power Cell Lens courtesy of GBFans

This is the part Im dreading of drilling. Im totally clueless on what kind of bit to use, how big to make the hole and how to mount this thing…

Last question ( I know I’m a pain in the ass) :walterpeck: .

What screws are used to mount the clippard valve to the pack?

Thanks again to all those that have been assisting me in parts and build advice.

Next up is to get more labels for the pack. Joe Luna provided me with some great ones i purchased from him last year. I need the big red danger sticker that goes on the back of the motherboard, as well as the nfilter sticker, and the other ones I can’t remember right now lol..

Here are is another update

A buddy of mine at Fastenal hooked me up with these socket cap screws, if anyone needs PM me to work out a deal

Finally located the real deal (10 mins from my house what a score) and most likely will have these in bulk in the near future

Attached the ion arm I need to attach the resistors. I have a sage resistor and I’m really trying to locate the Dale RH-50. This pack is a mix between the Omni/Zeddemore pack & Ray’s Sedgewick pack. I will continue to research those packs. I’m also gonna change the position of the filler tube

Hole for loom is drilled will attach the 3/4 dowel soon. Have to sand down the JB steel patch i have over the cyclotron SMC elbow hole

Will post more as I get more accomplished

Looking really good so far! I’m doing a full Hero GB1 Pack build myself, it’s taken nearly 1 year to get all the parts together, but I’ll be commissioning a prop-builder to put it all together, as I don’t have the resources to do this myself. Definitely take your time with each step, patience makes all the difference :slight_smile:

The screws needed to mount the Clippard R-331 Valve to the pack are 8-32 cap head screws, at 1" in length, with nuts & washers. It is odd that they are not 10-32’s, as the valves are threaded for this size, but apparently it is accurate to have the 8-32s. On the Thrower you’ll need to have 10-32 Fillister slotted machine screws for the R-701, in stainless steel for screen accuracy, however I opted for black ones as I prefer that look (I’m doing a custom GB1 build). With the Danger labels, I highly recommend picking up a set of vinyl labels from the GBFans shop - these are the best and most accurate that you can get. It’ll have every label you need.

I also saw that you’ve managed to find a grey Raytheon crank knob - and mentioned that a bulk supply may be available in the near future. If there was a possibility of obtaining any more of these I would be very interested, as I’m sure many others here would be too! I do have a spare RH-50 resistor (minus the Dale logo on the top, so accurate for GB1) - maybe we could work out a part exchange for one of those crank knobs if this is possible?

Looking forward to seeing more updates :slight_smile:

Thanks man for taking the time out to leave a comment. Not much action as far as comments go on this thread lol. All my questions have been answered by good old fashioned research, but thanks for the information anyway. I was a spectator on this site for many years lol. I try to post pictures as much as I can but my DJing takes up most of my time. I hope those crank knobs come in soon because that RH-50 in your possession sounds really enticing. As far as commissioning someone to assemble your pack thats cool and all the best of luck ,but there is a certain great feeling working with your own hands on something you know will last because you yourself put that labor of love in. I’m grateful from all the guys who have been down this road many times before who have posted all the items needed to produce an accurate GB1 pack build. Once more a special shout out to everyone here on GBfans.com and all those who have assisted me with this build be it with parts or input. The journey continues will post more pics ASAP

“Brooklyn Style”

You’re welcome dude! Thanks a lot - I completely understand where you are coming from regarding building it yourself, it does mean so much more when you can do this, but my current circumstances make this option impossible to achieve at the moment. I was a spectator too for a while at the beginning, but started to get more involved once I understood everything a bit better, and actually began the journey of a Pack & Uniform build. Like you, I’m so grateful for this site and everyone on it, whose vast knowledge and resources have made this dream possible…

I’ve just PM’d you back regarding the RH-50 :slight_smile:

Look forward to seeing more progress pics , I can understand how busy you must be with all that DJing!

Hey man all is good. Make sure you post pics of your pack during its build process granted whoever is building it for you takes pics. I will check the pm thanks again

I will do - they will be covering the entire build from start to finish, so will definitely be putting those updates on here, when the build starts in June.

No worries - glad I could help :slight_smile:

I was wondering where you picked up the Raytheon control knob? I’ve been looking for a complete knob in Grey for a while. Appreciate any info. Thanks a lot

Nice pack in the works here! Your doing well so far man, keep it cool and take your time. Hell, I’m nearly 2 years on mine! :smiley:

Well after a long hiatus Im back and more dead set than ever on getting my GB1 styled pack done..will be doing a revised check list on what i need to do for the pack before i move onto the thrower…keep you guys posted…

It feels good to be back !

I finally got time to get back into getting this GB1 pack done. As of now I am focusing on the pack and will move onto the thrower eventually. Just to refresh you all to whats going on. Started this build in late 2015…

GB Fans Shell

Alice LC-1 frame via The Old Guy @ the Army & Navy store in Brooklyn

Aluminum Pack Parts via Crix/Heavy Props

Labels via Joe Luna

Bumper via Nickatron

GB1 pack spacers via Nickatron

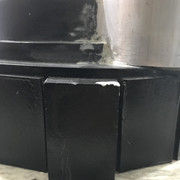
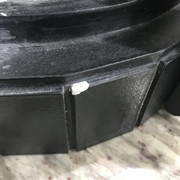
Here are some flicks of the shell as it currently is, the sad thing is I had this shell stored in a closet with nothing near it and upon inspection I found chips on the cyclotron fins and other spots on the pack. I hope repairing them won’t be a pain in the @$$…

I need to sand down where the rivets are and where the n filter meets the cyclotron:

I also have to re-edge this part:

Also does anyone have info on what size drill bit to use to create the Cyclotron “dimples”? Do you drill all the way through or just halfway ? I really hope someone will chime in on this …

My next post will be about the parts I need to get the pack up and running. All input is appreciated.

Help ! I need you guys input on this, this is a list of the items I need for the pack:

  • Metal Bellows (Only source of this item I have seen is from BENOFKENT props. Any feedback on him? Has anyone purchased his bellows, or know where I can source this item? I was looking for the “springy” kind of bellows for my pack.)

  • Bumper Spacer (that sits between bumper and cylcotron)

  • Hose Clamp (for loom that connects to thrower)

Electronics:

  • Cyclotron Lights & Lenses

  • Power Cell Lights

  • Sound Board

  • Speakers

  • Battery

  • Rumble Motor for the thrower

*** Is GBFans the source that most builders get the items listed above from?

*** I want to have my N-Filter glow and smoke emit from my N-Filter and Thrower, is it safe to say Fincher Technologies is who I should contact for these items?

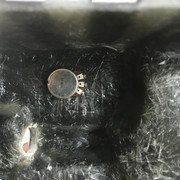
*** I also have a potentiometer for my Raytheon Crank Knob ,could this be used as a functioning switch maybe for the pack or the volume? Are there any threads that mention this?

My main objective is to still have a Stantz style GB1 pack with some elements of the OMNI pack as well. I am looking to get the pack done within a few months and then move onto the thrower which was made by Heavyprops.

Another question , is it mandatory to face your speak down to the motherboard with grill holes drilled? I wanted to have my speaker facing up towards the shell. Would this muffle the pack sound?

Just a side note I am looking for a pop mechanism for the thrower. Anyone have any leads to thrower pop mechs?

If anyone knows anything about those springy bellows that would be great. I can’t find anything about them anywhere. Also another thing I’ve been looking for is the pop mechanism as well. I would like the front handle to extend it but I’ve seen that those can take up lots of space and are hard to install. I’ve seen some pretty simple ones made with the green lever though and might just do that.

Your build is trucking along nicely, good job man.

You should also think about what you want out of your electronics kit. I personally would love the rabid kit since it does TVG (The Video Game) noises and sound, a party mode, and a vent cycle but he is one of the top blacklisted sellers so it would be like a 50/50 bet on if he’d come through for it. I’m lost for another kit that does the same as his. Just try to think of what you want out of it and ask around. The GBfans one does just great and I’ll probably end up going that way anyhow.

Thanks for the response. As far as sound I am basically looking for classic Pack sounds from GB1 , some of the songs and the vent sound. Any info on the size of the cyclotron “dimples”?

lol no clue sorry mate, I would just put them wherever they look right, maybe even look at some photos but I can’t see anyone measuring it so maybe just wing it. But if it’s a real big problem I’d keep looking and maybe there’s something on the forums or reference sub forums that you haven’t seen yet.

Hopefully I hear back from the Finchers soon, I am really jonesing to get a n-filter and wand vent kit…BenofKent is probably where I will source a bellows if FreekyGeeky doesn’t have any…will keep you guys updated…

In the process of scoring some replacement parts and a Bellows from Freeky Geeky, I am probably gonna cop a thrower from him with a pop mechanism, as I have never really been happy with my original thrower. Will have some eye candy hopefully in the following posts. Anyone have any advice on fixing chips in the fiberglass shell and repairing the sharp edges on the pack?

Any chance you plan to sell your current thrower???

I finally got around to fixing the chips on the pack, I have to finish sanding them down. Also mounted the bumper and bellows which in my opinion is a major PITA. I am still not happy with the results and may re-adjust somethings even though the level shows that the bumper is leveled (that means patching up the holes that were drilled). I still have to drill the cyclotron dimples, find a spacer for the stove bolt, drill the hole for the ribbon cable to go into. Stay tuned boppers stay tuned…

image

image

image

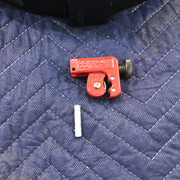
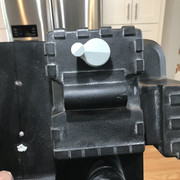
Today I got some work done, I cut the potentiometer stem down and mounted it to the shell and attached the Raytheon crank knob. I finally got the bumper to fit the way I want it to, I started to dry fit most of the parts to the pack. I have to now mount the booster tube which I hope will go smoothly. Once everything is fitted, I will patch up all mistake holes and chips, sand them down and then move on to masking the pack for the wall texture spray… Its coming along slowly but surely. Thursday should be the arrival of the GB1 ribbon cable from Fincher Technologies as well as Spongeface’s vent relay kit.

image

image

image

image

Side note I am selling this FreekyGeeky bellows, PM me for details.

image