This is crazy awesome!! Great job!
some progress on the trap shell


the following pic show the trap loosely put together


the bargraph, now mounted on a circuit board and fitted with cable.
its 13 rectangular LEDs and a 5mm round one and two 8*resistor-net


mounted in trap body (now glued together, doors mounted)

trap handle primed, trap insert mounted

How about some video of the Arduino in action? Thanks for posting your code, I need to take a closer look at your circuit.
@propcicle: I will for sure publish everything and share it with the community. Only a matter of available time. But i promise. Sharing is caring 
here is the bargraph board

plus side of the LEDs is to the cable side, minus is to the resistors side.
Really great work on that body/shell.
hey! I am still alive. Current work is painting the trap. Another 2 layers primer are done, and at this moment the 3rd layer of black is drying. Pictures to follow.
Sorry for the delay. Too much to do at work combined with private thing with a higher priority and a vacation (yay: was in Hawai’i and in Chicago! But saw no Ghosts).
And I lost 12kg weight. The uniform now fits WAY better.
some pictures
Battery box with switch, light and hose connector

trap body/shell

wheeeeeee wheels

trap closed

trap open

light bar

the whole trap

next steps. Lookout, it’s a trap!

Knobs. I bought a bag full of old stereo knobs and buttons for 1,50€ ($1.50). With a little sawing and filing they fitted. Glued some white PVC sheet on it, cut to size, corners taken off with a holepunch. Same for the round bits on the round knobs = holepunch and PVC sheet. And superglue.
On the picture you see the original knobs and the final results.

Next will be the aluminium sidings. I found a service at eb@y, who waterjet-cut to size (any form). Measured once and twice and ordered. Price is only slightly more than a piece of aluminium the size (and thickness 2mm) I would need to cut it myself - but then, how to cut it properly, with straight edges and 90 degree angles?
Now waiting for the parts to arrive.
the aluminium parts arrived, but 2 parts were the wrong thickness (1mm instead of 2mm). Arrrgh. Will be produced again. More waiting…
Nevertheless, I cut out the front plate, and it came out nice.
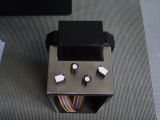
nothing fixed yet, need the red letters first.
some progress
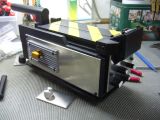
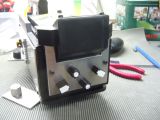
nearing completion.
Still missing:
- 2 red stickers, 1 white sticker, red lettering
V-Hook Holder and Holster
Electrical and mechanical gizmo-magical things
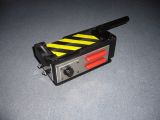
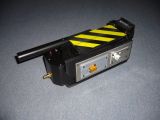
Stickers, V-Hook and Holster are finished also. Pictures to follow soon.
The two rivets on the v-holder are countersunk aluminium rivets. You need a hammer and a special tool to make the rivet head on the other side, but worth the effort. The rivets in the corners are simple rivets which can be put together with a vise.
the backside
side view. I bent the metal plate a bit into a “S”-shaped form to make it easier to slide the trap in.
the securing belt is long enough to make two loops and that way have a “no trap” tidy mode