First off I have to say that this site is simply awesome. I thought I was a massive ghostbusters fan but then I found out about this place and realised I knew nothing :sigh: .. There really is so much quality info around to be had.
Now after a few months of looking and reading, i have a fairly good grasp of the main “building blocks” that make up the majority of the pack and now I want to use this knowledge to create a scratch built proton pack. Looking through the forum I see two options open to me (Foamcore and Styrene) due to my lacking skill set and fairly low budget.
I have played around a little with foamcore to make certain parts of the pack, to just get a quick feel of the actual physical size. I have to say everything generally is smaller in the flesh then I thought. After this brief experiment I started to draw up some more accurate basic plans based on the measurements seen in Stefans. It took me ages to fully understand them and figure out all the dimensions from them.
The plans are just simple diagrams that “layout” each part so that they are flat (dunno if that makes sense but hopefully you get my drift). I will put up a few pictures of these is people are interested.
As for the two options that i feel are open to me I am swaying more towards using styrene. whilst it is a little more expensive then foamcore I think that the in the long run this price will be justified because of it being harder wearing. But now I need a few noobish questions answered if you guys have the time.
What thickness is likely to be best? 1, 2 or 3 mm?
I have the basic tools needed, hobby knife, sand paper etc. I will pick up some styrene glue when im next at the shops. But is their anything else that I will require? I am tempted to get a Dremel but dont know how often I would end up using it.
Cutting curves? I assume the score and snap technique doesnt work here?
I had so many questions in my head but now I can’t think of them I am sure they will come back to me soon. Bit of a long post I know but any help is much appriciated. Cheers!
Generally styrene should be cheaper than foamcore, the only problem being you typically have to buy more styrene at once so it’s a larger initial outlay. A 4’x8’ sheet of styrene should be in the $40 range. As to your questions:
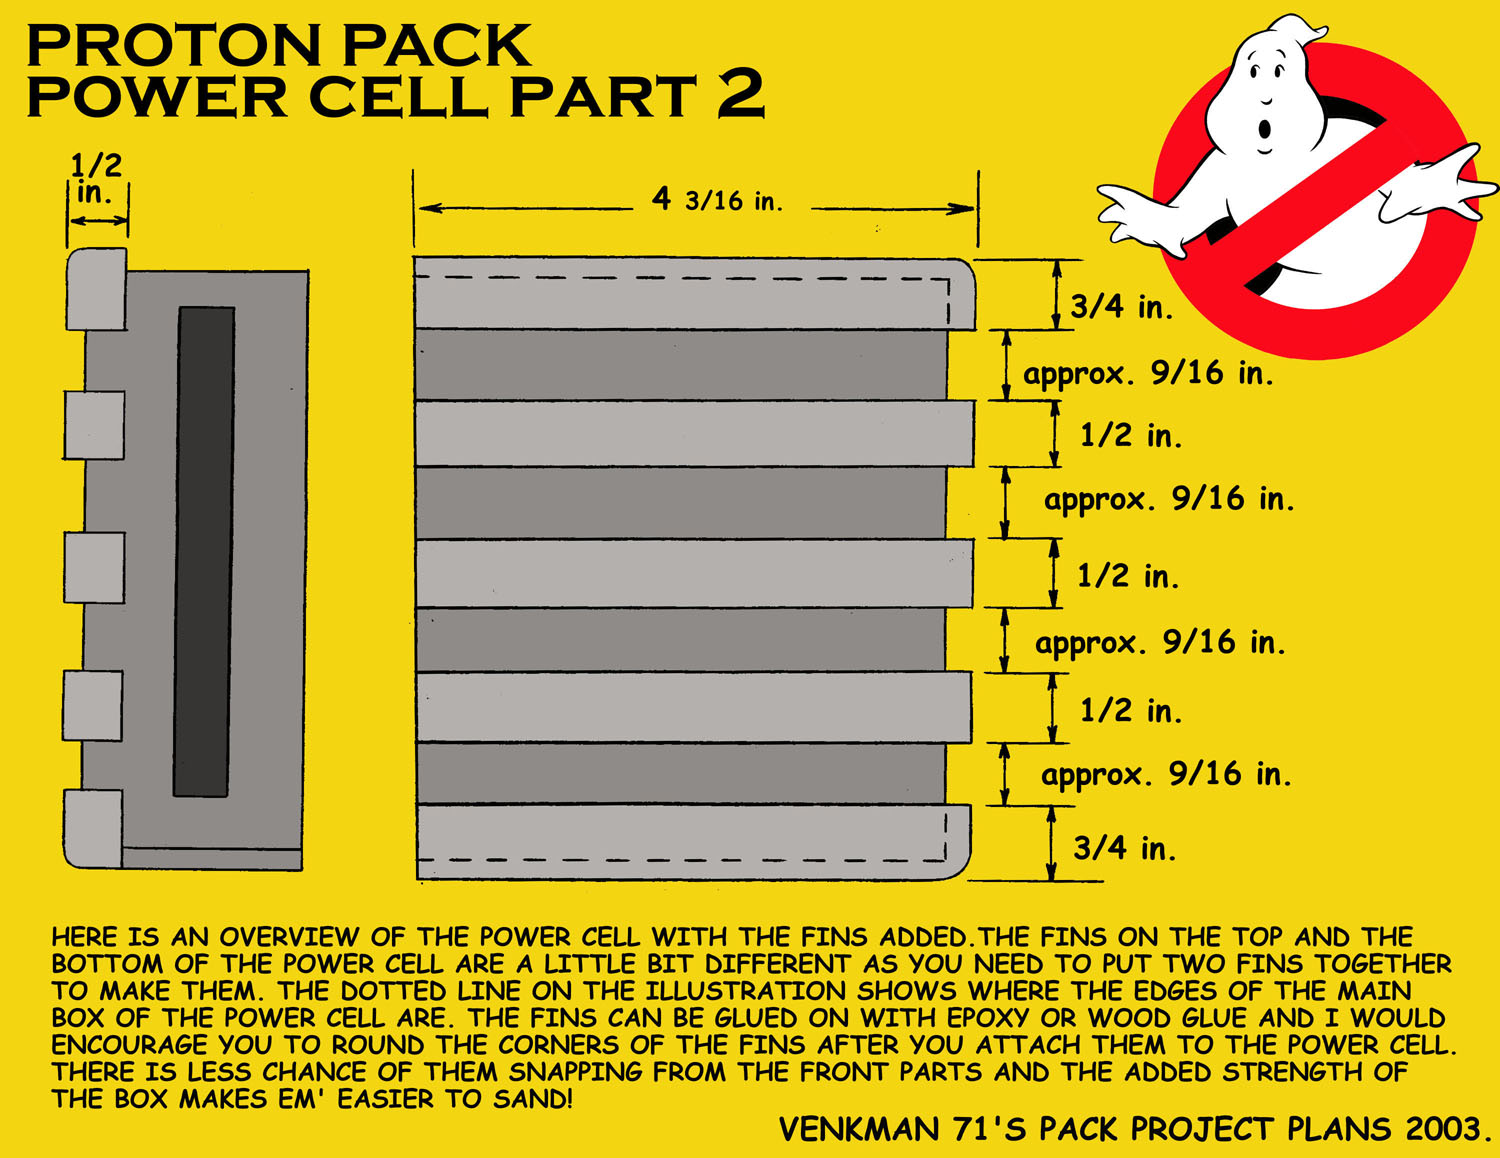
I used .08 styrene sheet to make pack parts, it’s just under 1/16" thick so it makes it easy to subtract material thickness from dimensions. Getting some .125 is a good idea too as things like the ribs are 1/8" thick and it’s easier to make them once than layering thinner plastic.
You’ll need a metal straight edge and square as well. You’re going to need something to drill holes, a dremel is nice as you can also use grinding and sanding bits if necessary. For larger circles like the cyclotron a circle cutting jig makes things easy but isn’t strictly necessary
You can score and snap curves up to a point. The main problem you’ll run into is it won’t snap at a 90* angle so depending on how it goes you’ll either have to sand down the ege or it’ll snap short. If you cut tangentially to the circle a bunch of times and then trim the excess you’ll be fine.
Thanks for being a higher than normal class noob, actually reading the forums and coming up with coherent questions before posting.
Ok so tonight I started measuring and “snapping” my styrene. In less then 20mins I have managed to construct roughly the power cell! This stuff is a lot easier to use then even I could have imagined. I will get some pictures up once I start sticking it together, unless people are interested in seeing various shapes of cut styrene?
I have a quick question which I hope someone can answer. For the front of the power cell, how would you cut out the rectangle in the middle? I have 2mm thick styrene
I have been fairly busy with the build this week. I have now built the majority of the upper half of the pack, still need to make the eda/booster box. I have some pictures of the parts below, I am pretty pleased with it so far considering this is my first attempt at making anything like this… ever!
First up the power cell. This was the first part that I made, as I thought it would be the easiest. It came out decently enough, and more importantely its not wonky! I experimented with using wood filler in a small gap I had on one of the corners, but I dont like using that stuff. I should have just gone and got some bondo type stuff instead of trying to save some money
The EDA spacer. I have one side that turned out a bit weird but once again, hopefully I can use bondo to fix it up once I start putting it altogether.
The gear box I found one of the easiest parts to make, by this point I had started to get a grasp on what to do when putting the pieces of styrene togeather.
The gun mount was a bitch to try and figure out, finally got there tho. Has a few spots that will need bondo on, but again nothing major. I still need to put some wood on the inside to strengthen it up, but thats way down the line atm.
And lastly just a progress shot of it all dry fitted. This picture actually makes it look half decent i feel
Next up I plan on taking on the sync generator, booster box and the plating. I have bought in a plastic cyclotron and plan on getting a list made up of other parts that I need to buy/build to complete it.
Anyways people, hope you like! and dont be too harsh on my craftmanship
This is all looking really neat! My only suggestion is to look at Björn’s thread. All the plans as awesome as they all are are a little out of date as new photos and facts have come to the surface since then.
I would have a really good look at Bjorn’s ( aka bigi71) thread below. You can see alot of details added like different curves on the crank generator…you seem to be at that stage where tweaks like this could be fairly painless?
and also have a good look at this thread
Anywhooo keep up the good work, I look forward to seeing more of your build!
Thanks Julz! I can only wish to make a pack half as well as bigi71. But I do plan on eventually adding curves etc later on in the build, at the moment just making the basic outline of the parts and will refine them later on… Thats the plan anyways!
Although production has come to a bit of a stutter… I can not seem to be able to cut the sync gen accurately
Any ideas on how to cut it accurately? I am finding the score and snap method hard to do with this shape.
I may move onto making another part and think about the sync gen another time lol.
I think it looks great so far Mine didnt look different at this stage, except for the gearbox. If you want to add these curves i highly recommend doing it before you do more work on the gearbox, so you can avoid more work than really necessary.
I assume you have trouble with the round parts of the spacer (?)
For this i recommend the score and snap method too, but i made the piece slightly larger than what it should be so i could file and sand the curves down to their final shape after the piece was cut out.
 I am sure they will come back to me soon. Bit of a long post I know but any help is much appriciated. Cheers!
 Just a quick question about what you said. What do you mean by the ribs? lol