Could you share the link to where you found the handle for the trap door?
1 Like
I will reveal every part soon including the handle. We don’t have all of these parts in hand just yet. They are all vintage with stock proving to be very difficult to locate. Unfortunately, a reveal will not happen until we have the right parts in hand.
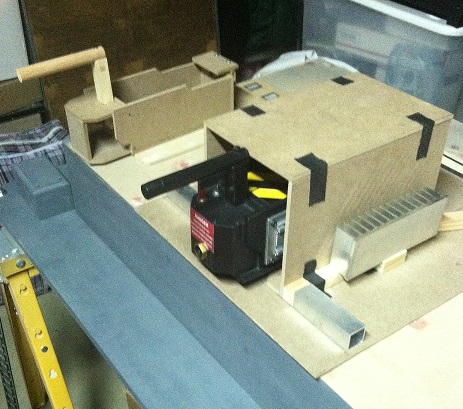
This is where we are currently at in our build. We are almost ready for paint. The parts will go on after and that’s when we plan on sharing the parts information. It will happen real soon.
I was doing research on the unknown labels and discovered that the long black label that’s all over Ecto-1A is by Burroughs!
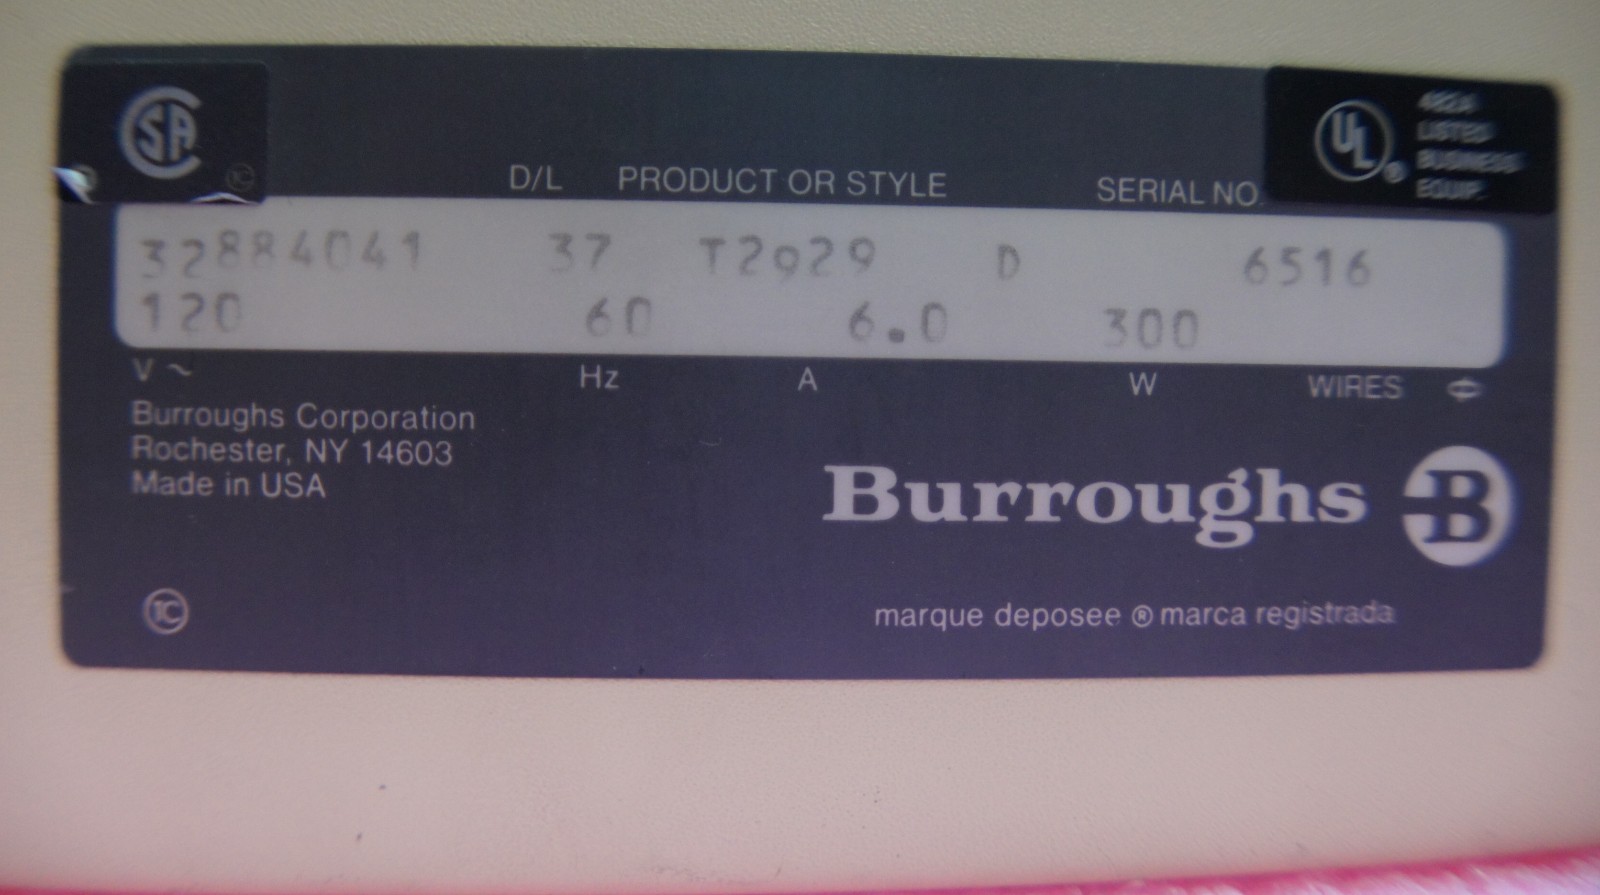
It’s going to be on a calculator or similar product. Now, it’s a matter of finding a match.
Yes!
Everybody dance now…

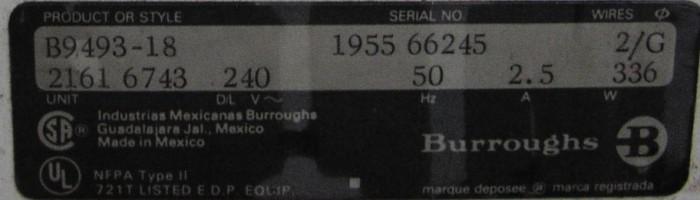
This is the Burroughs B90 hard disk drive ID plate…
-
Image used with the kind permission of Chris at the ‘Burroughs Corporation and Burroughs Machines’ Site
-
http://www.picklesnet.com/burroughs/descriptions/burroughs.htm
It seems to have more text (address) on the left and missing a line of text under the ‘Burroughs’ but proportions good.
The last picture I posted from the build was sort of a teaser as to where we were currently at. Let me take a small step back and show you what we did leading up to that. First, we started on the mock door foundation.
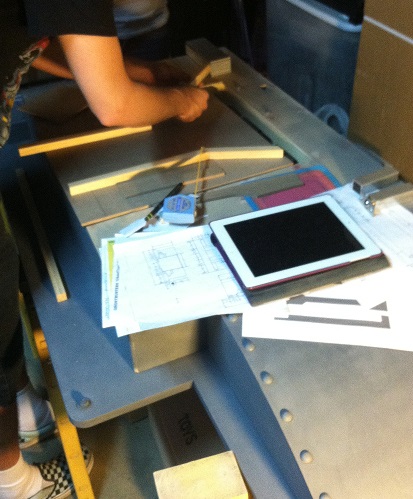
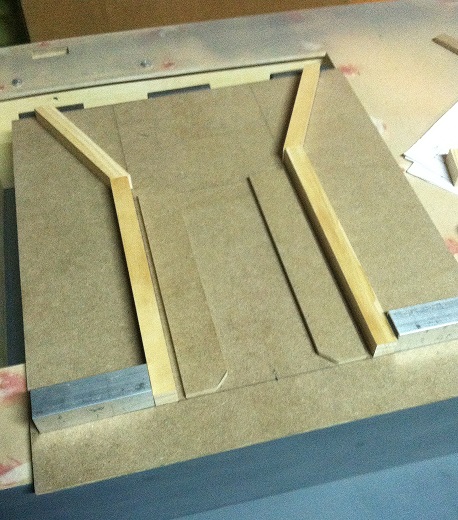
Then we built the trap housing to about where we felt it needed to be.
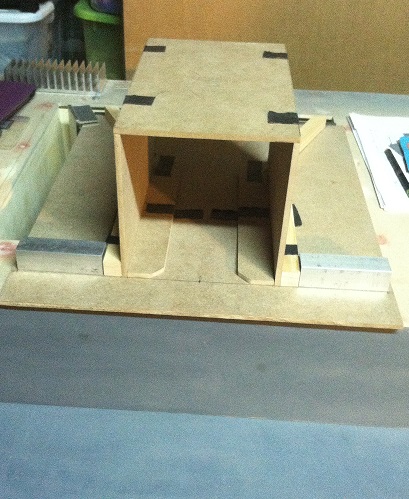
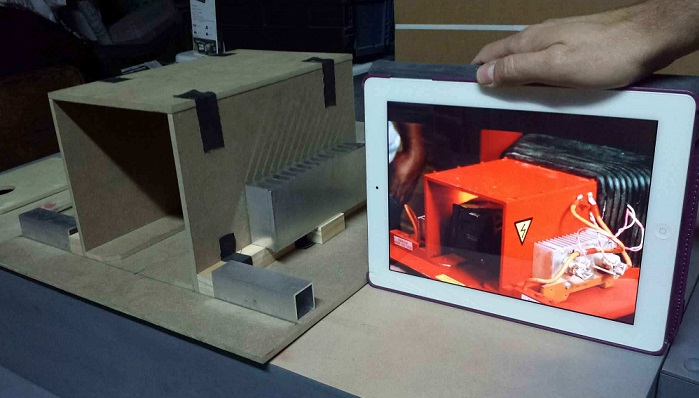
Then we played around with the scale. The heatsinks certainly helped in determining the height and depth.
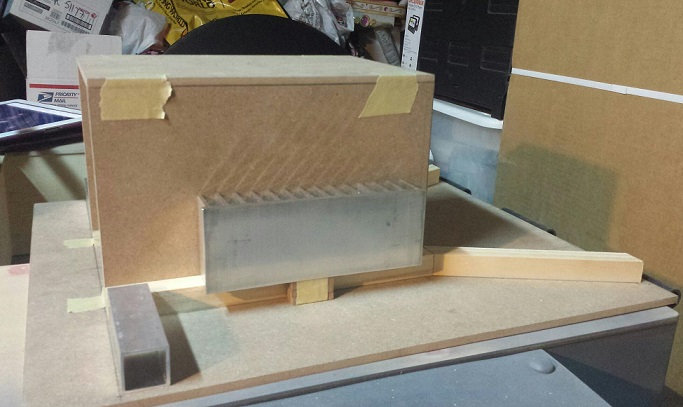
Here is us playing around with a matty trap and a quick mock up trap.
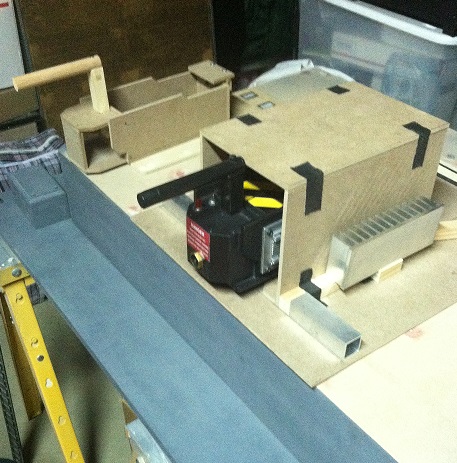
We decided the height was a little higher than we needed it, so we shaved a little off the top.
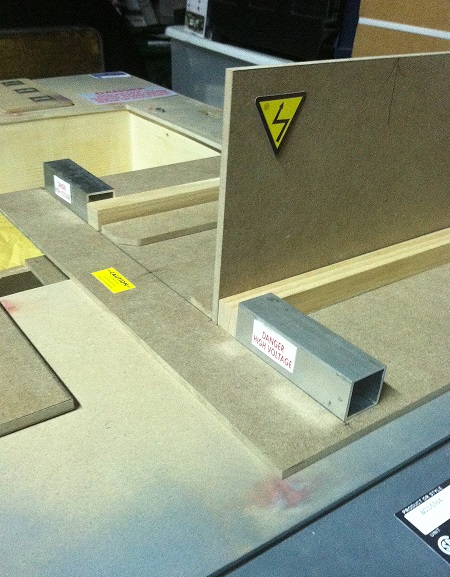
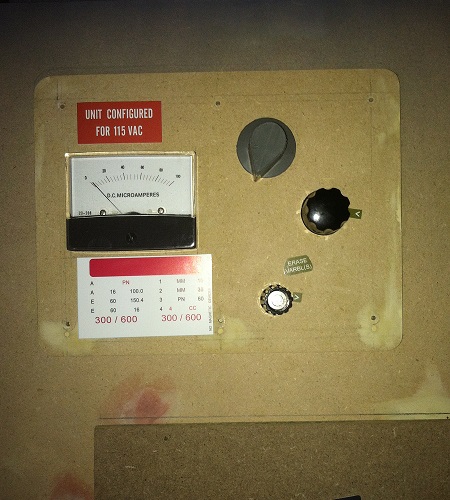
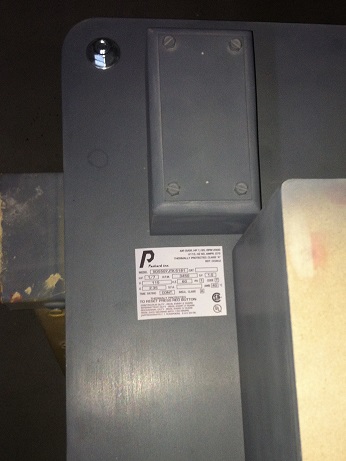
Meanwhile, I was busy designing the labels. Here are some mock ups which are not perfectly to scale yet. Basically the ones we know the size are correct while the others are estimated. I laid them out where they need to go to figure out where to iron out the kinks.
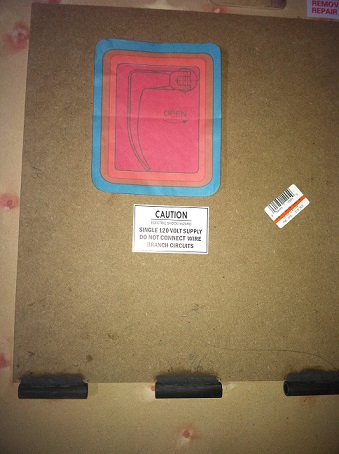
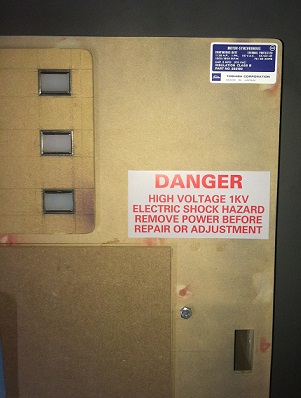
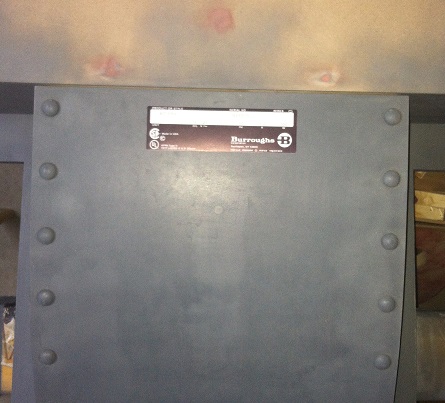
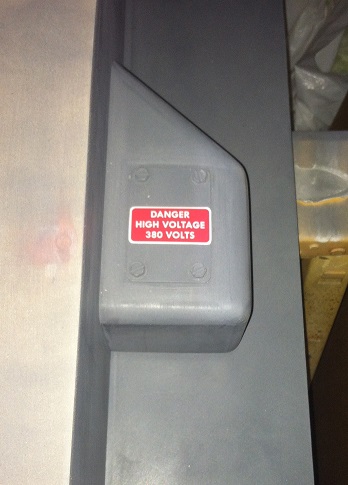
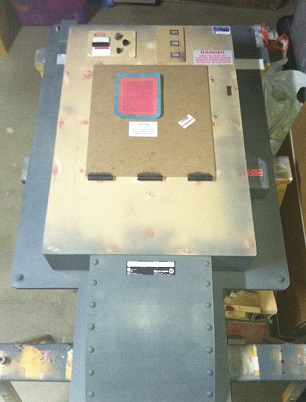
Here is a nice shot of the unit.
This is it! This is definitely it!
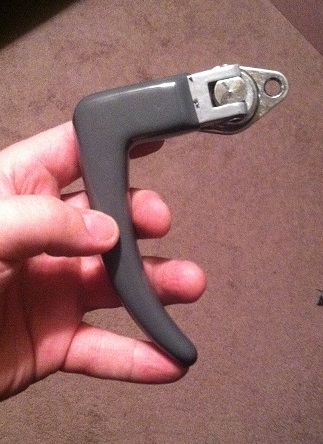
Well, that time has now come. We have the handle in hand so here is the big reveal.
The handle comes from the Eberhard Manufacturing Company (who owns the patent) as part of the 5560 series. The original model was #15-5560 which came with a jack dish, a small rubber vibration isolator pad and was zinc plated. As you can see our handle came dipped in grey plastisol which the original was not. At some point, Eberhard discontinued #15-5560 either sometime in the 70’s or 80’s. It was revised in the 90’s where the jack dish was left off and the handle was dipped in plastisol. This was #2-5560, which they still offer to manufacture but with slight variation. The handle and the keeper are now separate pieces. The keeper is model #15924. The handle is also dipped in black plastisol.
We contacted Eberhard about #15-5560 and they have no record of when it was last manufactured. Also, they are strictly a manufacturer and not a distributor. They don’t sell directly to the public. So, how did we track one down? Eberhard actually helped us with that. Thankfully we got someone over there who was a fan of Ghostbusters and went out of their way to help us track one down. They got us in contact with a supplier that had old stock of #2-5560. I will be glad to share that distributor information with anyone via pm. You can try contacting Eberhard directly, but honestly I feel like we got lucky.
There you go. The secret is out. 
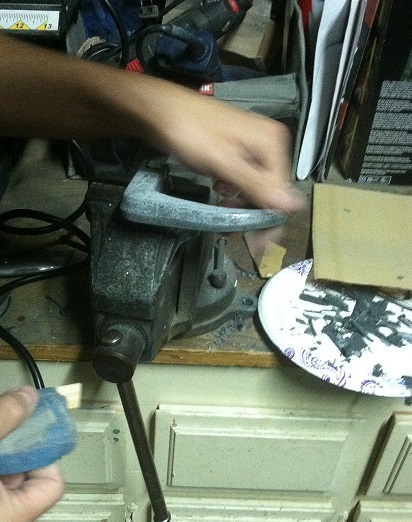
Now that we have the handle we needed to ditch the plastisol. We removed it with a heat gun, exacto knife and light sanding.
Here it is in all it’s glory!
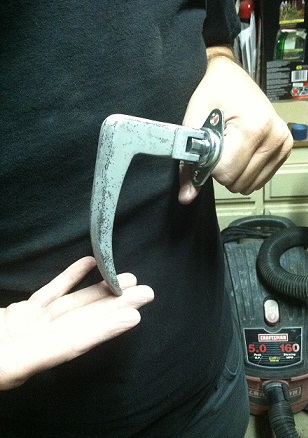
Now a shot of it on our unit.
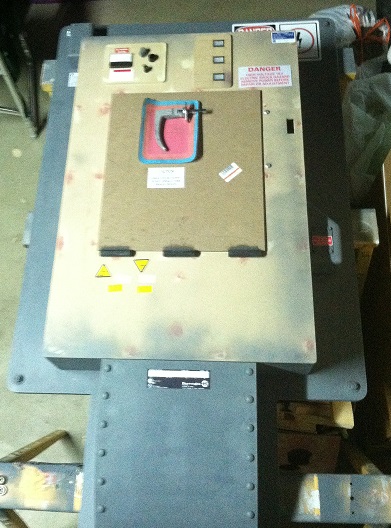
Until next time…
Holy shit on a shingle.
Haha! I can’t imagine anyone wanting to defecate on a shingle. Let alone one who is divine.
Well, here’s another small update but this one is another part reveal.
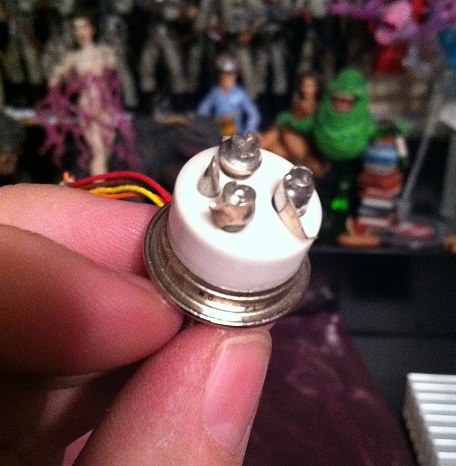
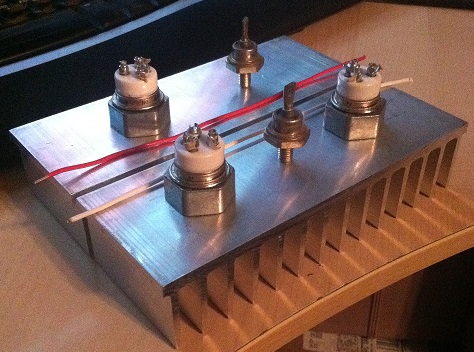
This is what is known as a vacuum relay and they are primarily used in ham radios. These bad boys screw into a nut that is tapped into the heatsinks on the side of the trap housing.
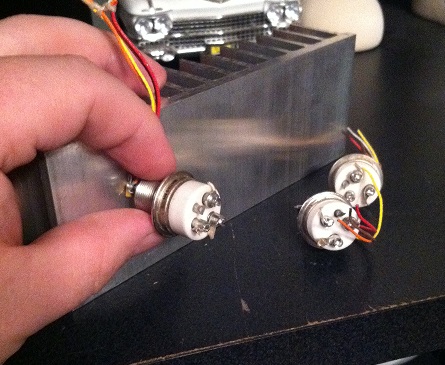
At first glance I thought these were too small, but then I put them next to the heatsink and they were perfect! A few companies make these and we went with a company called Jennings. I don’t know for sure what company made the ones on the ECU, but Jennings appear to be the closest.
That’s all for now! Just awaiting a few more parts.
I’ve been meaning to post this small update for sometime. I’ve just started working full time again so I haven’t had the chance to post until now. Plus, the other project we are working on took a huge leap forward, but more on that after we get back from Wondercon.
With the sides of the trap housing we are obviously looking to replicate this:
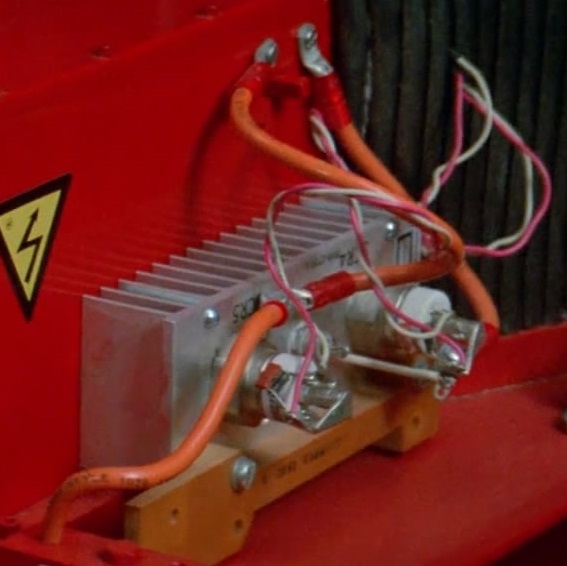
We set out to find all of the little greeblies associated with the heatsinks. We bought the two recovery diodes a while back. They are the little pieces in between the vacuum relays. We just recently found the bolts that the relays will fit into on the heatsink. They came off of certain conduit connectors. The bottoms of the vacuum relays unscrew and sit perfectly flush with the heatsink which will make them easier to connect without doing some monstrous tapping.
All we really need at this point are to find the right ring terminals that the orange tubing fits into. We believe that they are 6 gauge.
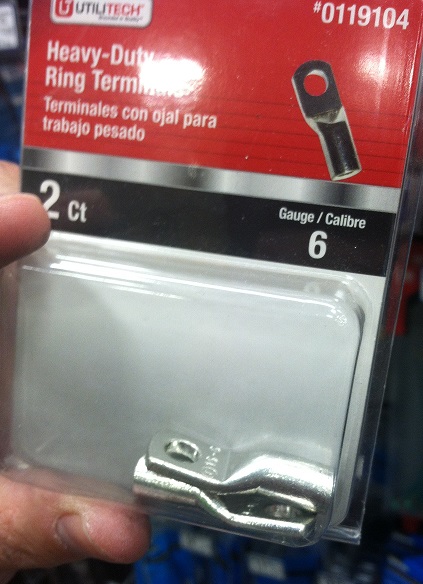
We didn’t buy these yet because Home Depot wanted a fortune for 2 and they are way cheaper online. We are going to need about 10 of them. Plus, I need to put in an order for the orange tubing. I’m going to go out on a limb and just go with Clippard. They have a 5/32" orange tubing as part #URT1-0503-ORS-050. It’s basically the same size as what is used on the proton packs. I’ve also got my eye on a set of dry rub transfers to replicate the CR4 / CR5 on the heatsink. Probably add CR3 to the other side?
Since the other side of the trap housing is never seen and its setting is obviously different from the opposite side, we are going to be taking liberties with it. We figured going with this setup:
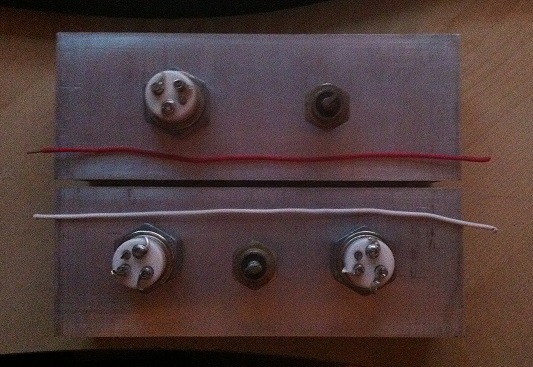
Who knows what the other side looks like? It might not even have any of these parts on it. Sadly, a detail lost to time.
Sorry it’s been a while. We’ve been all super busy with either work or personal matters. Not only that but our entire team is going on a trip in 2 weeks to visit Oregon for the Goonies 30th Anniversary. We’re not doing anything team related while we’re up there. We are all just huge fans of the movie. Anyways, upon our return we will have a booth at the L.A. Cosplay Con on June 13th. After that you can find some of us at SDCC and all of us at the Mass Hysteria party. We look forward to seeing everyone there.
Not a whole lot has happened with this project in the last few months, but I do have a few small updates to include. First, we finally got our hands on the elusive 3/4" red Dakaware knobs. Behold!
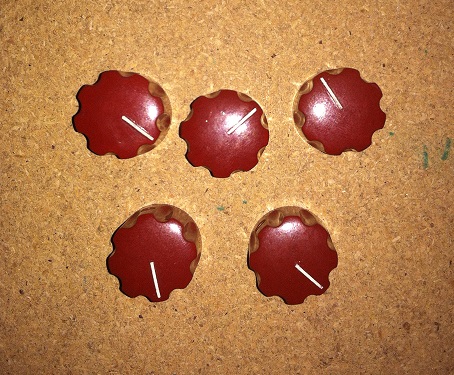
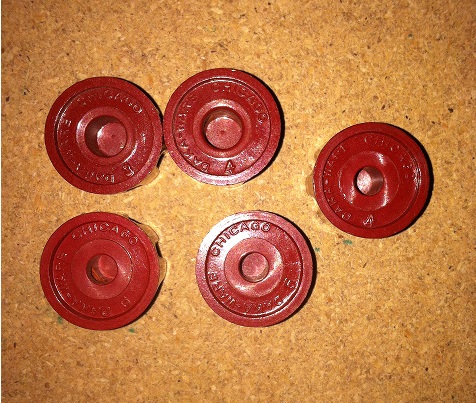
Finally! The little detail was driving us nuts. It doesn’t make a huge difference but you can really notice it when comparing to the other sizes. (L2R: 1/2", 3/4" & 1")
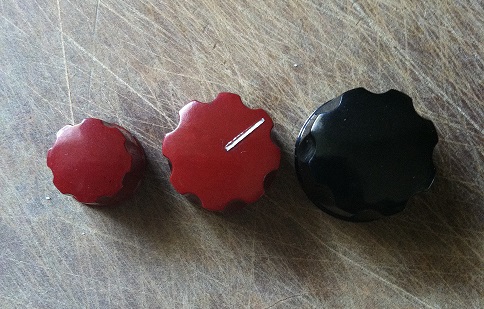
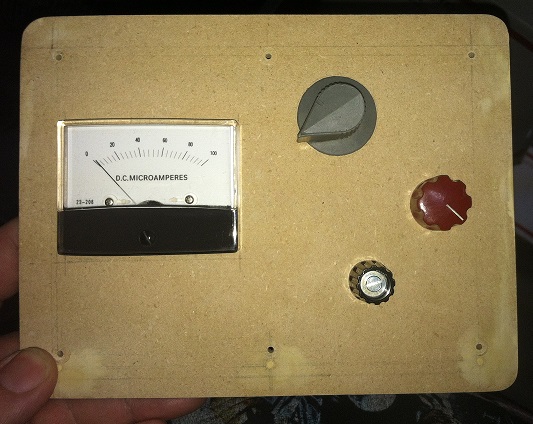
One of these lucky knobs will find a permanent home on the instrument panel.
We also tried getting our hands on the spring mechanisms for the door, but the company that had them told us they were discontinued and no longer had stock. Damnit! We have a few other suppliers to get them from but that’s going to have to wait until after our trip.
We also have been busy with something else. For the last two years we’ve been collecting parts to build an Ectomobile using a Ford Flex. Here’s a small update on that.
Here are most of our parts laid out.
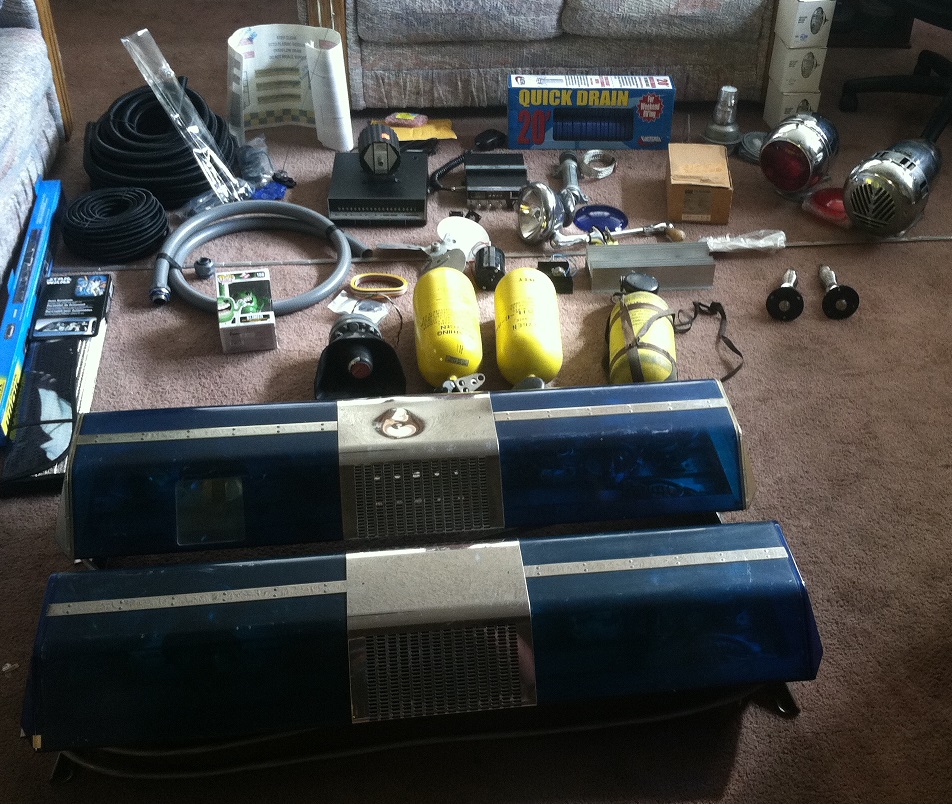
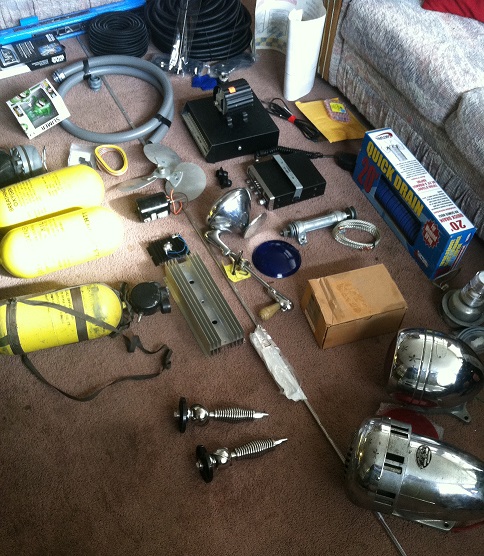
Oooh, sexy! However, this will make it sexier…“Everybody can relax, I found the car.”
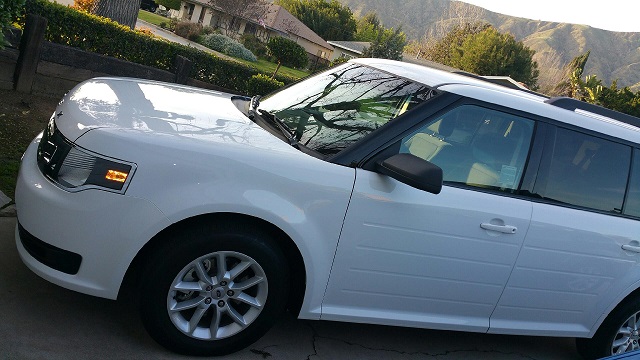
We have high hopes that the car will be done by October of this year. The containment unit done by 2029+…
This is amazing.
Thanks! I will have a small update coming in the next couple of days. At this point, there is one final step we need to do before we can paint it and put it all together. I’ll have more soon.
This is so awesome… always dreamed of having the containment unit in my room when I was a kid :garrett:
Update time!
It certainly has been a while. We got back from our trip and discovered all of these packages on our doorstep. The next mail day has finally come. Now it’s time to open everything, reveal some of the new goodies and get back to work.
To start things off, I have been looking for an appropriate jack dish for the door handle. There are specific measurements to the original that is proving to be very difficult to finding a generic one in the wild. Here is a picture of the closest one I could find.
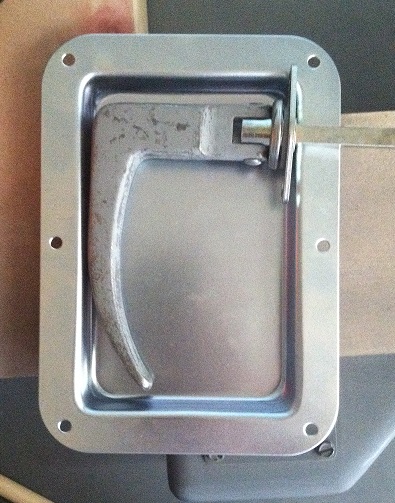
It’s slightly smaller than what we need. The picture below shows that it will work but it’s going to be a tight fit.
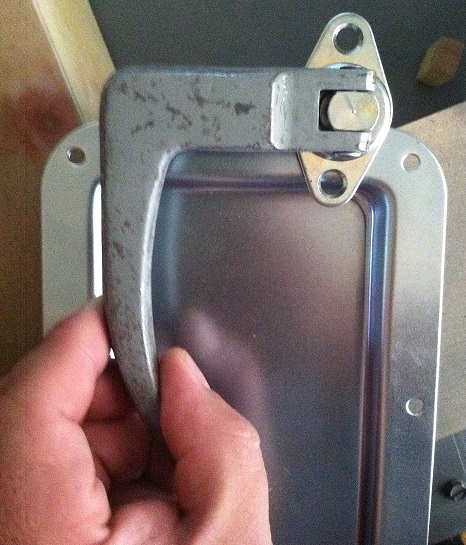
But if we’ve come this far, why settle for something that isn’t right? Well, the good news is that we aren’t going to be using this jack dish. Instead we are having one fabricated to the original specifications. That’s going to have to wait until another mail day.
Mail day also brought us these:
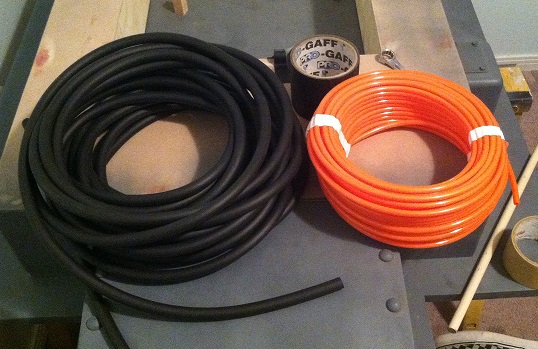
The black bundle of foam is for the door bellow. We need to be able to make 17 ribs in various lengths with this stuff so we ordered 50 feet. The orange tubing is for the wiring on the sides of the trap housing. This was the smallest amount I could find for a decent price. The end result will be something like this:
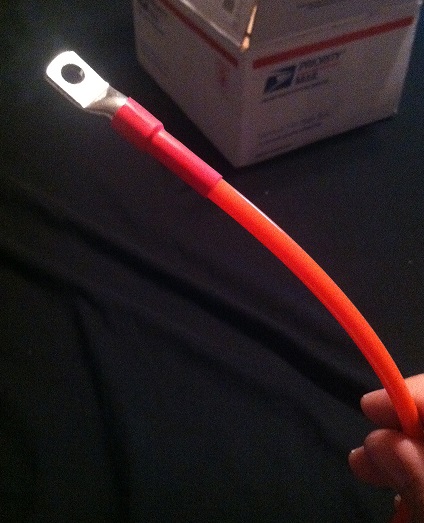
The terminal attached to the tubing you’re seeing is slightly too big. I ended up ordering the wrong size so I returned them. Got the new ones and those were also the wrong size. Damn! When I can get my hands on the right ones, I will be able to start on the housing wiring.
Now, let’s move on to find out what’s been holding this build back. Something else finally arrived. Let’s get some measurements first.
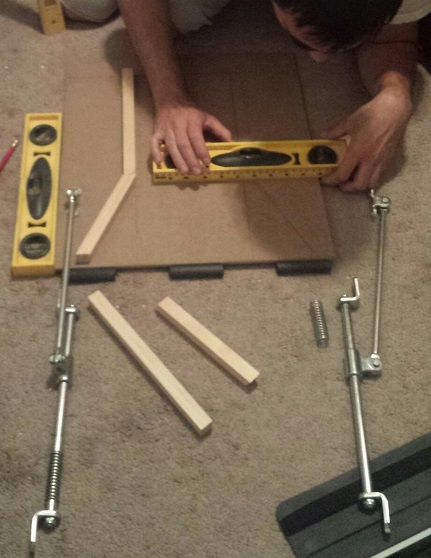
Now, let’s go ahead and temporarily mount these so we can get a working mock-up.
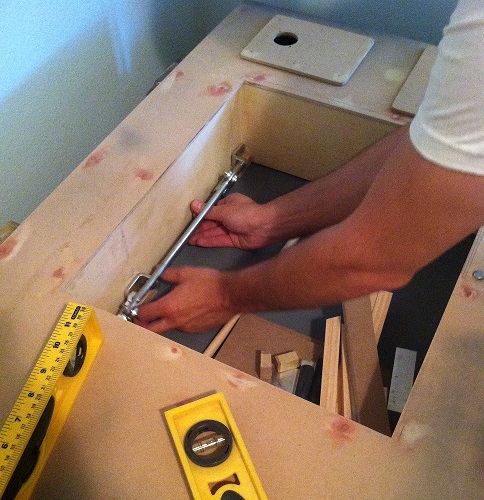
Let’s see if all of this waiting has paid off. Please, work the way you should. (x3)
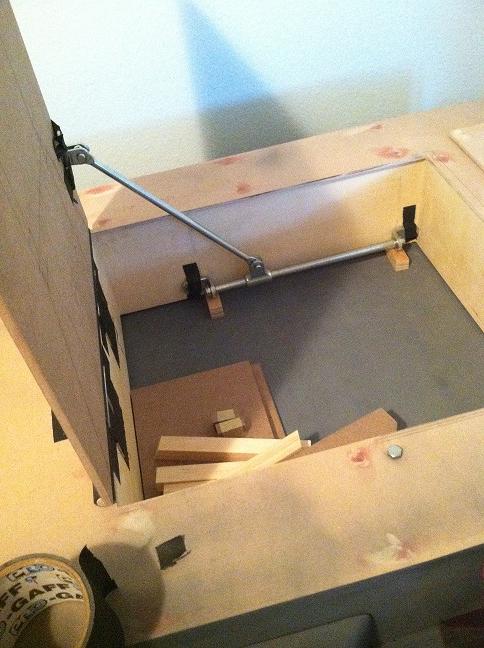
Well, it’s all taped down. Let’s see if it will work. (Sorry in advanced for the poor quality video.)
YES!!! It even sounds the way it should!
Last but not least:
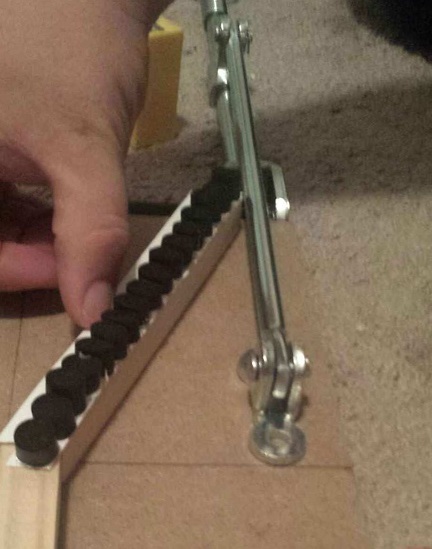
While Onlyalad19 was fussing with measurements on the door, I took some foam and glued together a mock-up to see if I could get 17 rows to fit in the space we allowed for it. Note: the first row is supposed to overhang like that.
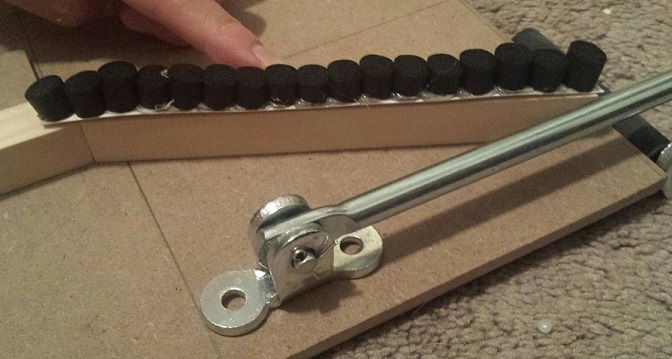
Success!!
We are approaching the final steps before we can finally paint this beast and put it all together. We are waiting for one more mail day to come. Obviously, inside that box will be a new jack dish alongside an aluminum door. The door needs some weight to it in order to properly accommodate the handle. Someone very talented from our fine community will be fabricating these for us. The plan is to have the visual details finished in the next few months. Meaning it will look like its finished, but won’t have any of the lights and electronics working yet. However, there will be a few more updates in store before that happens.
In the beginning we tried to have this done for the C4 convention back in September '14. While that didn’t happen, we had Robin Shelby with us and we all had a great time (minus the heat). The thing was we started discovering more details, parts, made revisions, etc. We decided that if we we’re going to do this, we were going to go all out and get it as close to accurate as we possibly could. That made this build slow down terribly. It’s kinda like a pregnancy where the baby refuses to come out. You get all excited because in 9 months you get a baby. Then the doctor comes in at 9 months and says the roost isn’t quite ready yet. “It’s gonna be another 6 months.” The jerk keeps doing that around the due date over and over again. Then finally after a thousand years the baby is finally born and you just lose it… I think that’s going to happen.
Anyways, we have high hopes that we will get to unveil this in a highly public place come October/November. However, nothing is set in stone yet and could quite possibly even be sooner. I’ll keep the updates coming when possible.
Stay Tuned!
I’m super jealous of this build!
The video didn’t work for me though. It says its private. 
Thanks, Jay. That means a lot! I fixed the video so it should work now.
Looking good!
Got the Ultimate Visual History today…

It’s a really good book but I can’t find a single image of the Containment Unit.
(I mean the red bit - there is one picture with Aykroyd, Moranis and Reitman in the basement with the wall to the right of the stairs in the background and a RGB Fire Station Playset pic)
(Also the pack used to illustrate a GB1 pack, is this one…
from New York Planet Hollywood)
Stephen Dane - “When I was working on Blade Runner, I went out to the Tucson airplane wrecking area and came back with two forty-foot flatbeds full of aircraft junk, and that sensibility showed up in Ghostbusters.”
I haven’t picked up a copy of the book yet, but have been meaning to. Well, I contacted the author of the book a few months ago on Facebook and asked him if the book had any rare pictures of the containment unit. Unfortunately, he said it features more production photos than anything and none of the ECU. That’s great to know about the Tucson scrap yard. That’s only a few hours where I am from. However, I don’t even know if its still there or even open to the public for that matter.
Small update - the aluminum door will be coming soon. Work will resume once we have that in hand.
Something I’ve always wondered about with the ECU is whether or not there is one small trapezoid on the side, or two of them, one on each side. As far as I know, there are absolutely no pictures of it that show that spot on the left hand side of the real unit, but I may be wrong.
Back on track, this build is amazing. The things you’ve been able to track down made me so happy seeing them as this is one of my favorite props/set pieces from the whole GB Universe.