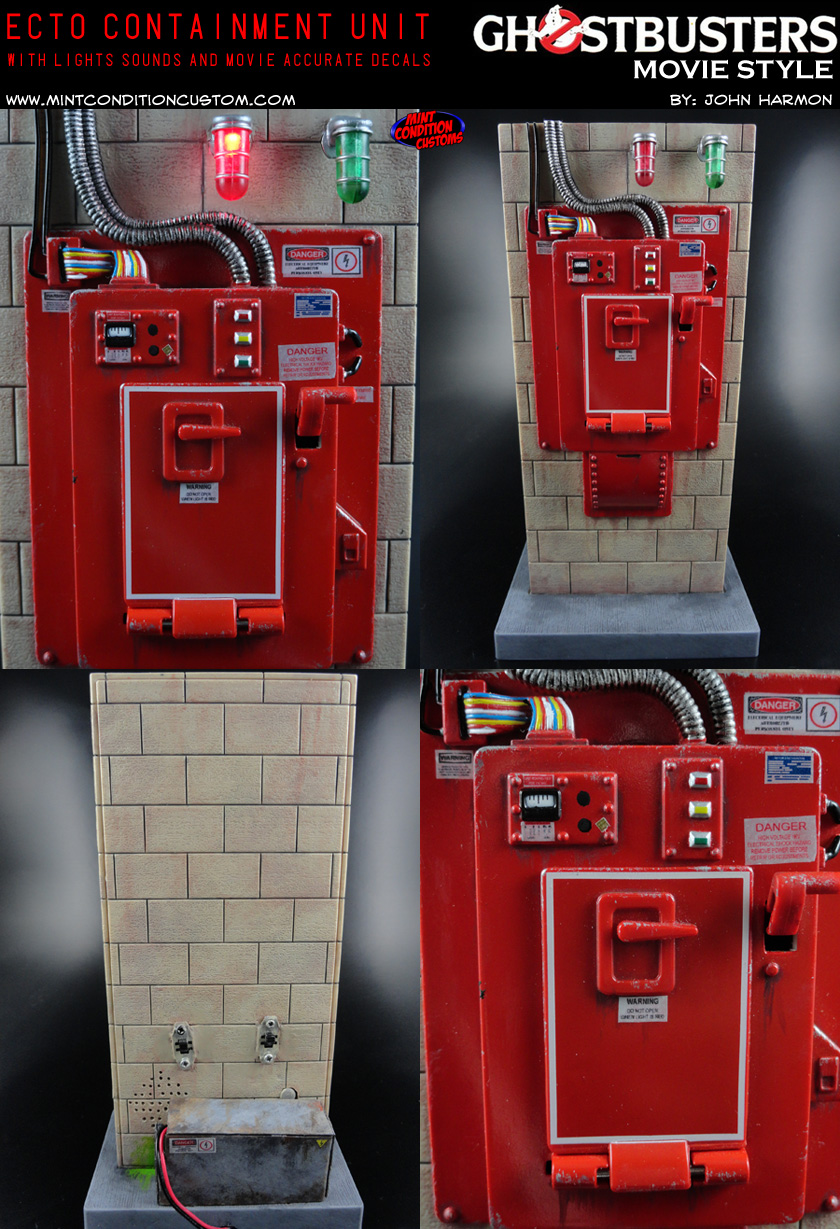
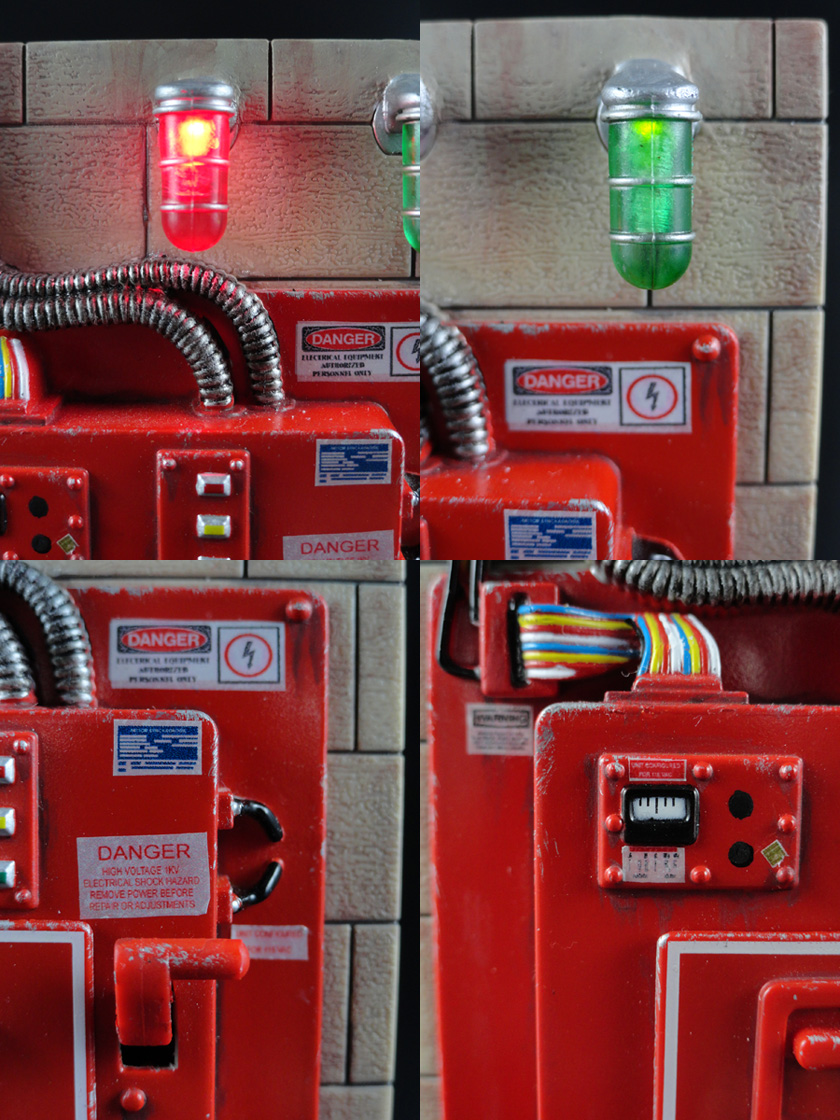
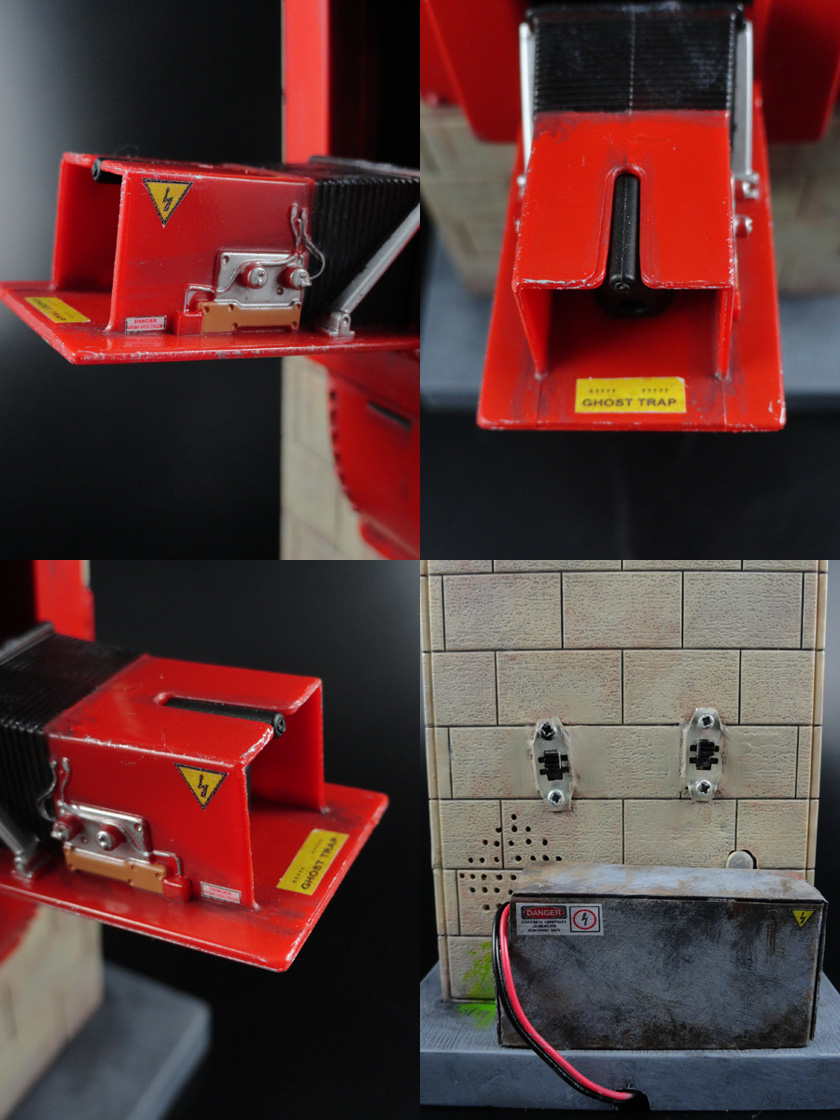
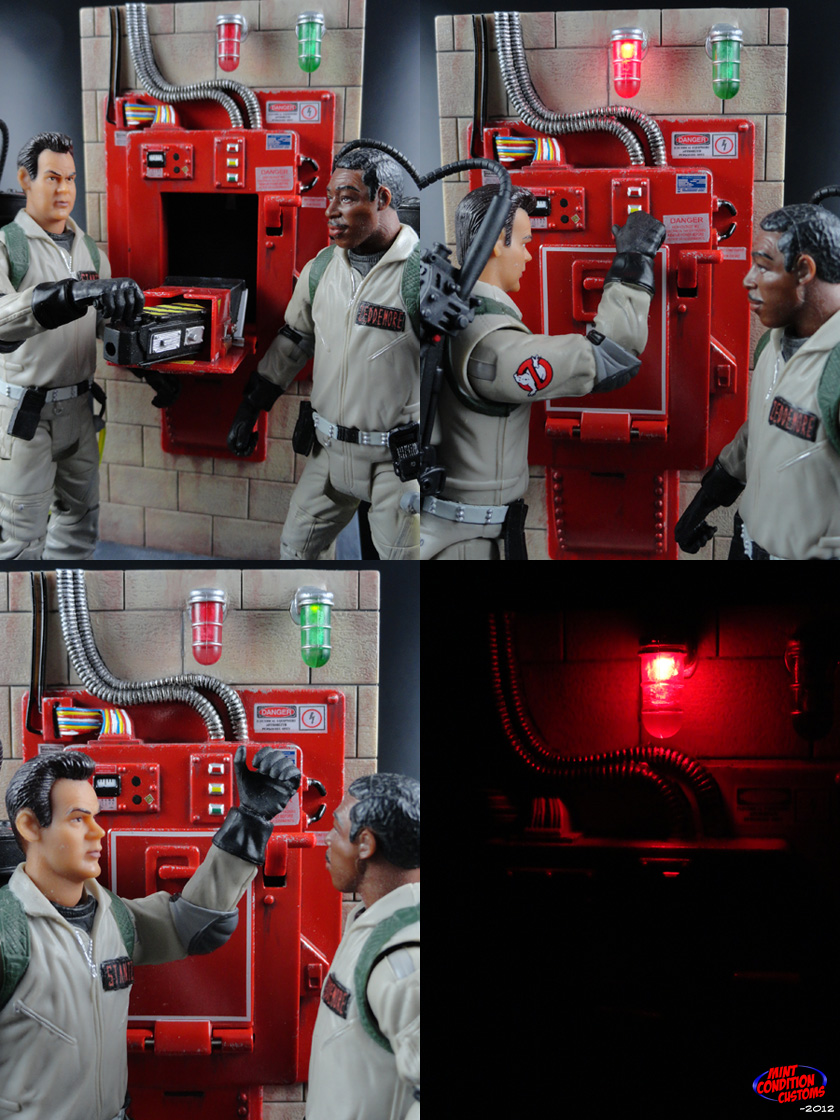
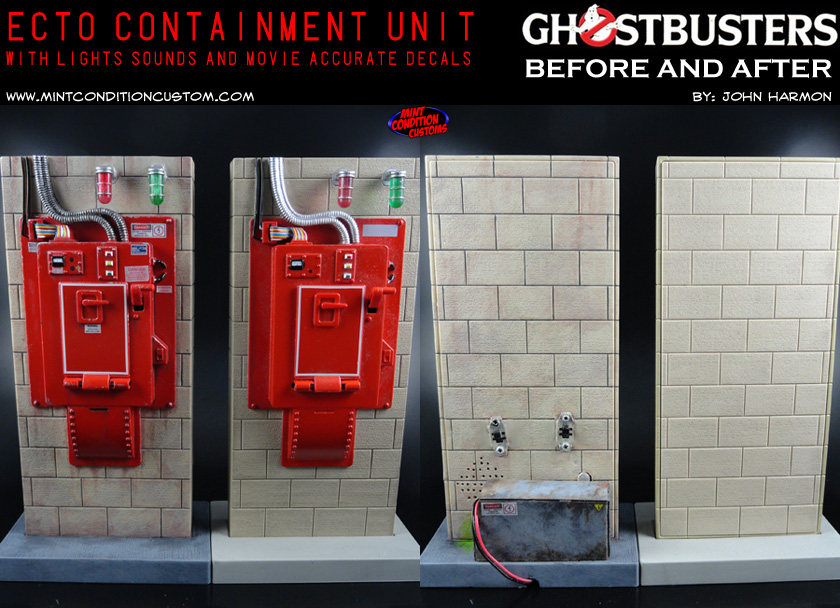
As cool as the Containment Unit was that Mattel made, it was definitely lacking in the details department. That’s where I came in. The entire thing has been repainted with realistic weathering effects, to bring some character to the piece. The bricks in the wall look dirty and stained, the Containment Unit itself has scratches on the edges, showing the metal underneath and looks a little dirty as well. I wanted it to look like something that gets used a lot, as opposed to looking completely pristine. You can see the difference in the before and after pics below.
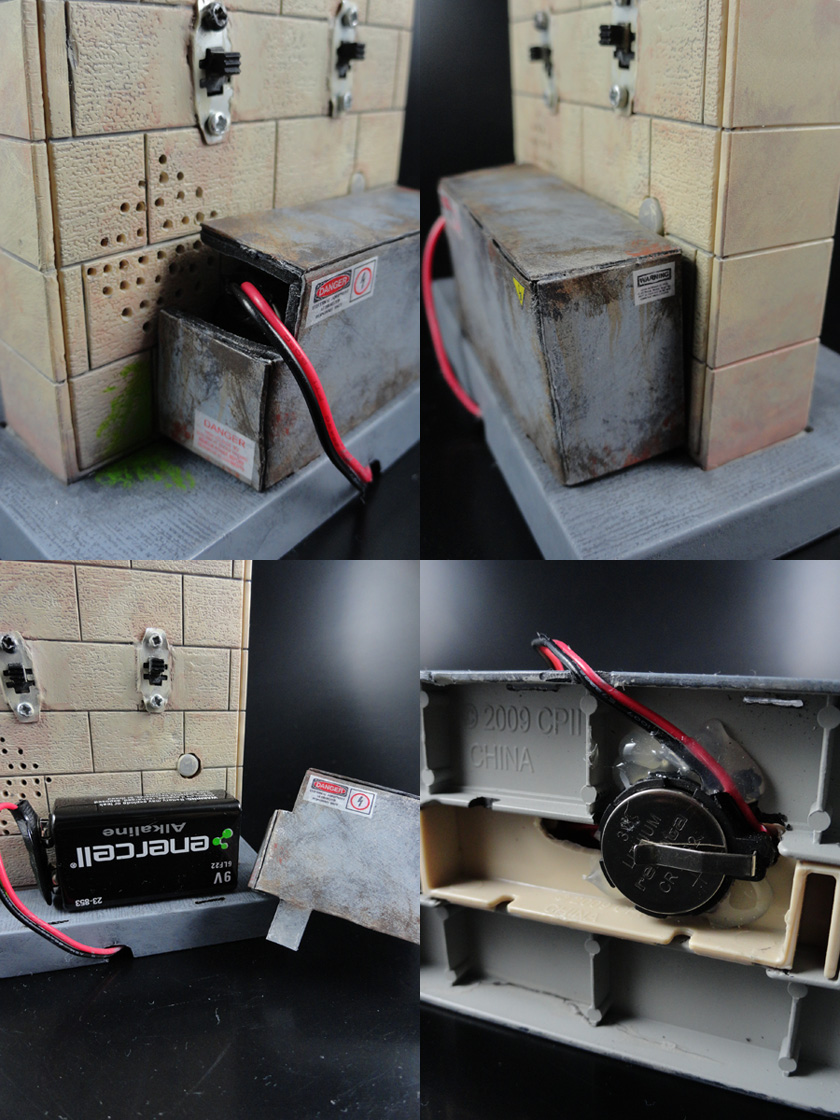
I’ve also given the Containment Unit lights and sounds. I installed a circuit inside the body with two switches on the back, and one button. One switch controls the red light, one controls the green light. The button activates the sound. I got the isolated “shutdown” noise the Containment Unit makes when Walter Peck turns off the grid. I thought it would be something cool to add. The lights are powered by a CR 2032 battery that you can access on the bottom, for incredibly easy changing. The speaker is powered by a 9V battery. I had to house it sitting on the back of the wall, so I fashioned a battery compartment and made it look like a big electrical box that you might see in the back of a store or factory that has all the wires and generators to power the building. The compartment is easily removable so you can change out the 9V as needed.
I topped off the display piece by giving it all the decals it had in the movie. I did an extensive search online to find all the reference I could, and utilized some references from GBFans.com and created hi-res versions of the decals and printed them off and applied them.
Ghostbusters is one of my all time favorite properties, so this is definitely a labor of love. I spent a lot of time getting this right, and as my girlfriend can attest to, I used up a lot of curse words as well. But it’s finally finished, and ready to incarcerate some spirits, spooks and specters!
Please tell me how you modified the lamps so they could light up… this is something I’ve wanted to do since a previous fan made a similar (non sound) effort, but unfortunately their process was never discussed in detail.
Sure thing. I’m assuming you already know how to wire up a circuit, so basically the entire thing is inside the body of the containment unit. It’s hollow in there, and you can pry the back off with a screwdriver.
All the wires sit inside the body, and I just hollowed out some space for the switches to fit through.
I had to drill some holes above the lamps, and carve out grooves on the lamp posts connected to the wall, and then drill into the lamps and make them big enough for the LED’s to fit. I got mine at Radio Shack. They have two prongs attached, and are quite flexible. The LED’s fit into the lamps, and I just bent the prongs back to fit into the grooves I made and they were long enough to go all the way back into the Containment Unit to finish wiring it up.
Then I covered up all the holes I had to make with Aves Apoxie Sculpt. Hope that helps.
REALLY nicely done! The weathering you added is perfect. . .makes me want to touch up mine now! I was ok with the stock paintjob till I saw yours lol.
The light up and sound feature is awesome, my ECU lights up (courtesy Slimeguy) but adding a sound component is just very cool. Also like that you went even further and made the outer box for the battery weathered with decals, nice touch!
Boy, the stuff you miss when you don’t have a working internet connection.
Hey Minty, nice Containment Unit you did! :nicejobyoudid: Your paint and decals take it out of the toy realm and gives it a real world look, the lights and sound just seal the deal. If you don’t mind me asking, what electronics did you use to do the sounds?
I’m not sure I understand. The lamps are connected to the front wall. The back wall pops off and is only connected to the rest of the Containment Unit via pegs that plug into the female counterparts on the front wall. The lamps are stuck on the front part. I’m sure you could pop them out if need be. They’re all one mold though. The red light is entirely molded in translucent red, and same goes for the green light molded in translucent green. The silver parts were just painted.
Holy moley, I get a compliment from the King (or Captain) of Ghostbusters customizing. That’s awesome, thank you. To be honest, I was just going to have the electronics and paint weathering, but at the last second I decided that if I was going for movie accuracy I might as well go the full mile and add the movie accurate decals. The smaller ones were a pain to get on…
To answer your question about the sound, I used this recording module you can buy at Radio Shack. It’s pre-wired, and has two buttons on it. You press one and hold it down to record your sound (up to 20 seconds I think), and the other plays it back. You can record over the sound if you need to. It’s really handy. And when I installed it, I just made sure the record button was inside, and that the speaker was up against the back of the wall, along with the button.
The only caveat is the 9V battery it takes to power it. Finding a place for it was annoying, which is why I had to make the electrical box to help it blend in.
Here’s a link to it online so you can see how it looks:
Yeah, you have this in the correct forum. Even though you’ve customized it, it’s still thought of as a collectable.
Thanks for sharing the info on the recording module, I can see few interesting uses for it. BTW, I think that making the Battery Box was a great way to blend it into the display and still keep it accesable. I have a toy Dumpster from an old Spiderman set that looks like it could hold about 4 9 volt batteries…guess i’ll be adding sound to my Firehouse.
Minty, very cool work. Looked at your website and though I didn’t look at everything you do excellent work on customs. ou actually made Daniel Craig look cool as Bond. Keep it up.
Radio Shack is the bomb. That recording module is extremely handy. If I had to try and wire that myself from scratch, the Containment Unit would definitely be sans sound effects ha ha.
I just got an email saying I didnt win the customized containment unit… then I saw the final bid price… congrats, but I wouldnt be surprised if the winner reneges on the deal…