Ecto-1H - 1963 Pontiac Bonneville Superior Consort

A few months ago I purchased a 1963 Pontiac Bonneville combo by Superior coach. After a week of headaches (truck breaking down, trailer too narrow, waiting a week for the wrecker to get off his butt to get them both) she finally made her way home.

As far as the car goes she’s in incredibly good shape for her age. The engine runs quite well, and we’ve already replaced belts, gaskets and such.

The interior is in very good shape. The headliner is in perfect shape, the floorboards are solid, and the dash is still good with all the knobs still functional. The front seat needs to be reupholstered, and the door panels can use some touch ups, but that’s about it. One of the previous owners retained the stretcher and the jumper seat in the back, so those will need to be replaced. Oh yeah, and the minor detail of installing seat belts.

The majority of the work that needs to be done is on the body. It’s got rusted out areas in the lower portions of the fenders, doors, etc. There were some spare rear quarters included with the sale, but they’re almost in as bad a shape as the ones on the car. I’m currently working to find funds for body and paint to have at least that part of the Ecto ready by May of this year.

As far as the conversion will go, we’ve had a few offers from a couple metal workers to help us make the roof rack. Another of our members has lots of old equipment to use as interior instruments. So we’ve got the meat of it planned out, just need to work on the nuts and bolts.

Sure, she’s not a Caddy, but she’s an excellent Ecto candidate in our opinion. :slight_smile:

![image](http://www.gbfans.com/images/pb/papao55/Pontiac Hearse_Hearseathome003.jpg)

![image](http://www.gbfans.com/images/pb/papao55/Pontiac Hearse_Hearseathome007.jpg)

![image](http://www.gbfans.com/images/pb/papao55/Pontiac Hearse_Hearseathome009.jpg)

![image](http://www.gbfans.com/images/pb/papao55/Pontiac Hearse_Hearseathome011.jpg)

![image](http://www.gbfans.com/images/pb/papao55/Pontiac Hearse_Hearseathome012.jpg)

![image](http://www.gbfans.com/images/pb/papao55/Pontiac Hearse_Hearseathome013.jpg)

![image](http://www.gbfans.com/images/pb/papao55/Pontiac Hearse_Hearseathome014.jpg)

![image](http://www.gbfans.com/images/pb/papao55/Pontiac Hearse_Hearseathome015.jpg)


I got two Code 3 MX7000 lightbars for the car from a local seller, and ordered some blue lenses from Wiseguys. There are a couple rotators that need to be fixed or replaced, but over all they work perfectly.

![image](http://www.gbfans.com/images/pb/cambot/ghostbusters_ECTO 1H_CIMG0278.jpg)

![image](http://www.gbfans.com/images/pb/cambot/ghostbusters_ECTO 1H_CIMG0279.jpg)

Here are some shots of the interior showing off that perfect headliner:

![image](http://www.gbfans.com/images/pb/cambot/ghostbusters_ECTO 1H_DSC03948.jpg)

![image](http://www.gbfans.com/images/pb/cambot/ghostbusters_ECTO 1H_DSC03949.jpg)

Here’s where the attendant seat should be. It was removed and kept by the owner before the guy who sold it to me.

![image](http://www.gbfans.com/images/pb/cambot/ghostbusters_ECTO 1H_DSC03946.jpg)

![image](http://www.gbfans.com/images/pb/cambot/ghostbusters_ECTO 1H_DSC03941.jpg)

![image](http://www.gbfans.com/images/pb/cambot/ghostbusters_ECTO 1H_DSC03940.jpg)

![image](http://www.gbfans.com/images/pb/cambot/ghostbusters_ECTO 1H_DSC03938.jpg)

![image](http://www.gbfans.com/images/pb/cambot/ghostbusters_ECTO 1H_DSC03939.jpg)

Here’s some close ups of the zippered access to the beacon mount.

![image](http://www.gbfans.com/images/pb/cambot/ghostbusters_ECTO 1H_DSC03942.jpg)

![image](http://www.gbfans.com/images/pb/cambot/ghostbusters_ECTO 1H_DSC03943.jpg)

Here’s the plug (I guess) for the port as seen from the roof.

![image](http://www.gbfans.com/images/pb/cambot/ghostbusters_ECTO 1H_DSC03950.jpg)

Also, we’re very big on fire safety.

![image](http://www.gbfans.com/images/pb/cambot/ghostbusters_ECTO 1H_DSC03957.jpg)

And some video for you. Please note that youtube squished the video some. The car is longer than it looks, even though it’s still short for a professional coach.

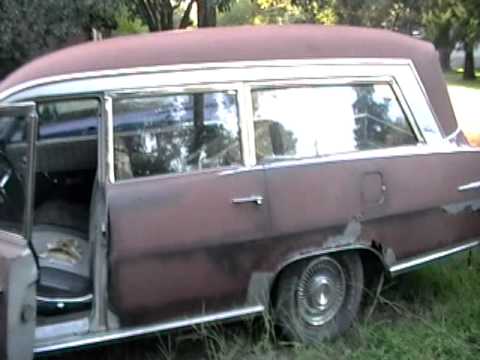
Engine running and a walk around:
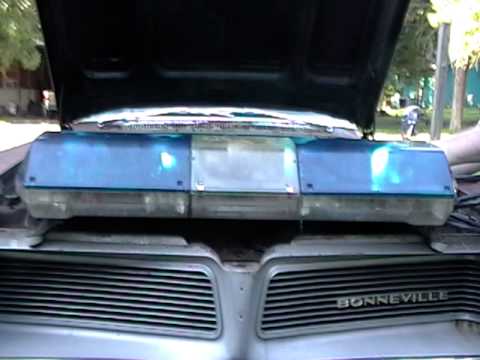
Lightbar test with the blue lenses in place. I have clips on them now, but this was taken before I got them.
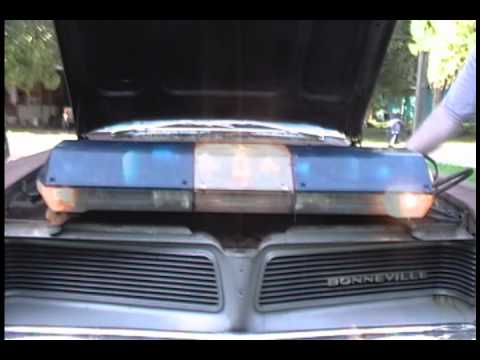
All glory to the Hypnobar!

Back in August we made a mockup of the roof rack out of 1/2" PVC, just to get a feel for what the real thing is going to look like and to make sure the measurements I came up with were correct.

![image](http://www.gbfans.com/images/pb/cambot/ghostbusters_ECTO 1H_IMG_0203.jpg)

![image](http://www.gbfans.com/images/pb/cambot/ghostbusters_ECTO 1H_IMG_0206.jpg)

![image](http://www.gbfans.com/images/pb/cambot/ghostbusters_ECTO 1H_IMG_0209.jpg)

![image](http://www.gbfans.com/images/pb/cambot/ghostbusters_ECTO 1H_IMG_0210.jpg)

That pretty much brings us up to speed. Like I said, I’m working on getting funds to have bodywork and paint done by May. I’m thinking of petitioning a few local businesses to help sponsor in exchange for some advertising - NOT a window full of decals, though. Something discrete and tasteful like a sign we set up next to the car at events or a spot on the scrolling LED sign if we get one.

Let me know if you guys have any questions about the car, or any tips or advice for the build. :slight_smile:
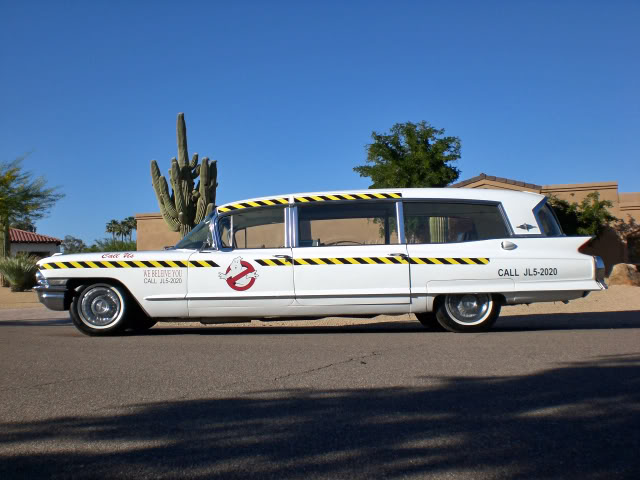
Now I feel more at home!

I love that car, and think it will make a great ECTO once you guys are done with it.

Yeah I love this car too. It’s got great style and presence and a little bit of “toughness”.

Thanks guys. Yeah, she’s definitely got some attitude! I spoke with my metal worker friend today and he’s excited to help with the roof rack. I want that to be as accurate as is practical. I had to scale the dimensions down because Bonnie’s shorter than a Caddy.

I’m having to jump through hoops sideways in order to finally secure the title for my Bonneville ( a '63 in this case). The guy who sold it to me (James) never had the title transferred to his name from the guy who sold it to him (Bruce). For the past eight months (yeah, I’m that patient) I’ve been trying to get him to do so so that I can get it in MY name.

After months of listening to his excuses and apologies and eventually his lies telling me “Oh, I transferred it and mailed it to you. You didn’t get it yet?” and most recently just not even answering my calls or returning my messages, I finally went to Bruce (who still owns the car on paper) to help me transfer the title straight to me skipping James completely.

This is what Bruce wrote:

So he’s willing to help, but he’s questioning my motives before he does. I tactfully sidestepped the truth and told him:

Which in essence IS true. I will be “restoring the body and interior to like new condition so that I can display it at local events and parades as a classic ambulance” … what he does need to know is that ambulance with have a roof rack and no-ghost logos on the doors. >_> I hope that by pointing out that horrible thing James wanted to do to it will distract Bruce from asking too many detailed questions.

Even though it’s not his business now what I do with the car, he still “legally” owns it and make the process a pain in the ass for me. Knowing how these guys feel about Ectos and seeing how they’ve treated other Ecto owners, I feel the need to “protect” them from the truth.

UPDATE: Bruce’s latest email to me was this:

So it looks like my “I saved it from being a rat rod!” distraction may have worked! xD We’re definitely on the right track now.

I’m sorry to hear about your title troubles. When I bought my Bonneville, I was faced with a similar situation. The guy I traded with never completed a bill of sale when he bought the car for $2000. He got with the man that sold it to him and decided that the best way to avoid confusion was to have two bills of sale. The first was from the guy I traded with; it told that I SOLD him my car for $2000. The second bill of say said that I BOUGHT the Bonneville from the other guy for $2000.

The whole deal made my head hurt.

I had a similar issue with the 59 Superior I thought I bought, but wasn’t as lucky. I got screwed out of the purchase price AND the car.

Gah .. that REALLY sucks! I’m sorry to hear that! Even though Bruce seems cooperative right now, I’m still crossing my fingers and won’t breath easy until I’ve got the title with MY name on it in my hand.

I just got an email from Bruce - he’s mailing the signed forms back today so they should be here in the next day or so. Then it’s just down to the tax office to register Bonnie in my name! YAY!

Also, he still has the original jump seat that he offered to sell me. Going to wait for his asking price - I have no clue how much those go for.

I’m busy else where all this weekend with work and have a local con next weekend so I won’t be able to do any kind of work on her until after that, but I’ve called for a work party the weekend after that. We’ll work on placing and mounting the lightbars and see about getting the actual roof rack started.

Once again, if I can pull the funds together I want to get the body work and paint done within the next month or two. I’m itching to get this car on the road in presentable condition!

I have a friend whose work has a welding department so one of his coworkers is going to help us out by building the roof rack at cost! BIG help there! So I think this project is finally going to get off the ground! I’m thinking once we have the title paperwork sorted, and the roof rack and light bars located and placed, it’ll definitely be time to take Bonnie to meet another friend’s dad who owns a paint and body shop for an estimate on repairs.

I’m going to locate any existing struts in the roof this weekend to see if I need to modify my roof rack plans or not. If there are existing struts roughly where we need them then I’ll revise the drawings as needed. If not, then we’ll leave the drawing as is and we’ll have to install new struts to attach the rack. I’ll be damned if we pull a Mosen on this one!

And speaking of installations, look what my Pop and I did today!

![image](http://www.gbfans.com/images/pb/cambot/ghostbusters_ECTO 1H_CIMG0365.jpg)

![image](http://www.gbfans.com/images/pb/cambot/ghostbusters_ECTO 1H_CIMG0368.jpg)

![image](http://www.gbfans.com/images/pb/cambot/ghostbusters_ECTO 1H_CIMG0364.jpg)

![image](http://www.gbfans.com/images/pb/cambot/ghostbusters_ECTO 1H_CIMG0367.jpg)

![image](http://www.gbfans.com/images/pb/cambot/ghostbusters_ECTO 1H_CIMG0366.jpg)

Yes friends, you too can have piece of mind without adding any actual safety value to your vehicle! We were just going to toss the instructions and drill the holes where we thought they should go and then on a whim (I’m prone to bouts of whimsy) I read the instructions. They told us that most 1962 and later models have pre-existing threaded inserts for seat belt anchors, so we checked under the floor mats and sure enough Bonnie had pre-existing threaded inserts!

So after 15 minutes of scratching our heads and trying to figure out how to do it, it took us all of 10 minutes to do it. We took a celebratory drive to the gas station and back. Weehoo!

I wouldn’t have put the belts on, but that’s just me…At least you get to drive yours though!

yeah, they cost all of $30 and since the anchor points were already there we didn’t do any damage to the car. I installed them mostly for peace of mind and even then mostly for my wife’s peace of mind.

Oh I wasn’t concerned about you doing damage to the car. I wouldn’t have done it because I don’t trust aftermarket seat belts. I understand the whole wife’s peace of mind, but I’d be concerned that they fail in a crash. Did the instructions provide you a specific amount to torque the bolts down?

No, there was no specific torque listed in the instructions. All it said was to bolt them down tight and make sure every thread in the factory-installed inserts was engaged.

Well fellas, we got some work done yesterday and I feel pretty good about what we’ve got lined up.

You remember that pretty pretty headliner?

![image](http://www.gbfans.com/images/pb/cambot/ghostbusters_ECTO 1H_DSC03949.jpg)

Well … It came out yesterday …

![image](http://www.gbfans.com/images/pb/cambot/ghostbusters_ECTO 1H_56.jpg)

![image](http://www.gbfans.com/images/pb/cambot/ghostbusters_ECTO 1H_58.jpg)

![image](http://www.gbfans.com/images/pb/cambot/ghostbusters_ECTO 1H_60.jpg)

The good news is that it came out easily and without any rips, so it’s all still in one piece and intact. The better news is, look at all those struts! We were able to measure them accurately and modify the plans I had made for the roof rack accordingly. The rack is in the process of being built and should be ready by the end of next week.

And the reason we took out the liner:

![image](http://www.gbfans.com/images/pb/cambot/ghostbusters_ECTO 1H_57.jpg)

So that we could do work on the roof, of course! Once the liner was out, we set the lightbars up on top and positioned them, making sure they were exactly where we wanted them. After we deemed them straight and level, we started drilling.

We made sure to mark exactly where to drill first. We hammered that shit:

![image](http://www.gbfans.com/images/pb/cambot/ghostbusters_ECTO 1H_31.jpg)

![image](http://www.gbfans.com/images/pb/cambot/ghostbusters_ECTO 1H_30.jpg)

![image](http://www.gbfans.com/images/pb/cambot/ghostbusters_ECTO 1H_25.jpg)

And just to prove that not all the metal in the car is rusted, we took this shot:

![image](http://www.gbfans.com/images/pb/cambot/ghostbusters_ECTO 1H_38.jpg)

The pic is a little dark, but rest assured, that’s shiny metal right there next my dirty ass fingernail!

Here’s Dave holding up the rear light bar for us:

![image](http://www.gbfans.com/images/pb/cambot/ghostbusters_ECTO 1H_35.jpg)

And Dave and Steve putting it up:

![image](http://www.gbfans.com/images/pb/cambot/ghostbusters_ECTO 1H_36.jpg)

![image](http://www.gbfans.com/images/pb/cambot/ghostbusters_ECTO 1H_33.jpg)

![image](http://www.gbfans.com/images/pb/cambot/ghostbusters_ECTO 1H_50.jpg)

![image](http://www.gbfans.com/images/pb/cambot/ghostbusters_ECTO 1H_55.jpg)

I want to use wider washers when we mount them permanently of course, but for right now we just have them dry-fitted before paint. But now she’s definitely starting to look like an Ecto. :slight_smile:

![image](http://www.gbfans.com/images/pb/cambot/ghostbusters_ECTO 1H_11.jpg)

![image](http://www.gbfans.com/images/pb/cambot/ghostbusters_ECTO 1H_12.jpg)

![image](http://www.gbfans.com/images/pb/cambot/ghostbusters_ECTO 1H_44.jpg)

![image](http://www.gbfans.com/images/pb/cambot/ghostbusters_ECTO 1H_42.jpg)

Next on the agenda is to get the roof rack up there once it’s finished and then we’ll start electrical work and getting the lights and sound system put together while I work on getting the paint and body shop lined up.

How did you go about taking down the head liner? I’m a moron when it comes to the interior. I’ve been pondering taking mine down for the same reason you took down yours. It seems like alot of trouble. If I can’t figure it out, I’ll probably juse use self-securing sheet metal screws to hold it down (sans finding a strut) since it’s gonna be much lighter than a metal rack. Any tips?

That’s hot. You picked the right car for the job. Think the Bonneville shows exactly the proportions that an Ecto base car should have. The ratio of metal-to-glass is perfect on the Bonneville, giving it a really mean look. Pretty much the exact opposite of something like this.

Great job. The lightbars are always what gives that first inkling of whether or not a car is going to make a good Ecto, and I think you’ve nailed it!

Also: what is your plan regarding the door trim?

This is (to me), the most obvious solution, other than removing it entirely (don’t do it!)

Well, on my car there were several trim pieces held on by screws that hid how the liner was held on: with staples! We removed the trim and tried our best to remove the staples wihtout damaging the liner, but they were pretty damn stubborn as you’d expect 48 year old staples to be. In many places we had no choice but to carefully rip the liner out from them since a lot of the staples didn’t want to come out at all.

Also, on each of the seams is a metal bar that simply “clicks” into holes on the metal frame on the sides, and there is a hook in the middle of each strut that holds it in place there. Since your car is pretty close to mine (a '60s era Bonneville) I can’t image it would be installed much differently, but your millage may still vary. My advice to you is to be very careful and take your time when you’re ready to take yours down. Slow and steady wins the race, right?

Alright! The Boomerjinks Seal of Approval! :smiley: Seriously though, thanks man! I love the architecture of this car, and I agree that it’s the tough attitude that makes her a great Ecto base. :slight_smile:

As far as the door trim, I assume you mean the pieces that continue from the front fenders? My plan is to leave those intact and place the No-Ghost on the rear passenger doors. It’s going to look a little odd at first, but I think once it’s all together it will work out. I want a great Ecto, but I also want her to still be a great Bonneville and my goal is to try to blend the two without compromising one or the other.

Edit: Hmmm … after seeing your 'shop, that’s another good solution, too. I’ll have to think about which one I’d rather go with. I don’t know if I’m confident enough in my skills to shorten the trim without it looking too cut up.

The headliner is usually the first piece of the interior to be installed. With these cars, it varies by year and coach builder. It can be a PITA, but what you’re gonna have to do is figure out how it’s attached and reverse the process from there. USE WASHERS!!! Don’t use only self-tapping screws otherwise you’re gonna have an airborne roof rack at speed.

Oh whew, for a second there this

made me go

image

I can’t imagine that sectioning off the trim and shortening it would be a huge problem. In my eyes, it’s the best of both worlds.