“Show us the trap!” the people chant!
Woah you all hearing this? 
“Show us the trap!” the people chant!
Woah you all hearing this?
Much appreciated. I’ll go with the ones you did.
Eight months since the last update??? Funny how time flies in the vacuum of Coronageddon. I finished the trap build quite some time ago, but things with my little business got quite involved, so I haven’t had the chance to post the results… until now. Yay!
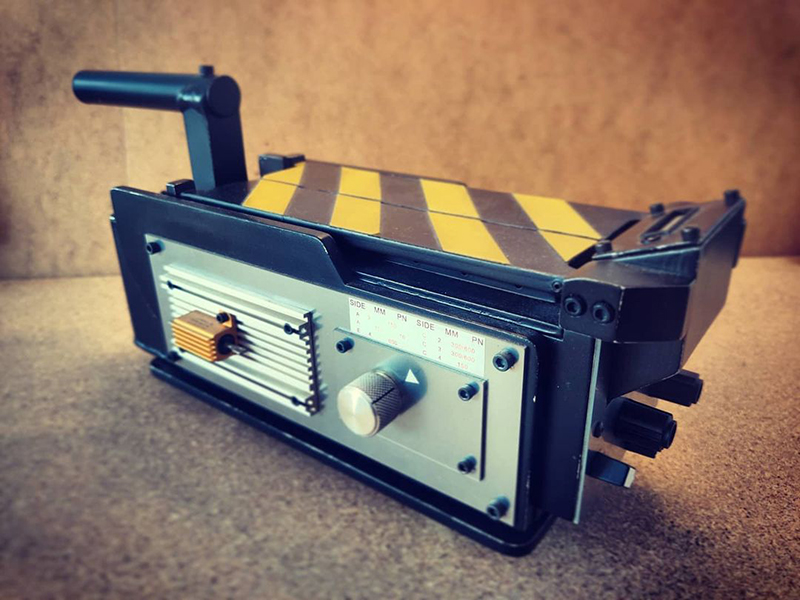
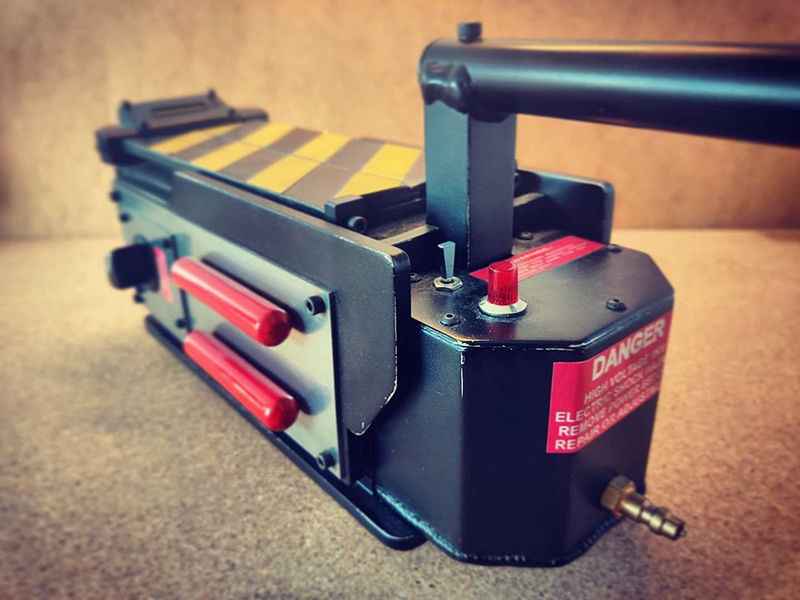
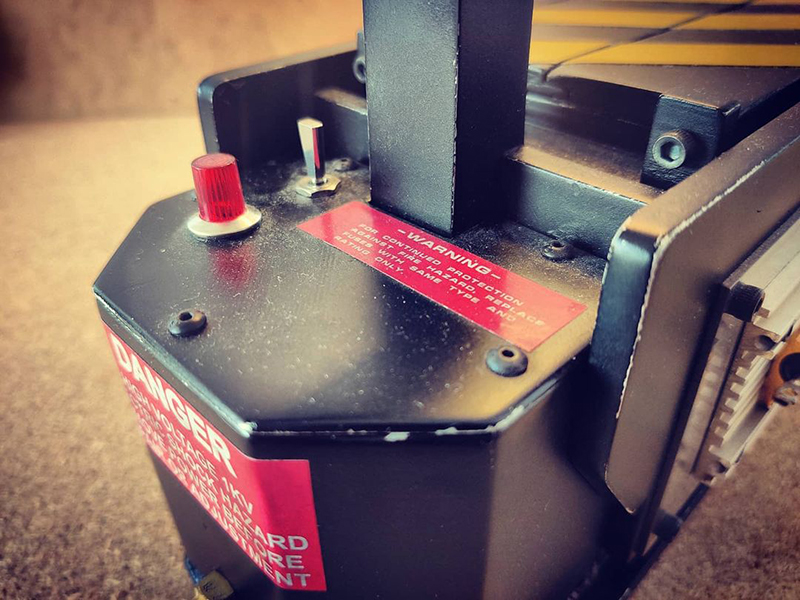
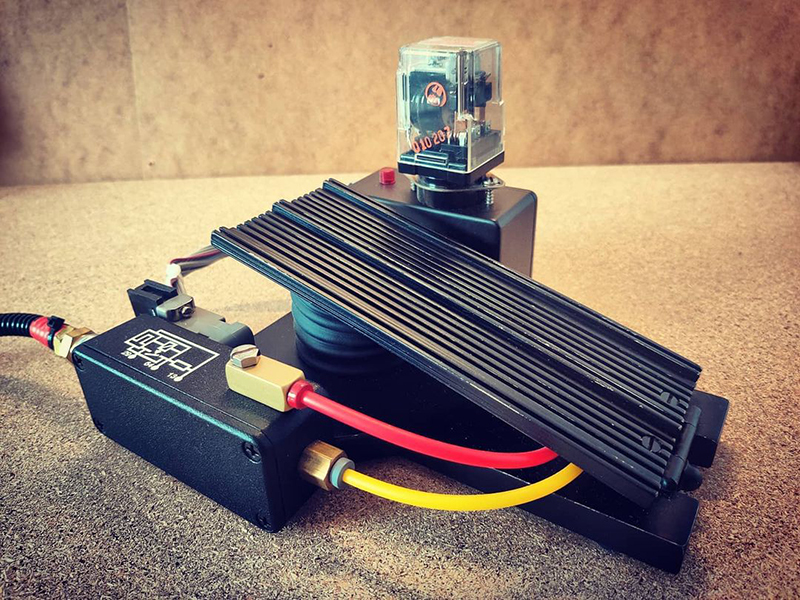
So, how did it turn out? Really nice, even if I do say so myself. It was a really enjoyable build and incredibly satisfying to see it all working especially as I went rather off-piste with some of the electronics and the supplied code. As far as aesthetics go, I went with a lighter approach to the weathering. I used a blunt piece of plastic to gently scrape the top coat of black paint from some of the edges to simulate general wear and tear. I then added the remaining vinyl labels and a dry-rub transfer for the diagram on the pedal’s metal Hammond box.
After this, I used some oil paints to add grime around the bolts and metal plates, and also into the labels and door stripes which really helps age the overall look of the prop - I used a mix of Burnt Umber and Ivory Black. I initially went a bit overboard with this, but as oil paints take an age to dry, there was plenty of time to wipe off the excess. However, it proved to be rather stubborn getting enough off the aluminium vector plate which now has a slight yellow tinge in the grooves, which actually worked out quite nicely.
I have seen some props go from great to horrible with way too much weathering that just doesn’t look natural. Maintaining restraint made the trap go from ‘fresh from the factory’ to ‘janky piece of ghostbusting tech’. Couple that with the insane amount of dust that it picks after just one day on its shelf in EctoLabs HQ, and it’s not looking too far removed from my original reference photos.
There are still some improvements to be made such as better quality labels, more attention to detail on the front knobs and also a GB1 accurate side knob (as I’m still using the GB2 style one included with the kit), but overall I’m really happy with how it looks - those that I have demoed it to can’t believe that it has been 3D printed. It even fools me sometimes!
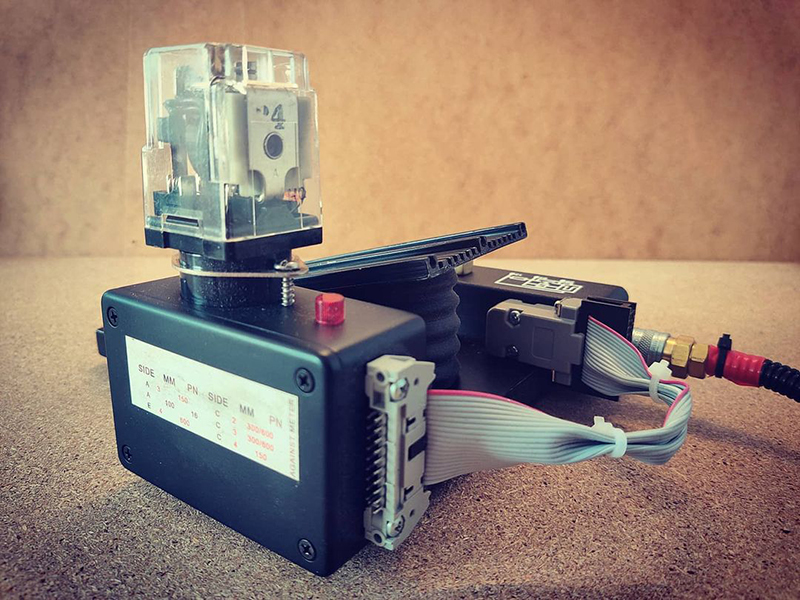
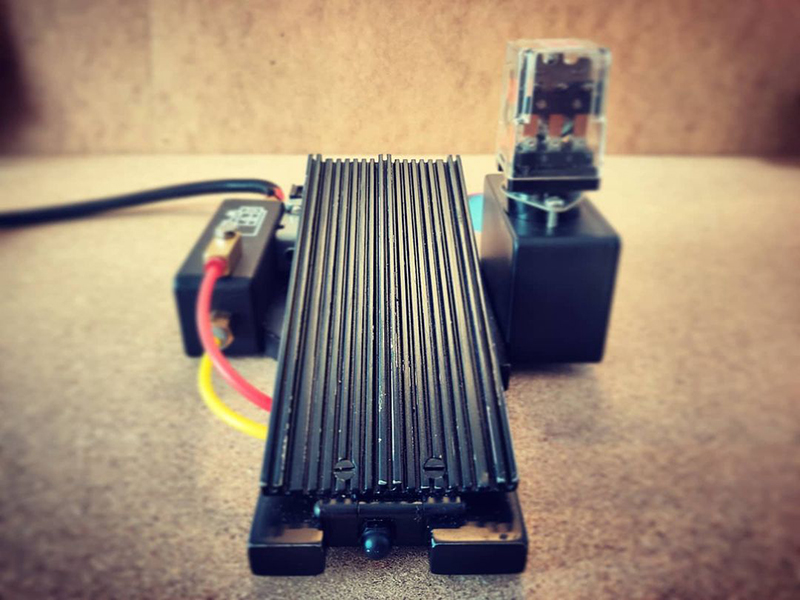
Here are some photos of the trap and pedal in their current form:
But, let’s face it, the electronics are the real star of the show when it comes to ghost traps. I’m happy to say that I managed to get it all working after a lot of code tweaking. As I opted to use NeoPixel Jewels for the main lighting effects, there is a conflict that exists between the NeoPixel library and the servo library that operate the doors. This can cause the servo motors to twitch when the NeoPixels are being animated. I did try the alternative servo library that exists, but I had no luck in getting it to work. In the end, I opted to tweak the code so the motors are only active during the movement of the doors and completely detached from the code at all other times. This seemed to do the trick and now everything works consistently every time.
My original plan was to make the trap behave more like the hero trap does in the Sedgewick Hotel scenes. This was greatly helped by the inclusion of better SFX more accurate to GB1. Giant Crunch bars to Ryusui for the sound files he shared here a while back. I edited these to adjust the timings and create loops so they would work with the Music Maker board inside the trap. These sound effects are triggered by the pedal stomps and are synchronised with the smoke machine to create four distinct phases:
POWER ON (Flicking the toggle switch initiates the Arduino code. Once it has been fully loaded, the bargraph on the front of the trap displays a red chase pattern, followed by a start up sound to indicate it is ready (I used that lovely little sound you hear at the very beginning of the first movie as Columbia appears).
TRAP OPEN (The first pedal stomp opens the doors with accompanying SFX. Initial pinkish light from inside the trap which flickers randomly. I added a looped rumble here to make the trap suddenly feel a little more ‘dangerous’ ).
CAPTURE (The second pedal stomp starts the 8 second capture sequence. The main lights burst into brightest white and start strobing with increased intensity. The smoke machine kicks in at this point which makes the lights look even more awesome. The capture SFX runs for the full sequence until the doors snap shut. Silence for a second until the yellow bargraph illuminates (I created a new sound effect for this which replicates the bargraph sound heard in the movie as closely as possible). Red light on the back starts flashing with a looped beep. I also added a little extra SFX to suggest the sparks that emanate from the trap when Venkman kicks it. This is matched with some blue lights that can be seen if you look closely underneath the closed doors (this can be seen better in the dark).
RESET (The trap is reset to the phase one by a third press of the pedal).
Wanna see it all working? Oh, go on then…
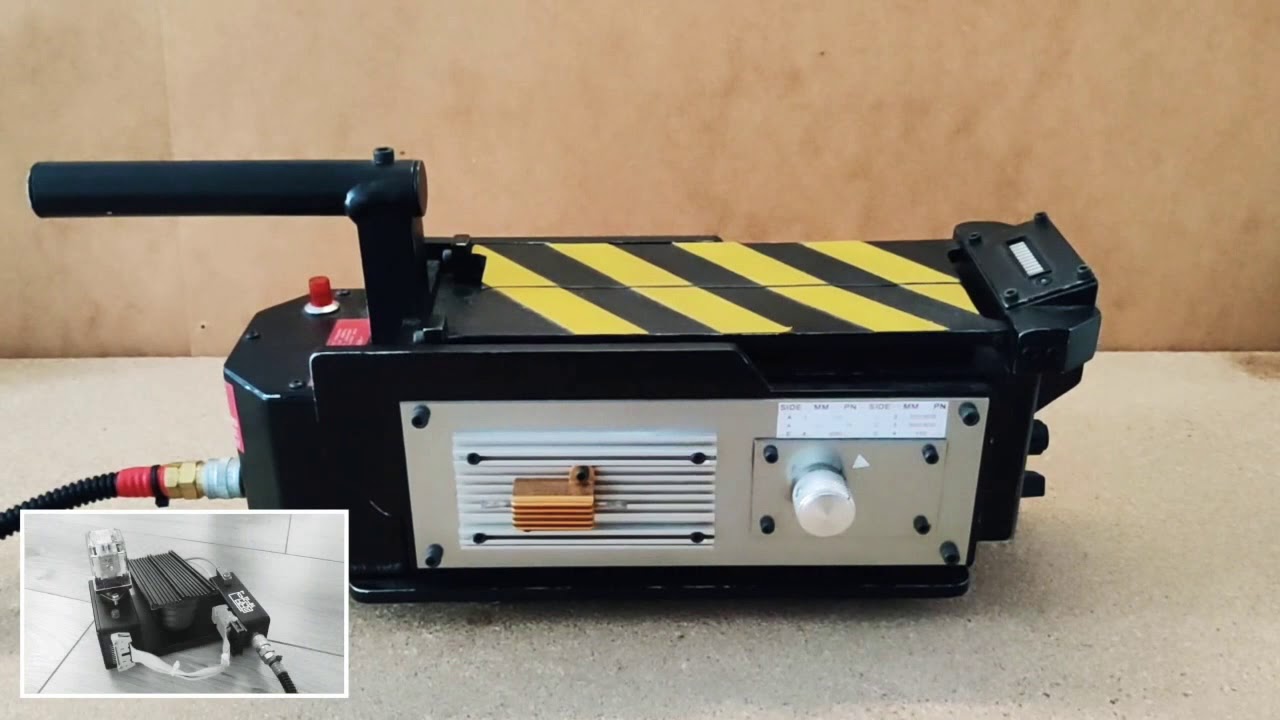
I have dubbed the sound effects over this video so you can hear them clearly (they didn’t sound so good using the microphone on my phone), but it’s a good indication of how the trap sounds in operation. The only slight downside is that the air pump that drives the smoke is quite noisy, so there is a loud motor noise during the capture. This kind of adds to the theatre of the sequence though and makes it sound like the trap might blow up at any minute which is no bad thing! Ideally, I would want the smoke to only emerge after the doors are closed. This is an easy adjustment to make but I feel the sound of the pump just ruins the illusion so I have settled with how it is here.
Downloads
I don’t want to keep the additions to myself, so for anyone who is working on their own trap here are some files that may help you…
Firstly, my modified ARDUINO CODE. Bear in mind, this is written for the specific hardware I have inside my trap and may not work with other components. However, for the tinkerers amongst us, this may be of some help (I included comments so hopefully it makes some sense):
https://www.ectolabs.net/files/CD_Ghost_Trap_-_Arduino_Code_v1.0.zip
Note: for this to work, you will need the following two additional libraries installed in your Arduino folder:
millisDelay: GitHub - ansonhex/millisDelay: Arduino millisDelay library · GitHub
And, finally, a SFX PACK with all the edited sound files I used for my build. Full information can be found in the included CREDITS files, but big thanks again to Ryusui for the original files. I have also included an alternative SFX for the capture sequence take from the 2016 reboot which sounds really great too (just edit the code to use the one you prefer):
https://www.ectolabs.net/files/CD_Ghost_Trap_-_SFX_Pack.zip
So that’s that! Thanks to those of you that have read through all of my waffling. I hope it is of some help to those of you building your own traps. I’m happy to answer any questions if anything needs clarifying - just shoot me a PM.
Ghost Trap. Done.
Dave x
Absolutely stunning Dave, great job!!
This is amazing!
I’m trying to build my trap to resemble yours. I haven’t gotten to the electronics yet, but I am thinking the only real changes I would like to make (if possible) are the following.
I would like it to randomly play a capture sound (out of say, 5?) where there is a clean capture sound like you have, but also one with different ghost screams mixed in. So it sounds like it is pulling in a resisting ghost, but not always with the same scream. Possible? I dunno.
In the movie it doesn’t seem to smoke until it is brought out of the ballroom. I was thinking it might be cool to hide the pump motor by activating it during the “lightning” sound. I’m not really sure how the smoke pump works, but the noise is something that really sucks. I wonder if it could be pulsed or shielded somehow?
I am hoping that I could use the other knob on the rod side as a volume switch so It could be adjusted depending on where it was (and while I’m working on it).
Either way, you did a fantastic job!
Oh… when you say you want to do more work on the front buttons, what did you mean?
Love it! Great mod to the code! We should give a shout out to Jeremy Williams who put together the original code and electronics. https://ledseq.com
@ImperialWalker - we decided to have it smoke when the lights turn on so you can actually SEE the lights. Even the brightest lights don’t look like much bouncing off black doors. The effect with the smoke is much better.
Cheers Sean, and thanks again for the great kit. Yes absolutely, big props to Jeremy too - I have credited both of you at the top of my modified code too.
Yeah, definitely possible. You could have 5 different variations of the capture sound file and have the code pick one of them at random to play.
I did dismantle the pump at one point and it has a silicone diaphragm that is spun by a basic motor. Isolated from the rest, the motor itself is pretty quiet, but it’s the sound of the air passing through the diaphragm that causes most of the noise. I did try another pump with a slightly different design but it didn’t do much. There may be other options that are quieter but there’s only a limited amount of space in which to fit the whole assembly, and Sean’s solution is very neat. I agree though, having the smoke happen silently would make it perfect. That said, in a room with more ambient noise, this may not be such an issue.
I just mean the detail on the front knobs. I still haven’t added silver caps on the round ones - they are still black in the centre. And maybe one of the round ones was actually completely silver/metal on the GB1? I can’t remember now.
I’m having the same problem with a twitching servo. I’m building Charlesworth Dynamics kit, and everything runs great except I have a servo that continuously twitches while in operation. You said you tweaked the code and that helped. I have no experience with coding, so I was wondering how you tweaked the code to get it to work?
Kind of tricky explaining without going into coding details, plus my own tweaks may not work with other setups if the hardware is different as I made some deviations.
Put as simply as possible: there’s a function in the code ‘servo.attach()’ which effectively turns on the motors so they are ready to receive commands, and a function ‘servo.detach()’ which turns them off and into a non-responsive state. What worked for me was to make sure that the servos are only attached at the point you want the doors to move and then immediately detached as quickly as possible after the movement is complete. This minimises the time the servos are active and less chance for any other components to interfere. In my case, the NeoPixels animations were causing the twitching, but if you are using the original code supplied by Sean and Jeremy, then not sure what would be causing it.
Thanks for the reply! Yeah, I’m using the hardware from Sean’s instructions and the original code provided. It’s just the right servo that is twitching. The other servo works just as intended. So I’m wondering if switching out the servo for a new one might work.
Or try swapping your existing servos over temporarily - if the fault follows you know it’s the servo itself (and worth obtaining another). If it doesn’t, more likely cabling/elsewhere. Doesn’t sound like code if it’s only affecting the one tho.
Switched the servos over and it’s still the same one twitching. So I just ordered new servos and hopefully that does the trick. Thank you for all your help!
Same boat than you mate everything bought from sean too, but both servos are acting as crazy and i ve not the skill to recode. a bit sad as it was a big first for me in soldering and using arduino  . If you got any solution… Thanks to Ecto labs by the way to take the time on Fb to speak with me !
As noted in my electronics guide the servos twitching a little is fairly normal due to hardware/coding stuff which I don’t understand. This was the setup that Jeremy Williams did for our original ghost trap. The servos going completely crazy is not normal and often caused by a crossed wire/short circuit somewhere which can be a total pain to narrow down. Make sure the mod done to the Music Maker board (cutting the trace) is nice and clean and complete. Try removing modules and try just the servos. If they act normal start adding modules back until something goes wrong. Apparently another problem is that there are many, many, many fake Tower Pro servos - not just replicating the design but even the sticker! I try to buy from reliable places and I test each servo before putting it in a kit but if you find that one servo is causing a problem let me know. Try hooking up one servo at a time to see if one is the problem.
Sean
hi sean, sent you a message on etsy about the problem, i really don t know what s happening i unplugged the light to be able to make a video. Motor moving crazy only when i push button and activate sequence. I followed your manual as i’m not an expert on electronic and even less on arduino like you, i worked step by step taking my time (around a week) to be sure i wouldn’t do anything wrong and following all the tutorial, and did my best for a clean job. everything works great, just that servo problem sadly.
As noted a while ago in the thread, I too had a problem with the servos going crazy. I checked and rechecked every single thing a dozen times, had various other people look at it (including an electronics specialist from the animatronics studio I work at) and ended up replacing nearly every part. Nothing fixed it except switching over to Ectolabs’ code and wiring, at which point it immediately worked. It’s still a mystery that bugs me.
is the wiring really different or easy access for a beginner ?i sthere any tutorial to explain it ? i 'm stuck on this one i guess. I was nearly ordering new servo and adafruit mp3 player today in case i did anything wrong. I also unplugged everything, tested one servo at a time etc… they still move a lot after pushing the button to open doors, and act like that until i close the doors. So would it be a servo problem ? wouldn t it be easier to have recode as commission from someone to make the servos stop after opening and rework before closing doors ? Sorry for the vocabulary as i’m not an expert but looking for a good solution before final asssembly 
edit spent the day checking with someone, no clue about what 's going on, we tested and retested. Here is a quick video of the servo :
https://www.facebook.com/daviddeessevermoon/videos/10223176078843772
Yep, looks just like mine did. Ectolabs changed the code a lot, while also changing the lights to 3 neopixel jewels linked together, and attaching some of the parts to different pins. Changing it took 15 minutes maybe. I don’t understand why, but the servos never worked properly in the original configuration, and then worked flawlessly with Ectolabs’ mods.
Ectolabs definitely earned this: :crunch:
would you have any easy tutorial or pictures to follow for a beginner ?
All the information I used to mod it is on page 1 of this thread, where you’ll also find Ectolabs’ code, sounds, and the 2 libraries you need to include with the code. I can dig out my electronics later and take a picture of the wiring so you can see which parts are wired differently. It’s only the lights and servo pins that get changed, and the lights are a really great upgrade. You’ll need to purchase 3 neopixel jewels before using his code and wiring.