EGB: Ecto Containment Pack

Well I thought I would start a new topic in here and let the old one in the EGB forums alone now that I am beginning to actually build this thing.

Recap:
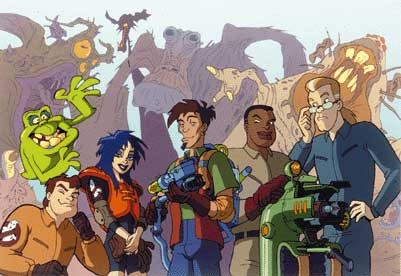
I have always wondered what on Earth the piece of equipment was that Roland was leaning on in the promotional pictures and the opening credits of Extreme Ghostbusters. I originally believed it was a recreation of the Slime Blower, but I now know it is called a “Ghost Containment Unit” according top the Deluxe Roland action figure that features the weapon in question. Personally I prefer calling it either a “Trap Pack” or an “Ecto Containment Pack.”

image

It was featured in a single episode (Sonic Youth) and used by Janine in an attempt to capture an escaped donkey ghost. The weapon failed to work, but it was quite neat nonetheless.

For those interested, the names of the weapons for the other Deluxe figures are:

Egon: Radar Pack

Eduardo: Extreme Protonic Cannon

Kylie: Plasma Blasters

Some interesting things to note, the smaller tank that is situated directly behind the wearer features a Cyclotron with three lights (most likely red, if they were real) with a Bumper and Ion Knob. I thought that was a neat detail to include to maintain a continuity between the Proton Pack and this.

Also, the promo image of the action figure posted above is not exactly the same as the real toy. There are several minor detail differences with the final toy. Interestingly enough, the promo image is also featured prominently several times on the front and back of the retail box.

Detailed Photos of the Toy:
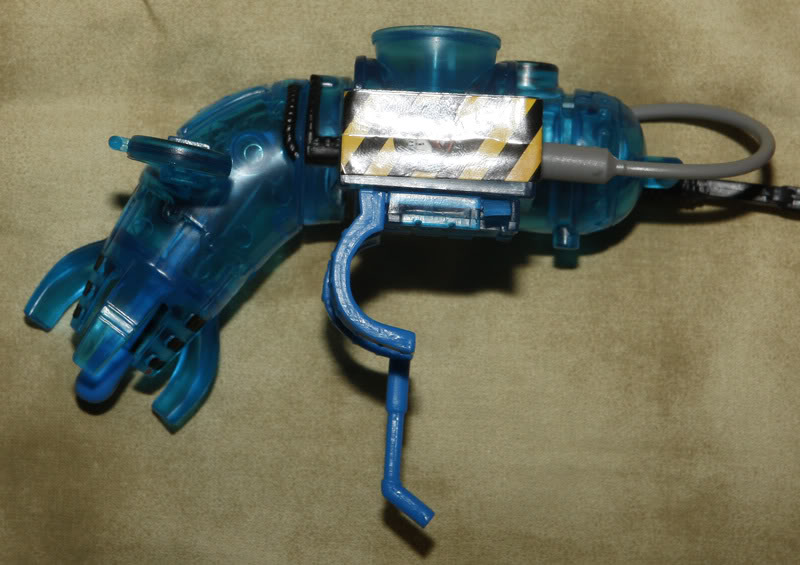
Right Side
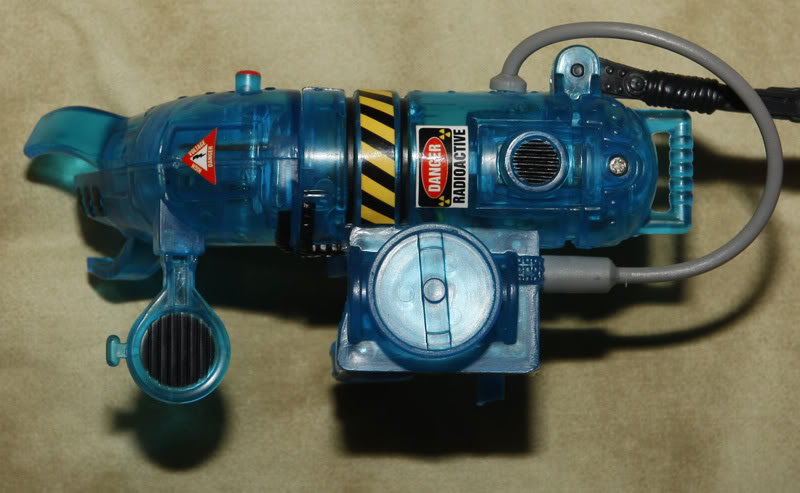
Back
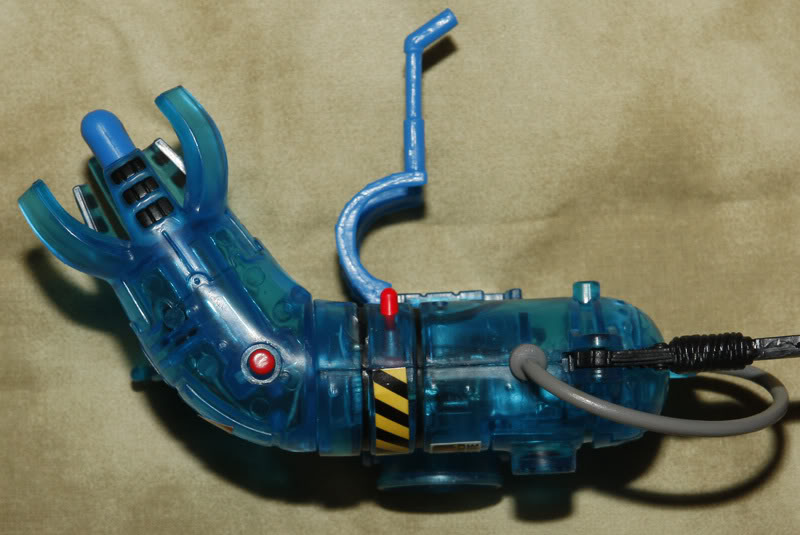
Left Side
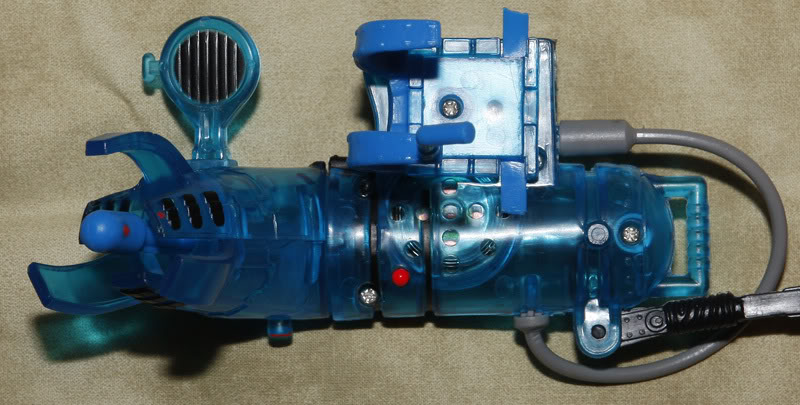
Front

Cyclotron Detail
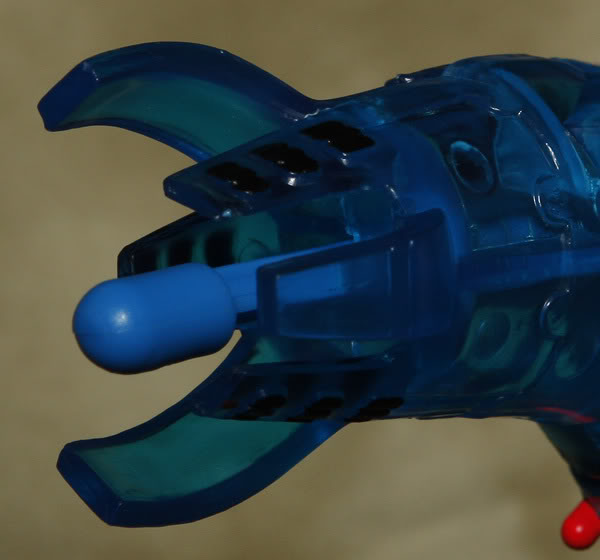
Containment Pack Barrel Detail
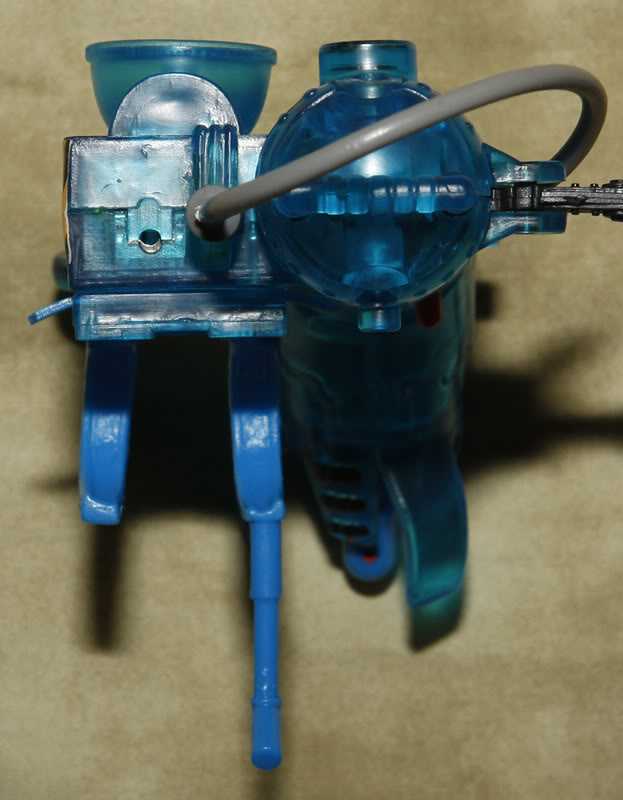
Bottom

I have a brand new Alice frame ready to go for this project. Right now I’m securing materials and other supplies. I took some time at work while it wasn’t busy to make a “mock up” of the EGB-Containment Pack from a used paper towel roll. I’m pleased with the results so far.

I am currently planning to use an 8-inch concrete form tube for the smaller tank positioned directly behind the wearer (the same size tube used to create the primary tank on my Slime Blower) and a 10-inch concrete form tube for the main barrel tank. According to the cartoon, the tank barrel jets off from the tank at a 90-degree angle; however, the toy I have makes in more of a 120-degree angle. Not sure which I plan to go with, but I’m leaning towards a 90-degree… thoughts?

I have a Proton Pack bumper on order from Irricanian and I have a few cake pans and plastic bowls already for construction.

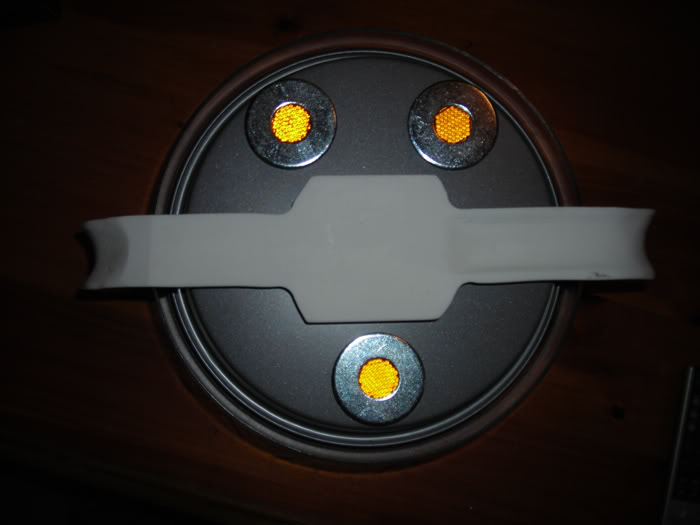
Above (Photo labeled “Bottom”): The Cyclotron will be built on top of a large mixing bowl that sticks out from the 8-inch form tube with a cake pan on top of it. I think I will go with the 3-light configuration depicted on the toy rather than the 4-light configuration used on the Proton Packs. I’m debating on if I want them to stay red or go with another color.

I am picturing a olive drab color with select parts in black as the primary color scheme. Thoughts?

ok, what scale is this for? Did I miss that? Is it for 1/6th scale “GI Joe” size? That would be cool to build–keep us posted!

This is a full sized prop.

Thats a MASSIVE pen!

:cool:

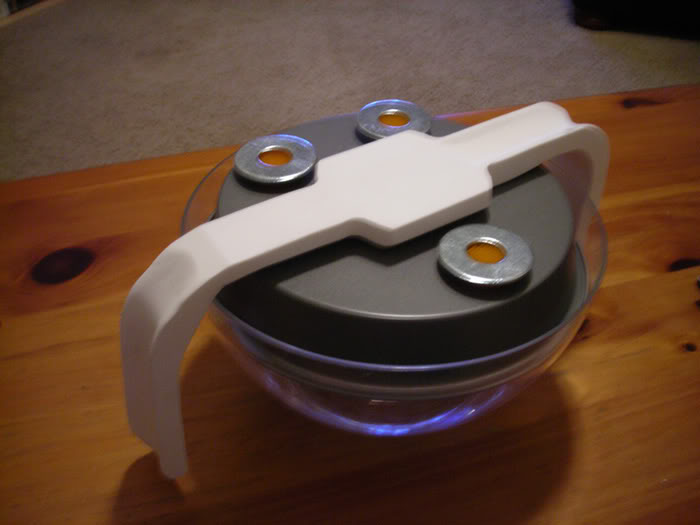
I finally got in my Proton Pack bumper from Multimediamayhem (great quality, BTW!) so I’m starting to move forward. I was afraid that if I got started before getting the bumper, that I would find myself in a situation where the bumper did not fit to the cyclotron.

Here are some photos of most of the parts just setting on top of each other loosely to give the basic idea of the construction.

A 9 inch mixing bowl is the primary base with a cake pan on top. Very similarly construction method to my proton pack. Still need to add the Ion Knob.

I’m going with the three lens design featured on the toy and harkens back to the RGB Proton Packs. I want to use yellow rather than red, simply to make a distinguishing difference between the two.

I know you haven’t gotten many comments, but I - for one - think this is very cool and await further progress pictures.

Thanks Ron!

Yesterday, I went to Wal-Mart and searched for some lighting options for the pack. I currently plan to purchase a Pronton Pack light system from Exoray in the near future to power the Cyclotron and a chasing bar light on the right side of the pack (the toy currently depicts a flat surface with a yellow & black caution tape sticker featuring the Extreme Ghostbusters logo).

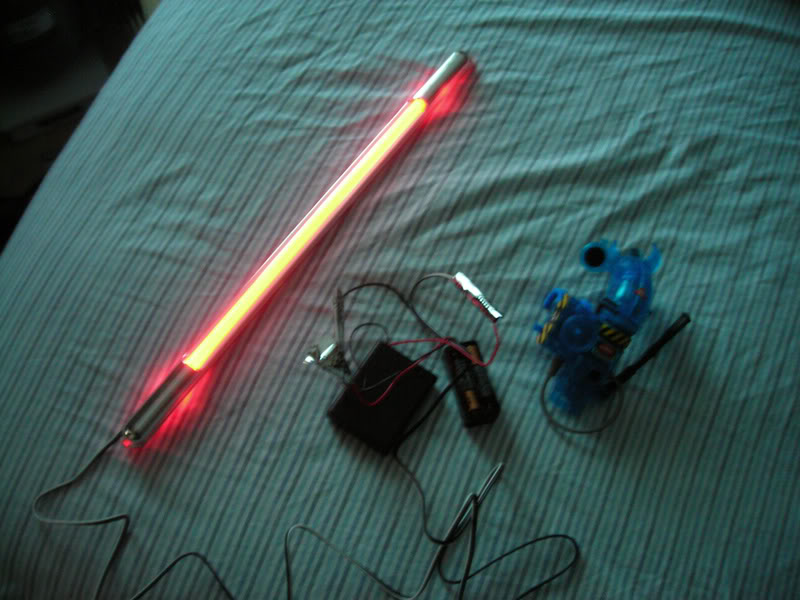
To add a little more “razzel dazzel”, I want to add two of these automotive LED Light Bars. They are made by Pilot Automotive and are located in the Automotive Department at Wal-Mart. They are designed to run off of a car battery via a parking light or tail light electrical output on your car, but I went to Radio Shack and wired it to a switchable 8 AAA battery source. This gives me the needed 12 volts to power the LEDs (1.5v x 8 = 12v).

My current plan is to place a red one (picture above) and a blue one on either side of the primary tank with the small black exhaust vent located near the bottom in between (the round thing below the “Danger Radioactive” label).

Thoughts?

Ok, I had a rather interesting epiphany to in regards to the barrel canopy at the top of the primary tank… I got to looking at it, and it kind of dawned on me that if you were to close the 6 “prongs” on each other, you would have a dome that would look similar to the EGB ghost trap. After all, this this is really just a glorified ghost trap anyway, right?

So, I got to thinking what if I modified a mechanical umbrella to open and close the barrel?! The “rod” sticking out from the center could be the umbrella handle/shaft and then I could attach each section of the dome to the umbrella “arms.” I could locate a trigger switch somewhere on the side of the tank that would release the spring loaded “runner” and propel the barrel open!

The 3 longer “prongs” would be divided in half and fold inward on a hinge. As the canopy opens up, the hinges would flick outwards making them longer than the shorter 3 “prongs.”

Anyone have any ideas one how to better construct this mechanical design? I’m open to suggestion on this, since this appears to be a rather lofty goal… but damn, the pay off would be well worth it if done properly! :cool:

If done properly then yea it would be an awesome effect.I really like this idea too BTW.

I did mainly supply shopping today to get ready for a building marathon Sunday and Monday.

However, I was able to get the Cyclotron about 90% complete. I cut holes in the cake pan and attached the washers to the face. Once it dries, I will install the yellow lenses. The bumper is sanded, painted, and has the Ion Knob installed. Its looking damn good so far!

I’m not sure if I want to keep the washers silver or paint them either black or olive drab green like the rest of the cake pan and bowl. Opinions?

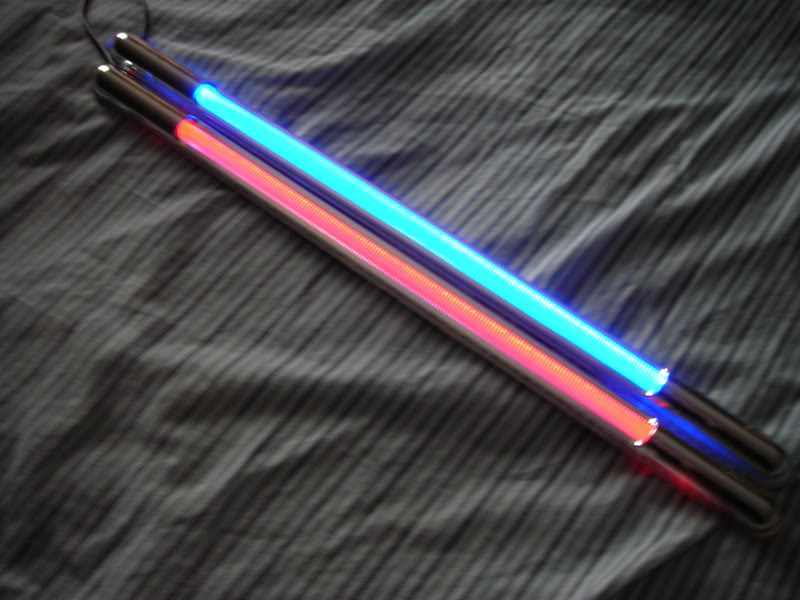
I also got the 2nd light bar, except only blue. They look great next to each other.

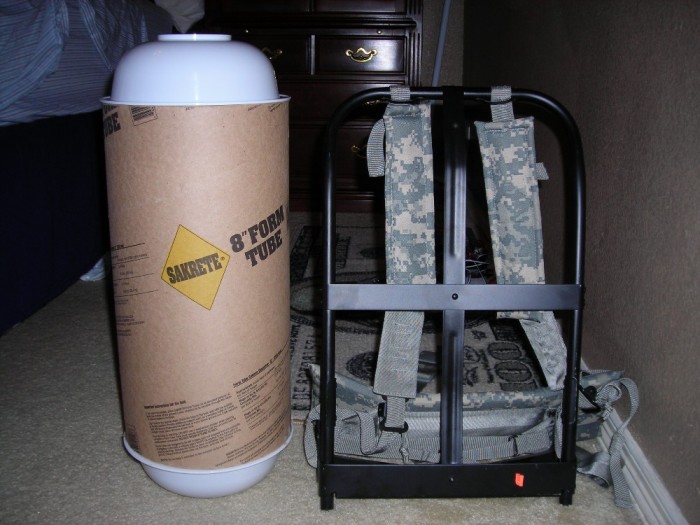
Finally, here is the ALICE frame in front of the two concrete form tubes that I am using to give everyone a better idea of scale and size. The left tube is 10 inches and the right one is 8 inches.

wow…i really like this thread

Thanks! :cool:

Unfortunately, I faced several set backs today. First, I went out to put on the second coat of green paint on the Cyclotron (so that the washers around the lenses wouldn’t be silver) and the paint bubbled on me. The strangest thing I had ever seen. It looked like vines rapidly growing or branching blood veins… Needless to say, I had to scrape off all the paint and repaint it. It wasn’t too hard actually, because the original paint job came off like scotch tape.

While the new paint job dried, I began working on the smaller tank that houses the Cyclotron. I cut down the 8-inch concrete form tube into three equal sections. The entire tube was 48-inch long, which produced three 16-inch tanks. When you put the two domes on each end of the tube, the tank comes to about 22-inch tall. I then cut a good size hole dead in the center (the 8-inch mark) which is where the mixing bowl will sit.

I applied a layer of DAP Vinyl Spackling, sanded it down, and then painted. The first coat didn’t look too good, so I applied another layer of spackling, sanded it down, and then repainted. It looks much better! its in the garage drying now.

I then glued on the yellow reflectors on the Cyclotron and that should be completely dried by Noon tomorrow.

Finally, I cut the Primary Tank’s shaft section to 36-inches. I plan to do a little more work on that next week, but I at least got it started. :cool:

Now its raining, so I am not pretty much shut down for the remaining half of the day. Oh well, I have Monday off for Memorial Day, so hopefully it wont rain and I will be able to build the wood “Support Cradle” that the “Cyclotron Tank” will sit in and the Bumper will attach to (my version of the box surrounding the tank on the toy).

I can’t wait to see more.

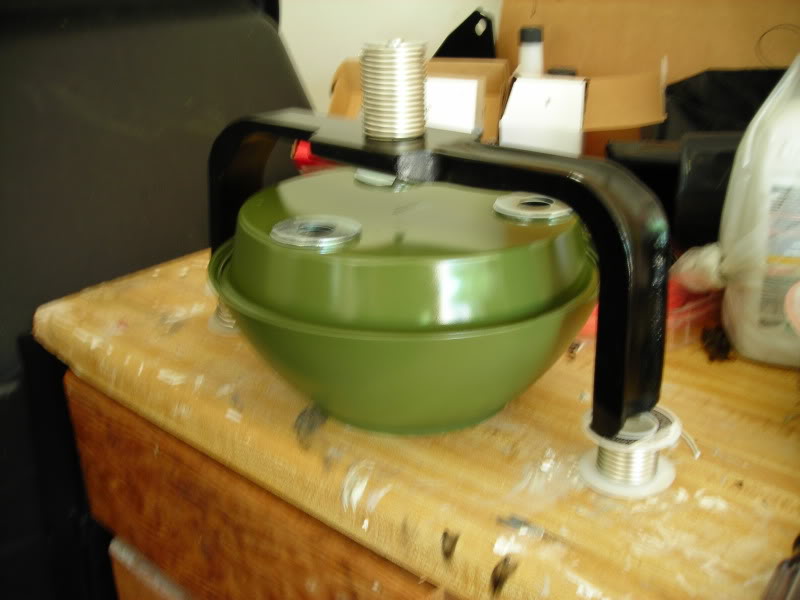
I did a little more work on it this weekend. Most of my efforts went towards building the “Support Cradle.” I cut out the parts, nailed them together, applied spackle, sanded, and painted black.

image

image

image

image

Wow ! this is awesome. :cool:

it’s stating to come together keep up the good work!

I like where this is going man.

Any more progress updates? pics?

Loved this thread.

Holy crap.

any updates?