I told ya he was a handsome guy.
Good job, Matt! I can honestly say I am very jealous. 
I told ya he was a handsome guy.
Good job, Matt! I can honestly say I am very jealous.
Very nice, that’s a great setup.
Great Job.
Nice job. I like the way the barrel tip “snaps.” Very cool. How sturdy is it? Are there weaknesses to having so many attachment points, etc?
Stop making youtube videos and make a set of instructions already, that is AWESOME.
What light kit are you using in there?
Awesome.. have you thought about making a taper on the barrel rod (and maybe the pin as well)? so when the pin resets itself you can push it back in and lock without using the level.
The spring loading problem has been on my mind since I started investigating this pack, so I’m glad you’ve come up with this inspiring solution, cheers 
Blah, I have started a new project now, so I don’t know when I’ll get around to making official plans. I view what I did in this thread as a prototype, with plans of making it better in my next pack. For the most part, you can piece together what I did from the info that’s in this thread.
As for the light kit, I have a hyperdyne gun kit in there. My next gun will have a proptronix gun kit in it.
All things I will consider when I do this again in my next gun.
Another reason why I didn’t go more in depth with the front mechanism is because everyone’s front barrel is different. The main points are:
1.) There’s a brass bar attached to the clear tip, with a guide hole drilled out of the center of it.
2.) There is a spring that is fixed over the brass bar, fixed between the end of the clear tube and the set screw of the brass bar.
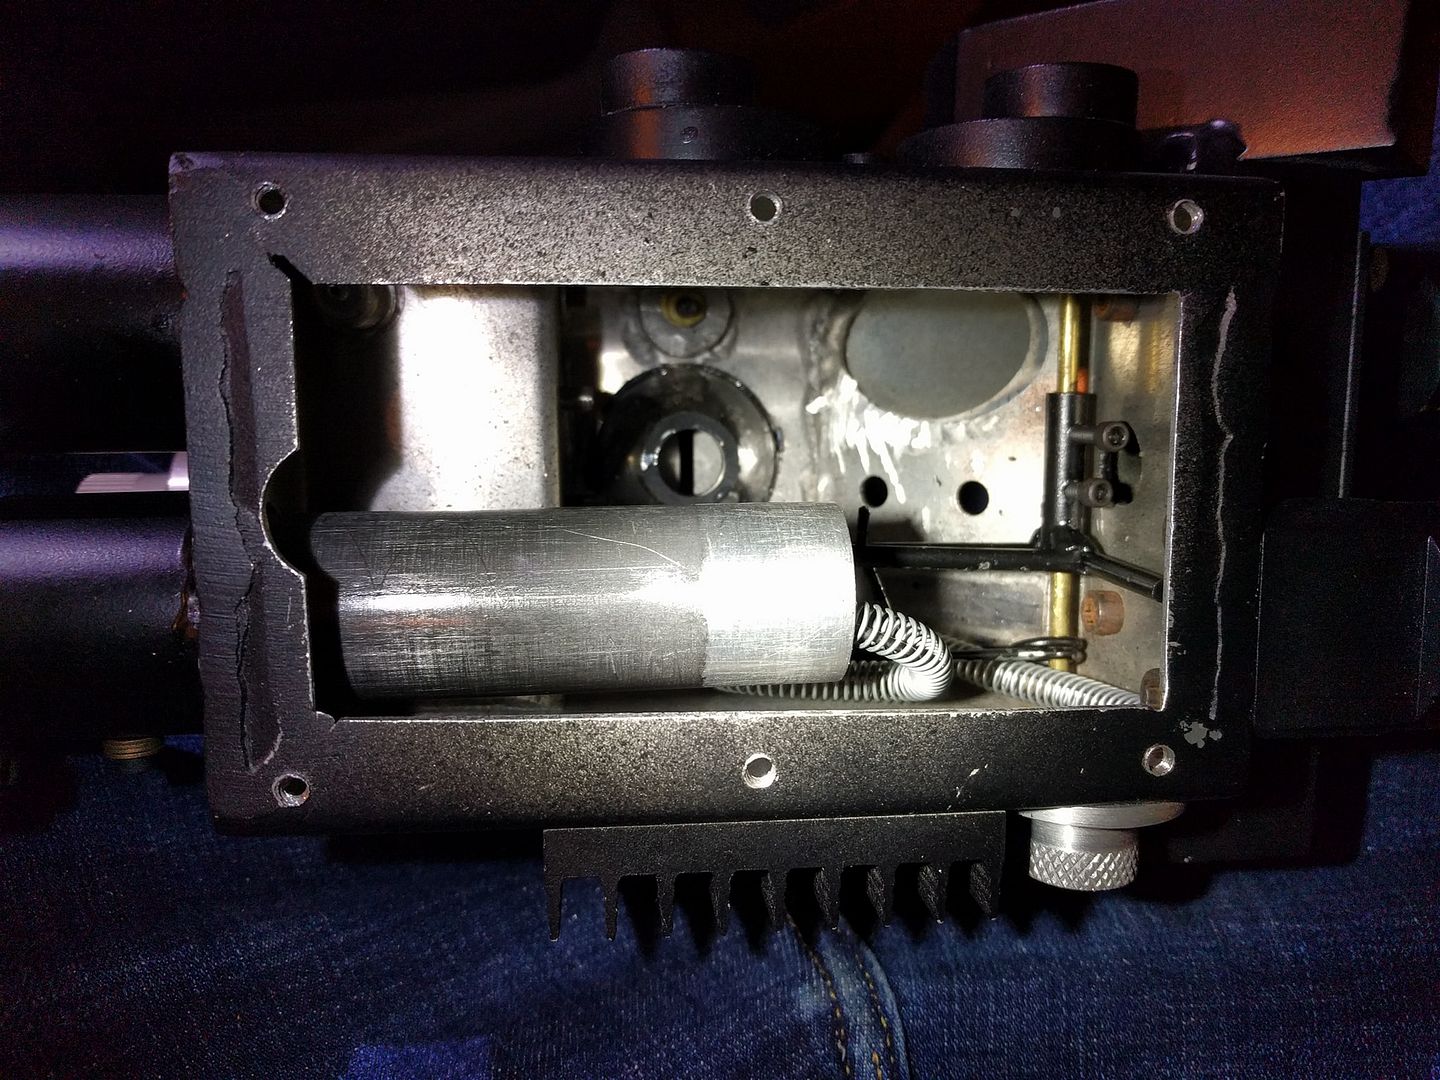
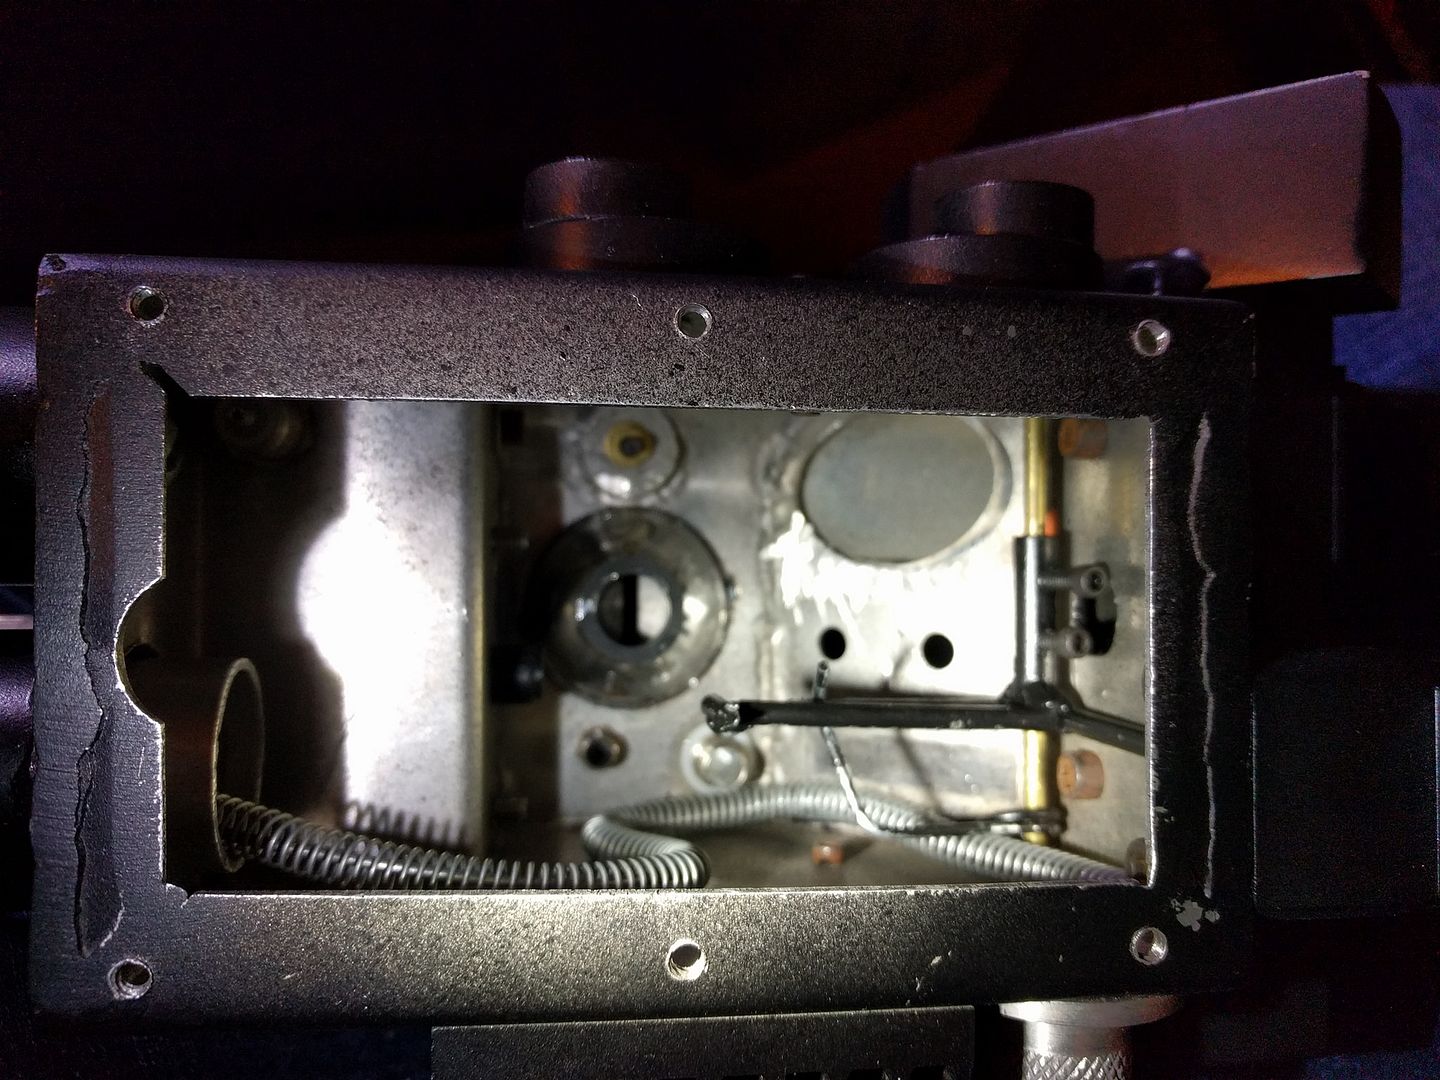
3.) There’s a trigger mechanism inside the gun body, as shown in my pictures.
Its really pretty simple. The hardest part is fabricating the parts and getting it all to line up correctly.
Maybe once I’m finished with my PKE meter, I will revisit this idea and write a tutorial. But for now, I like making you guys work a little for it
Little off subject, but where did you get your orange/red light cap on your gun body. That’s dead on!
first let me say that it was very nice of you to take the time to share your idea’s. Second i think you are right about things being different with every build and your idea’s need to be adjusted to fit that person’s needs.
but the main thing here is that you took the time to share what you have found and maybe this will save some people some time comming up with some idea’s for there situaion.
If I understand you correctly, i think you are asking about the flat orange light cap on the top of the gun body, next to the vent and behind the blinking yellow light?
What the real packs used was one of the top hat light caps (like the one at the end of the barrel) and seated it inside the gun body so only the top of it was showing. What I used for this was one of the orange caps that Multimediamayhem sells on his site.
Thanks Jason! Yeah, I was hoping someone could come up with a better idea by using what I did. My idea works, and I don’t see it breaking any time soon, but I’m sure there are better ways of doing this. Hopefully I sparked someone’s imagination.
I love it!
No way with my unique wiring and flasher setup I’d ever get it to extend, but if I do a second pack one day I’m comin’ after you with this design!
I’m jealous of that extending mechanism!
Your sound setup is the closest to mine I’ve seen too…minus the 6 other sounds and hum I added! 
G
Classic. 
I like the CLOC sound when it goes out!
Is the guide screw have a bolt? Is it reliable enough to stay in place after many tries?
I would like to see a video of the mechanism in action. It’s difficult to imagine how it’s working because we don’t see the piece all together. 
Any chance that the videos for this thread can be re-posted?
Thanks.
Since I originally did this thread, I have since developed a better extending mechanism based off of how the real hero props functioned. I don’t have videos to share but I can share some photos.
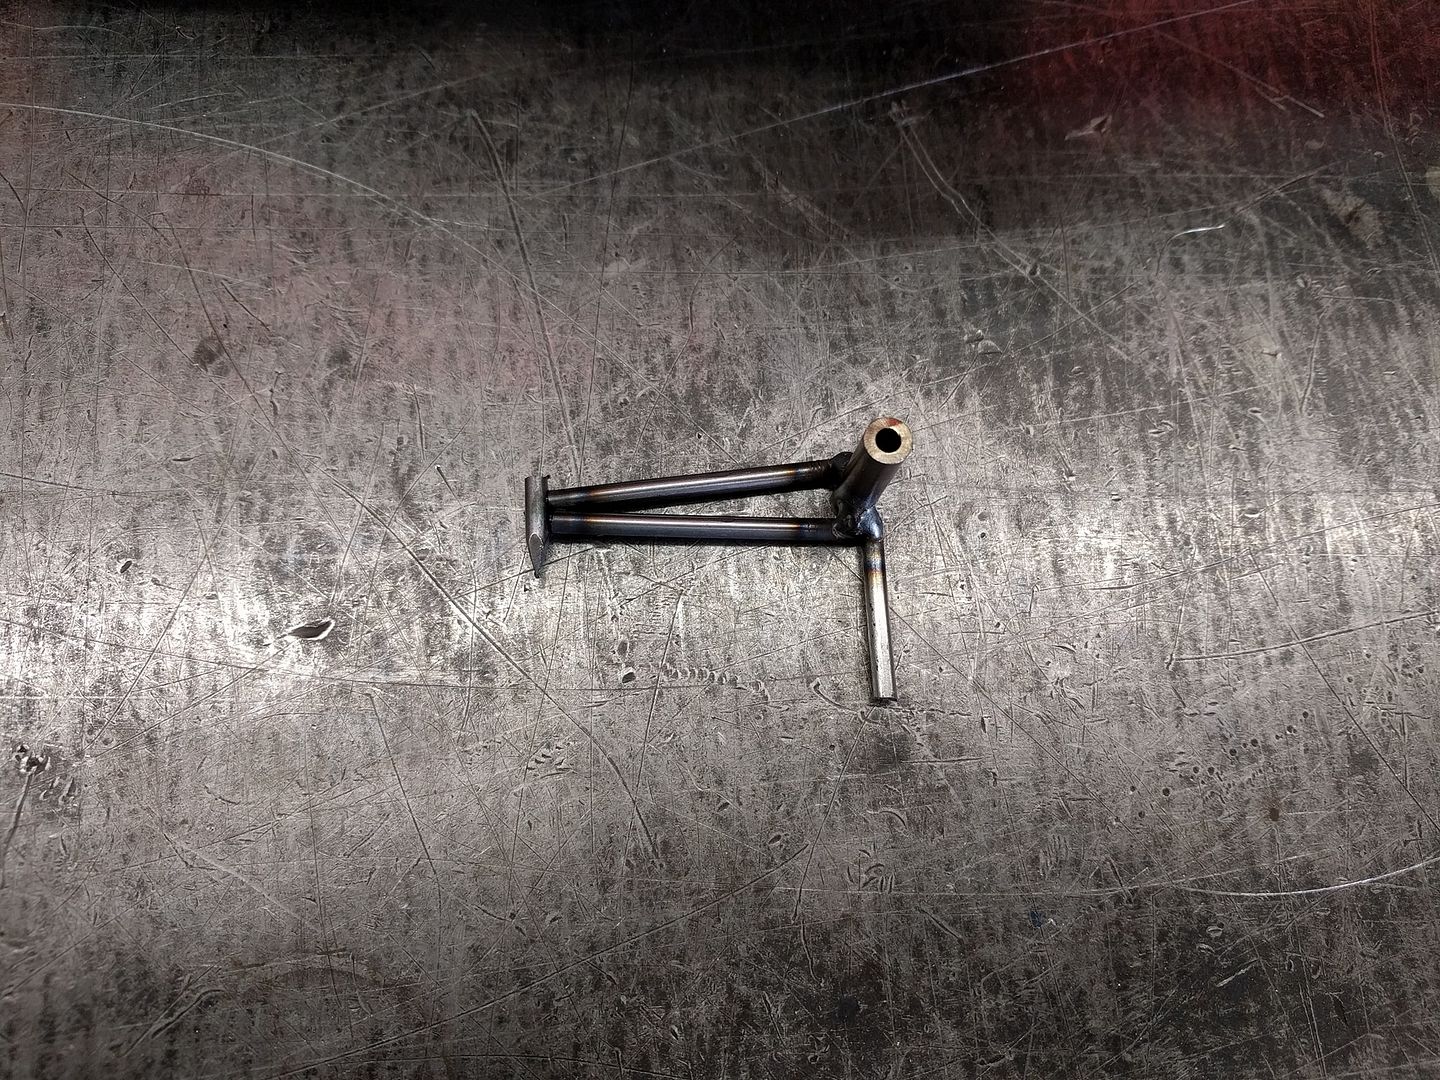
The latch inside the thrower body of the original props was actually just a bunch of nails welded together, like this.
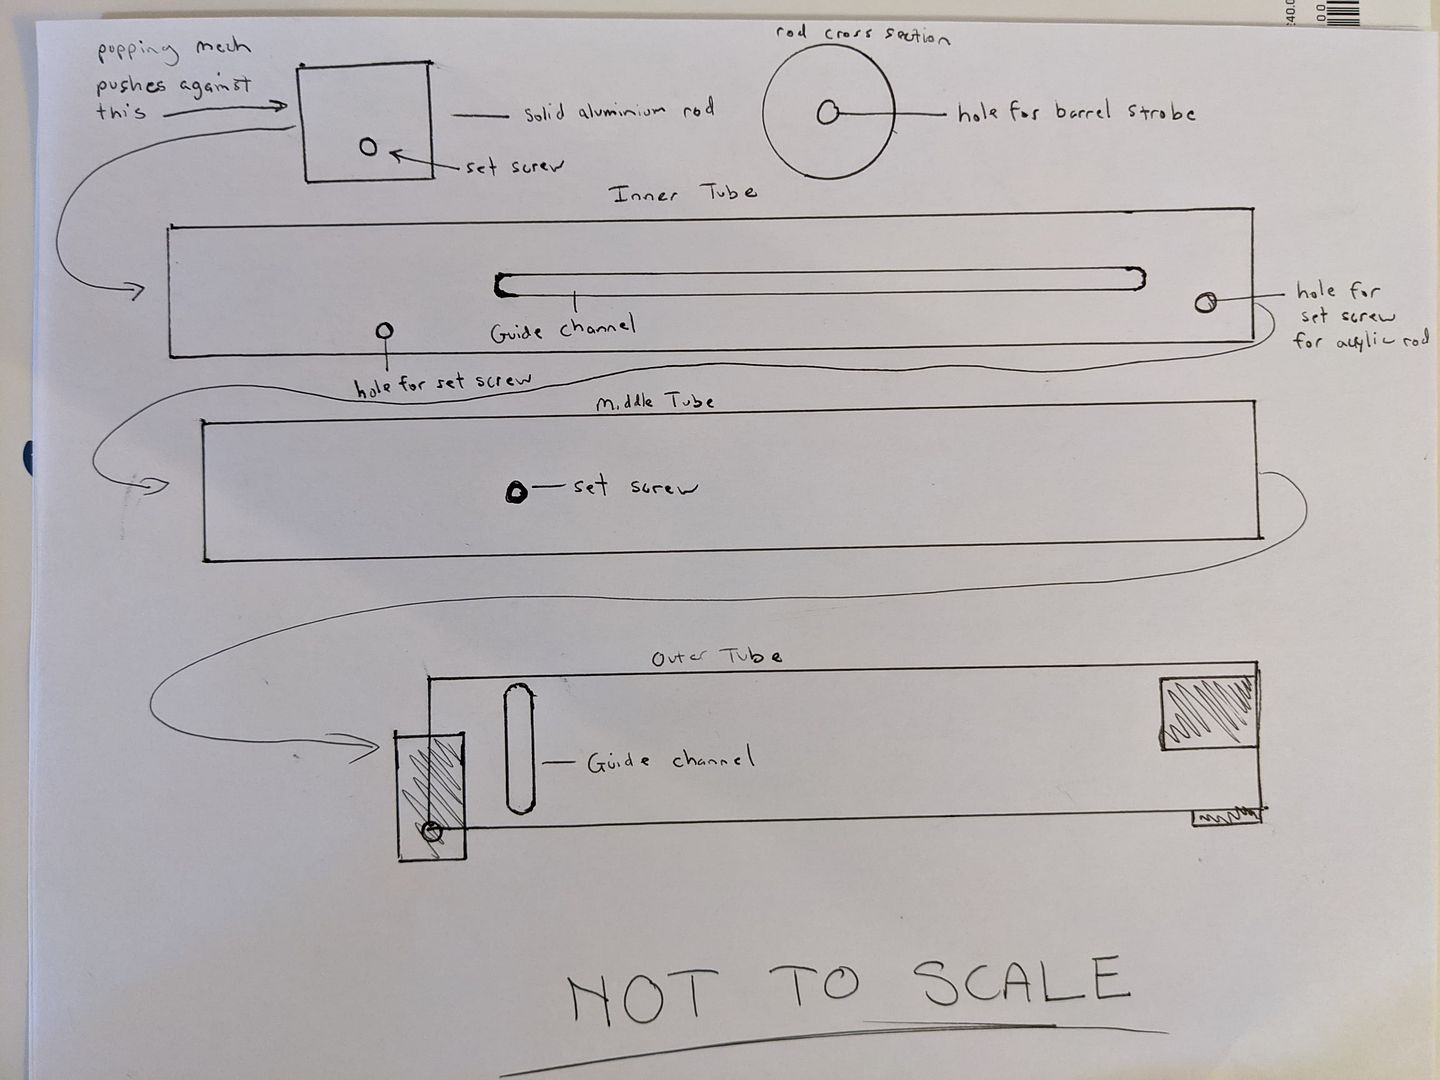
And the front handle was 3 telescoping pieces of aluminum tubing, as seen in this drawing I did.
As the inner most tube is pressed back into the gun body, the latch hooks into a hole cut into the top of the inner tube.
And as you pull back on the green lever of the thrower, the latch lifts and the inner tube is sprung forward by a combination of music wire and a compression spring.
I hope some of that makes sense. It is difficult to explain.
That’s how I make mine, but I moved the spring inside the handle and the latch to the front so the tube doesn’t take space inside the box. The whole front handle can be removed without taking apart the system.
Nicely done!