I’ve enjoyed reading all your posts for the last couple of weeks, and now I’m really getting rolling on my own pack plans. Fortunately, my father-in-law is an engineer, so we’re going to be programming our own lights, which I’m optimistic will turn out really awesome (we’ve actually had some parts already donated by his co-workers). I’ve narrowed down most of what I’m going to do with a combination of Norm’s and Sean’s plans with some special ordered parts (which I purchased here on GBfans). So here are my questions as we get started. I’m seeking the advice of those wiser than I.
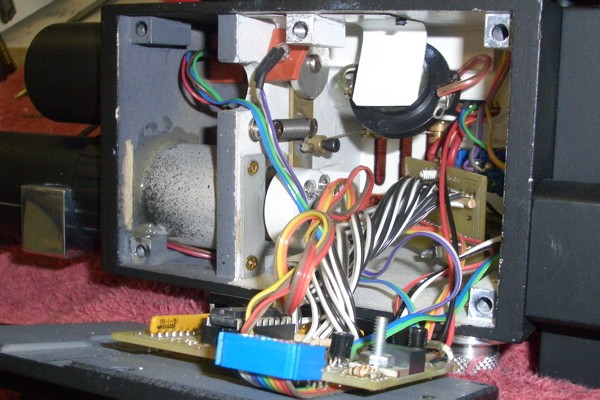
Will the main part of the thrower (the center box) be large enough to contain all the programming boards and a speaker? Where do you normally create your access points and where do you mount the speaker?
Routing is my next question. Since we want to house all of the main programming parts in the thrower, routing from the cyclotron to the Power Cell appears to be a challenge. I had considered using the external wires on the left side of the pack to actually serve as real wires providing the power and control for the Blue LEDs, but was curious if there is a simpler routing method I’m not noticing.
Sounds. I’ve done some audio production work in my free time, but I’m looking for some high quality sound samples to create my loops from. Does this already exist? Or should I hook up my DVD output to my recording interface?
I’ve seen some interesting weathering thoughts while on this site. What is the consensus from most of you? Paint it black, then touch it up? Or prime it silver, paint black, and use some sandpaper? It doesn’t sound like there is a right or wrong way to do it, but just looking for some thoughts.
If you don’t get an exoray light kit, your gonna want to keep the circuit boards in the pack shell and wire them up to the thrower through the split loom..
Wouldn’t that be more difficult to access? My thought is I might want to make programming upgrades to the lights and sounds later on (you know, add enough memory so the entire movie could be played through the speaker), so I’d need to have easy access to the components. Are Exoray’s boards mounted in the thrower or the pack?
I’m pretty sure you can make some easy access panels on the back of the pack if you want to.
Personally, I plan on putting at least the batteries on the pack, as I don’t want the wand to be overweight…
In any case, the wand box isn’t the bigest thing out there, and if you want something powerful audiowise you’ll need some juice to supply the necessary kick…
I’ve decided to house basically all of my electronics and batteries in the Spacer/Cyclotron. As for access issues my Cyclotron is attached strictly with screws - never to fear, it’s light weight. Amyway, in theory - at least - if I ever need to get inside there I just have to pull off the bumper, and a few screws and tah-dah - I can diddle with whatever I need to.
Mind you, I’ve yet to set eyes on any of my electonics components, and I’ve already realized that I should have planned ahead a little bit more regarding where I’m gonna hide all the wires involved - so this plan could just blow up in my face in a real big way.
I don’t think the thrower will be able to hold all of that , most people that do have sound have the speakers mounted in the Cyclotron Spacer on the pack
I’m bit confused about the question, if you have electronics in the pack then you can just drill holes between the “walls” of the parts when they are glued together so they are all hiddne inside .just use the split loom tubing for switches pack to thrower
I think I’m definitely going to get started by just building the thrower box. That way as my father-in-law and I set up our light/sound rig, we can do some test fitting, and mounting. The good news is I think we are going to do a custom board that mounts both the switches and the lightbar right up against the box. My thought is to make slits in the heatsink, and then use that wall for mounting the speaker. As far as space goes, it looks like the problem with a hyperdyne kit isn’t the size of the boards, but all the excess from the wires. If those were trimmed down (or made to directly mount to the board) it could be fit pretty easily. Or so I think. I guess the real trick is to do things one step at a time. Lots of test fitting.
I’m betting the batteries will be the first thing to get stored in the pack.
Busybuildr: What is the section division you’ve got going in your box? What did you build the box out of?
I’m still a bit confused about the routing (maybe when I get it built it will be easy). Which parts of the pack do you drill holes through to create access for the power cell lights?
Thanks for all the info, guys, it’s really helpful.
The bar graph cable from Hyperdyne is TWICE as long, with large connectors at each end ! I removed the plug headers from their PCB and “hard-wired” the bar graph with 4" individual wires. You need at least this much slack for access to connect the rest of the components !
The “section division” acts as the rear barrel support. The gun body is made from 1/8, 3/16 and 1/4 thick R/C aircraft grade birch plywoods (available at most hobby shops).
Go to “Fans>Props>Proton Packs, page 6>Busybuildr’s Proton Pack” for a few shots of the raw gun body. The pics will help explain how I built it.
All the wiring runs through the 3/4" loom into the Pack body.
On painting, it really depends on what medium you are construction with and the abrasions made during the building process. Generally with wood you would need to fine grit sand it and apply a light coat of actual primer (for paint adhesion and to fill)
Same goes with styrene or polystyrene, really any plastics (besides ABS) but best to get a plastic specific primer for best results. After midcoat with primer and abou 15 minutes flash time you will want to apply your top coat of actual color paint to the pieces. This should be your last step, as opposed to painting the pieces and then glueing them together. (glue doesnt stick best to painted surfaces)
Then after all pieces are covered in color, would be advisable to weather-resist your units by giving them about 2 medium coats of clearcoat (matte for the “used” look or Glossy for the “new” look) Also want to give the clearcoat about 15 minutes to flashdry between coats as well or you will get solvent pop or worse destroying all your topcoating.
Also if using a enamel based paint…take it outside, otherwise you will have overspray everywhere in your house. lol
Then lastly for the weathering you could use weathering chalk found at hobby stores…or just use some silverpaint and streak it across the edges of the pieces on your gun or pack. A little foam brush works really good, or just use a q-tip to apply!