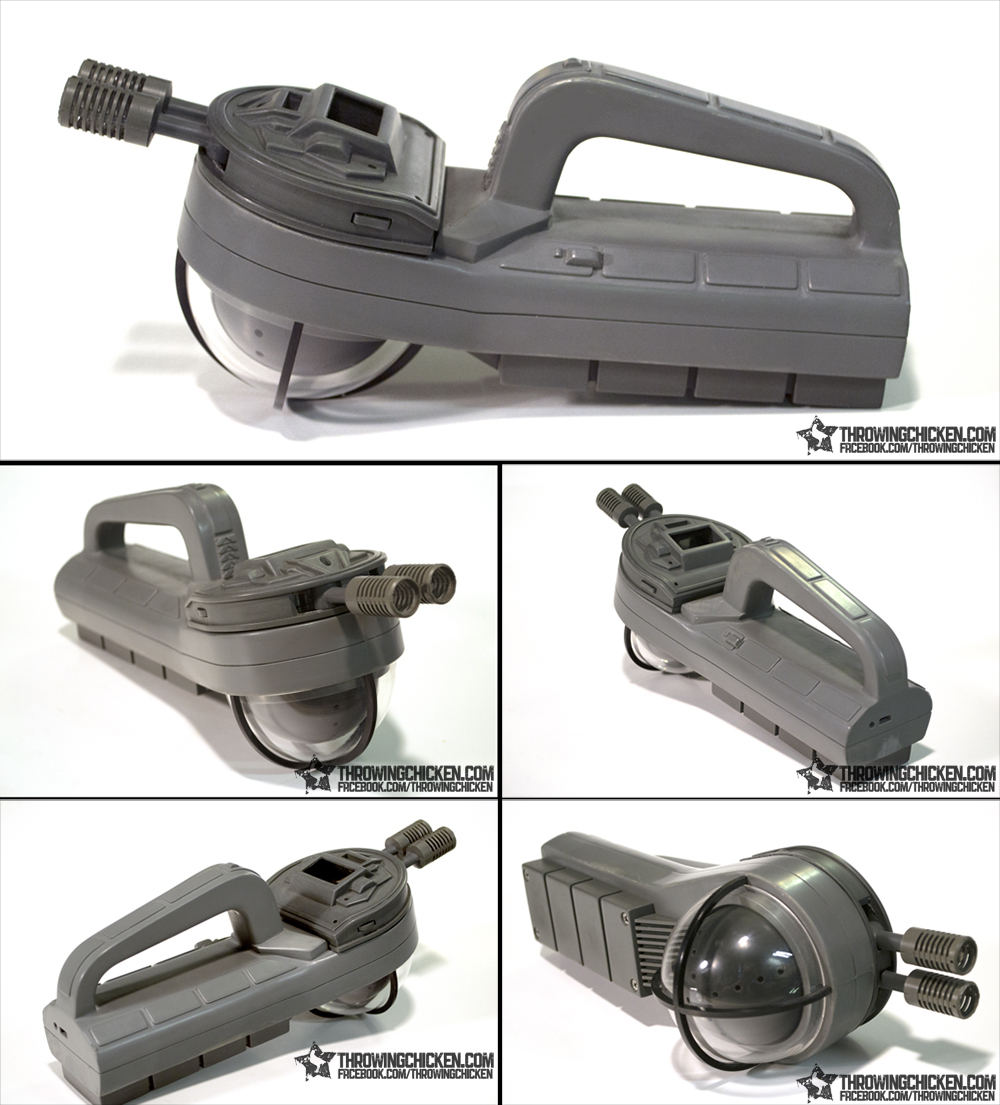
It has been a long time in the making, but my Giga Meter kit is finally here! This is easily the most thorough kit I‘ve produce, including upwards of 60 individual parts, yet I also believe it stands out as my most easy to assemble kit. Drying time aside, you could put this thing together in an afternoon. Let’s have a look at what is included:
The Kit:
Main Body

The instrument panel attaches to the Giga body using three screws (included), and the inside has mounting posts for the motorized ears.
Battery Cover
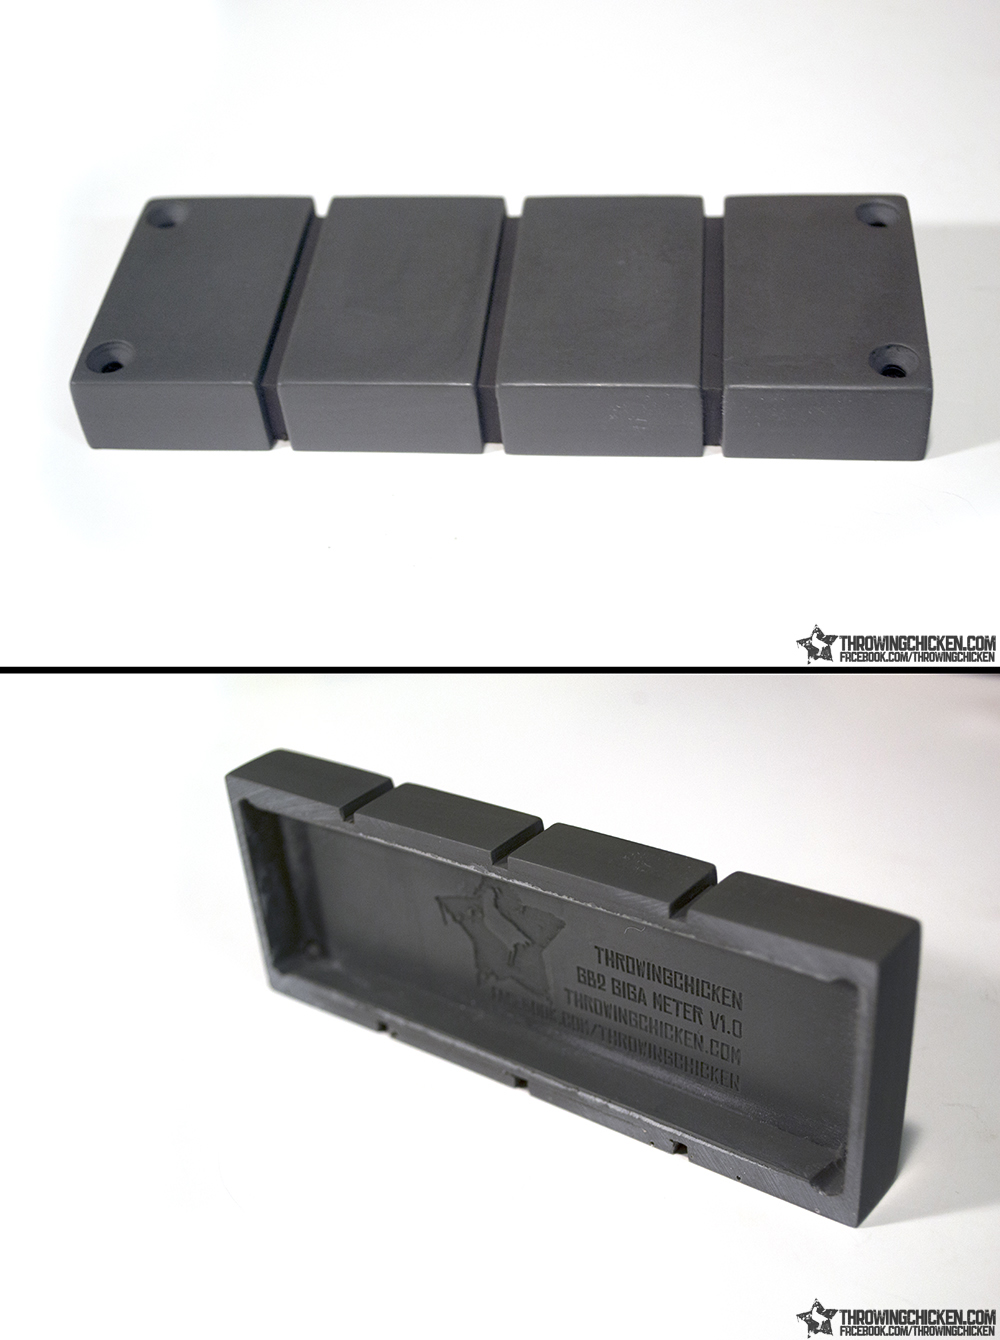
The battery cover is hollow in case extra room is needed, and is secured to the bottom of the Giga using four Philips head screws (included).
Scanner Head
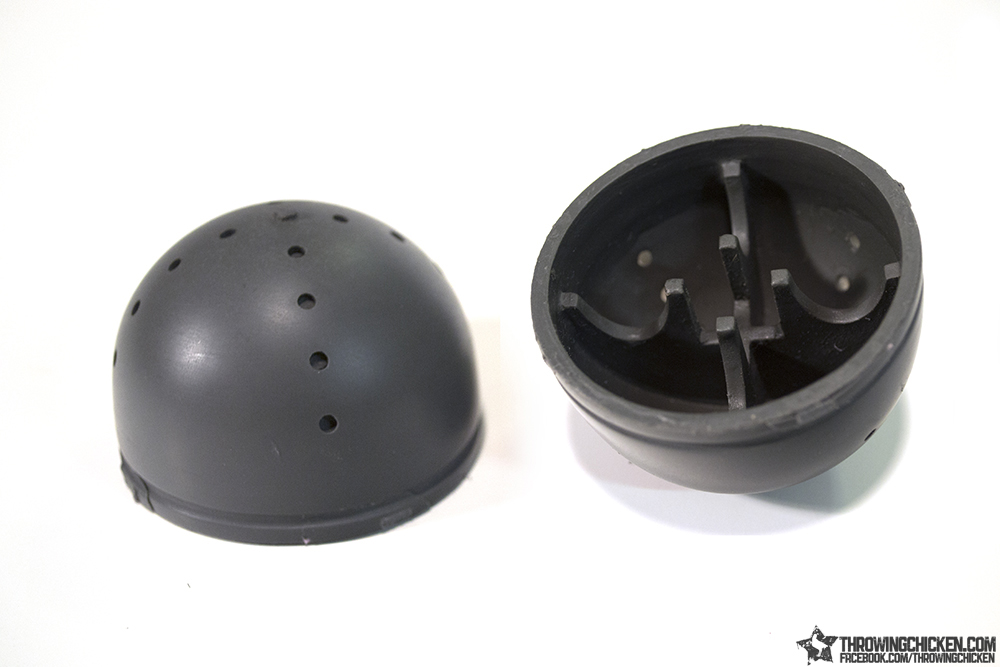
The scanner head (or light dome) is cast with all of the light holes already placed for you, and the inside contains a bracket for mounting the dome to the rest of the mechanics. I intend for the dome to be spun using a wheel, but I’ve included a notch along the outer upper edge in case the builder prefers to use a belt.
Antennas and Heatsink
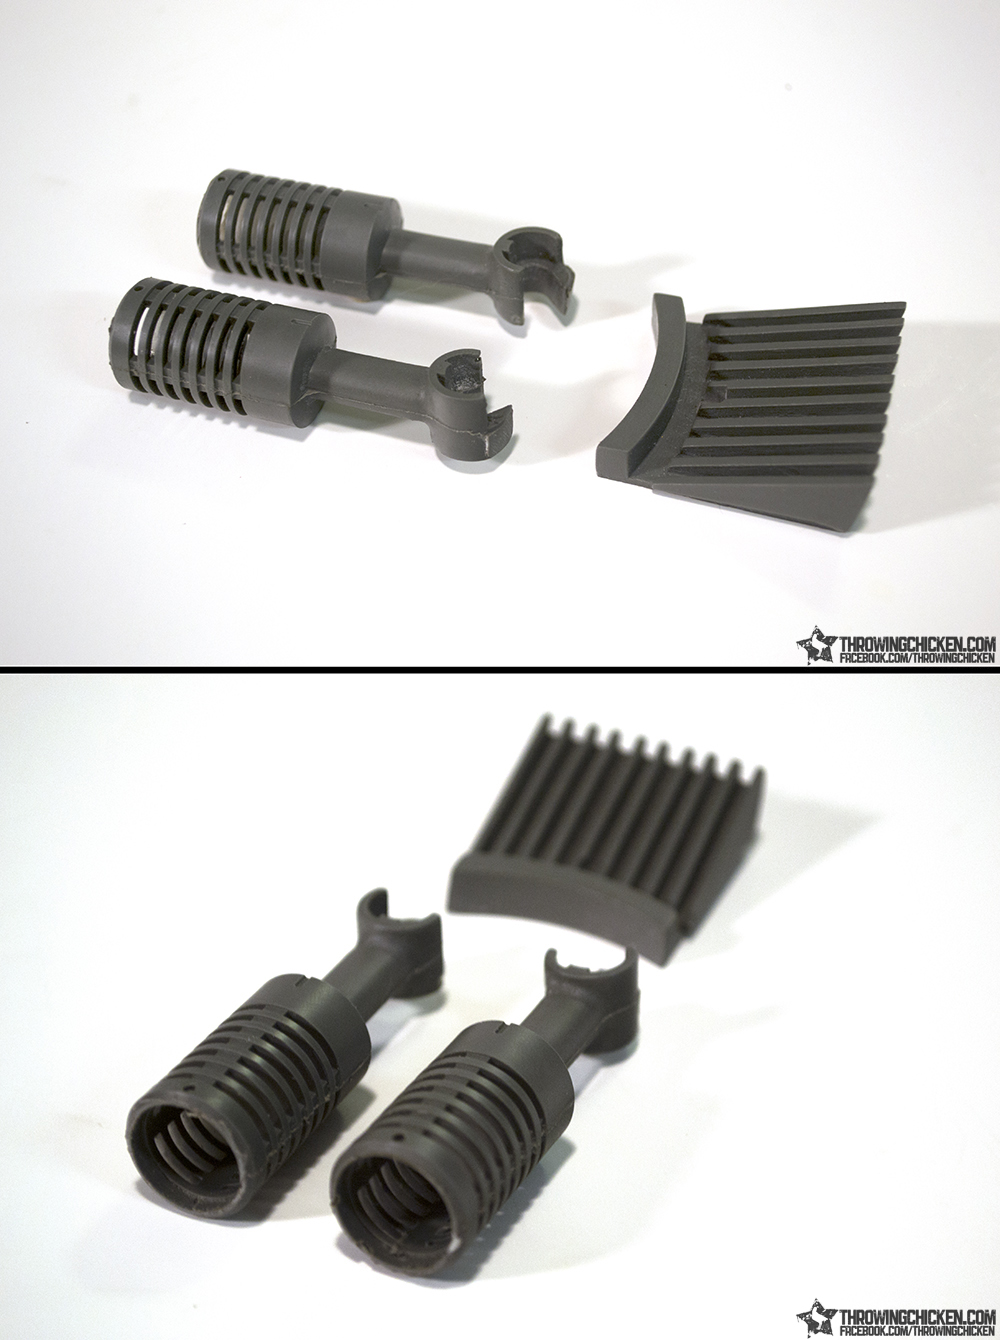
The antennas are pressure cast from genuine Realistic Stereo Microphones that were modified to make them ready for the motorized gear system prior to molding. Do note you can use genuine microphones if you have them, but you will need to cut off a small portion along the bottom to add the gears.
Screws, Gear Head, Greeblies
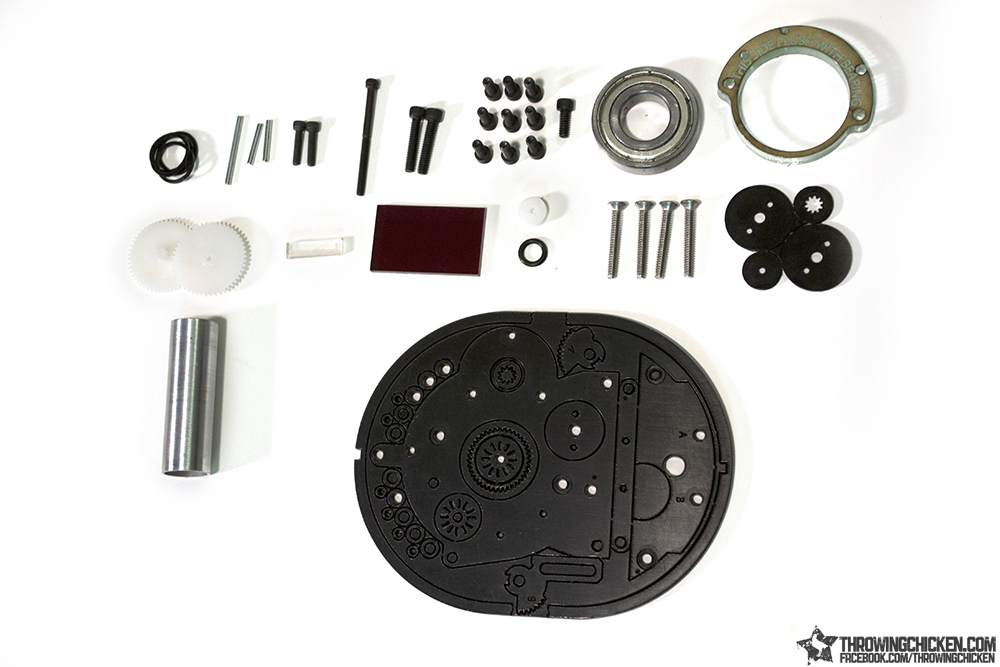
Most of what you see here are the internal guts that make the scanner head spin and the antennas move back and forth.
Starting from the top-left:
Rubber Bands (x4)
2mm Shaft Axis 25mm (x1)
2mm Shaft Axis 15mm (x2)
Socket Cap #4-40 x 1/2" (x2)
Socket Cap #4-40 x 1-1/2" (x1)
Socket Cap #6-32 x 3/4" (x2)
Socket Cap #6-32 x 3/8" (x10)
R10 ZZ Bearing (x1)
6mm Laser Cut Bearing Mount (x1)
50102A Gear (x2)
Laser Cut Light Sensor (x1)
Laser Cut Red Face Plate (x1)
9mm Pulley (x1)
3/8” OD O-Ring (x1)
Phillips Flat Head #6-32 x 1" (x4)
1.5mm Laser Cut Gearhead Disc (x1)
5/8” OD x 2” Aluminum Tube (x1)
3mm Laser Cut Gearhead Disc (x1)
I will go over what each individual thing is for in the upcoming tutorial, but in the meantime you can get a pretty good idea of the assembly by viewing this video.
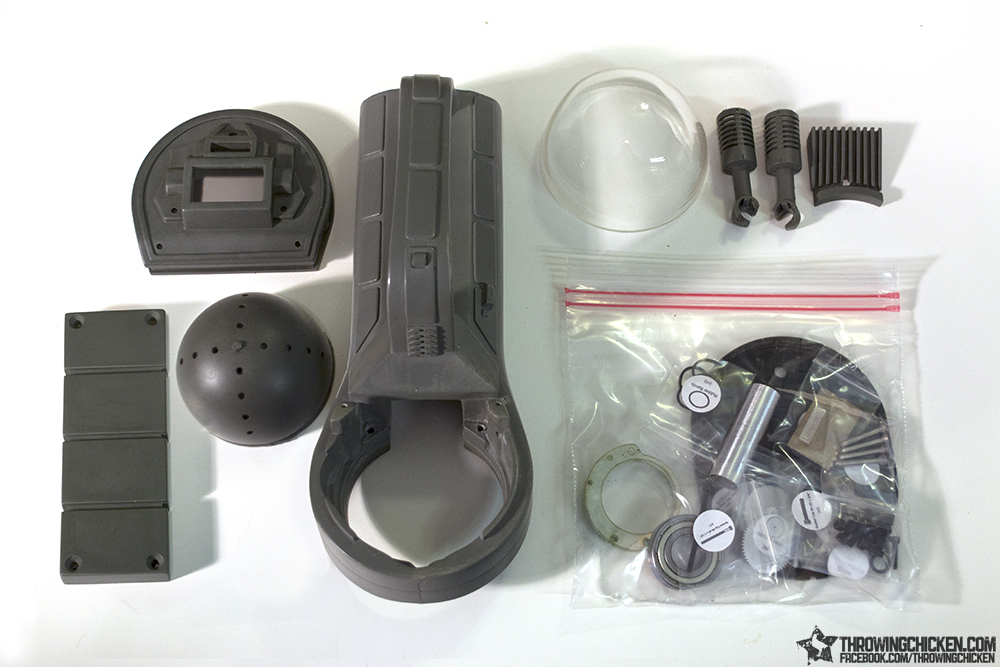
In addition to everything we have already gone over, also included is the clear dome, which seems to have become a bit of a rarity these days, so much so that I had to have these custom made specifically for this kit. You can find the correct sized domes out there for about $15 a pop, but they have sprue and ejector pin marks right on the top center point of the dome that would be quite troublesome for the average person to remove without leaving unsightly scratches. Well don’t worry about it, because I have the clear dome included.
The Cost & Ordering:
The kit costs $200 + shipping based on location (be sure to include your zip code with your order request)
At the time of this post I have a number of kits ready to go, but bear in mind that we are quickly getting into the Halloween season, so between this, my thrower kit, and my trap kit, my time might be getting spread pretty thin, so I may have to form a wait list if pre-Halloween orders exceeded my current stock. In other words, if you wanted this before Halloween, then don’t hesitate.
To order, send me a PM with your name, your PayPal email address, and your shipping address or zip code. I will only ship to the address on file with PayPal. I will send you an invoice through PayPal.
Further Questions & Answers:
Q: When will my order ship?
A: For the time being I am going to be dividing orders into groups and handing out expecting shipping dates. As of 9/9 the next opened shipping date is the week of the 28th.
Q: What is the shipping method?
A: Everything will ship USPS Priority.
Q: The kit seems to come with a lot of stuff, what doesn’t it come with?
A: The kit does not come with electronics, glue, or paint.
Q: Where am I supposed to get an electronics kit?
A: Currently Heavy Props is working on an electronics kit. I’ve also been contacted by a couple of other electronics makers interested in making their own. Additionally, if you have confidence in building your own electronics, you can purchase the RF-520TB model motor on eBay or Aliexpress for just a couple of dollars.
Q: It looks complicated; how am I supposed to put this thing together?
A: I will try to have a tutorial available by next week, which is about when the first orders should start being delivered. The gearhead is the most complex part of the build, but I can put one together in about 15 minutes. Of course, I’ve done it several times, but with the upcoming guide I think anyone can do it.
Q: What kind of tools do I need for the build?
A: You will need a drill with 3/32 and 7/64 bits, a Phillips head screwdriver, an Allen wrench for #4 and #6 sockets, and sandpaper and a hobby knife for cleaning up the casts and laser cut parts. A small file might also come in handy, but you can probably get by without it.
If you have any more questions let me know and I will add them to this list.
Thanks for looking!
**
Seller Info:**
Justin Black
San Antonio, TX

)