Libtechinit's Kenner Remodle x2

Since the original creation of the two packs and my uniform a lot of life has happened. Kids, new careers, moving, vacations, marriage, new house, etc. meaning it has been a quite some time since I have gotten a chance to start a completely new GB project. Yea I have updated my pack and uniform through the years, but I’m talking about something brand-spankin-new.

With the introduction of kids into my life, it has been pretty cool being able to expose them to the awesome 80’s stuff we had when we were kids, including Ghostbusters of course 8) And watching them actually take a liking to it is even better.

I recently started doing events with the BAGB’s (not an official member yet but working on it). The kids have started showing an interest in wanting to go to some of the events and the group loves the idea of having the kids join us.

Which brings me to my task as a father, building the kids uniforms and packs for them to play with and use during those events.

I originally contemplated 3d printing scaled packs for the kids but I wasn’t sure if that would hold up to the rough carefree play that kids normally do. Not to mention, it was going to be pretty expensive and take a lot longer to get to the final product. That lead me to making the decision to remodel a couple Kenner packs for them.

Once that decision was made, I searched through the site for ideas I could pull from other Kenner mods (like Riggs’ Kenner Pack Build) and determined I was going to go for a Movie-esk remodle, you know so there’s are “just like dads”.

From there I started gathering the parts I would need to execute the plan I had in my head and here’s where that ended up.
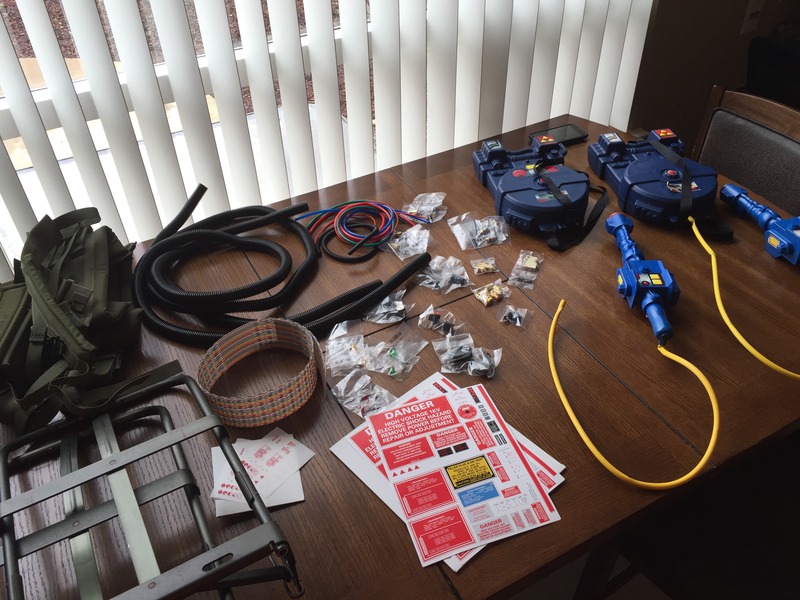
The only thing that I haven’t picked up yet are the lights kits I want to use. Jupiter makes a .75 scaled pack/gun light kit combo that I’m going to go with.

The first step I wanted to try to tackle was shrinking down the normal adult size ALICE pack frames. I took some measurements of the kids and from the Kenner packs and determined how much out of each frame I needed to remove.
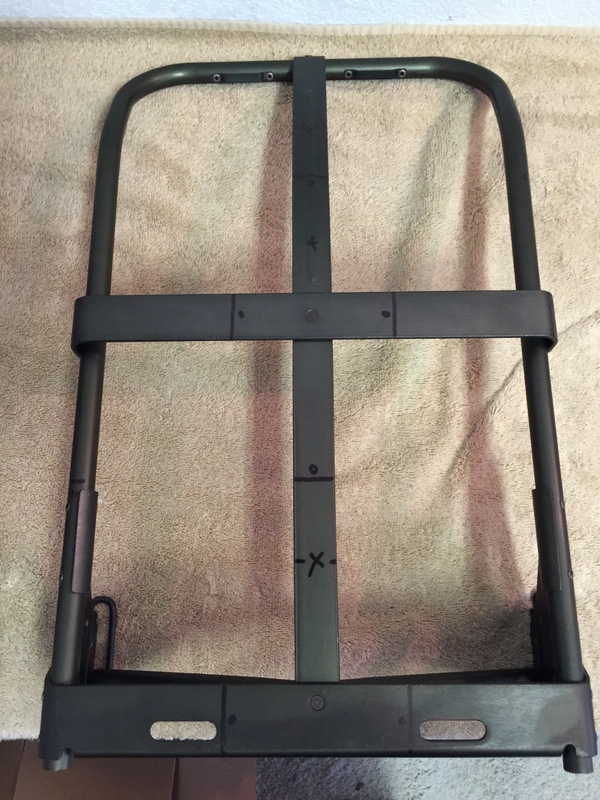
And then started cutting.

It was at this point that I realized that my Dremel would not work for cutting this frame because it doesn’t give me the angles that I need. I’ll have to wait until I can get my jigsaw back before I can finish cutting and shrinking these frames meaning the frames work is TO BE CONTINUED.

After setting the frames aside I started work on cutting on the packs themselves. First removing the entire back (they’ll be mounted to aluminum motherboards later down the road).
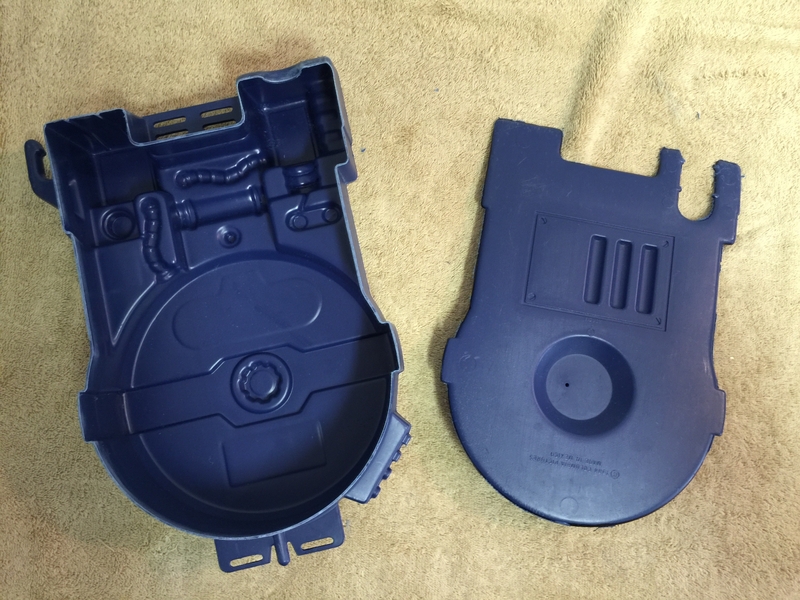
Then cutting off the stock gun hook and the lower strap/tubing mounting points.
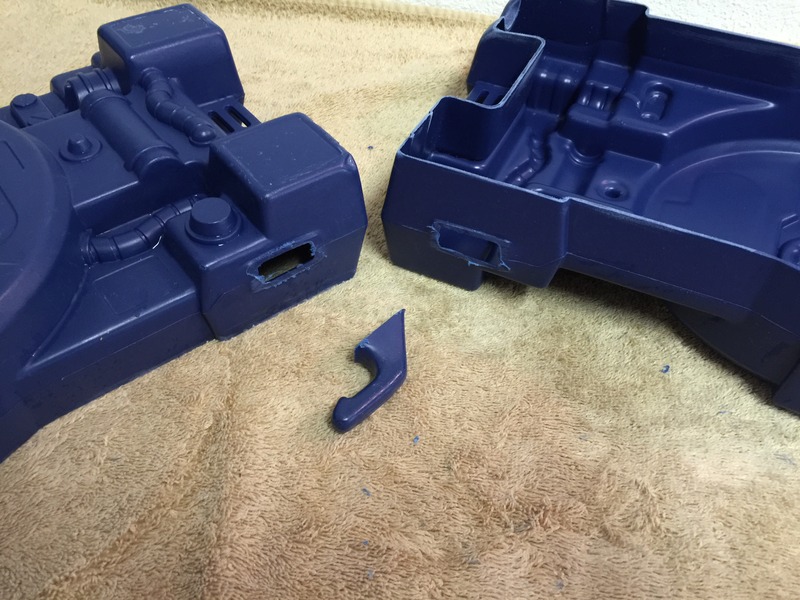
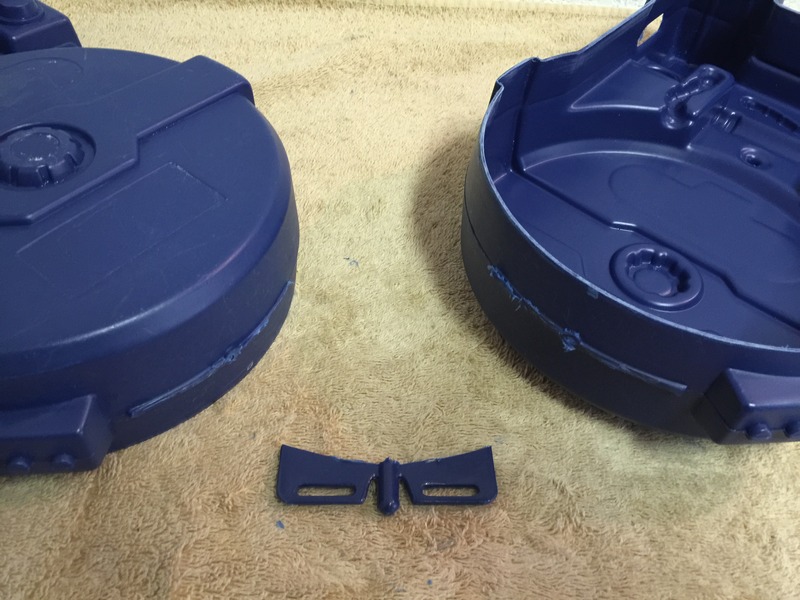
At this point sanded the packs down with 220 grit to get them ready for putty and paint.

Next, I moved over to the guns. I cut off the knobs from both sides (planning to replace them with real knobs) as well as the mount in the middle of the gun.
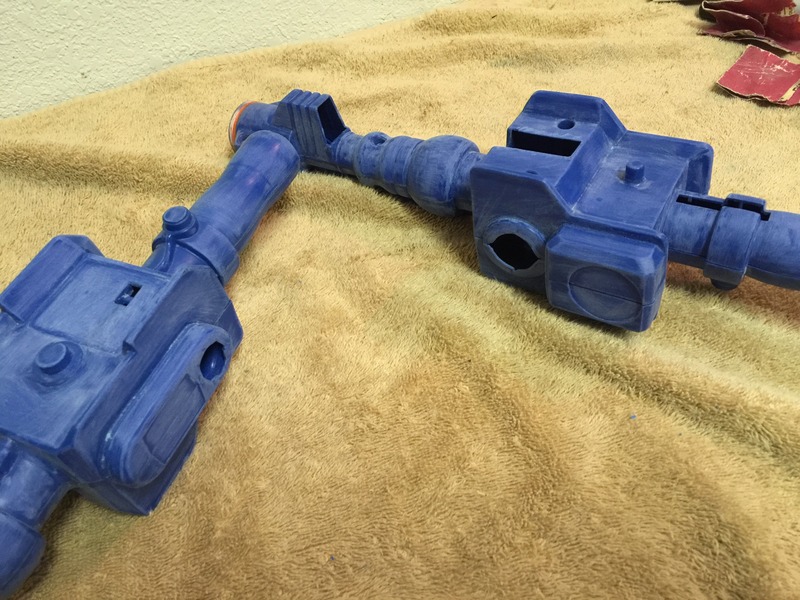
Cut off the stock yellow tubing attachment point and then drilled out the back of the gun handles to accept the split-less wire loom.
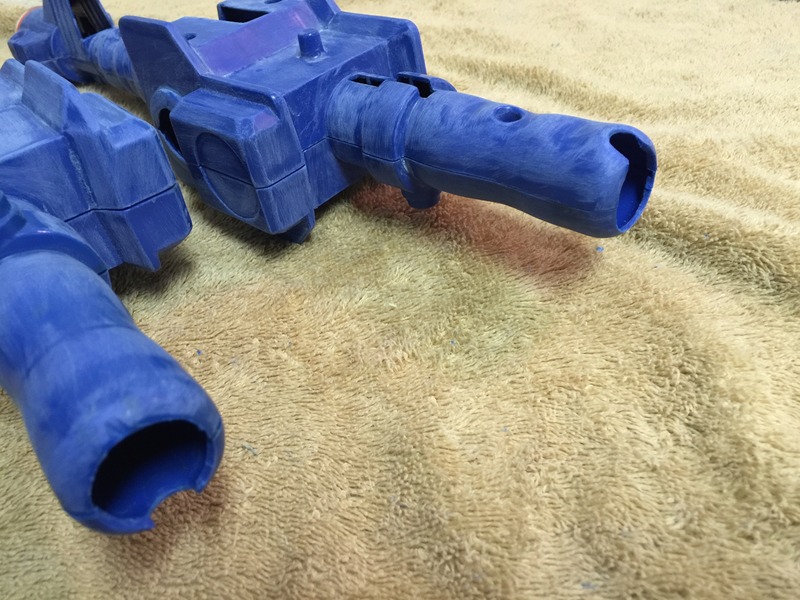
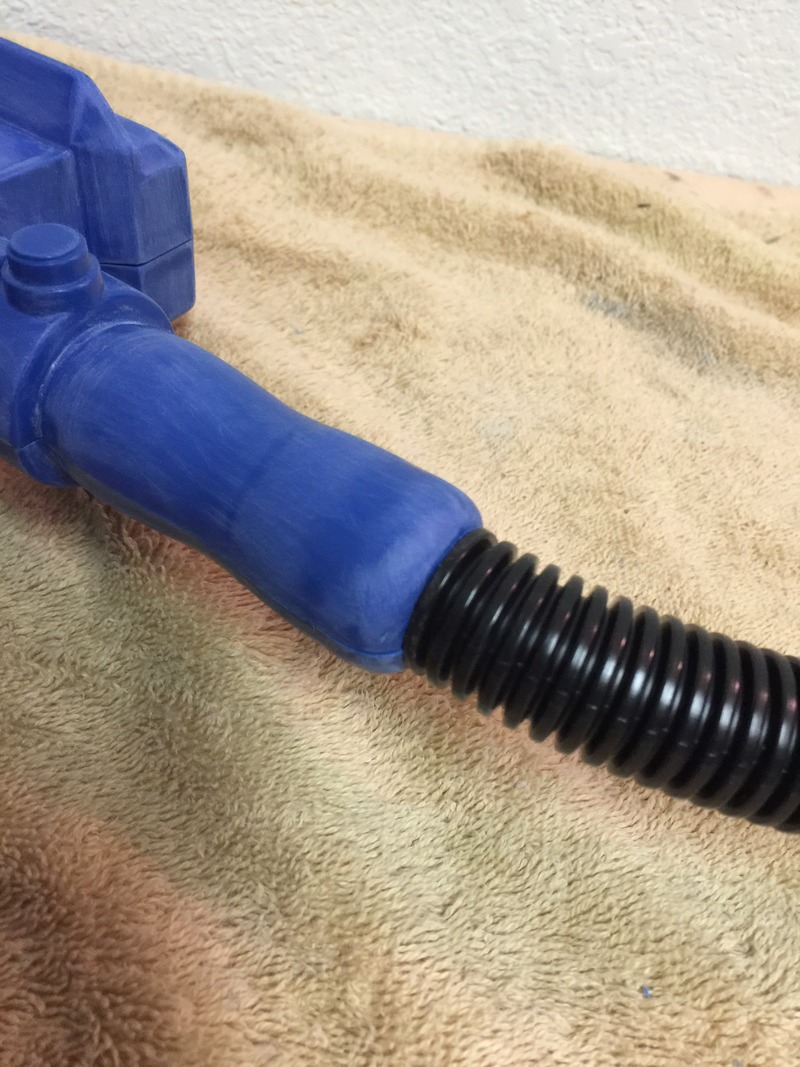
The last thing I did was to sand the guns down with the same 220 grit from the packs.

My next step is to fill in a few of the sticker areas plus the holes left from all the cutting and modifying. This will smooth everything out and get them ready to drill for all the knobs switched and greeblies.

More updates/pictures to come.

Oh man! I can’t wait to see what you come up with! I’ve made some additions to my Kenner pack, I just havent got to update it yet. Ill be keeping an eye on this one!

Nice!

Yea Im currently in the process of buying and moving my family to a new house. Super stressful!

I hope to be able to work on this again in a couple weeks shooting to finish them by March 19th for Silicon Valley Comic Con.

I will have more updates, just hang tight!

I love seeing stuff like this. Good job.

Wish I could find a Kenner pack cheap enough to mod for my little girl. Looking forward to seeing how the shrunken Alice frame turns out.

Love Kenner pack mods. I will be following this.

Buying a Kenner for my son. Definitely following this with great interest! :slight_smile:

OK I know I know it has been a loooooooooong time since I threw out an update but… We’ve Got One!

In my defense my wife and I bought a new home and spent the last 4-6 months replacing carpet, painting the entire interior and working on sprucing up both the front and back yards. All of this had to be done before I could work on the garage and get a workbench built for myself to continue working on the packs my kids are eagerly waiting for.

Now that the bench is built I can show you some of the progress I have made over the last 2 weeks.

By far the most difficult/tedious part so far has been converting adult size LC2 ALICE frames down to mini LC1 versions. I was able to make it happen though and they came out a lot better than I expected.

Viola!

![image](http://www.gbfans.com/images/pb/CiViCStaTUs/Kenner Proton Pack Mod_IMG_1873_zpsytmyf6v5.jpg)

Here’s a compare shot next to the full size frame. The mini frame in this picture was my attempt at converting the first frame before I decided that I should model them in more of the LC1 style essentially lowering the center horizontal cross bar so it sits right against the frame. I decided to go this route because leaving it raised in a more LC2 style doesn’t really work when the frame is scaled down to this size (as you can see by how goofy it looks in the picture):

![image](http://www.gbfans.com/images/pb/CiViCStaTUs/Kenner Proton Pack Mod_IMG_1827_zpspjs5wwoq.jpg)

And here’s how it looks next to the Kenner shells:

![image](http://www.gbfans.com/images/pb/CiViCStaTUs/Kenner Proton Pack Mod_d82535ff-790d-4650-9410-c4e602e85170_zpsg5wzgjii.jpg)

![image](http://www.gbfans.com/images/pb/CiViCStaTUs/Kenner Proton Pack Mod_IMG_1875_zpssbmf6hgo.jpg)

The next step was to start drilling, cutting and fitting the various greeblies to the shell. To avoid boring you with all of the minute details of the process to get here I’ll just skip right to how the shells sit currently:

![image](http://www.gbfans.com/images/pb/CiViCStaTUs/Kenner Proton Pack Mod_IMG_1877_zpsc93ydl7h.jpg)

I still have a few more mods to make to the shells plus I spent some time designing a handful of pieces that will add more movie-esk features to the whole setup. Those designs went out for 3D printing over the weekend so hopefully I can show those off next week depending on how long the printing actually takes.

And then it will be time to cut the aluminum motherboards, mount the packs to the motherboards and frames, move on to modifying the guns (which isn’t as extreme as the modifications to the packs), then panting everything up before the final install of all the electronics, greeblies and stickers.

Until the next update…

Is it just me or are the photos not working?

A few for me, but not all.

None were showing up for me.

Sorry about that I guess Google+ isn’t really that great for sharing photos on a forum so I switched to a different image hosting site. Are they working for you all now?

WOW! I’m glad you fixed those. That pack looks amazing!

Another quick update :0)

I ran into a little problem with the Kenner shells after cutting off the tube and strap mounting point from the bottom of the pack and then sanding it down smooth, the material became really thin along the crease and eventually through handling, the shell split apart along said crease. I tired to use my Epoxy Sculpt to repair it but its so flexible along the bottom of the shell that once you move or flex it, event the slightest bit, the epoxy just falls off…

To solve this problem I decided cut some cosmetic plates out of light aluminum that will be attached along that bottom edge of the shell. I was thinking they would somewhat resemble the cosmetic plates that circle around the cyclotron of the original movie packs.

And then cut a longer piece that I curved for the inside of the shell.

I attached all of the cosmetic plates using small rivets through the shell and the curved piece shown above

I think it looks pretty neat (will look better once painted), added less than an ounce or so in weight, it takes care of that weak spot and adds a little protection for the rougher play these packs will likely see from the kiddos.

What do you think?

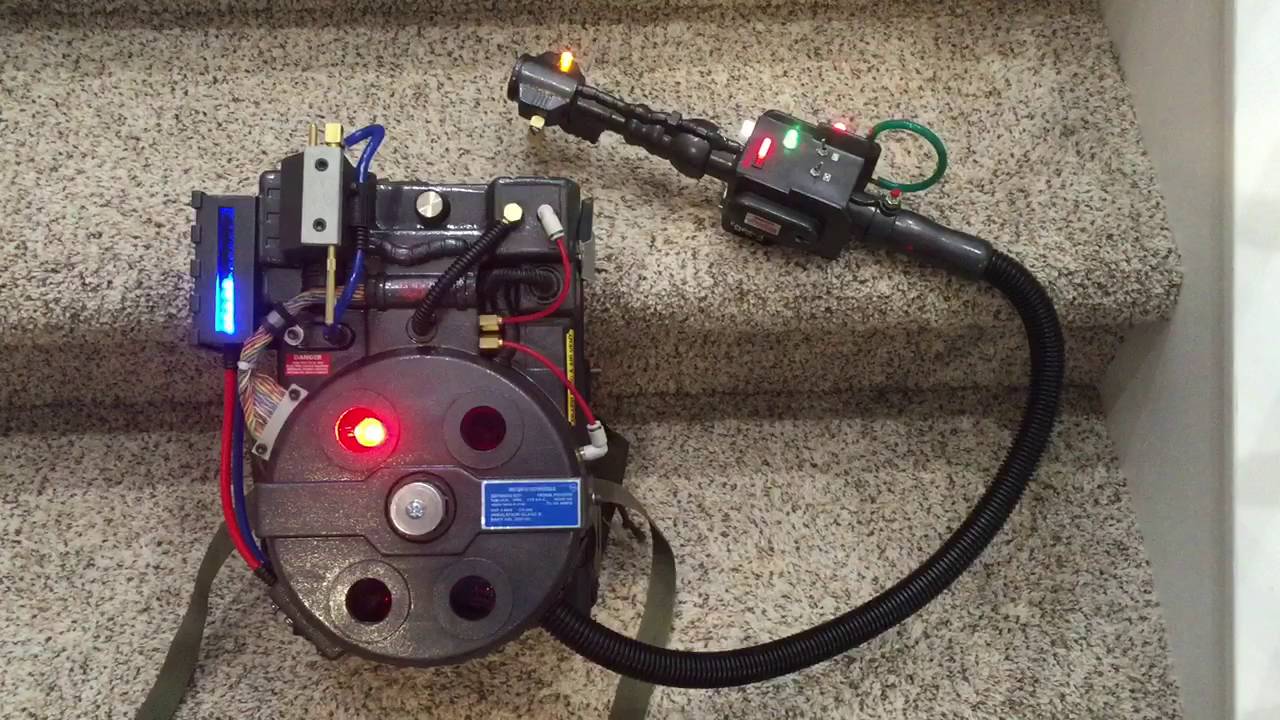
Ok so this built took wayyyyy longer that I originally planned but I had a marathon pack building session over this last weekend and was able to wrap them up for the most part… I still need to add the clear barrel and a couple knobs to the sides of the gun but other than that its pretty much a done deal!

Until hes big enough to handle the weight of adding sound 8)

On to the pics

And a short video showing off the light kit!

Let me know what you think!

Gorgeous! What nice work! Smooth and stunning. ..the way I wish the kenner packs were actually produced!

Utterly brilliant

This is amazing and I would pay you to build me one for my son!

Nice work, it looks good! Ill have to try to get some pic’s of the kenner pack I did up for my girlfriends 7yr old son uploaded one of these days, I just put ALICE straps on the packs normal strap mounting points :blush: