Mike Decays "I'm finally building a proton pack"

Ok, quick update because I’m tired as hell. I’ve always thought to myself “I won’t be like these other guys with months between updates. One weekend is all I need.” Then I go back to work and have to move arcades and single piece slate pool tables. All of a sudden it’s “it can wait. Too sore to hold drill…” :stuck_out_tongue:

I got my bargraph bezel from Spongeface. This thing is amazing. I’ve been working on the gun for a few months here and there waiting for other parts to arrive.

Putting the bezel together was no problem. Worked perfectly. Didn’t have the film protector liquid stuff, so I used the next best thing. Pledge with Future Shine. This stuff is amazing and can be used for all kinds of things. Hobbyists use it to seal water transfer decals on models. Collectors use it to tighten joints in action figures. Etc. etc.

I wish I would’ve snapped a pic after it was put together. Now, I originally decided to mount the bezel inside the gun box, so all you saw was the plexi/bargraph, which looked fine. But after looking at reference pics…I started to like the protruded look. When I mounted the bezel inside I used Q-bond. It’s an Industrial strength super glue. I didn’t think it would stick that well to the aluminum. Boy was I wrong. Had to pry the damn thing out with a screw driver. Needless to say, the bezel has that vintage used look…but I might be ordering another one just because. What do you guys think?

Need to touch up the paint around the bezel from filing.

image

It fits nice and snug inside the hole.

image

GBfans light kit inside.

image

image

image

Looks great. Don’t touch up the paint, the “been repaired” look is dandy!

Not sure if somebody answered this yet, but it should be 1" for GB1 accuracy…

Everything is looking great, man! The Booster Tube was my biggest PITA as well… took me 4 hours to mount the sucker…

Bishop - I was thinking the same thing…but there are certain tiny spots that just irk me. Lol

Phil - 1"! Thank you! Having my pack outside in sunlight yesterday working on it (instead of a poorly lit laundry room) I noticed there’s a pretty decent sized gap between the tube and where the angle sits, above the EDA discs. Unfortunately, on this shell the tubes not going to sit perfect, but I was considering doing the fake weld around the bottom to cover it up.

I had a gap on mine, but I left it alone… nobody has noticed… LOL

Ok…I think it’s finally time for an update here. Been working on my pack every little chance I get, but not enough time in a day to do as much as I’d like. And I’m terrible at taking pictures while building.

So in the last episode cliffhanger, I was talking about the gap I had between my bumper and shell. Checking out Rigg’s Studio Creation build (thanks to robandliv for the point in that direction) I used the method of heating the bumper in really hot tap water to be able to bend the resin. The trick was to fill one sink basin with the hot water and the other basin with cold. Submerge the bumper in the hot for 30 seconds or so to get it to bend, then pull it out and dunk it in the cold water while holding the shape so that it sets as it cools. Took a few tries, but worked like a charm. I wasn’t able to get pics of all this as I was working solo.

After that I proceeded to drill the holes in the sides of the bumper where I fealt it was right and use those holes as templates for drilling through the shell itself. Lined up the bumper where I wanted it and went to town on that sucker. :slight_smile:

In this picture you can also see where I drilled and dremeled the hole for Wiz’s loom bracket. I decided to go with this particular rib because I liked not having to mess up Wiz’s perfect piece of beauty and I saw it like this on one of the Sony lobby packs.

I drilled the first hole through the shell and put a socket head in it. Used that as an extra hand to hold it in place while I drilled the second hole.

image

image

image

image

image

B-E-A-UTIFUL

image

Holes on both sides lined up perfectly between the ribs. Slight chipping here and there but nothing major.

image

Next, with the bumper in place, I made a pilot hole by hand with a drill bit. I had predrilled and tapped the bumper before this so all I had to do was run the bit through and turn it a few times to get my mark.

image

The mark made.

image

Then drilled

image

Screw and washer from bottom.

image

As I said before, the hole in the bumper is threaded for 1/4-20. So the screw basically screws in the bumper and draws it towards the shell making it tighter. Helps with the 1/16th I was off with my spacer. Then the bellows screws into the exposed screw and tightens down nicely.

image

image

image

Somewhere in there I also attached the beam line, filler, and injectors also. Nothing special…just drill and run the screw through.

I’ll leave you guys with this for now. I’m wiring a DPDT for the vent light in the gun. That way I can use an actual flashlight bulb hooked into two AA’s and tell the GBfans wand board it’s being turned on.

image

image

image

image

Stay tuned!

Nice progress!

I remember the day that thrower body was born..

Looking fanta-stick!

Your baby’s in good hands. :slight_smile:

Thanks guys. I got a buddy of mine that’s going to let me use his work place to weld the booster tube and ion arm together. Hopefully tomorrow. I’ll definately be taking pictures of that.

Great job on mounting the bumping, Mike. You’re pictures helped me with planning the mount of my bumper… so thanks for that :slight_smile:

BTW, would you be able to post the OD of your bumper brass washers? I need to order some and wasn’t sure if I should go for a 0.562" or 0.625" OD. Thanks :cool:

Hey buddy, thanks. Mounting the bumper was a little hectic, but not too bad. Just getting the holes lined up.

The OD of my washers are 9/16" and the ID is of course 1/4". These are the exact ones I bought at Lowes. They have a whole section of brass hardware. You’ll find them there.

image

Thank so much, Mike. You put my mind at ease. This seems to be a good example of my “making things more difficult than than they need to be”… :wink:

No problem. I’m currently doing the same thing trying to get my top knob on my thrower to act as a volume knob. Trying to follow Julz idea…but making it much harder on myself than it needs to be. :stuck_out_tongue:

In case it helps, I had to level out the back of my shell (using a forester bit and drill press) so that the potentiometer would sit flush, and the crank knob could spin freely and in a non-wobbly fashion.

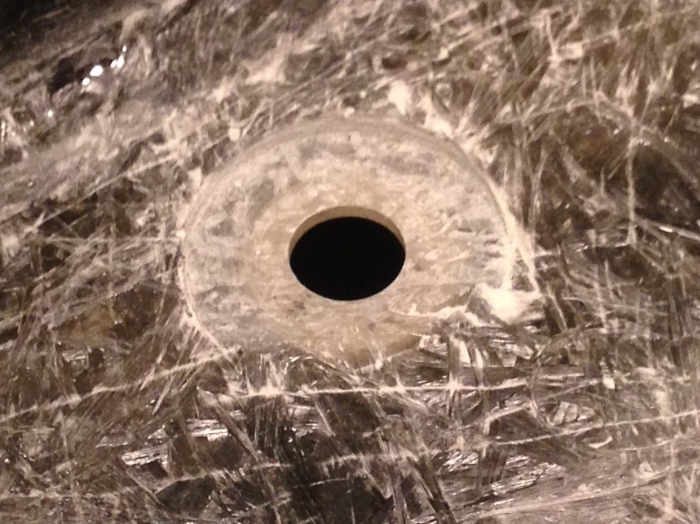
Here is a shot of my crank knob mounting hole from the back, showing how it was leveled…

Holy ■■■■!! You just gave me a fantastic idea!! I’ve been racking my brains trying to figure out how I was going to level the back of the cyclotron holes for the red lenses. I see guys using dremels…but couldn’t figure out how in the hell they got them in there at a decent angle, let alone sand a perfect 2" circle. I just realized…2" Forstner bit. This should be interesting.

Surprisingly…where the crank knob is on my shell…was the most level spot on the whole pack. You’d think I’d go the easy route and just hook the potentiometer there to the volume. But noooooo. I have to make things difficult on myself and those around me. Lol

Hey GT… just throwing this out there…there are generally 2 options for the bumper bolts: first are 1/4-20 bolts, the second is 10-32. I guess it depends on which option you take as to the washers being used.

Thanks, Grimmy :slight_smile: I understand the ID of the washers, but I noticed #10 and 1/4" ID washers can have a couple of different OD sizes. Just wanted to make sure I using washers with an OD commonly used by other pack builders :slight_smile:

Right on! :slight_smile:

I just now spotted this… :love: