I’ve seen a few excellent and some creative slime blowers out ther and been considering making a slime blower of my own. So I started, collecting parts needed to make it and the other day picked up an 8" concrete form from my local HD.
On the way home I was thinking of how to add the caps on the ends and all (most likely bondo’d) but then it dawned on me:
----> I don’t know how I would mount the cardboard tank to the mobo once the tanks are enclosed, formed and painted.
Would riveting work? Or adding a support plate on the inside with a bolt sticking out before enclosing the tube?
You shouldn’t have any problems drilling the holes after painting. Even if some of the paint gets messed up around the hole, it’ll be covered by the 4" plate that the tank gets mounted to. Although since you’re using the cardboard tube, you might want to look into specialty rivets for less sturdy materials that expand over a wider surface area.
I think Funkpunktwang used sheetrock screws for his main tank. I wasn’t there when they attached them to the motherboard, but we did a test with rivets and they just tore through the cardboard. He did wrap it in styrene after though. I think there was also talk of using washers on the inside, but I don’t think they put washers inside, as they’d sealed up both ends of the tank and painted it before they attached it. The side tanks were pvc pipe so those could be simply riveted on.
Here are the notes I took during Funk’s build. I make no promises about the accuracy of the measurements, but I did go back and add some notes to portions where I know the measurements are off because they were off in our finished build:
And here are the plans I drew up. These drawings are accurate in scale, so if you blew this up full size you could actually pull measurements off it. A word of warning though: The metal plate on the right side of the drawing ended up being too small on our build. I believe it needs to be a little taller and wider. It was hard to tell exactly how much it was off by because the gold boxes on our build were a little too large. Also I think I may have sized the main and side tanks here according to how large ours ended up due to the use of PVC and concrete tube.
If you order the aluminum online, onlinemetals.com will cut everything for you except the angle on the piece on the left. I think we used 1/8" thick 6061 aluminum.
Ghostguy this is GREAT!! The measurements will help out tons and i like the link to the notes but I think i need to go over you notes a few times just so it makes sense to me.
When I did my slime blowers years ago, I built a frame inside the main tank that would support the weight and allow the screws from the motherboard and frame to be mounted securely without the fear of the screws ripping out from the tank. The interior frame was done before the ends were attached and had all the pilot holes drilled. Hope this helps.
The 4" mounting plate is the correct size but the length of it will depend on what diameter of tanks you end up using. I was told the center tank was 9.5" diameter and the side tanks 4" and 5".
I would recommend if you are using a sonotube (cardboard form) to reinforce it on the inside possibly with some fiberglass cloth before you cap both ends to give the rivets something to bite into, the cardboard form alone will not hold, also use the appropriate lngth rivets that will expand enough.
PVC pipe would be the best choice but is a tad expensive, I remember Cyland made his own with some wood rings wrapped in sheet pvc or styrene to get the 9.5" diameter
I was thinking i may try lining the inside with either a sheet of .125 styrene heated and curved to match the inside of the cardboard concrete form so a rivet or screw would have something to bite into
Another option i was considering would be similar to irricanian’s suggestion: lining the inside.
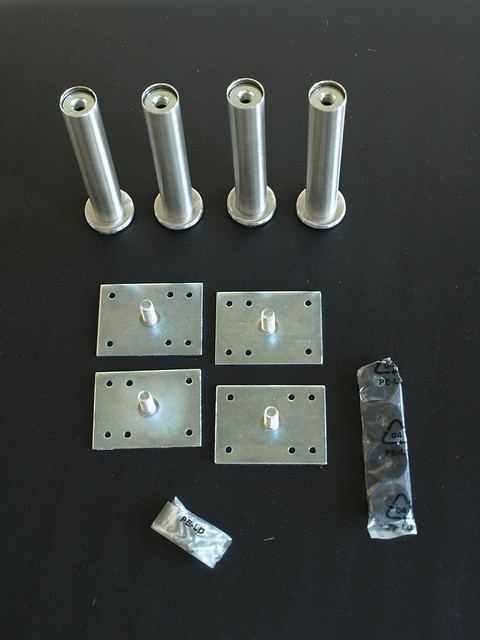
I was thinking I might epoxy a small piece of stiff curved sheet metal with a bolt thru it (bolt expoxied to the sheet) and have it stick thru the tube wall and use that to attach it to the 4" mounting bracket with a nut.
Similar to the square braces for this Ikea table leg:
PVC in that diameter would be insanely heavy. I’ve seen PVC in that diameter and it’s thick. It’s probably also insanely expensive. Jon’s blower tank is made of cardboard and his weighs more than a pack already. I can’t imagine lugging that thing around if the tank were made of PVC. It would be like wearing three packs at once.
I’ll post where I got mine later tonight (or it’s in my build thread also). The PVC I used is slightly too small, about 9" OD, cost around $40 shipped, and weighs around 7 pounds.
Well I stand corrected on the PVC. I have no idea what they would use such thin PVC in such a large diameter for, or how it could be priced so low when shipping is included.
My plan of attack was going to be… locking washers with a large washer in between. Drop some large bolts through. Then hotglue them in place before sealing it off.