I think the question everyone has, is how much is this, and when are you doing a run??
This is how I did my ecto goggles for Ray a few months back!!
I’m glad you do it like this too, from what I’ve seen , you’re really good!!
You’re a inspiration to all of us if I may say!
Check out my goggles on Ray
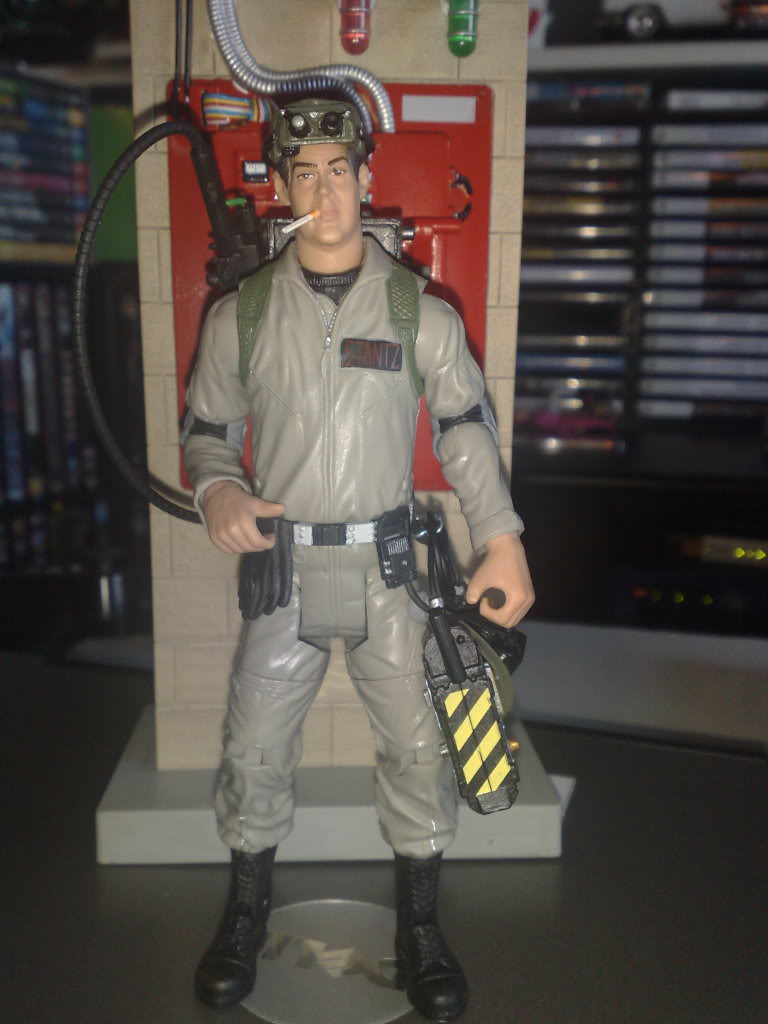
Really? you both did them this way? And here I was thinking of how to make one like PeteVenkmanJedi…
Nice Ecto Goggles! Well, it shows I had the right idea, just after you did. 
Don’t let this stop you. Yours will probably turn out more accurate.
I forgot about that Ray, looks like a good substitution, Capt! when you attach them to his head can you tilt them a little more so they are slightly higher on his forehead?
Sointenly! This is just a test fit and to see how they look. They need more work.
Poor ray, his head is in a better place now
Heads up! I’m half way to having the perfect Rookie head replacement. The outer mold is done.
Now what’s needed is and inner mold to duplicate the cavity in the Matty figures. Then the head transplants can begin.
awesome!
Your seriously tempting me to butcher up the only Ray figure I have of that kind just to get the ecto-goggles off…you bad bad man. :sigh: Although I could just try sticking some sculpey over them and using that as a mold, saves a figure.
lol Woah! Looking good!
Captain, where are you located? It’s not posted so if you don’t feel comfortable, by all means PM me. I might need you assistance on a future custom Vigo I have in mind.
Looks great so far.Final version will be look so cool I bet.
That’s awesome! I was planning on tacking this project when the GB 2 4-pack comes out… Nice work finding a good head! I can’t wait to see this thing complete! Hey Capt, you should check out figurerealm.com (my favorite custom figure community) and upload some customs!
I have been looking to make the same goggles, but last time I painted details on something I used Testors paint I got from Michaels and the paint remained tacky for many weeks, I don’t have any other paints and I don’t have a paint color of Olive Drab.
@ kenny_a:
what is the paint you used to paint the goggles? also did you mix paints to get the color?
@ CaptCyan:
I love the work you are doing, I have always wanted a Rookie figure (he’s canon and part of the team), and a upgraded game pack, I am extremely looking forward to the progress on this project.
Hey Makuta!
For the ecto goggles I used Tamiya color Acrylic paint.It’s field grey (XF-65). It’s says grey but it looks like olive drab.
For the little silver things I used Humbrol Enamel paint or Revell color enamel paint, I don’t quite remember, but no paint was mixed, just straight from the small container.
For the black on the lenses I used a Tamiya color spray paint. I sprayed some in a cola bottle cap and painted with that.I know very primitive but I believe it was on a sunday and I really wanted to finish it!!
I’m just a beginner on these things, I never thought it would come out this good.
Hey kenny_a! A word of advice (a bunch of them, really) Acrylic paint on top of Enamel should be okay, but Enamel on top of Acrylic sometines has adheasion troubles and can alligator or peel. It’s best to use the same type of paint from start to finish.
You should try Citadel Paints. They are an Acrylic so they thin and clean up with water. The color range is very good and they mix beautifuly. They also have some of the best metallics around.
That’s my 2 cents! Back to making pieces-parts.
Hey thanks CaptCyan!!
Like I said, I’m just a beginner at this, it all started when I got Egon.I first tried a PKE-meter but I didn’t get it quite right but that problem is solved with the clean egon in september.
Thanks for the advice!!!
This is the paint I used on my 12" Ray’s goggles. I used similar types on his belt & radio too.


I can’t find the individual bottle in the Testors website, but I found the actual Paint Set I got it from.
http://www.testors.com/product/0/9188/_/Aircraft_Acrylic_7_Color_Flat_Paint_Set
If push comes to shove, I’m sure a flat olive drab color would be just as good!
Here is the very beginning to the Rookie’s Trap (that’s the RGB Trap sitting behind it). I first thought uf using the Matty Trap for the Rookie but it looked too big compaired to the screen caps.

Here you can see that the Kenner Trap is more in line with the size they stuck on the Rookie. Doing this also shows me that the profile of the Trap will need to be lower to allow the Rookie figure to put his arm down. (It’s also sittig a bit higher because the putty wouldn’t stick when I placed lower)


One other bit of a break through is I’ve figured out how to get the “Slime” in the tubes! While it might not sound very exciting, it was becoming a challenge.
Joeghostbuster had sent some green wire to use for the tubing. The thing was it looked like wire and I wanted it to look like liquid going thru a tube, so I thoought “run some paint through the tube”. When I did just that, the paint color “Edged” to the outside of the tube and made it look like the solid piece of wire that joeghostbuster gave me.
I had to keep the paint away from the inside tube wall. The solution was to find some Styrene Rod that would fit inside the tube and paint that (which is what I did).

I have to get abetter pic of the end result, but you can see the tube and the “Slime” inside of it.

And before you ask, yes it is still flexible, so the figure can be posed as you wish.