Spanakadakawaka's Studio Creations Pack Build(Updated 11/11)

First off, thanks to AJ for this great site and building this community (and for being more than happy to take my money in trade for random bits of plastic and metal).

So back in July I decided to start building a pack and signed up here to begin researching. In attempts to keep my budget low(er), I was drawn to a Studio Creations vac shell. After asking a bunch of questions here:Studio Creations shell question - Proton Packs - GBFans.com from the great people here, I decided this was the way to go for me.

The version that I have I believe is the third generation which comes as two separate pieces, basically split at the synchronous generator, and does not have the N-Filter molded in. Overall I’m pretty happy with the shell. It does have some softness around the ribbing and cyclotron washers, but it’s a fair trade off for price. My initial worry before ordering was how the thin the plastic walls might be, but after handling it now it’s stronger than I expected, so very pleased.

OK enough yammering, onto the pics.

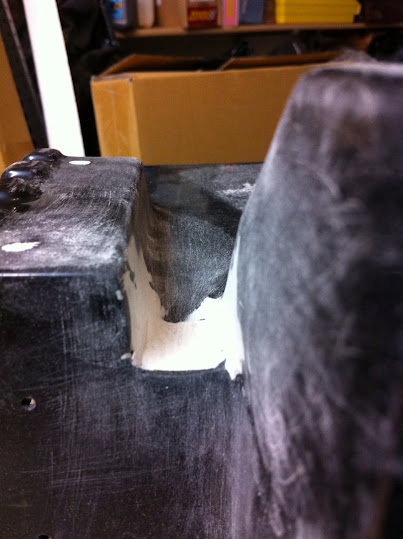
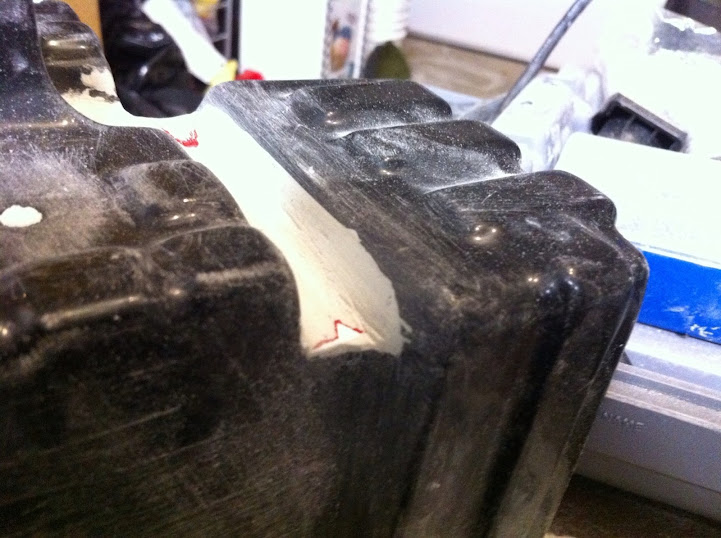
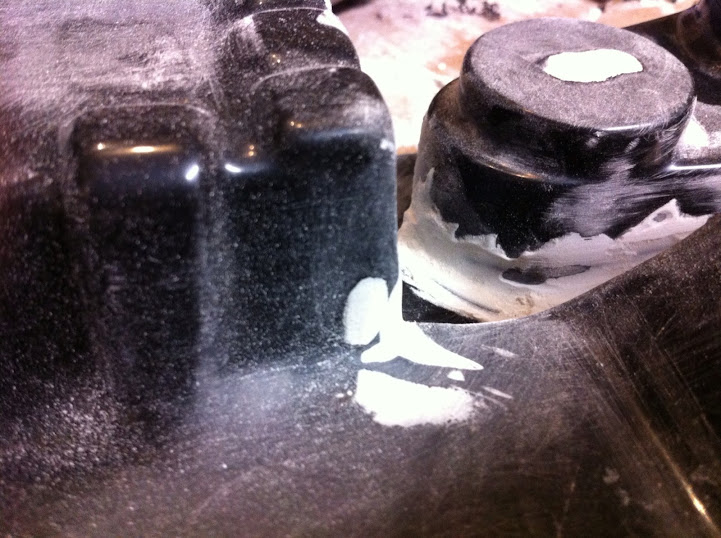
The first thing I wanted to do was to clean up some the areas where the plastic webbed durring the vac-form process. I cut away the webbed areas and expoxied plastic on the inside to frame out the area. Afterwards, bondo like crazy. Sorry for no before pics.

First up the area next to the power cell:
Area below the HGA, next to the crank generator:
Booster-side of crank generator
To join the two halves, I drilled several holes in the interior walls of the halves, and added some machine screws and nuts to keep them together. On the face side, bondo like crazy.
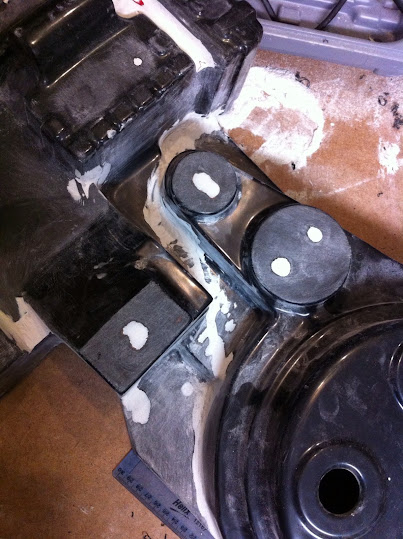
Started some PVC injectors and filler tubes. Wooden dowels were expoxied into the tubes to give me something to attach to the shell. I might end up removing the bases and do a fake weld around it instead. I just think that might look cooler:
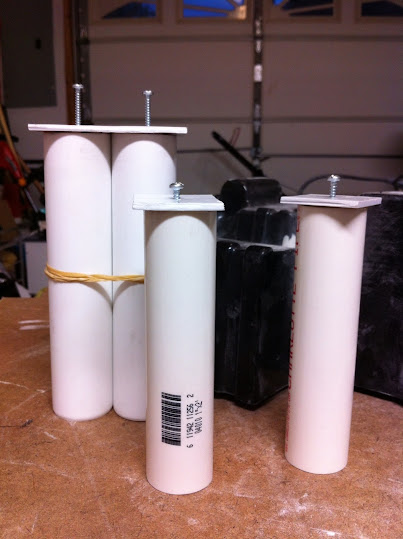
Found these couplers at Lowes that was the perfect diameter for the N-filter, but just a bit short so I had to cut and join two together. To get it attached to the shell, I cut up an Illy coffee can to make a bracket to bolt the N-filter to the shell. Once that was good and tight, that’s right, bondo like crazy.
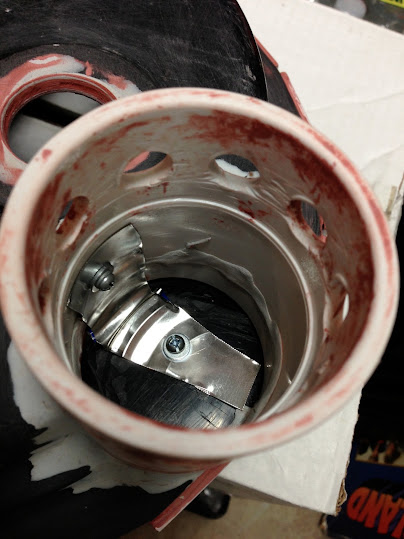
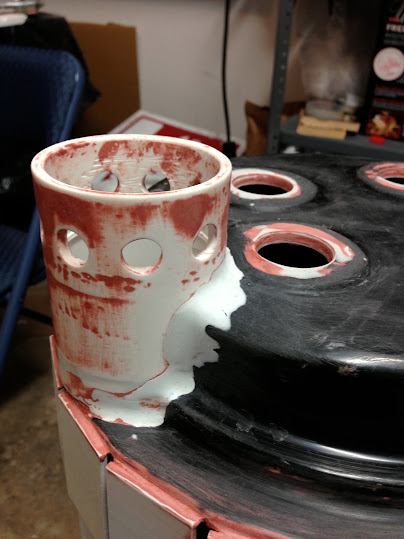
Close up shot of the shell seam after bondo, filler, and sanding.
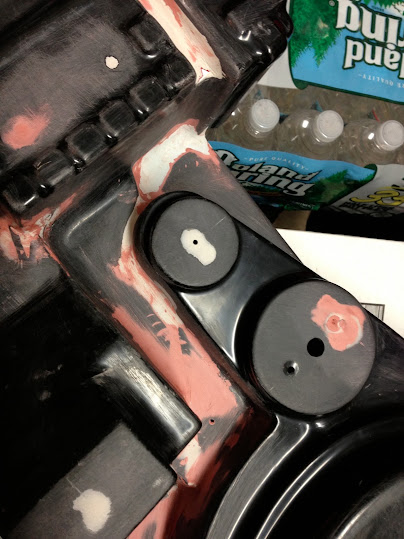
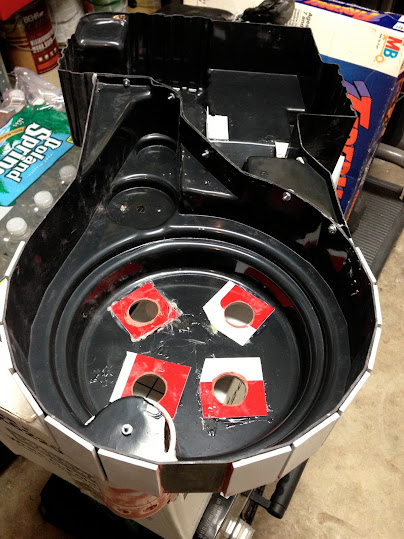
Interior of shell. You can see the screws for the seam in this one:
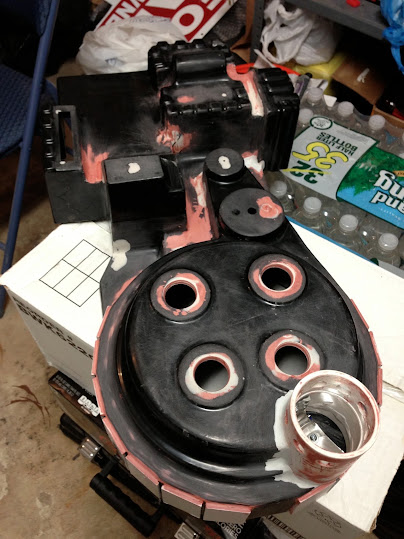
Exterior shot so far:
As for the gun, I’ve ordered Throwing Chicken’s v3 kit and should be getting that this week. Can’t wait to start on it. Also nabbed a $5 heatsink from the GBFans sale!

Much of the tubing, resistors, and greeblies I have so far have been sourced from GBFans, MMM, and a few random other places.

For sound, I’ll be using the GBFans soundboard with two speakers. Holding out on lights for now, hoping GBFans has a plug-n-play light kit when I’m ready to install. (Hint hint AJ :wink: )

I’m itching to get this sucker primed, but still need to finish my ion arm and build the two little boxes that jut out of the sides of the synchronous generator.

Looking good so far. If you’re looking for a good light kit, Jupiter Electronics has a great light kit available, and they’re always ready to ship. You’d just have to replace the switches n buttons to keep the sound and light’s voltages seperate.

I have checked Jupiter out and they definitely seem like a strong contender if I get anxious. I was hoping to wait for the integrated light kits since I’m not the most electrically inclined.

If you’re willing to spend $125-200, check this out. I’m getting one myself. http://www.gbfans.com/community/viewtopic.php?f=2&t=29529

The progress of the shell is looking really good. My first pack was a vacformed shell and I was surprised to how strong the shell was. If your a little worried about the strength of the shell I put a few layers of resin fibre glass on the inside of the shell. I also but some blocks of wood in the corners to strengthen the pack in the weaker areas. I also put some wood on the back of the shell where components were fixed such as the gun mount bracket.

As for the lights I recommend the Jupiter electronics kit I had this kit and was impressed how good it was and it was really easy to wire up

Thanks for kinds words and advice. Jupiter electronics does seem to have a pretty good kit for the price. I’ll probably start checking out if anyone has used them with the GBFans sound kit to get an idea what the effort is.

If you buy a MIGHTY, the sound and lights are all in one system, so it ends up being cheaper than buying the GBfans sound chip and any of the light kits out there. Plus you won’t have to keep the sounds or lights on seperate voltages. Best thing about the MIGHTY is that you can change the programming of the lights, as well as the sounds.

Wow thats looking really nice!

Well in my classic luck, I literally saw the MIGHTY controller the day after I got the GB soundboard in the mail, so I’ll probably stick with it for now, for my first pack at least.

Speaking of future pack, thanks for the feedback Nick-a-tron. From the looks of your new (and gorgeous) shell though, I’m already scheming a second pack!

Looking good! I’ve been wanting to start mine for a long time…being in a divorce at the moment ( she never really supported me with all this) I think its time to start my build! I’m going to go with the vac formed shell for my first pack as well :boogieman:

1 Like

Updates should hopefully be coming soon. Got my gun kit and some other material to get me going again for this holiday weekend.

How have you been doing on this build? What did you use for fins to extend out the bottom of the cyclotron sections. Been thinking of using this shell as a cheap build for a friends pack. Like all the bonds work. I ordered some magic sculp, so hopefully I can use that. Plus I have a TC V3.0 I am working on also.

Hey Mike,

Progress has slowed so far due to it being a bit too cold in the garage to work. For the fins on the bottom, I order 1/8" thick PVC sheets from Amazon. I’ll warn you now though those things are too hard to cut with a utility knife. I used a jigsaw with them but just take it nice and slow and remember to account for the thickness of the blade or else you’ll be off. Attaching had been a little challenging as from the front of the fins (facing the front of the pack) there was a little gap between the shell and fins. I puttied as best as I could but I still see some cracking. I hope after priming it might be able to do another small coat and it’ll be OK.

Hope you like the TC kit as much as I do. The pulls are very clean. I ordered a heatsink off the GBFan shop when it was on a firesale for $5 so I’ve sanded off the resin one on the kit. I have pics but I haven’t had a chance to post em yet.

1 Like

looking very nice mate keep the good work up :slight_smile:

Thanks @spanakadakawaka. That helps a lot. I was looking at the original Studio Creations Vac pull and I noticed that thos fins where not on the side of the Sync Generator. I noticed how you set your up and it look great… So this helps Mucho. :slight_smile: Plus I hear you about the cold… :slight_smile:

I really like the TC kit. I got mines second hand uncompleted from someone, so I broke it down. I didn’t like the way he had it painted and assembled. I have some aluminum pipe and knobs on the way. Picked up the Jupiter Light kit for it. I did buy a heat sink along with some side knobs and was actually going to do the same thing. But I have decided that I want to get an aluminum thrower one day. So I am saving them for that. Plus I already have an idea on a way to build a moving tip based off of one of the threads on here. :slight_smile:

Opps, I wanted to vote up on your post but I hit the wrong arrow by mistake. :frowning: It won’t let me change it. :frowning: Sorry. So I voted up on all your other posts…

No worries Mike. I’ll chalk it up to karmic payback :slight_smile:

I am looking at getting a studio creations shell myself right now. cant even come close to affording the fiberglass shell at all. Is there any other things you noticed with the shell that i should be aware of if i do buy the shell?

The main thing I can probably think of that may be the most significant is its “softness”. By that I don’t mean the plastic is soft (in fact it’s far more rigid than I thought it would be) but soft in the details. The best example of what I mean is the roundness of all the ridges around the boxes. Ideally you would have crisp, sharp edges, but due to the vac-pull process you lose some of that. Since the plastic is glossy, the roundness is more apparent than it would be were it more of a matte finish. Personally it doesn’t bother me that much and i think with a good paint job, it won’t be that big of an issue.

I haven’t kept track of all the hours I’ve put in on the pack so far, I kind of wonder if it would have been “cheaper” to go with a fiberglass shell and avoid the work. But it’s been a lot of fun working on it so I would definitely recommend it.

cool. thanks for that heads up. I will definately be getting one this weekend then. I dont mind the soft edges to much. its my first movie pack and kind of just wanna jump in and get the idea. now my first pack was RGB and the entire thing is hand made. Heavy but definately a fun build. I guess you can say i wanna take it a little easier on this next build. I will probably get a fiberglass shell later on down the road but I think this would be a great start to the movie pack.

your pack is looking good. I am starting a SC pack as well. Im too chicken to do all that filler though.