So it’s finally come to this. I’ve been collecting the little parts for my proton pack for probably the last 2 years or so. It was something I’ve wanted to start for a long time, but just had to get motivated.
So last weekend, I got motivated. Dug out some polystyrene sheets that I had sitting around and got started. Why do I have sheets of polystyrene plastic just lying around. Way back when, I wanted to make my own Imperial Stormtrooper armor. I flaked out on that idea.
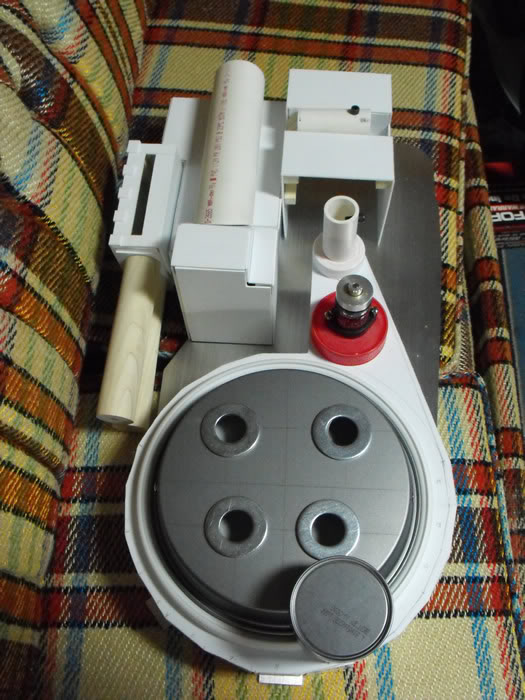
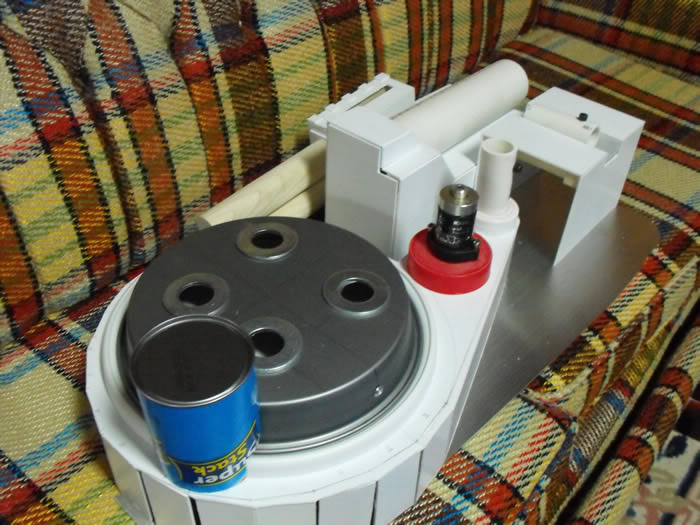
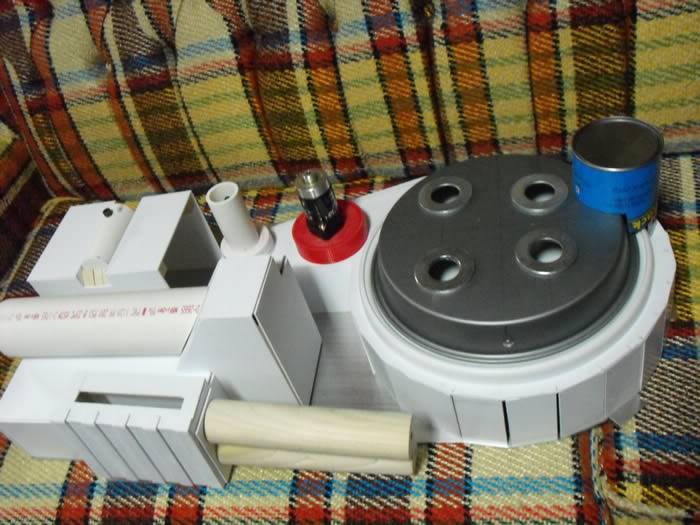
So now it gets to go to good use in my first ever proton pack build! I’ll try to be detailed without being overly detailed. Here’s some pictures:
(4) 1" center diameter steel washers (again, not screen accurate, it works though)
Plastic table carousel top for cyclotron rim
Pringles can n-filter (this may be replaced at some point If I find something better…I hope I find something better)
1/4" socket head cap screws for the filler plug and crank box tube (so I don’t have to glue the split loom in)
I’ve got a bunch more parts on the way from irricanian. I’ve also got a handful more waiting in the wings from nick-a-tron and the gbfans shop.
OK the Clippard Valves, not screen accurate. Here’s the deal. I got an R333 and a R443 a long while back for $10 for the set. That was too cheap not to grab. Especially since they are roughly the same form factor as the screen accurate ones (R701 and R331). So I’m punching my artistic license card and using these instead.
I’ll post updates as I make progress. Most of the work left is finishing the crank box, gun mount and cosmetic plating. Then it’s on to bondo the open seams and smoothing and sharpening the shapes a bit. Then primer, paint, details, mounting, etc.
Any questions or helpful suggestions are more than welcome.
Hey, an excellent start on your pack. Is this gonna be wearing pack or a display pack? Don’t worry about the clippard being the wrong type, i honestly didn’t notice it until you pointed it out, only the real die hard pedants would be so picky. Keep up the good work
It’s going to be a wearing pack. The alice pack frame is waiting in the wings.
Also, if anyone can suggest something other than a pringles can for the n-filter, I would be very appreciative. My second thought was to go with PVC pipe and cap it off with a circular peice of plastic. I wasn’t sure if someone had better success with another material or if there is a container out there (that is not cardboard) that works just as well.
I glued two 2" pvc couplings together and filled the seam with body filler, then sanded it smooth. Then I cut it to the right length and capped it with a piece of styrene cut in a circle. I think that would be stronger then the pringles can.
Coming along a bit better than expected. In the picuture above you’ll notice that I’ve finished the crank box and added the gun mount box. As it is, I’ve bondo’d the edges and have got ALOT of sanding to do.
For the n-filter, I went with mburkit’s suggestion of 2 - 2" PVC couplers stacked on each other. I cut a very short piece of PVC pipe to fit the 2 couplers together to make sure they line up correctly. I’ve filled the seam between them but I already seen place where an air bubble formed under the bondo that I’ll need to re-fill. As for the cap, I’m using a short piece of 2" PVC and a 2" cap. I drilled the 1/2" holes all around the filter. The plan is to cap and paint, then use a thin sheet of PVC (probably a for sale sign) to line the inside. The plan is also to make it removable since I drilled a hole in the cyclotron (pie pan) and the trim piece (table carousel) to accommodate the shape. I foresaw cutting the cyclotron would be much easier than trying to cut the PVC to the right shape.
A note about the cyclotron, I’ve JB Welded the Washers to the top and a set of Dollar Store flashlight reflector assemblies to the bottom for the lighting. The assembly is the entire screw top from the flashlight, clear lense, reflector cone, and bulb holder. For the holder, I removed the metal piece that carried the current to the bulb and drilled a hole to stick the LED through. Since it is soft (kinda cheap) plastic, it bends a little to give the LED a snug fit without needing to glue them in (good in case they go bad and need replacement at some point).
As for lighting, I purchased Proptronix’s gun and pack kit which exceeded my expectations. I’m still seeing yellow dots from testing the power cell lights!
Off to the left you will see the gun kit coming together. It is a mix of nick-a-tron and irricanian’s gun parts. I’m working on it when I get tire or frustrated working on the pack.-grin
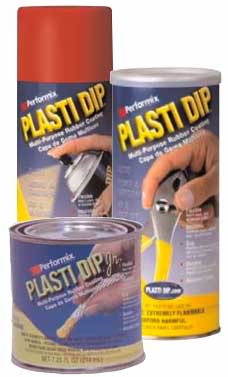
One thing I’ve decided to do for the gun grips is to use a rubberizing spray to make them a bit more slip resistant and to give them the feel of real grips. The spray is called Performix Plasti Dip and is the kind of stuff you’ll find for coating the handles of pliers, but in spray can form. I tested this stuff on a piece of PVC pipe and it seems to be exactly what I need. It’ll need a few coats to give it a good thickness, but it doesn’t scratch or peel easily.
That’s all for now. This week I’m going to be sanding down the pack and possibly starting to paint. Sorry for the lack of pictures, if anyone wants to see a specific part of the pack, feel free to let me know and I’ll grab a picture.
I think the grip is just laying there underneath the rear grip and it’s sitting sideways so you can see it. I could be wrong but it doesn’t look like it’s glued on yet to me.
Hehehe, mburkit is right. The handle grip is actually laying on it’s side under the rear gun handle. The picture does make it look like it’s glued sideways though. The plan is to paint the gun and coat the grips in plasti dip separately, then attach them.
So no worries. If I do something stupid while making my pack, I definately want someone to speak up. Better to let me know now rather than wait until after my pack is mounted upside down on the alice frame.-grin
Oh OK, good haha. Should of just looked at the shadow. Hey so how does the “Rubber Dip” stuff work? Have you used it before? does it leave drip marks when you coat it? Can you apply it with a brush? Sounds interesting.
Yeah, with the Plasti Dip spray, it goes on in thin layers just like you would with paint. I tested it on a peice of unsanded and unprimed PVC pipe and it really worked well. 1 coat was enough to hide the underlying color of the pipe (which was white). However, you can peel it back from the edge with your fingers because it is practically spray rubber (guess Rubbin Dip sounded to naughty). As long as the edge of the sprayed area is out of contact with your hands you shouldn’t have to worry about it peeling.
It comes in several different colors, but you will want the black for the grips of course. If it’s a nice out this evening, I will go ahead and spray one of the grips and grab some pictures to give a comparison. It takes about 2-3 hours to fully cure so it may be later this evening before I have pictures up.
I just noticed something… I made the cosmetic trim piece on the left side of the cyclotron spacer about 1" too tall. Saw a side profile of another pack, then checked the references, then checked Stefan’s plans. Aaaand…Royal Crappage!
It doesn’t interfere with the powercell tubes so I didn’t notice it before. That’s what I get for not inspecting the plans closely. I’m thinking I might just leave it as-is unless someone can think of a reason it would be better to fix it.
Honestly though, no one will ever notice it because of the filler plug, ribbon cable, and injector tubes abstract the view of it anyway. The only reason to change it is if you want your pack to be as accurate as possible or if Kind2311 decides to give you a hard time, haha.
i actually thought it was cooler that way. they’re “cosmetic plates” and ive never seen them before until norms v2 plans, and i dont remember any height to them. i think your 1" works for them.
Sorry Gareee, I meant to answer you earlier and my ADD kicked in and I started chasing a butterfly. Yes, the goal is to have it finished before halloween. There are a few local events that may require a rookie ghostbuster on scene.
Thanks for that! I thought it looked ok too. That’s why it didn’t tip me off until I saw someone else’s pack. I’ll try not to let it bother me.
Thanks! I meant to have some pictures of rubberized grips this evening, but I ended up working late and up running out of daylight. Hopefully I’ll have some time tomorrow to do the grips and some sanding.