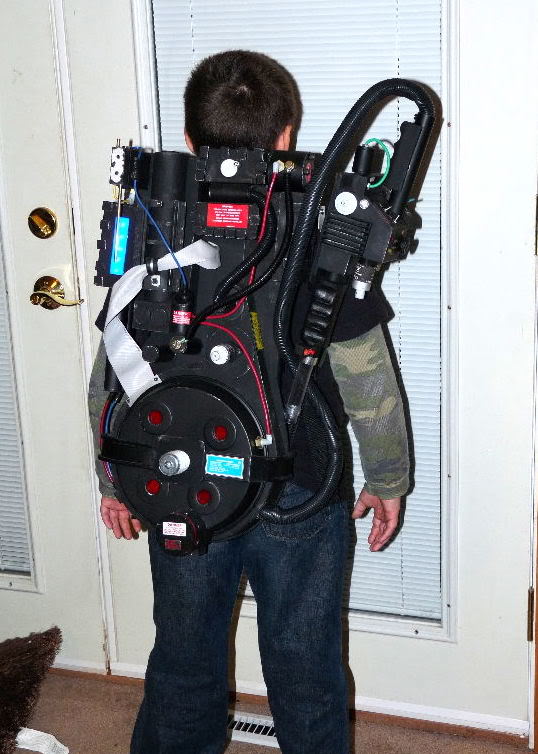
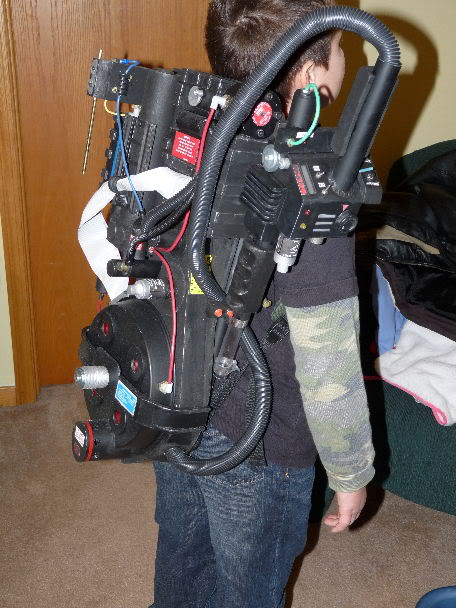
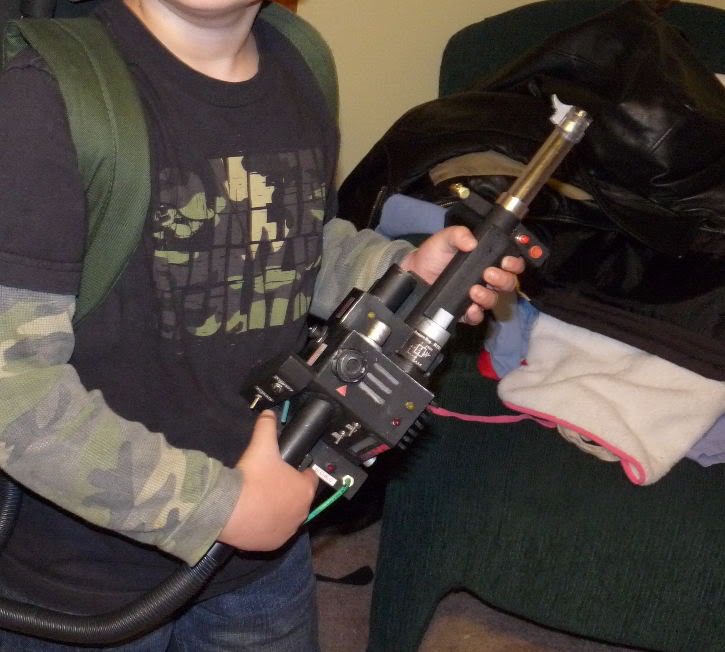
My son had been playing the recently released Ghostbusters video game and had really been into it. He’d seen the movies and liked them too. After seeing the thread above, I asked him if he’d like to be a Ghostbuster for Halloween and he was all for it.
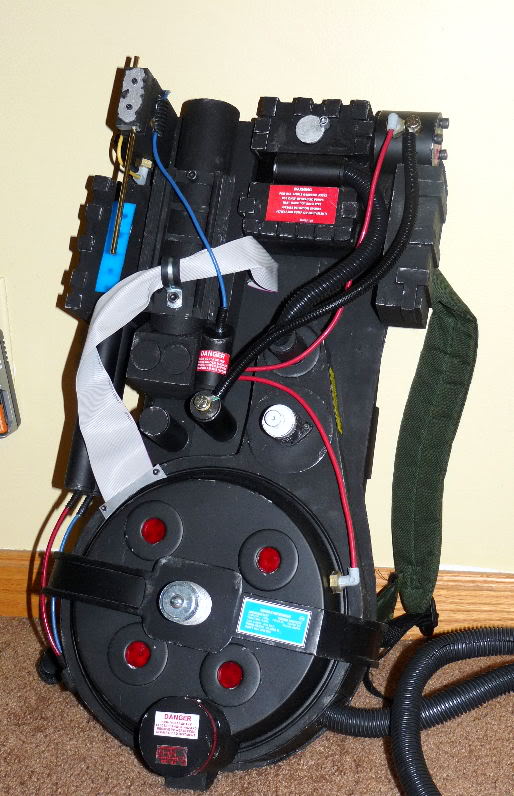
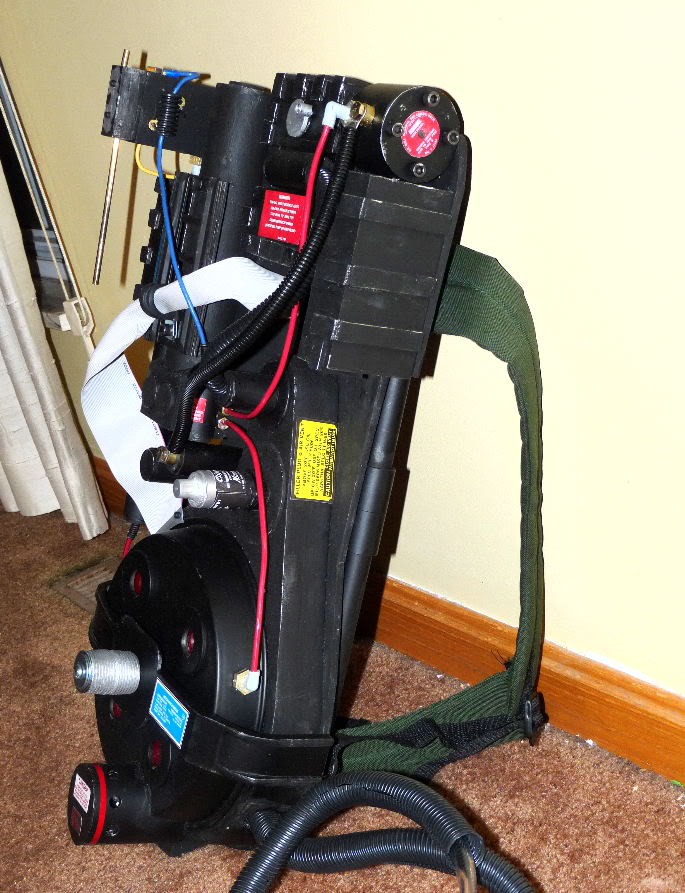
I spent about 1/2 hour each evening for the past month putting a kid’s size Proton Pack together for him. I spent a little more than the $15 the RPF kid’s pack cost, but probably didn’t use more than $50 worth of materials. Most of what I used I already had on hand.
I built this using plans here, plywood, PVC, styrene, bits and pieces from hardware and craft stores and some pink insulation foam. I also used a couple of cheap LED craft light kits so that the blue box on the side, the red holes in the cyclotron and the little lights in the gun flash on and off or blink.
It’s about 15% smaller than a full-size pack and as I had to scale everything, a few dimensions are kind of wonky (and made it impossible to use any real “accurate” found items either - which actually helped keep the prices down).
This was a pretty fun project, and now that I know more about Ghostbuster stuff, I might actually take on a full-size pack in the future!
ps. The red wire isn’t attached to the front of the proton gun yet - I know.
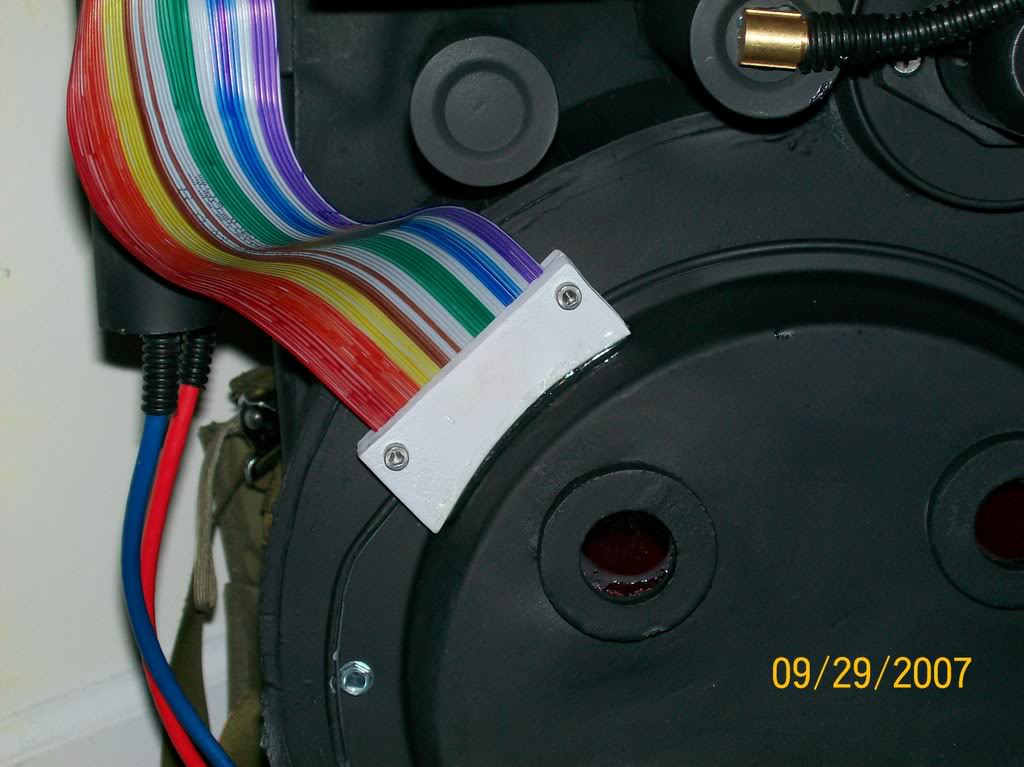
i do have one small suggestion though. take a couple coloured sharpies and colour in some stripes on that grey ribbon cable. i did that for my first pack, and it comes out pretty good and is really quick to do:
I was thinking of a quick way to get a more colorful ribbon cable, but wasn’t sure if just using a market would look decent. It does! I may just try that. THANKS!
I started by measuring my son’s back where I thought the pack should go. This gave me the dimension I needed to scale the motherboard I was going to make to fit him. I think I figured out that his measurements would require everything to be reduced about 15 percent.
Once I knew what size the pack needed to be, I took some of the plans featured on this site and imported them into a vector drawing program. I reduced the plans by 15%, then traced everything and then printed out the file. That’s what I used as my “blueprint”.
I first cut the motherboard out of some thin plywood I got at a craft store. I then spray painted it black.
Then I made each piece of the pack one by one after measuring my blueprint. Most of the areas I used pink insulation foam that I cut with a small saw. I glued details onto the foam with Gorilla Glue. I used a lot of little wood strips I got at the craft store to make the raised details on most pieces. Once each sub assembly was done, I coated it with a layer of black acrylic paint, then glued it to the wooden motherboard (again with Gorilla Glue)
Pieces that needed to be hollow (like the piece on the left with the blue lights and the gun body) I made with styrene (from a FOR SALE sign). I cut out all the sides out of plastic, then glued small wooden strips inside the joints where the pieces come together in order to make a fairly sturdy frame. All the tubes are just PVC pipe. The colored tubing is electrical wire. The boots on the tubing are flexy straws painted black. The bumper piece is made from a threaded ■■■■■■ with some washers and a screw in the middle. The crank knob is a wooden disk I got from a craft storre with a little semi-circle cut out of it with a cut pen cap attached to the side.
The cyclotron is a cake pan with 4 holes cut into it. I used a hole saw and a drill press for that. I added 4 washers that I glued with 2 part epoxy. The lighting is from a cheap craft LED set I had. Basically, I adhered that to the inside of the lighted areas and ran the wires back through the motherboard via holes big enough to fit the LED’s, and I velcroed the battery/controls to the back of the motherboard where my son can turn the lights on and off.
For the frame, I really couldn’t use an Alice pack frame (and didn’t want to due to the cost) so I made a PVC frame and painted it black. It was a long rectangle with a piece that came across the center. I screwed this into the wood mother board. I harvested the straps from an old backpack and used washer backed pop rivets to hold the straps onto the PVC pipe.
The gun grips I sculpted from the pink foam.
I think that’s most of it…if there are any specific questions, I’d be glad to answer.