Containment Unit Discussion & Build

That’s a possibility since they make the small bulbs as LEDs.

I believe that we are talking about the exact ones. That’s excellent advice and we will use that in the future when replacing the bulbs.

Thank you. We can’t wait to see it finished either!

Update: Build Day 15.

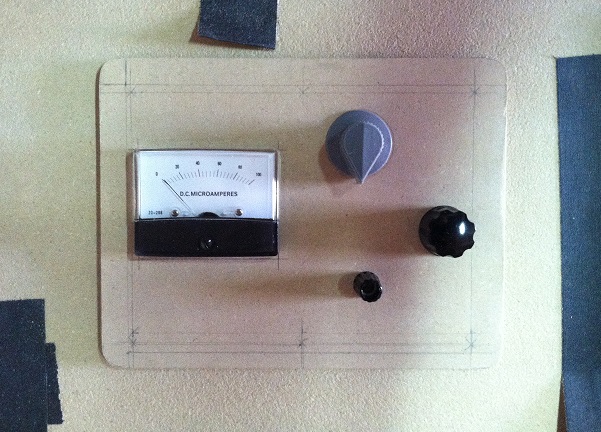
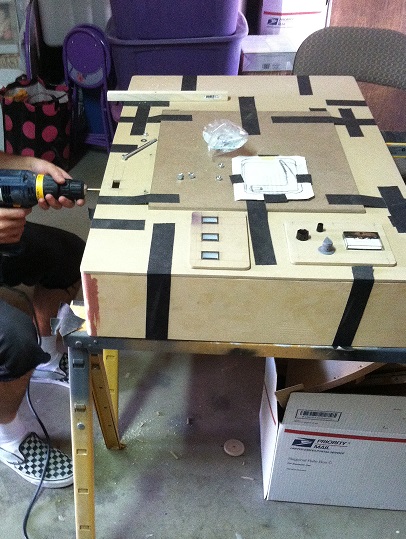
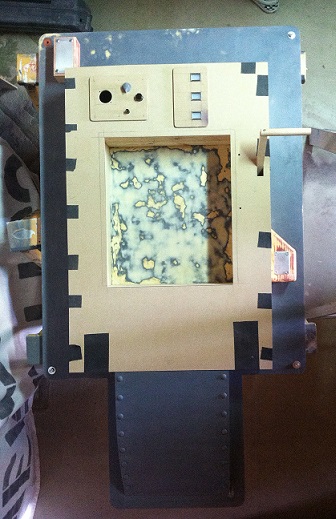
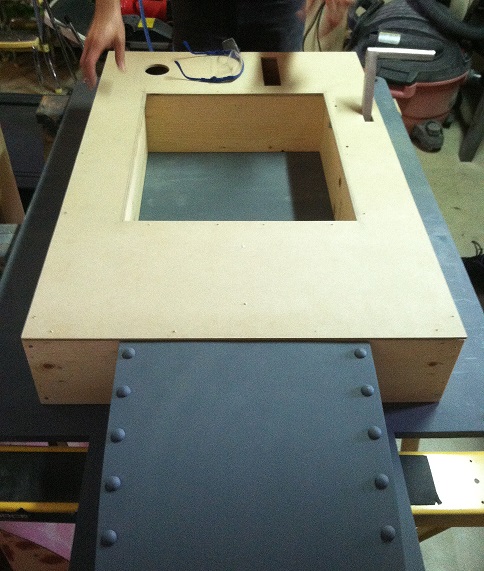
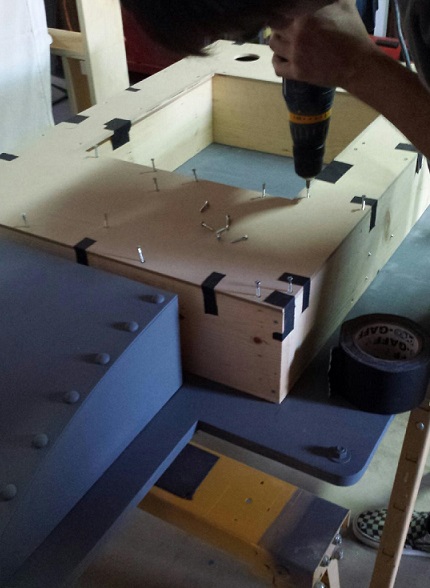
Spent the early part of the morning getting the panels mounted to the front.

Everything fit to the front perfectly.

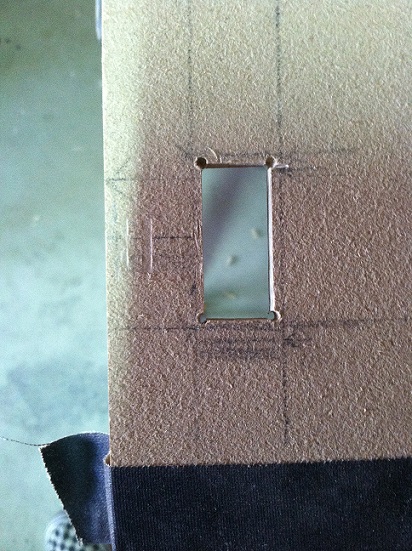
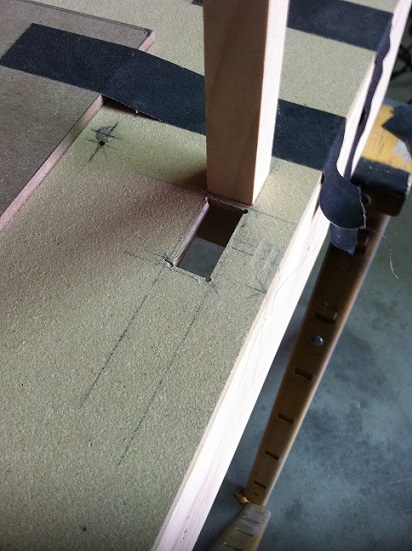
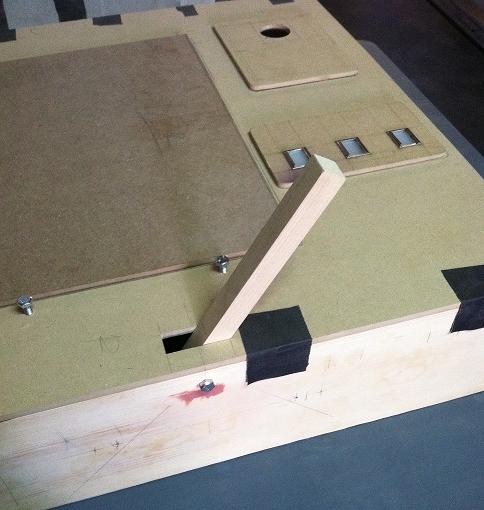
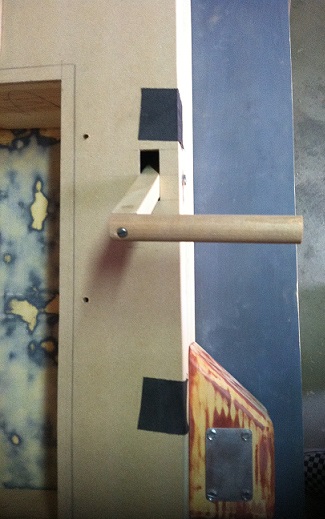
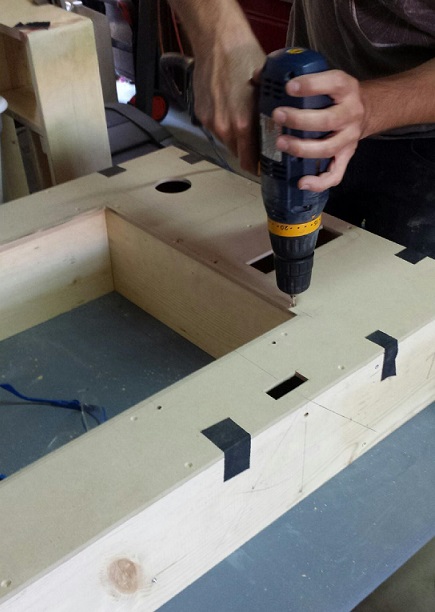
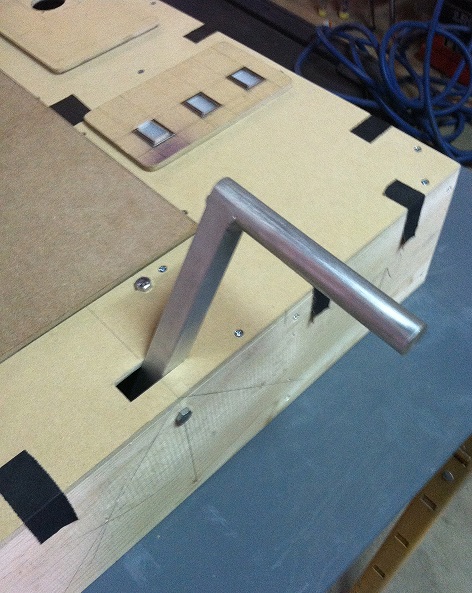
As I was drilling pilot holes for each of the panels, other work was being done to get the hole for flush handle cut out.

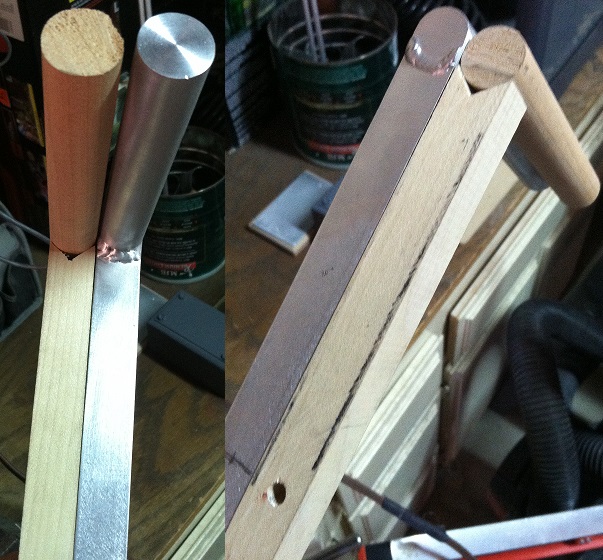
We cut the hole out smaller then we needed it and then sanded it down to the proper size for allowance of the handle shaft.

Then we drilled all of the necessary holes to get the lever to work.

I didn’t take any pictures of the handle in place but i’ll include those in the next update. A lot was done yesterday and the day before that so we’ve earned a break for ourselves for today. Next update probably won’t be for another few days. Until then…

It may look like not much has happened since the last update, but I can assure you that’s not the case. First, there was always debate about whether the edges on the bottom backboard were rounded or not. We left ours straight until we could find a screenshot.

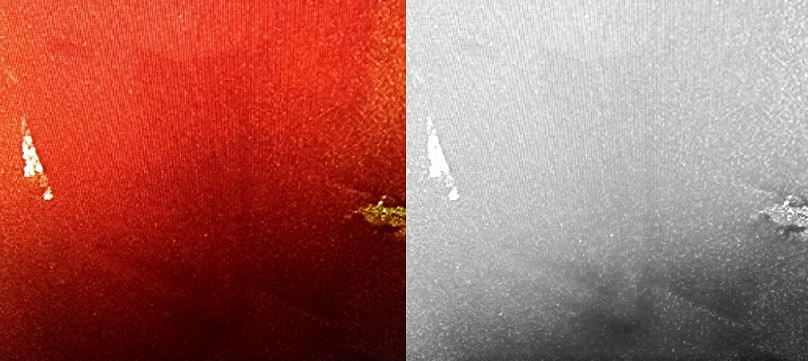
We finally found a screen shot during the explosion sequence and settled that debate once and for all.

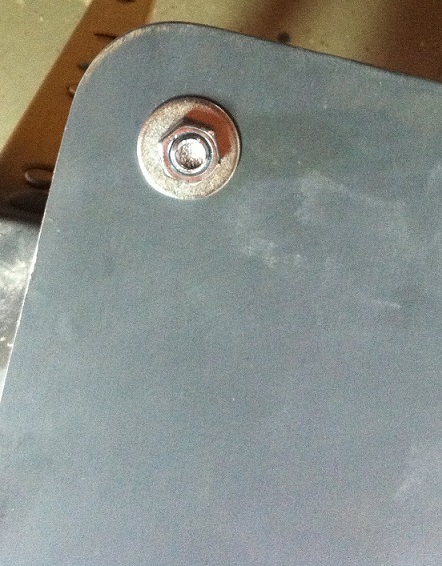
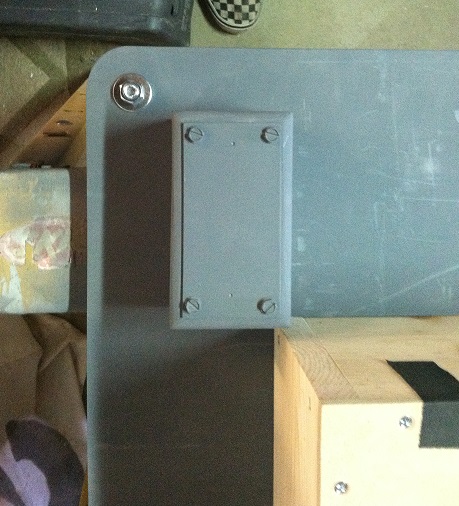
Then we drilled the four corner holes and added the bolts.

We are going to leave the top left bolt unpainted. As you can see in this screenshot, it is left as such. The other three are painted.

Doesn’t this look better now?

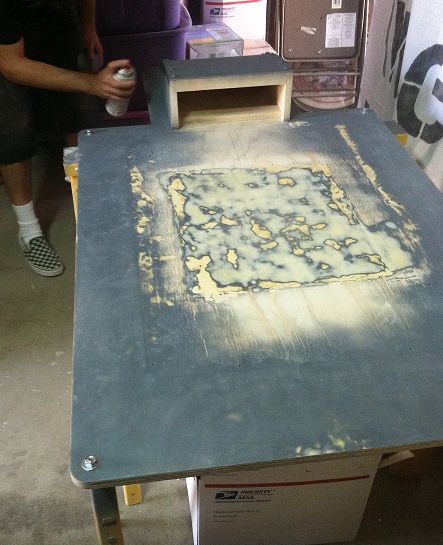
At some point after we added primer to the backboard, we went back over it to eliminate all of the tiny imperfections that were left behind. At this point it was prepped to be primed one last time.

Before we got to that step, we took the time to figure out the size of the flush handle.

This is where we left off that night.

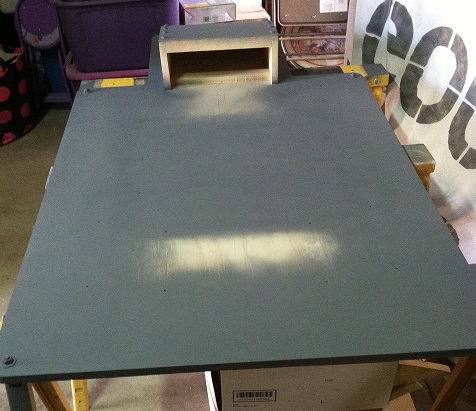
Then the following day we started with getting the backboard primed. Earlier on in the build, we pre-drilled the holes for the screws that were going to secure the frame.

Before:

After:

We were pretty confident that we removed every imperfection and thankfully we did just that! It looks fantastic. Couldn’t tell the piece is made out of wood.

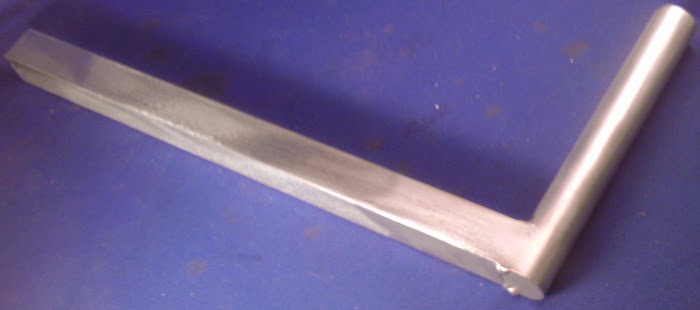
Moving away from wood, we contracted Umoribawar to make our flush handle out of aluminum. We gave him the measurements and he sent us this picture.

When we received the handle, it looked great and was exactly to the specs we provided.

We couldn’t be more happier with this handle and if you ever need something special made out of aluminum, umoribawar is the guy you want to go with. We want to thank him ever so much for his aid in our build.

Now, here is what our project looked like as of this afternoon. Notice anything different?

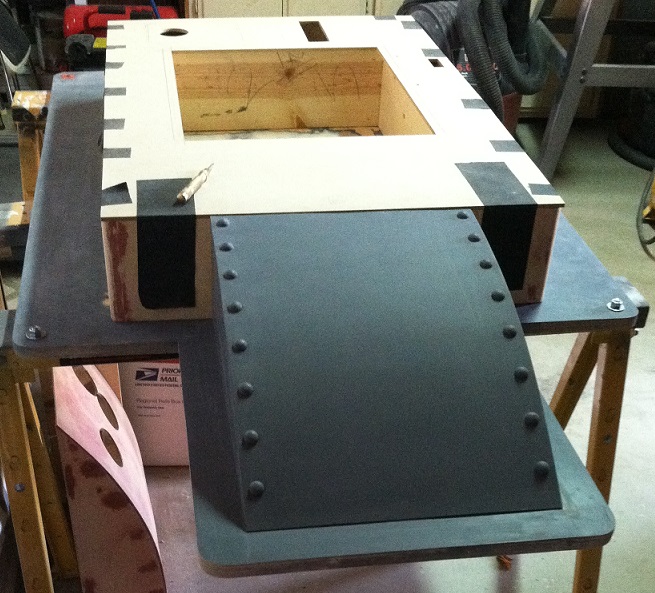
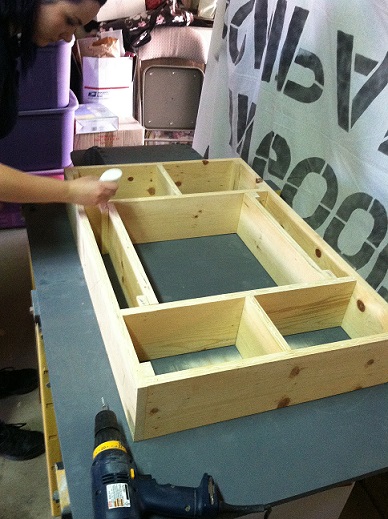
Besides the handle being mounted, the frame and front cover are completely new. When we built our original frame, we were never 100% satisfied with it. The wood was cheap and kept expanding. It was flimsy and our bondo work never held together properly. We rebuilt both pieces in a span of two days and now the frame is a beast! It’s everything we originally wanted it to be.

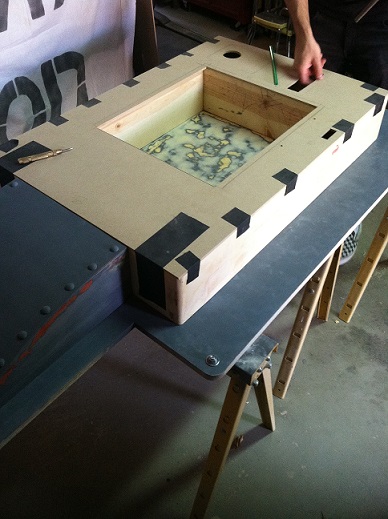
Now, we’re at the part of our build where we can mount the front to the frame. First we had to countersink the screws and drilled pilot holes into the frame.

Next we used wood glue to strengthen the bond.

Then all that was left was to screw it down.

Now that it was bolted down, the handle was fit into place. Looks great!

We also primed the smaller blocks. We still need to drill two large holes to accommodate the flex connectors and then mount them to the backboard.

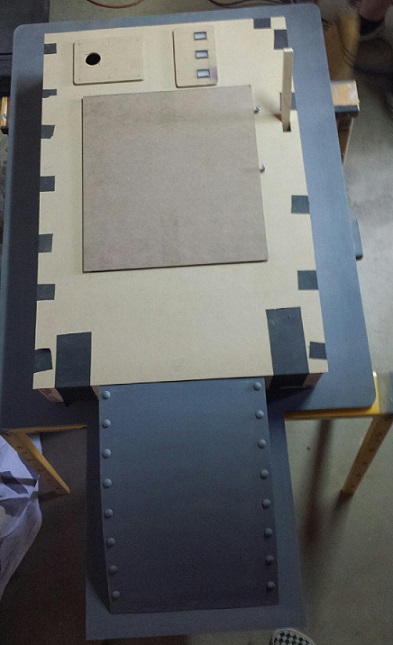
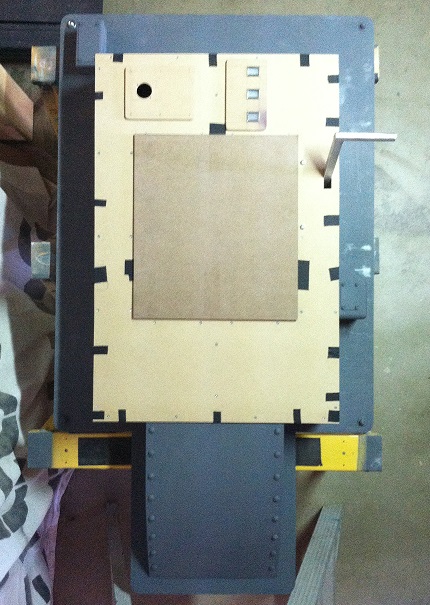
Now, here’s a shot of what our project looks like as of the end of today. It’s getting there! It needs some more holes drilled in it and then a layer of filler. From then on the frame will be primed and then we’ll move onto the inner workings of the door.

Our table banner also arrived earlier this week. This also turned out great!

We have a few things to unveil regarding the C4 convention. Details have been finalized and confirmed. I just don’t know if I can make an announcement yet. We are also doing another convention here in California a few months after that. It’s a big one, so if you’re in California and you can’t make it to C4 in Ventura, chances are you’ll be able to see our completed containment unit at the next one.
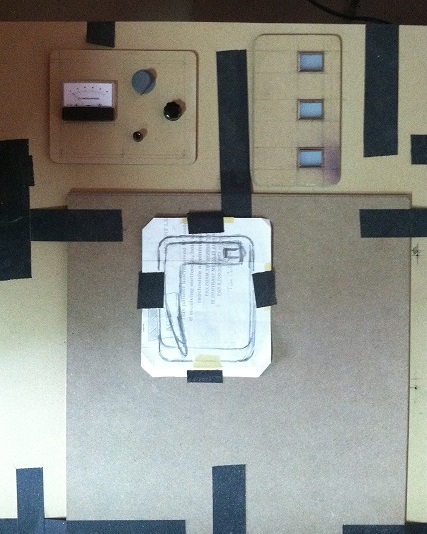
I wanted to jump in here and just update everyone who has been following this build. We are currently waiting on a few more parts and are slowly working on other details that we will reveal in the coming weeks. Also, since the temperature has hit the triple digits in our area, we have put any priming and painting on hold unitl it cools down a bit. We should have something to update soon, so stay tuned.

this build looks downright amazeballs guys, fantastic job!

Can one of you guys post up your general measurements of this for reference? I think I wanna tackle one of these since I’m gonna be building a trap too.

Thanks for the compliment EvilToastyBagel. We will be posting our measurements once we have everything completed along with a complete parts list.

I’m sure someone has made a comment like this before, But if there is any chance, please consider using this as a buck and and selling fiberglass shells of it:)

.. I can dream right?

cant wait to see this finished!

Man that is some serious ■■■■■■■■ work. Can’t wait to see it finished.

That idea did come up at some point during the earlier stages of the build.

Another question, since you’re using wood what does that sucker weigh? I’m thinking of making mine out of foam and plastidipping various parts because I don’t think I have a wall that could support that monster xD

It actually surprised us on how much it weighs. I can tell you that it weighs less than a hero proton pack. While we haven’t weighed it yet, my guess would be either under or around forty pounds? I can lift the whole thing up with one finger, so it’s much lighter than it looks.

We’re going to either have a frame built out of steel or find something to repurpose that the unit will attach to. We’re going to use foam sheets for the brick walls.

These might help u in ur quest…

http://www.laststoplighting.com/vaporproof-wall-mount/

Here is just an update to this project. I know it’s been a while since the last update but we had to pause work on it for several reasons. First was tracking down parts. We want to build this properly and we needed the right pieces to move forward. Second, the heat was too much for us. We live in one of the hottest places in Southern California and it’s not fun to work in a garage when it’s 125+ degrees with no air conditioning.

Finally, we’ve successfully found the correct lenses for the push button switches, the correct ‘Erase Varbl(s)’ black knob and even found 2 accurate new old stock barn lights! The one part that we cannot find is the red knob. We know what kind of knob it is and we have some but they’re the wrong sizes. We have one that’s 1/2" and 1" but the correct size appears to be 3/4" which seems impossible to find. If anyone wants to help us locate these (has access to a place that has a large stock of various control knobs) please send me a pm. I’ll tell you who makes the knob if you’re willing to help track one down for us.

Anyways, we are starting this project back up and will continue to post updates in the very near future.
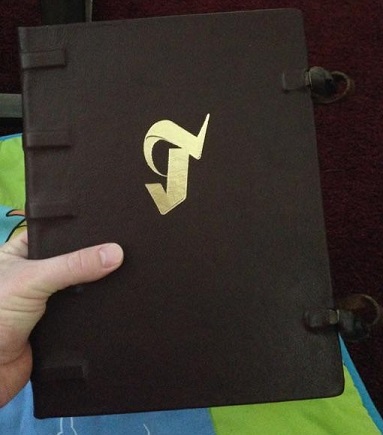
Before I get into our next update, I just want to quickly mention the other projects that our group also began this year. Since this year is almost over i’d like to review the progress from our two other builds. First, o0Ecto1A0o has just about completed a fully printed with aged pages, gold foiled and leather bound Tobin’s Spirit Guide. It looks fantastic! He is at a point where he could call it completed but he’s just waiting for some antique brass pieces to add to each corner. Take a look!
His build thread is located here: Tobins Spirit Guide Build - Other Props - GBFans.com.

Also, what kinda of group would we be without an Ecto?

In the beginning, we always joked about dropping the idea of using a Ford Flex if a Miller Meteor ever came along that we could afford. Well, we recently found a '60 Miller Meteor coach. It was beautiful and for an amazing price. The vehicle even ran with a modern engine! However, it needed a full restoration including a donor car to repair the rust damage to the rear quarter panels. It needed at least another $25k (if we cut corners) to fully bring it back in shape. That’s when we were completely sold on the idea of using a Flex.

Our build thread for our Ecto-Flex is located here: Ford Flex/Ecto-1 Conversion. Looking for parts - Ectomobiles - GBFans.com

Expect to see the thread revived in early 2015 once the car is purchased.

Alright, now let’s get into this build update for the containment unit. This post is all about the parts we found during our absence these last few months.

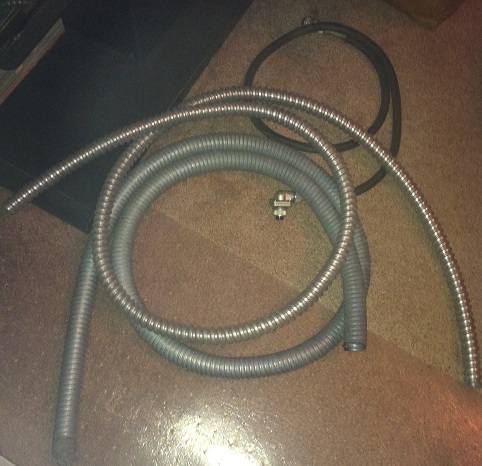
We finally found the right conduit tubing in the correct sizes and patterns:

The 1" piece is a bit more weathered then the 3/4" tube which will be taken care of with some wire pads. It’ll make it look brand new again. The black tubing is for the side of the door, just above what I call the motor oil bottle. The tubing seems to match up to the screen shots.

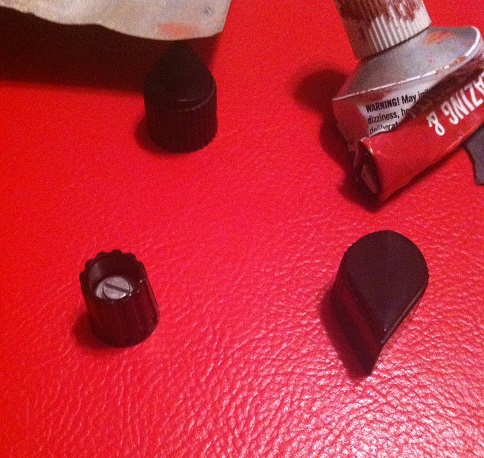
Next, we discovered the correct lower black knob as well as finding the proper teardrop knobs. The skirts we found for them have white arrows on them and were being removed when I took the picture. That’s why they’re not pictured.

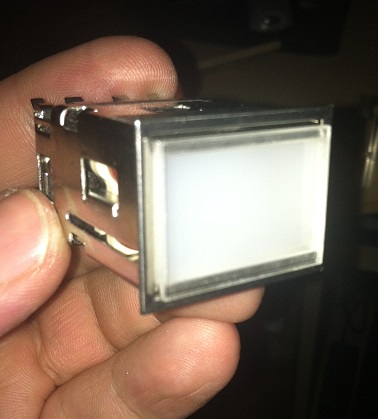
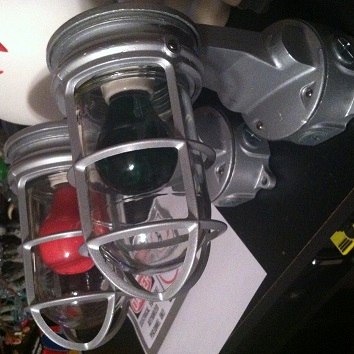
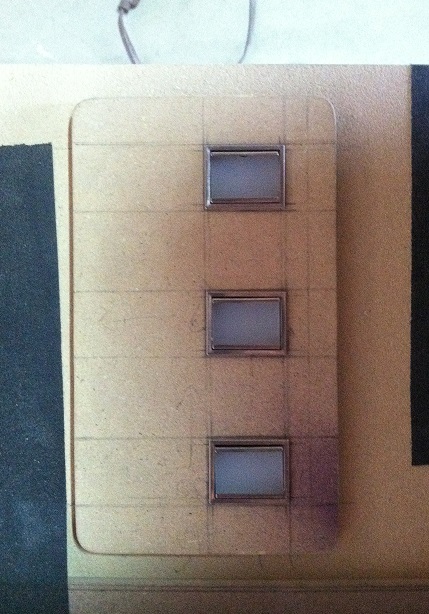
Then we happened to find missing pieces for the push buttons! Luckily we found the exact vintage outer lenses for them. Thank the maker! Fabricating these out of acrylic would’ve been a nightmare.

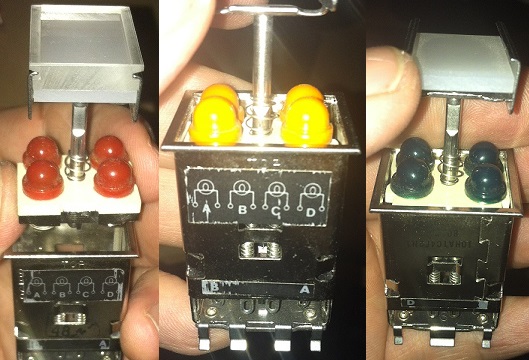
Now here’s something cool. We found original colored caps and bulbs that go inside these switches. Here is your first look at what the original buttons look like inside. They sure look complicated.

The only pieces missing are colored (Red, Yellow, Green) inner frosted lenses. These appear to be super rare. In the case we never happen upon some, our solution is to use R,Y,G light gels to slide in between the two lenses.

Finally, the jaw drop of this update:

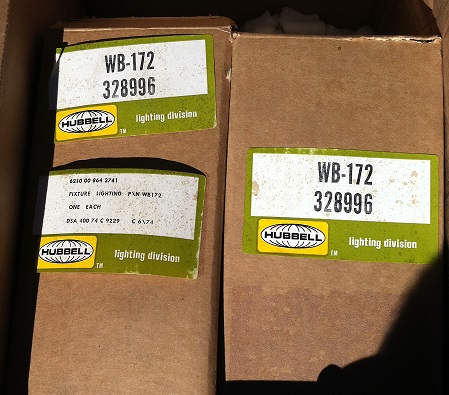
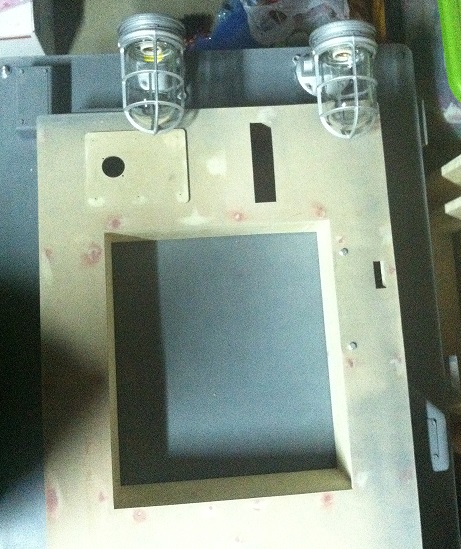
New old stock in unopened boxes!! Yes, we were the first ones to break the seal on these. Manufactured in 1973 and sat undisturbed in the boxes ever since. Waiting to be used for a containment unit some 40+ years later. That is until just yesterday. OMG! Can you imagine? That’s like someone not knowing their worth in this world and feeling useless for all those many years. Only to find out their whole purpose was for something greater. A benefit to mankind. Hahaha!

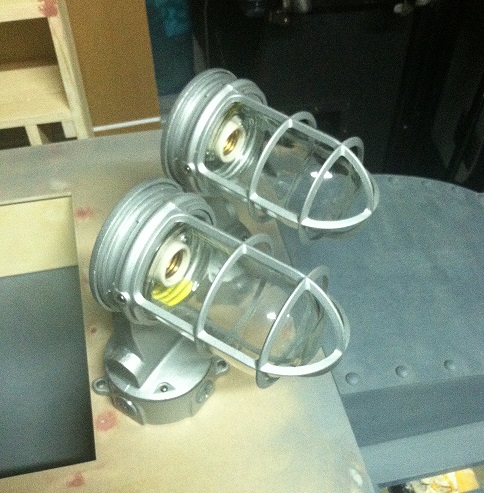
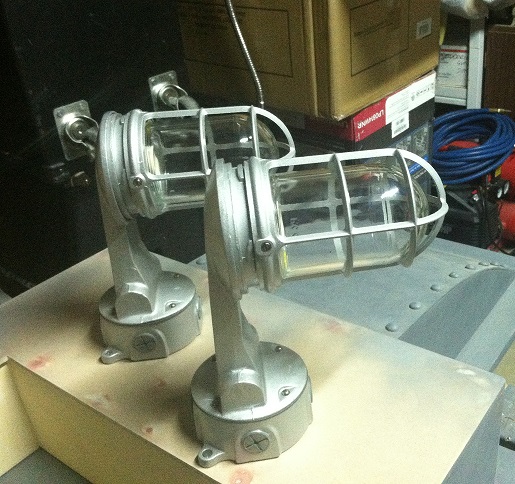
Look at those! Never in my life would I have ever thought i’d be so excited over some lights. One truly does suffer for their hobby. Alright, now the moment of truth. Do they fit the scale?

Squee!! Damn straight.

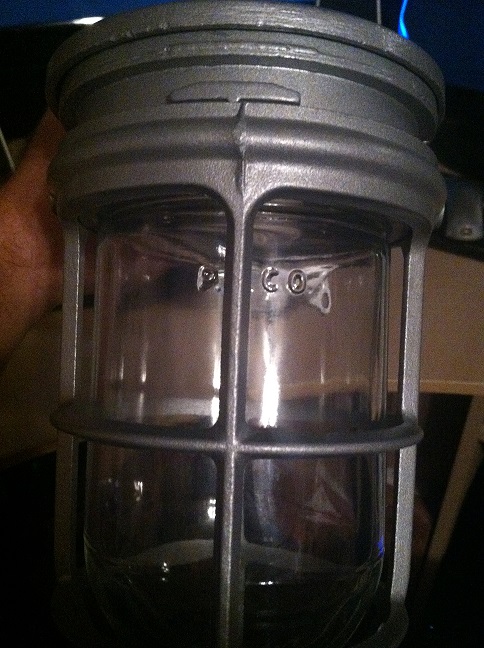
One thing we noticed when putting these together.

Notice the letters on the glass? Well, they say P.G.C.O. Now compare that to the green bulb fixture in this screenshot from the film (hi-res picture. right click mouse/view image and zoom in to see it).

It feels great when a plan comes together. So, once we get back from picking up the red and green light bulbs from the store for these, we can get this build back on track.

Have a Murray Christmas…

image

…and a Happy New Year!

See you in 2015!

This is amazing!! I want my group to tackle this project at some point.

This will be our goto thread .

Speechless. Utterly.

Thanks guys!

Here’s a little update so far.

I went out after Christmas and found the green and red bulbs for the lamps. I was lucky enough to find them in the right configuration. The red bulb is supposed to be non-transparent and larger, while the green bulb is smaller and transparent. At first, I was concerned about the red light which has more of a dark peach color up close. However, we tested it out in a socket and was the perfect red.

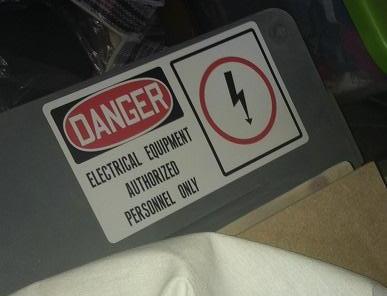
Next, I have been slowly working on replicating the signs/labels as close as possible. Here is an example of the danger sign which I am looking to have screened onto vinyl.

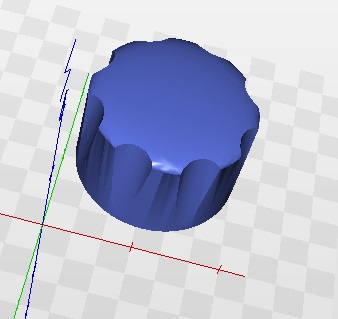
Finally, we are looking into 3D printing since we are having a difficult time in finding the red knob in the correct size. It didn’t occur to us to go this route until a member of the RPF graciously knocked this out for us. It needs a few tweaks to get the print spot on, but it will be a great substitute until we can find the right knob.

That’s all we have for the time being. Haven’t started work on the body yet but that’s coming soon.

Until next time…

I want to see one of these ECU’s in person one day.

I’ve got the perfect outfit to wear.

Alex

Hi All,

Saw you camera bellow chat - been looking into this for a while, can’t quite work out for sure but could be this…

In the documentary

“ON THE SCENE WITH THE GHOSTBUSTERS”

A CIMARRON PRODUCTION in association with

SCOTT WOODWARD PRODUCTIONS

written by PAUL WALES

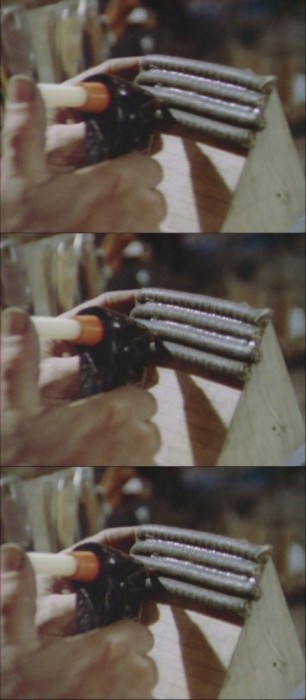
This appears for a split second…

Could be it.

Need to find out where you got your red/green bulbs from - will pm

Great build!

ET

Alex, if you ever make it out to Southern California, you have our blessing to shut down the unit. We just won’t be responsible for what happens when you do. Haha! BTW, i’m envious you’ve been able to check out SofaKing’s 1:1 Falcon cockpit build. Been following that build on therpf for a long time now. I really want to see it in person myself.

OMG! The prop maker in me is dancing in circles! Great eye and awesome find!

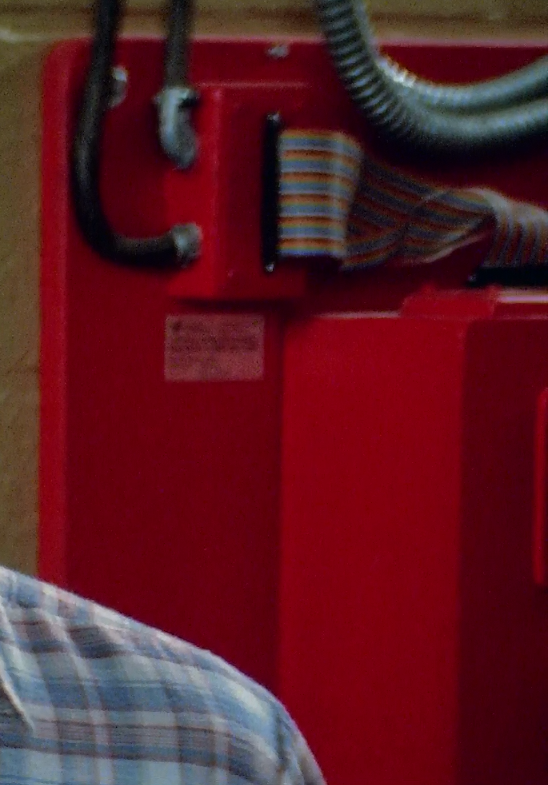
I’ve watched that documentary many times and it never dawned on me what I was looking at. The thing that’s so cool about that screen shot is that it leads me to believe that the ECU itself is fabricated out of wood. We had ideas of it possibly being either an industrial laundry chute (prison, ships, etc.) or an old oil can crusher, but now I heavily lean towards it being a product of Boss Films. There are a few clues that can be seen in screenshots that point to this possibility and this detail alone convinces me. I’m glad it’s not an existing real world part, because I no longer have to look for it anymore. That’s a big sigh of relief and makes me giggle. Now, if I can only find the door handle or those odd brackets underneath the heatsink outside of the trap housing.

If you’re curious about the red/green bulbs, I got one from Lowes and the other from Home Depot. One only carried transparent color bulbs and the other solid colors. The green bulb was made by Philips and i’ll have to look to see which company made the red. If you’re wondering about the lamps, then please pm me.