I’m currently working on a photoetch set to add more details to the Ecto-1A kit from AMT. This site has been a super reference, but I’ve hit a brick wall looking for images of the control panels at the very rear-left (driver’s side). There are photos in the reference section of the rear-right, but only from about mid-way forward for the left.
I can tell you a few things I learned while building my AMT model:
The caution stripes in ALL of the Sony back lot pictures are not the same stripes from the movie.
In the movie if you go frame by frame and pause in the right spots the caution stripes are right on/below the key holes.
Stripes on car since the movie are too low.
The Call JL5-2020 is actually angled towards the front of the car in Italic font
the same metallic/gray warning logos on the Ecto-1 yellow storage tube is the same warning logos on the White Gas Tank on the back of Ecto-1A. Along w/ some Freon warning labels (i believe its Freon)
The pics of the car in the Sony back lot show some of the warning labels faded to white but are really yellow- the Warning thread thru safety chain first ect ect warning label on the green box and flat black tube are yellow and black
Chrome:
Front windshield trim
Door Handles
Red fin trim
Gas cap
Hood accents
Emblem
Aluminum/Stainless Steel (MATTE!):
All window trim
I think Ecto-1A sits lower on the ground than Ecto-1
The Red of the fins is not exactly the same red as the No-Ghost Logo
This is a reference that I’ve been searching for for years! Unfortunately, it’s one of those corners of the car that every photographer seems to miss, have out of focus, or partially cut off. These are the only three, partial, references that I’ve been able to find over the years (the third is so awful that it’s hardly a reference, but it does show that there is a third button on the right side of the control panel.)…
That part’s incorrect. The storage tube stickers in the first film were completely different. When the E1 was given a quickie “restoration” in 2004, the original labels were replaced with ones that have the same wording and layout as the E1A’s large tank, except that the top portion of the E1’s new stickers were black with silver text, while the E1A’s were all silver with black text.
The E1’s new stickers are also missing the " / "s in “NRC6400 / 11109 / M1033”.
Okay, I’m clearly confused by your terminology. The AYQ-5 (black box) is on the drivers side, and there is nothing under it except the floor, so by you saying “console” it’s really hurting my head. Other than the large box behind the forward facing jump seat, every “console” has a close up picture of it. If you’re really curious, TRIO-TECH is still in business and built all of the instruments in the back minus the AYQ-5 and the computer screen.
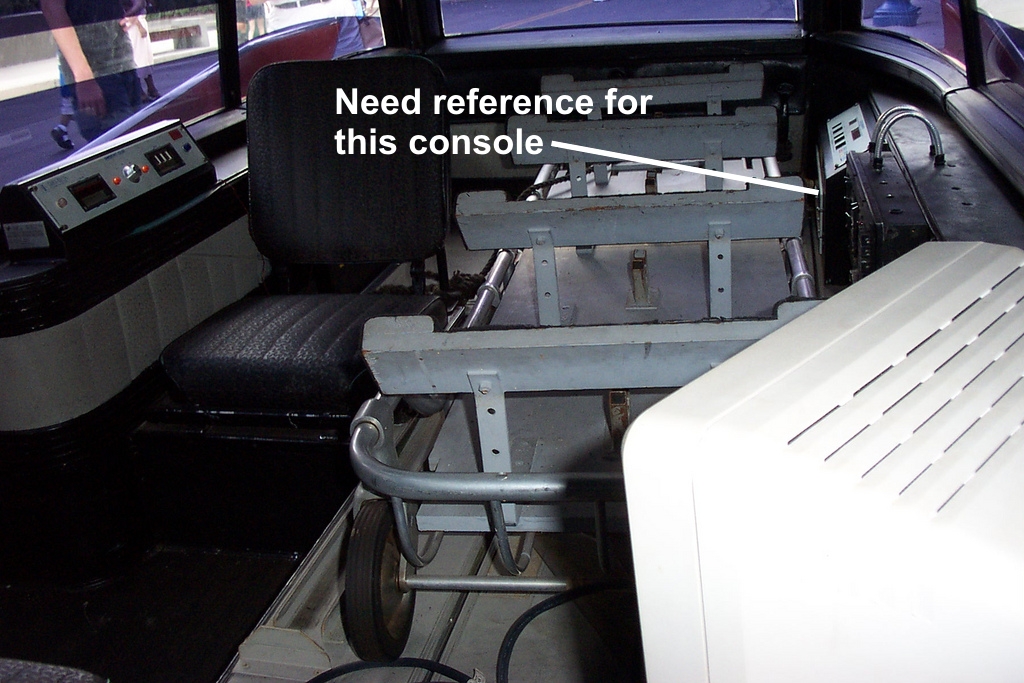
The device in question is not pictured in your previous link. It’s located in the very back corner of the car on the driver’s side (to the left of the computer and black control box with the hoses coming out of the top). It’s a black box with an angled top and two white control panels. It’s very similar to the device in the back-most-corner of the passenger side only not as wide (I think).
You can see it in the pictures I posted above.
He was just saying that now he just needs to find a clear picture of the lower of the two control panels (the one on the front of the device).
That’s it exactly. I’m not in the office right now so I don’t have my FTP client to upload the annotated version of one of Cosmic’s images pointing out exactly the panel I’m looking for.
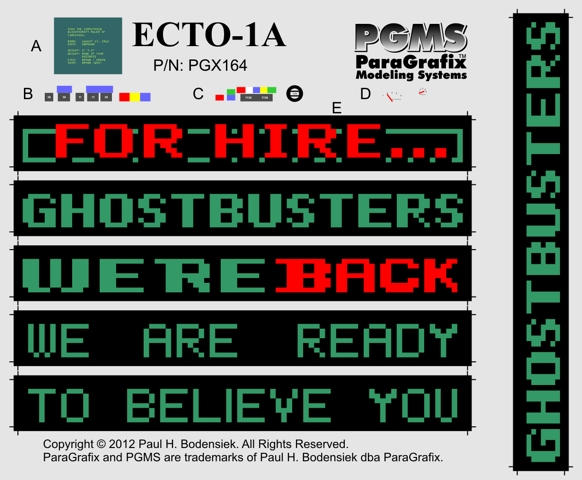
Wow . . This is great photo etched parts for this model is going to be a real game changer. . . Will you please do the round mesh screen that is used on the cross cut out on the dish on top . Also do the led sign messages dot by dot so they can be back lit with leds . . Man the potential of this is really exciting
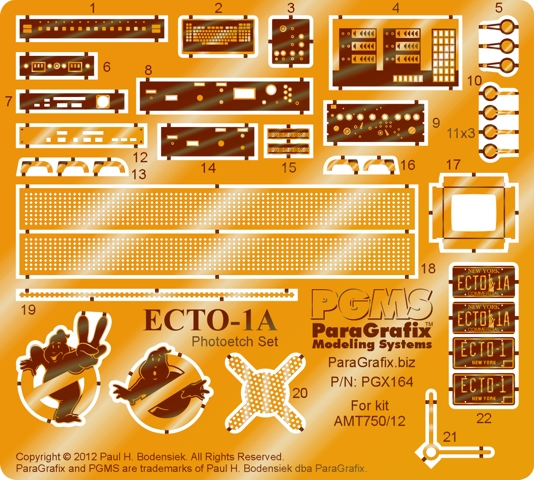
BTW - I forgot to mention that along with the control panels, I’m also including the “strap” around the large container on the equipment rack and all the door and window handles (including exterior door handles). All of the control panels have (where appropriate) through holes for lighting, as well as light-diffusing films for the gauges.
Paulbo for the win. . . . Dude.,folks are not gonna know how to act with these . . . Game changer. .when you poped up talking photo etched parts for this I put down my model and watched this thread . . . Im using fiberoptic strands for lighting on the consoles on the inside with great results but you might make me start over. .
I’ve also got a video showing how to work with PE parts showing all of the steps necessary for this particular build (though showing the PE set for the 1/32 scale Viper Mk II from Moebius Models): http://youtu.be/eIUJKzC3RME
Although there were many helpful emails and posts, I have unfortunately not been able to find proper references for that one blasted control panel. From my analysis, though, I determined its height and width, and the height almost perfectly matched that of another panel, so I truncated that one to make it fit the space. (Parts 14 and 8, respectively, in the first image below.
CultTVman.com has a wholesale lot on order, and Stevens International has ordered a bunch as well that they can distribute to local hobby shops.
To answer your questions KP: the two parts #15 are the switch plates below the steering wheel; 17 folds up to be the computer monitor’s face (which can be lit and faced with backlight panel A; and 21 goes on the back of the dish antenna. Yes! The license plates have raised lettering and borders.
D’oh! Thank you for catching the green color! Being a touch color blind I sometimes miss things until someone points it out - I see them as green now that you mention it. That will DEFINITELY be changed before the films go to press.