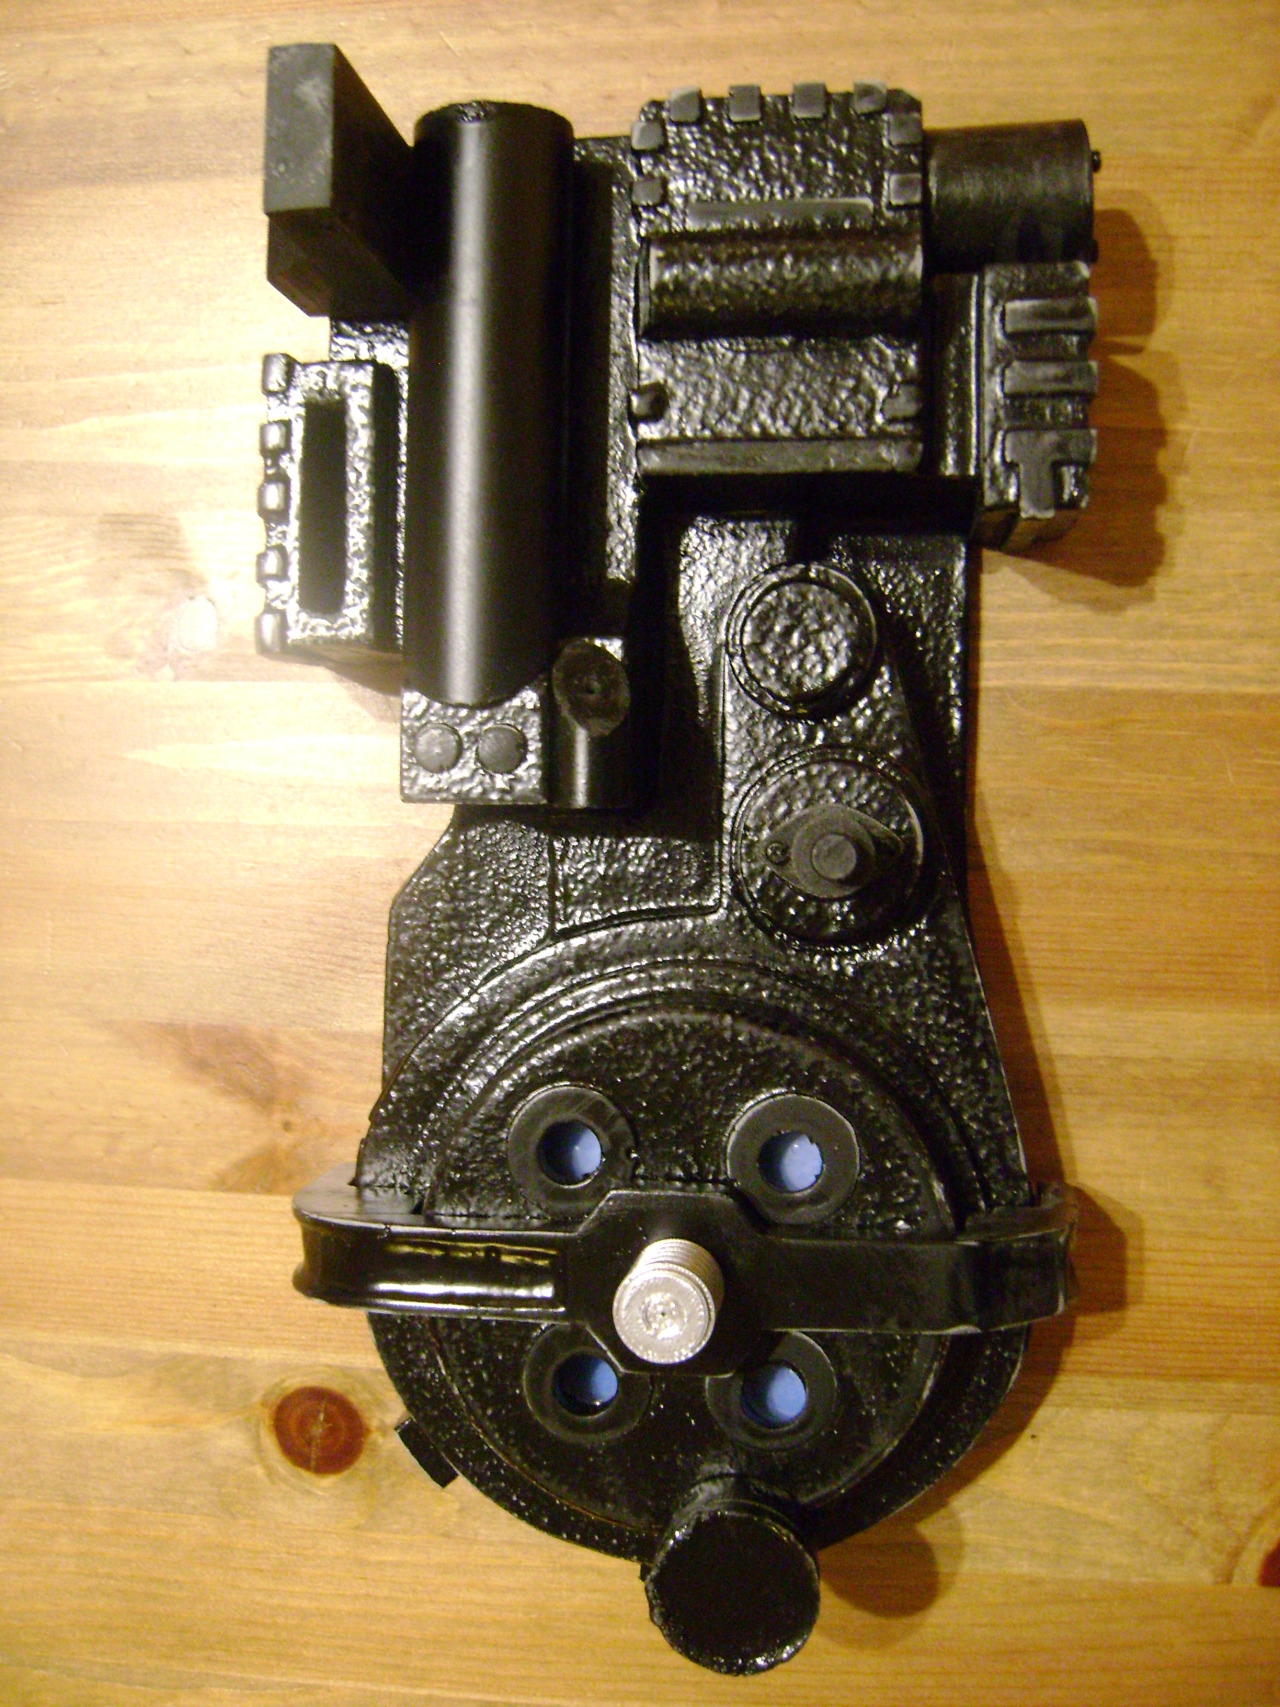
Half (50%) Scale Positron Collider build

I’m building my first Proton Pack for my son as a birthday present. Several months ago we were both home sick and I decided he was old enough to be introduced to Ghostbusters (4 years old). Since then he has been 100% hooked. I have been a ghosthead for as long as I can remember, and have been collecting parts for my own proton pack build, but this build is for him.

My goal is to create a pack for him that he will keep for the rest of his life; I want to get this pack right. Does it have to be screen accurate down to the rivets? No, but I want to make sure a majority of the pieces from the real deal are present on this build and have them look fantastic.

I will gladly accept help, advice, and leads on difficult to fab/find parts that I do not currently have. I don’t consider myself a strong prop builder and most things take me a long time to complete, but I’m REALLY looking forward to completing this.

NOW for PICTURES!
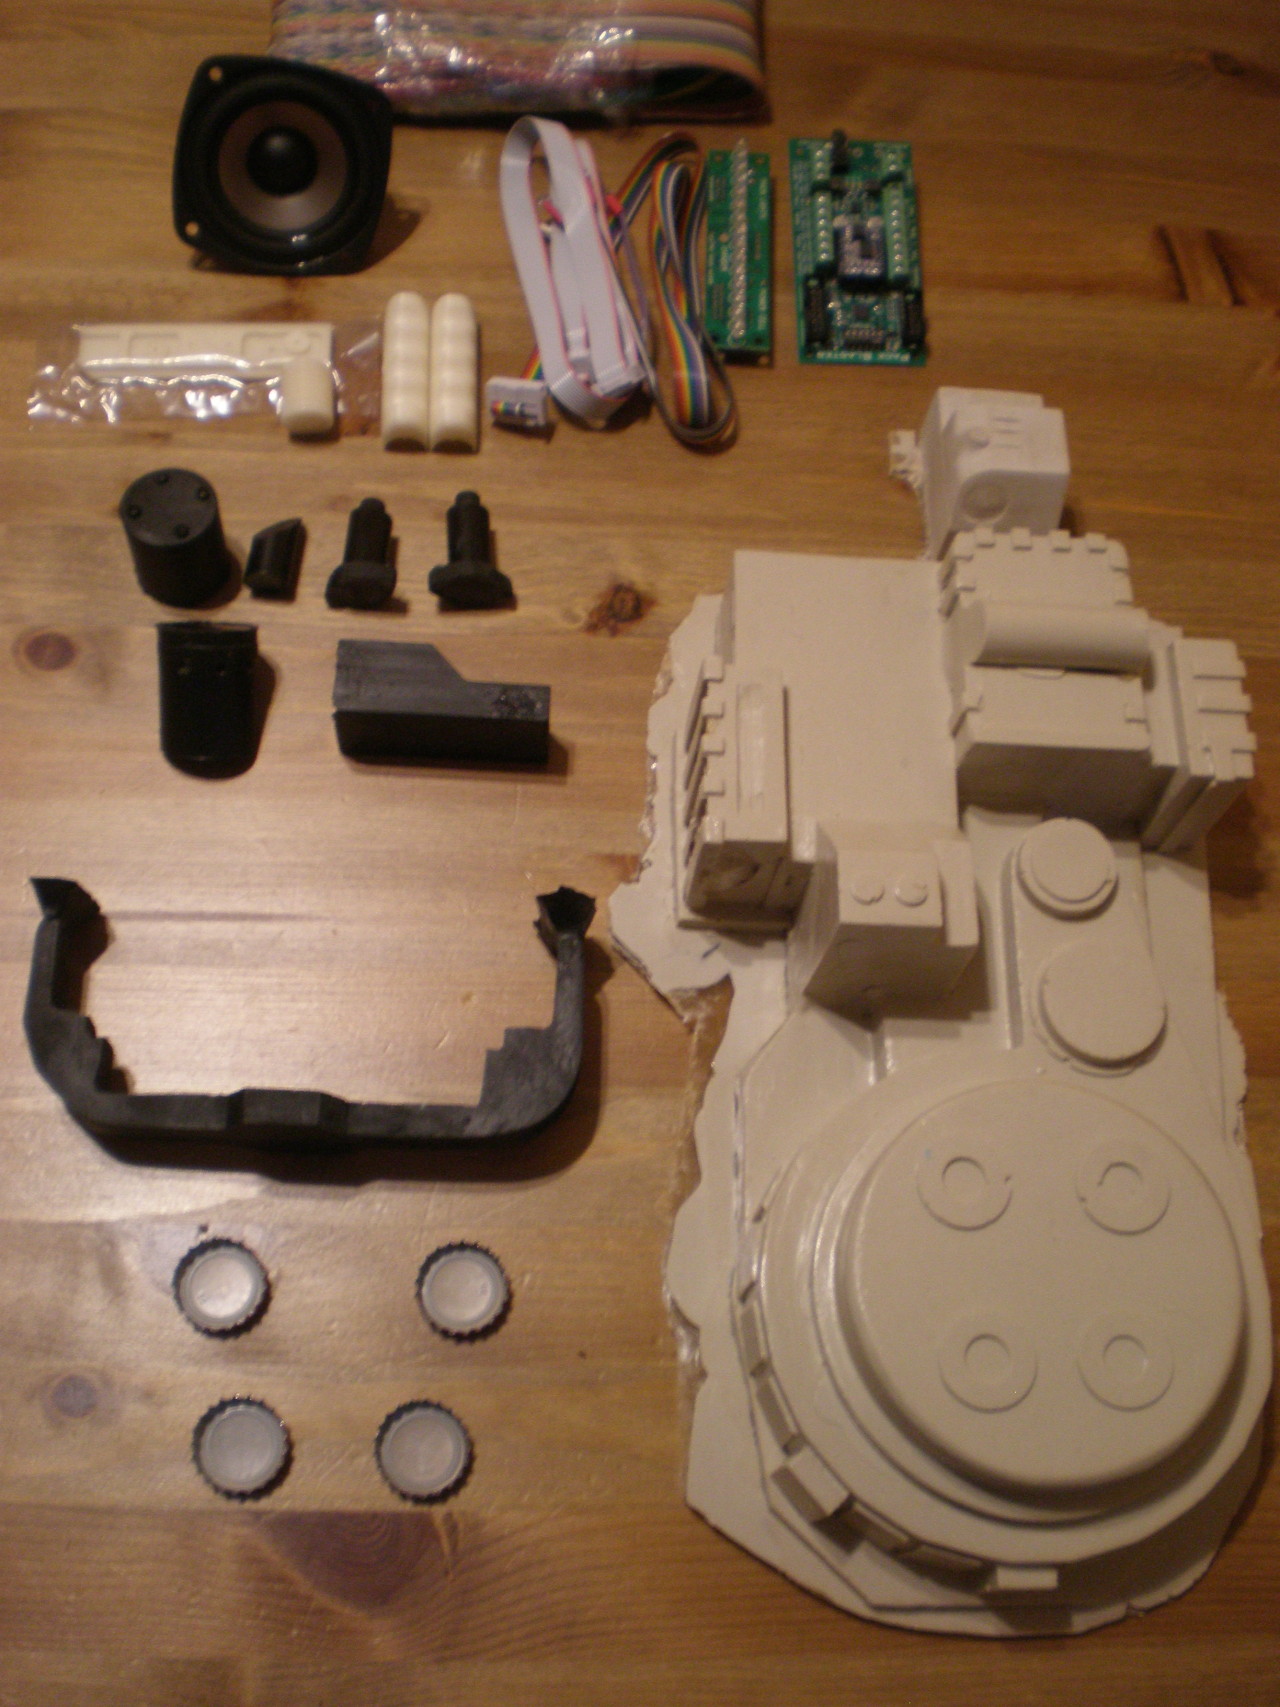
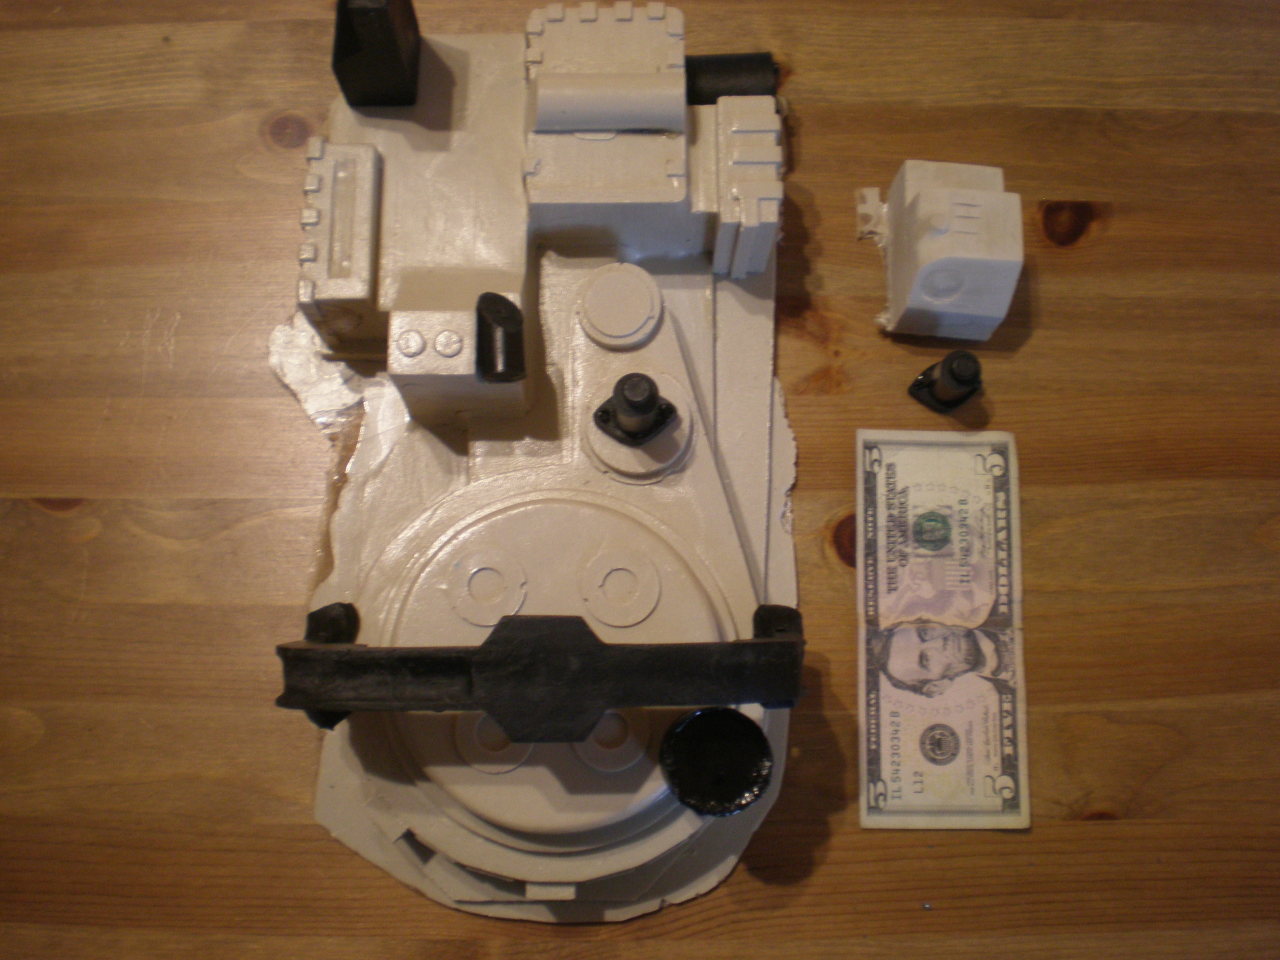
This is pretty much everything I have.

Top to Bottom, Left to Right

GB2 Ribbon Cable and colored hoses

3" full range 8ohm speaker

GB Fans Pack Light and Sound Kit (Ghost Labs)

GB Fans Printed gun track, bellow, & Grips

Fiberglass Gun box

Resin HGA, PPD, Clippards, N-Filter, Ion Arm, Bumper

Twist off bottle caps (Cyclotron light reflectors)

Fiberglass Shell

Not pictured:

C-PVC pipe - Neutrona Wand & Alice Frame

Acrylic Sheets - Mother Board & Alice Frame braces

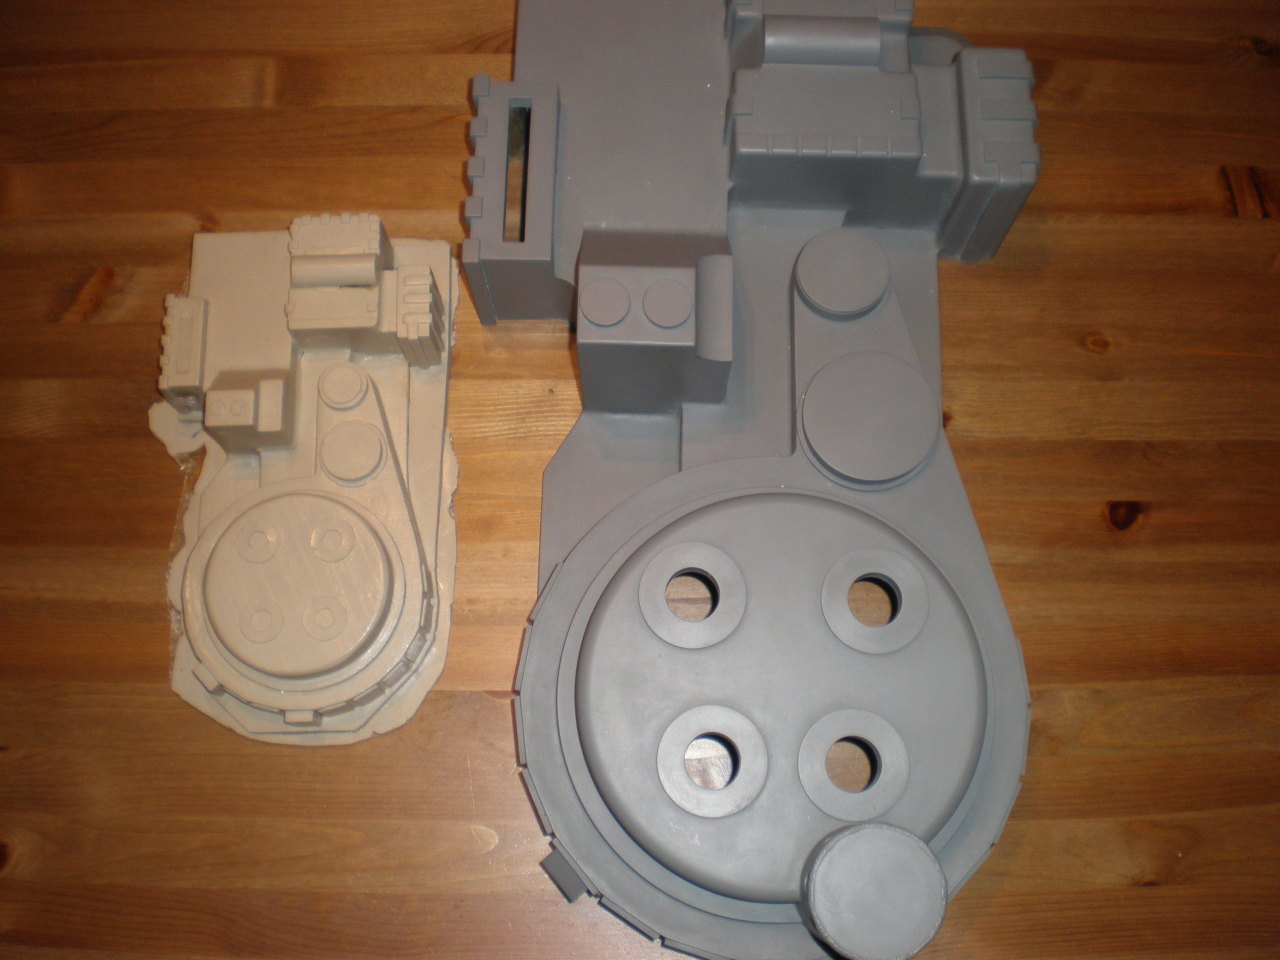
It really is a half scale pack.
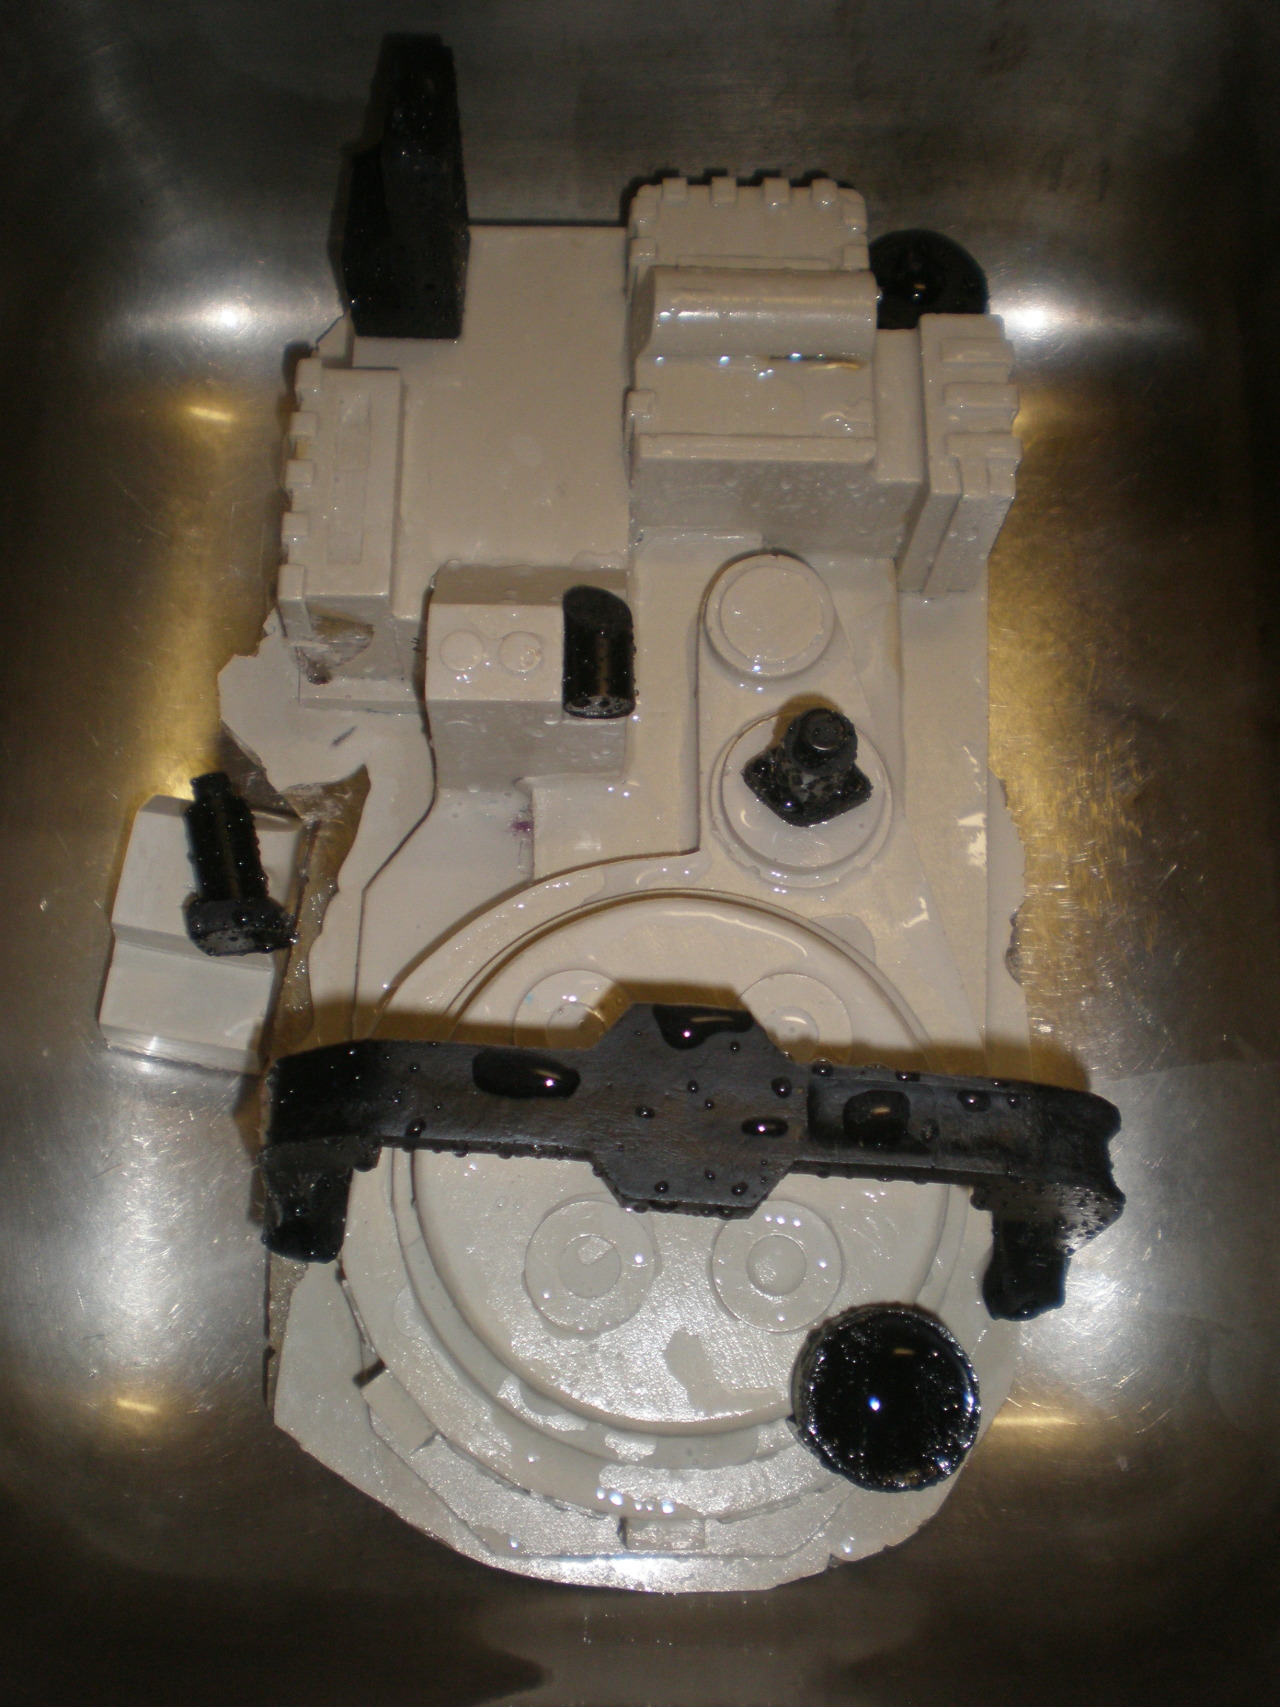
Step 1:

Wash/scrub ALL parts with hot soapy water. Everything was washed at least 3 times with blue dawn dish soap. I didn’t get a shot of everything soapy, just everything cleaned up and arranged in my sink. Working with half scale means easy handling. No need to use the bathtub for stuff this small! (I’m aware the bumper is on backwards, SORRY!)
The GOOD!:

The level of detail on the parts I have is astounding. I was expecting to get stuff that was marginal at best. The 3D printed stuff I received from GB Fans is literally out of this world. You can’t see it in the picture, but the detail on the bellow is phenomenal. The gun track & grips are just as good, but when you consider how thin and deep the grooves are in the bellow I just can’t imagine making that out of resin. The GB Fans (Ghost Labs) Lights/Sounds are REALLY high quality items. I don’t think I would be able to fit the standard stuff in this half scale pack. I have the separate board/amplifier etc for my full scale pack, and that will work great because I have plenty of room in that, but with a half scale pack things are REALLY crammed in there. With the integrated parts, and easy to wire up boards this is going to be MUCH MUCH MUCH easier than I anticipated.

The BAD:

The shell is in rough shape. The detail is there, but there are holes, thin spots, OVERLY thick spots, and a ton to trim off. Is it a deal breaker? Heck no! I bought a fiberglass kit from the auto parts store, and a grinding wheel for my rotary tool. I have NO idea what I’m doing but I’m sure I’ll figure it out.

The FABrication I’m worried about:

The GB Fans light kit will absolutely not fit in the power cell location. I’m going to have to make a new board just for the power cell lights. I haven’t decided how I want to do this. Stack the lights side by side and use all of them, use half of them, or something else.

Making a booster frame has me tied up in knots.

Stuff I still need:

A LOT!

Lenses, red and blue

Crank knob

Ion Cap (might just make this)

Heat sink

Booster plug (not sure how to make this)

Labels

Pack Straps (wife isn’t really interested in making half scale straps … I may have to get creative)

Uniform

Boots/Shoes

Thanks for looking and I look forward to your comments and advice!

I’m rather surprised that the shell is missing the fins from the bottom side of the Gear Box, but that should be an easy fix for you to implement. Good luck with the project. :slight_smile:

Thanks for the heads up, I actually didn’t notice. Any recommendations on how to correct that?

Also, I started building my Alice frame from scratch and it isn’t going as well as I had hoped.

First, bending the c-pvc tubing wasn’t as easy as I had hoped. The PVC crinkled more than I wanted and didn’t bend evenly. In other words the left and right side don’t have the same radius. Even though it was filled with sand it crimped a lot more than I wanted. It looks “OK” but I think I’m going to re-do it. I just not satisfied with the look.

Next I’m trying to cut 2mm thick acrylic for the Alice cross braces and I’m failing BIG TIME. I am using a straight edge clamped down to the acrylic and a scoring tool, but it seems to just shatter instead off break even. Here is the technique I’m using: http://www.youtube.com/watch?v=jCeHx-vvJ7k

On another smaller pack build, someone just cut down an actual alice frame. Maybe try that approach?

Potentially a length of plastic or wood, with five indentations made with a metal file… enough to suggest that there are six separate fins… but not enough to actually make them separate. Referring to how that portion looks on the props in the reference gallery will serve as a good guide.

Regarding the A.L.I.C.E. frame, I have a suggestion: rather than using hollow PVC, give an acrylic rod a try. In assembling my replica of the 7th Doctor’s costume from Doctor Who I tackled the challenge of making his question-mark handled umbrella, rather than try buy one… the main bit of the handle is an acrylic rod heated up in an oven and bent around a jig until the plastic cools down:

https://www.youtube.com/watch?v=UjtaeMlOH0o

I bet that you could build a jig that would allow you to form the acrylic into the rough shape of the frame… even if you can’t form it from a single piece, as long as you had two near-identical pieces you can then join them in the middle. The density of the material would also allow you to screw the cross pieces to them.

Thanks for the idea Gareee, but that seems like it would take more skill than I have readily available.

I noticed that the gear box bottom is raised like the fins should be there, but the serrations are missing distinguishing each “fin”. Probably just an oversight when laying the glass mat out. I’ll take a look at the reference pics to make certain. Thanks again for the heads up, I didn’t catch that.

Ok, seriously, that video was straight up awesome. I will without a doubt try that if I can’t get the pipe bending route to work. I’m already planning out a jig in my head.

I’m looking at several 1/2" pipe benders and I think it might be best to make a small sacrifice in the radius scale to get a higher quality frame over the pvc. If I can’t get what I want out of this then I am without a doubt going to go the acrylic tube route. The only thing holding me back from the solid acrylic tube is weight and time to build a jig.

if I recall, the guy who modified the alice frame just took a hacksaw to it, cut out equal sections on either side, and epoxied a dowel inside all the joints to reassemble it.

Pretty easy, and you could just overlap the center cross braces, and drill a hole for a few bolts in them.

If I could do it, I’m sure you could. The only issue is the cost of a alice frame… plus you’d have to make a new or modify the kidney pad.

Sounds do-able; I’ll certainly keep this in mind. Thanks for the update. :cool:

2 more brackets to go and then I’ll be pop-riveting this thing together!

image

Once it is riveted together I’ll sand down any sharp edges.

I have all the brackets cut and ready for drilling pilot holes. Once I have the pilot holes drilled I’ll remove the duct tape and start riveting it all together.

image

I think I made that bottom support brace wrong. I’m fairly certain it is supposed to be 1 piece and come together at the center. I’ll re-cut it and make it work the way I want. I might have to make another trip to the hardware store.

I feel like such a n00b … because I am.

image

This is the third set of brackets/braces I have made for this A.L.I.C.E. frame and I think I FINALLY got it right. I still have the angled cross brace to make and the wire loops for the cross strap. I’ll take a file to the sharp corners and smooth over the rounded edges that don’t sit flush with the tubing with a hammer, but I’m getting closer!

All the brackets/braces are COMPLETE! I just have to drill holes, paint, grommet, and rivet this thing together.

image

Here is a close up picture of how it all comes together.

image

Colour me impressed. :slight_smile:

WOW! This looks really amazing! Great job!

Great job, that looks awesome!

I had some issues, and I REALLY want to re-make this because it isn’t “perfect” but if I don’t keep going I’ll never get this pack done in time for my son’s birthday party. The fact of the matter is I am going to need time for the rest of the pack, I can always come back to this later after he already has the pack.

I was having issues drilling holes straight. I kept all the patterns, measurements, etc and I will be re-building this A.L.I.C.E frame probably sometime in the November/December time frame. By that time I’ll have a jig setup for drilling the frame properly.

image

image

Been working on my pack shell a LOT. It is in worse shape than I thought. I used fiberglass resin with weave cloth on the inside to reinforce the thin spots, and I’m using epoxy putty on the outside to rebuild some of the fins and fill in some of the cracks/holes. It is taking FOR EVER to get this thing in good shape. I have about 10 hours in getting it sorted out already, and I’m willing to bet I have at least 20-30 more that I’m going to have to put into it just to get this thing straightened out. I put a few heavy coats of primer on it and I’ll begin sanding this week. It may need more epoxy putty … I’ll see how well things look after a good sanding.

I placed an order for a few parts; I’ll post more pics of some AWESOME items in a few weeks!

My next challenge:

I have no idea how I’m going to tackle the power-cell window. I bought a GBFans lens kit and while it is SUPER high quality, I think it is beyond my ability to cut to size. Anyone have a resource for something that I can cut with a set of scissors? Even then I’m worried about placement as the shell is REALLY thick at that spot. I’ll get some pics up in the next few days.

That frame is REALLY impressive - if you do end up remaking it, I hope you’ll have time to take photos of all of the steps. It looks fantastic.

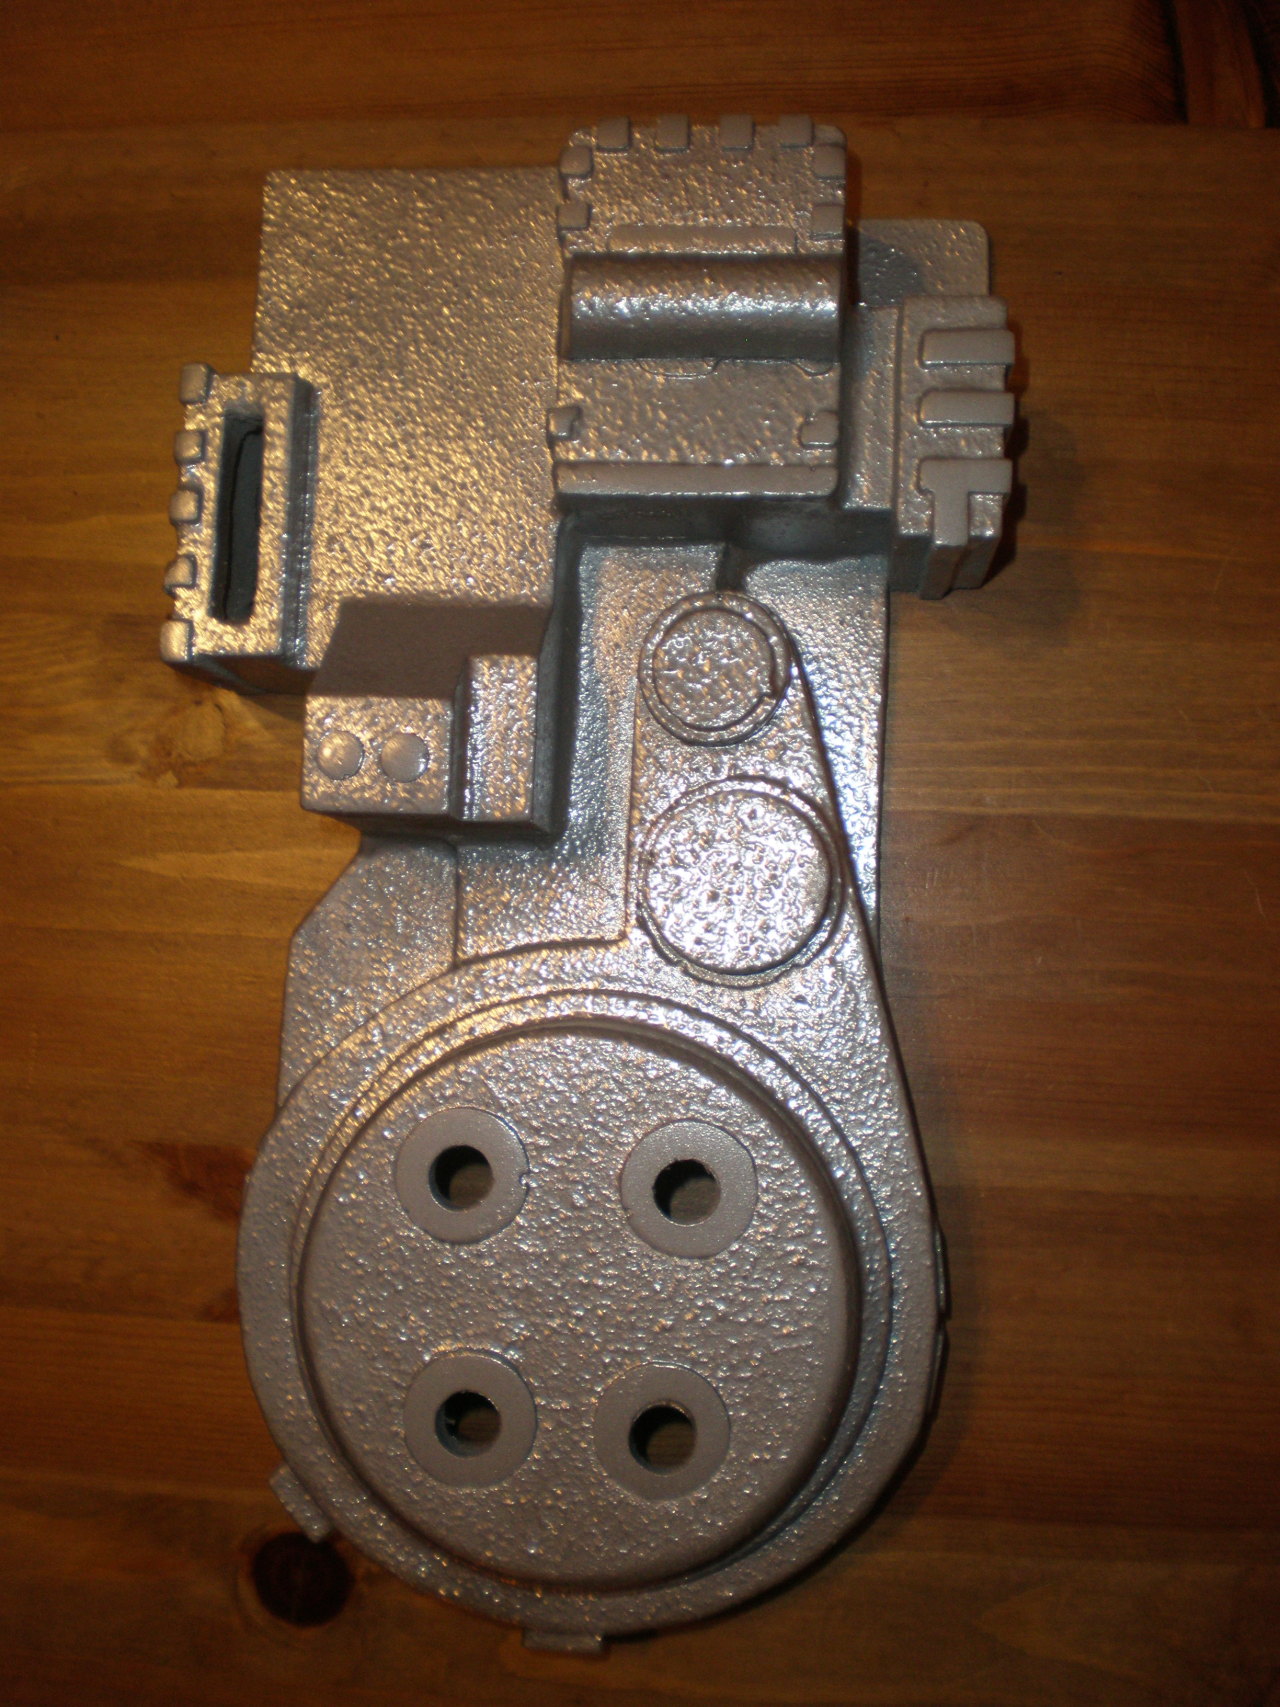
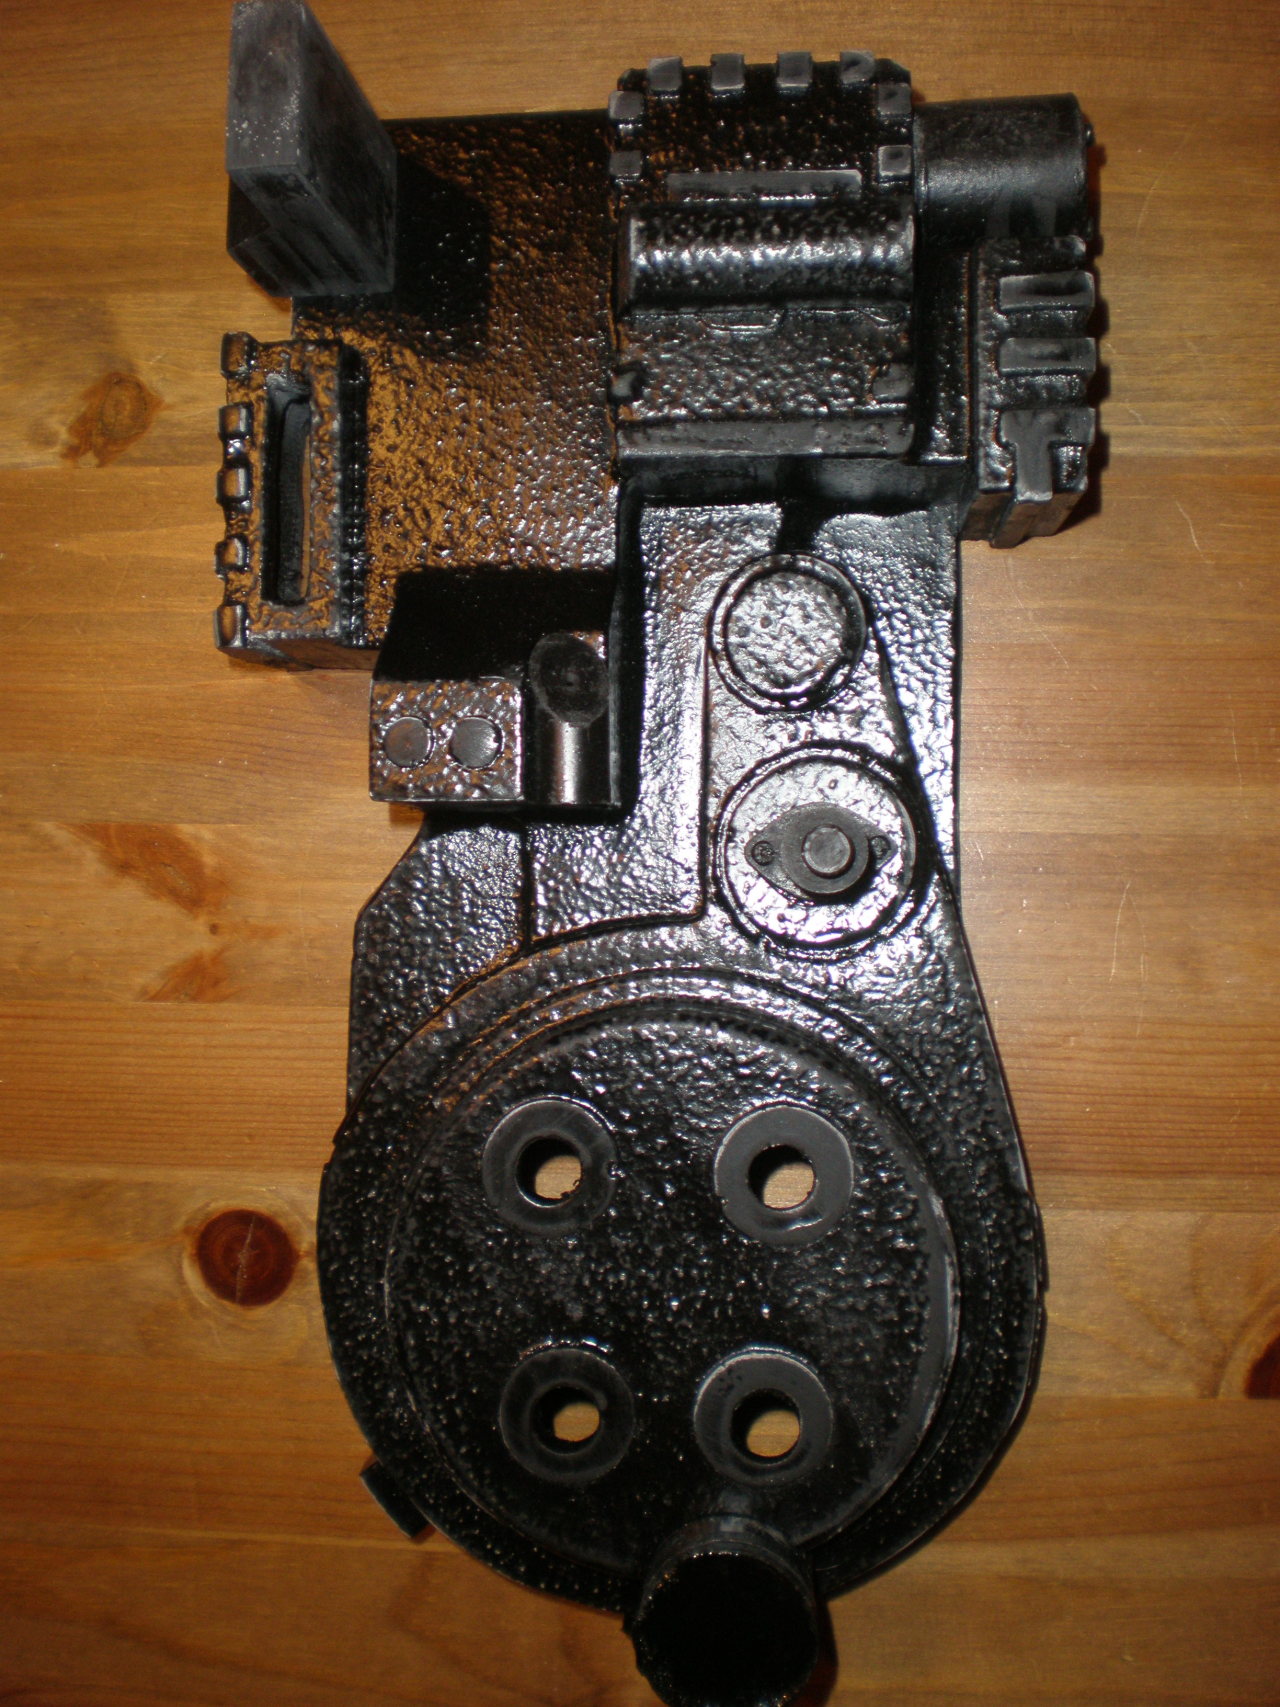
This cast iron Positron Collider has had some basic machining completed to get it ready for the next step of assembly.

In reality this is a multi layer paint job.

Layer 1: Primer

Layer 2: Texture Paint

Layer 3: Chrome Paint

Layer 4: Clear coat

Layer 5: Flat/Semi-gloss black paint

WHY do I need that many layers of paint? The primer is self explanatory. The texture paint gave the pack that nice cast iron look. I sanded down the ribs, and the cyclotron holes (4 holes in the round part) smooth to make them look as though they were machined in after the casting was completed.

The chrome paint made the pack REALLY pop! It literally looked like a chrome bumper. The clear coat provides a protective layer for the chrome paint while dulling the shine to a silver/cast metal look.

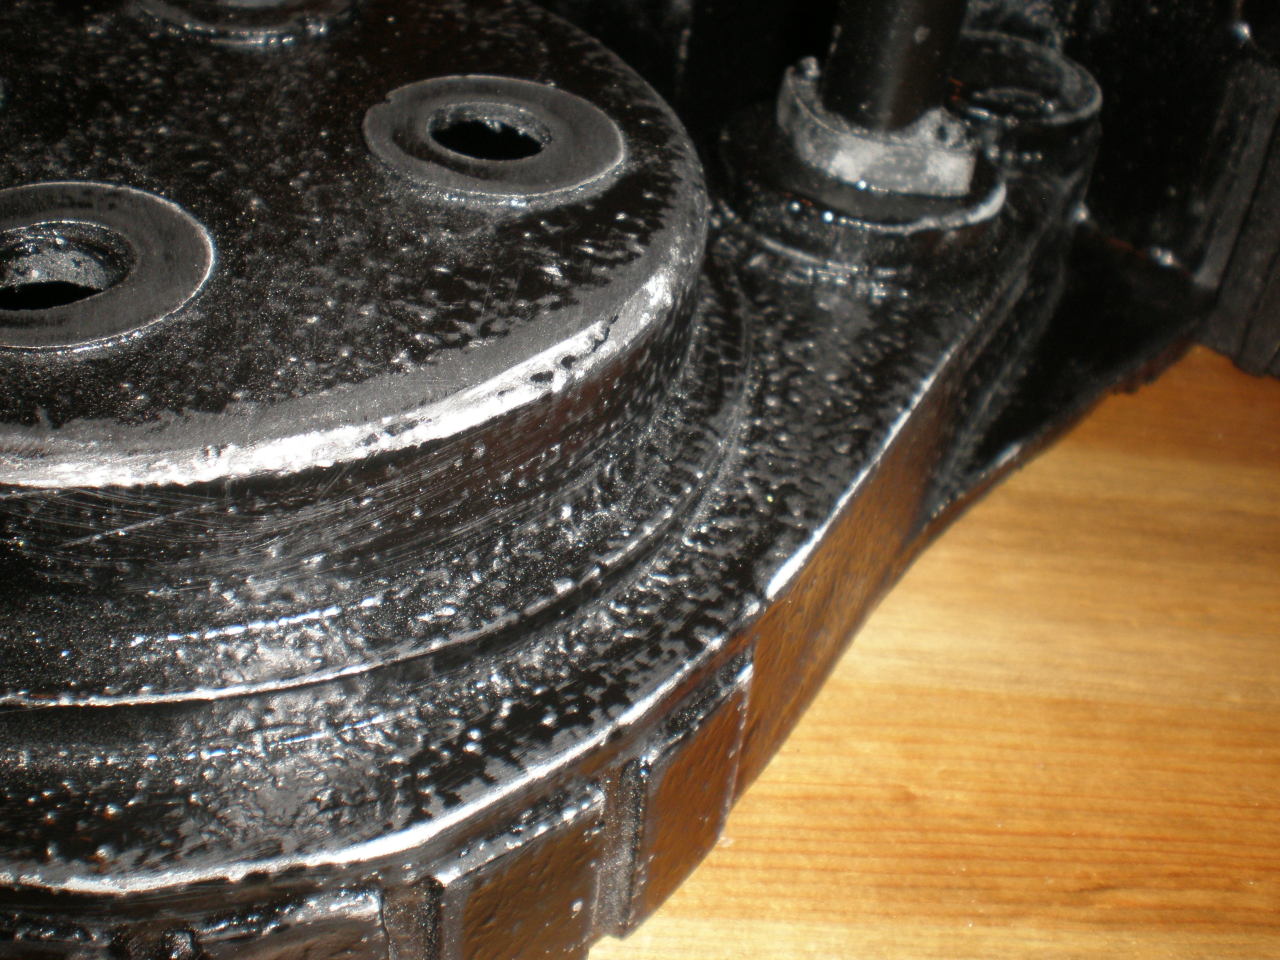
The black paint will be the top coat and the color I fully intend to “weather” with a scotch-brite pad to give that super heavy metal look peeking out from under the paint. This will look like a well used tool of the trade when I’m done. Additional weathering from lil’ man playing with it will add more character aka exposing the super heavy cast iron (chrome paint) under the black paint.

Hopefully I won’t have child services investigating why I strapped a several hundred pound chunk of unlicensed cast iron nuclear accelerator to my toddler’s back. In all I believe this will be under 3lbs when complete.

Taking something made from fiberglass with an official weight of 1 lb 6.2 oz look like it is 50 lbs of well used cast iron takes a LOT of time and effort. It also took at lot of gumption to hit a spectacular paint job with sand paper to weather the “metal”.

Here is a close up of a really well worn corner. This unit has been on MANY a job sites and has busted more than its fair share of ghosts. I’m willing to bet it will need to come in for a service in the near future.

Looking more and more like a positron collider. That is blue painters tape holding the water bottle caps in place so I can adjust where the speaker will go on the mother board.

The motherboard is another horrible experience with acrylic. After an hour plus cutting out, filing, sanding, the motherboard drilling the hole for my jig, so I could cut my speaker hole, the acrylic shattered. I’ll post up pics of the motherboard progress in a few. I have video of lights and sounds from the GBFans shop that I need to post. I don’t think if I didn’t have that set I could put lights and sounds in pack this small. It is REALLY crammed in there.