good pics and write-up looking forward to the end, will definately use this as a guide in my build
I’m looking forward to the end too! Sometimes it seems it will never end. I haven’t even acquired everything I need yet – like the knobs for the gun. Ugh. Well, I’m off to sand down the sync gen and gearbox…
great woodworking skills! gunna be a fantastic pack 
Progress on the Gun
Here’s some pics of the gun body. It’s been sanded down a bit since these pics were taken; the edges have been rounded. It’s looking good (although it’s a bit heavy). You can see here the holes drilled in various places for switches, and for the screws holding on various dowels and the instrument bar and trigger box.

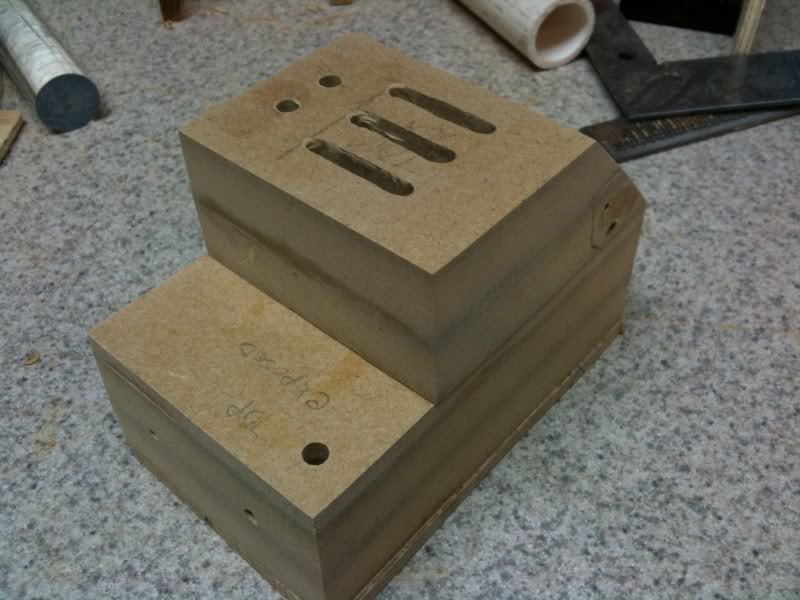
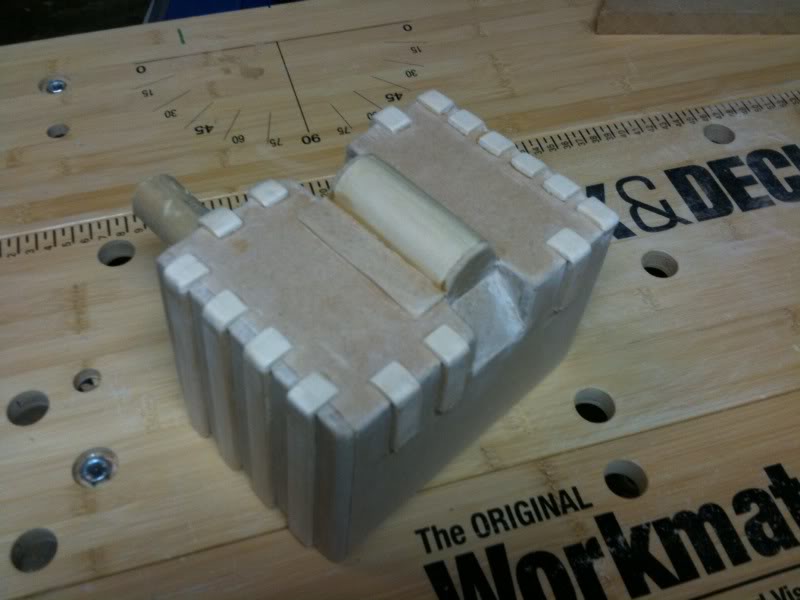
Here’s the trigger box. It’s made out of a piece of 3/4" oak. The oak is strong; I don’t think I could have put all those holes into a piece of MDF that size. I routed out holes on the right side so I can insert the switches. They should be mostly covered up by the side of the gun body. Not sure if this is a better design (making it from one piece) than constructing a small box.
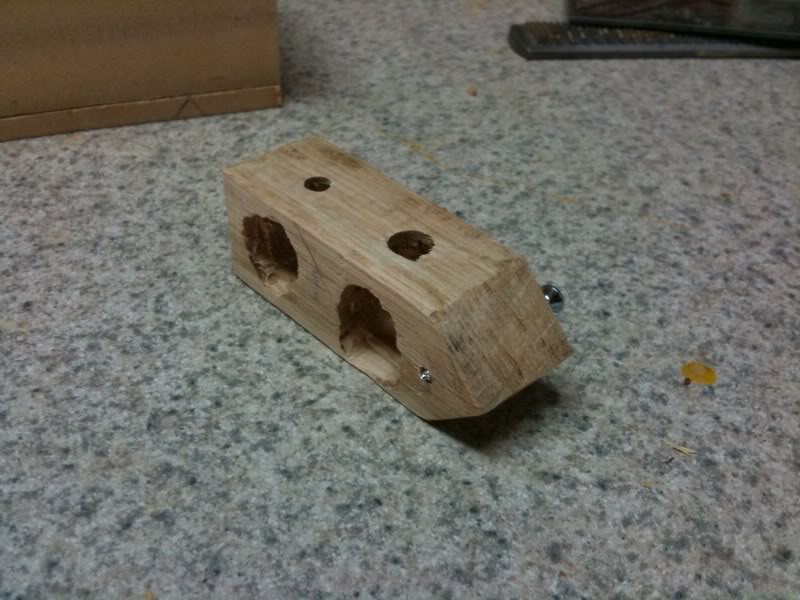
Here’s the front barrel. The two wooden pieces are made of high-quality 3/4" plywood. They are very strong, and should hold up fairly well. They’re attached to the pipe via set screws and glue. Because of the curve of the pipe and wood, you can’t screw the wooden blocks onto the set screws as you normally would, so I had to drill the hole in the wood a bit bigger and just push the wooden block onto the set screw. It’s a good tight fit, and the glue backs it up too, so I think it will hold. It seems very solid.
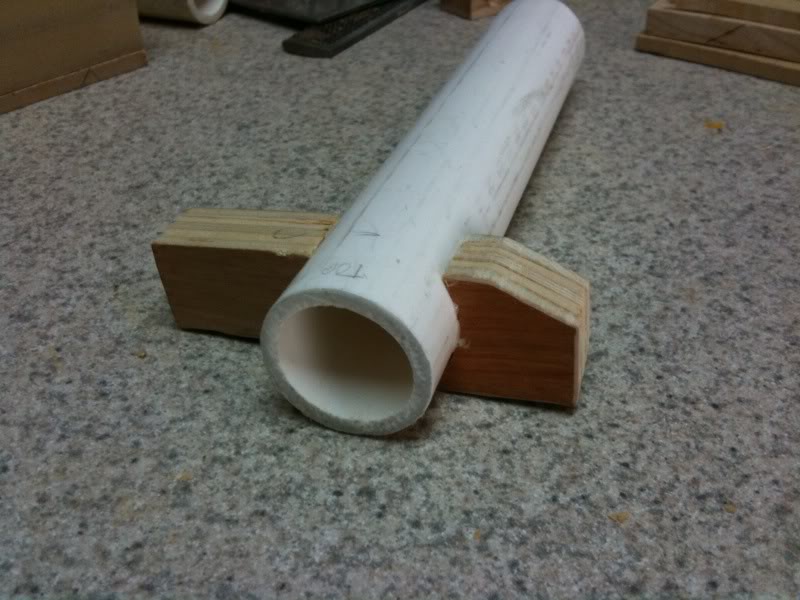
In addition, I’ve got a piece of 1" acrylic rod for the rest of the front barrel. I’ve cut a 1/2" wide piece of 1" inner diameter PVC pipe to go around the front of the acrylic rod. I have a spare piece of 1/4" thick aluminum lying around, so I might fabricate the trigger piece by hand. But it really looks like a pain, and I’m not sure my keyhole saw or hacksaw can do that curved edge.
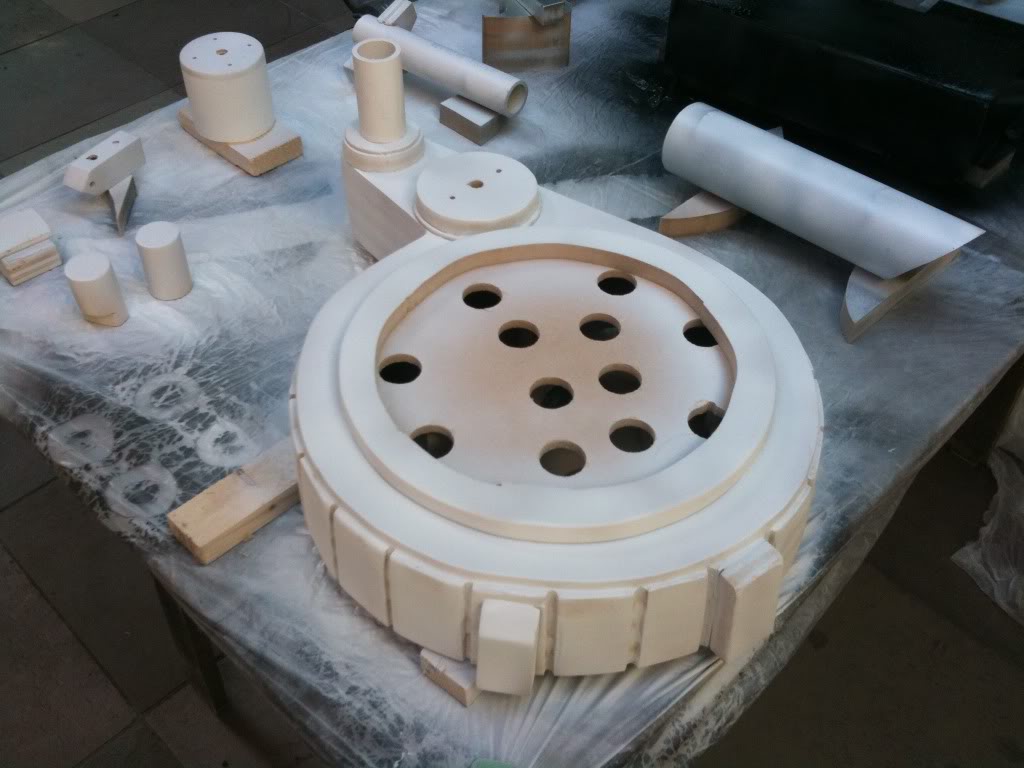
Here’s the sanded down gearbox / crank generator. It’s all ready to be painted! The gunmount, EDA, and ion arm are also ready for painting. The power cell needs a quick sanding job to round off the fin corners. I’m really glad I bought a Dremel. Rounding all those edges and fins, and sanding in tight spaces would have been a total pain without it.
The sync generator is all done too, except it needs another round of sanding. And I’ve got to figure out how to sand in between the flat plates. Maybe sandpaper wrapped around a piece of 1/8" thick MDF.
Next Steps
Things are looking pretty good now. I won’t get it all done by Oct 10 for the kids’ early Halloween party. But that’s OK, they won’t know that it’s not totally done. I’m planning on having most everything done by then except the bumper & ion knob, N filter, booster frame, gun grips, lighting, and sound. I may or may not be able to get the cosmetic plating done by then (I’m thinking of using foamcore for that). Maybe I can get the N-Filter done too. I haven’t found a piece of PVC pipe that’s close to the right diameter; what do people usually use for that?
The rest of the stuff I can do next week or the week after, and still be ready for Halloween.
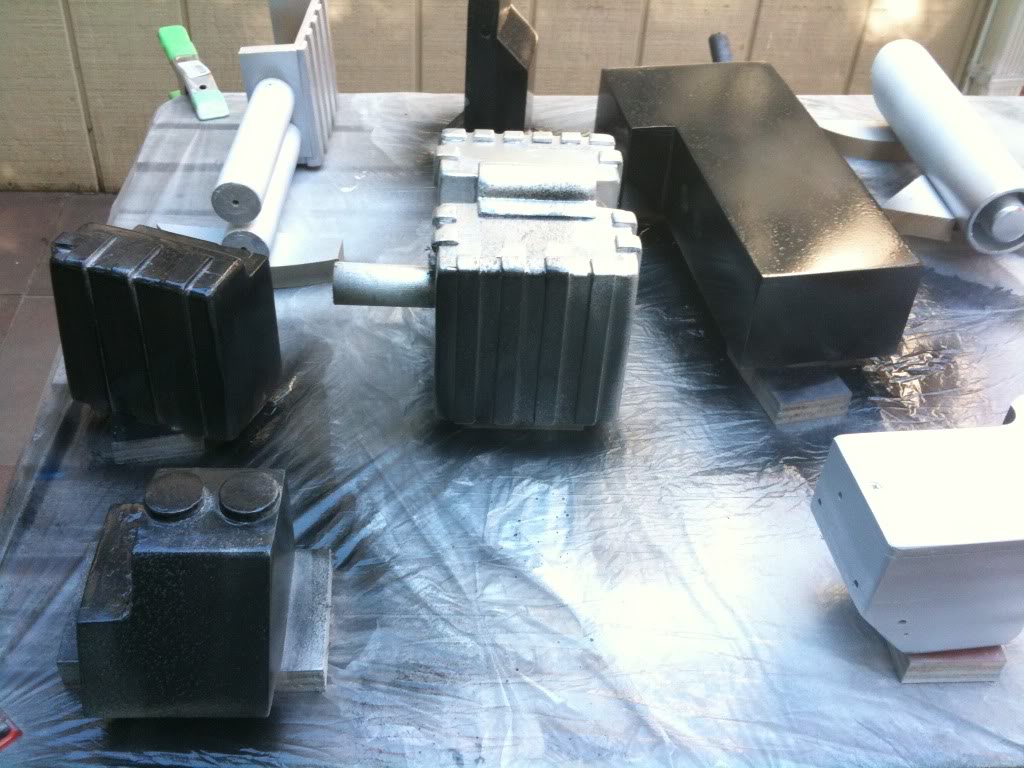
Next steps are mostly sanding and painting. I’m planning on putting on four coats: a primer, then a metallic aluminum-looking coat, then using Micro-Mask for weathering, and then two coats of black. I ran a test on four different blacks, and I’m going with the Rustoleum Hammered black. It really looks good, gives it sort of a slightly beaten up hammered black metal look. For the gunbody, I’m thinking of using Rustoleum textured black, as I don’t think the hammered look is right for the gun.
Then I’ll need to mount all the hardware. The hoses are in (from hoseandfittings.com), but the banjo fittings are backordered :-(. Either Allied Electronics or the USPS seems to have messed up my SMC elbow order. Who knows when that will arrive.
For our n filters I used 3" abs (black) plastic pipe, drilled the filter holes into it with a hole bit, and slipped a flat white painted prongles can inside it, so it looked like an actual filter was inside.
For the red stripe, I bought a small spool of red electric tape, put that on a glass kitchen cutting board, and using a ruler as a guide, cut a 1/4" strip off it… and then just wrapped that around the n filter.
To cap it, pick up a 3" knockout cap in the plumbing section, near the white 3" pipe.
Total cost was under $5 for everything.
Yeah, I’ve got some 3" PVC too. I was concerned it was too big – Sean and Stefan’s plans indicate that it should be 2.75" or 2.875" total, and 3" PVC has a 3.5" outer diameter. The difference seemed too big, but it appears that many people use it, so it must work OK. There’s a specialty plumbing supply store nearby that I’ll drop by and see if they have 2.5" PVC, otherwise I’ll be using the 3".
I’ve got some red electrical tape too; that looks like it will work great.
I found some 2.5" inner diameter ABS pipe at a local plumbing supply store. They had a much better selection than Lowe’s or HD. Perfect size for an N-Filter.
Here’s the Synchronous Generator, almost ready for painting. It’s also got the base ring for the cyclotron glued onto it. You can see the beginnings of the N-Filter next to it. The Sync Gen is heavy; I’ll bet it’s at least 5 pounds. Not looking forward to carrying that around, but that’s the price you pay for having an unlicensed nuclear accelerator on your back (I’ll bet a fully licensed one would be even heavier…).
See that little piece in the front with the two holes for the injector hoses, on plate #5? That’s the second rev of that piece. The first piece was cut to Sean/Venkman71’s plans, and his measurements are wrong. It says 12/16" wide (3/4"); that’s way too small. Couldn’t possibly fit the label on that. Stefan’s plans say 1.13" wide, so I had to recut the piece for that width.
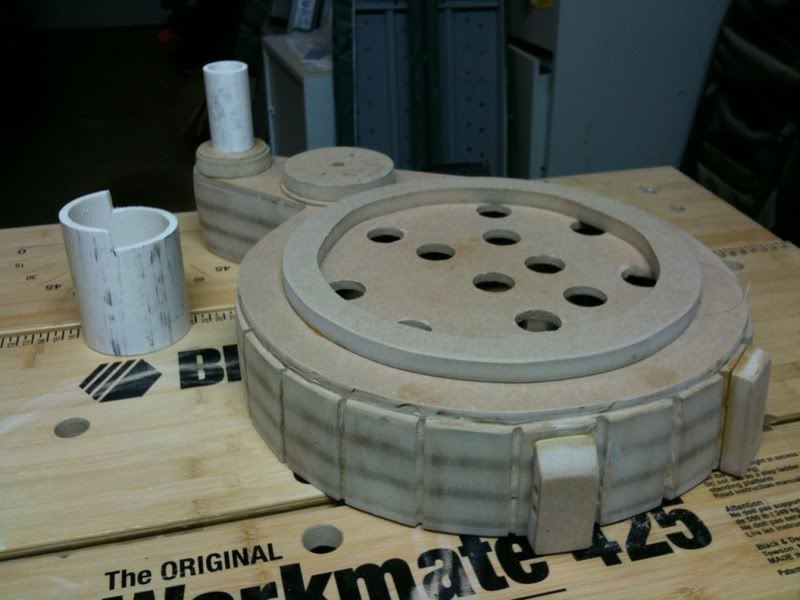
Going with the cakepan cyclotron in the short term (this weekend), and then will update to a better one sometime in the next two weeks for Halloween. Have to figure out the best way to make that; haven’t really done a search on the site for it yet.
Painting!
Actually I’ve been painting some pieces for a couple of days. Let me pass on some lessons learned:
- Leave yourself enough time – like > 3 days. You’ll need to do many coats, and you want to let the paint dry between at least a few of them.
- Spray very light quick coats. Don’t worry about covering everything thoroughly. You’ll get it on the next coat. It’s more important not to lay down too thick a coat, which will run and drip, as well as take forever to dry.
- Test paint something before you start on the real stuff. I actually did this (one of my few smart moves) and it was very helpful. For instance, I discovered that the Rustoleum spray paints come out very quickly and heavily.
- Sand those parts really well. I sanded with 120, 150, and 220 grits, and was still surprised by the marks and grain that showed through on a few pieces where the sanding wasn’t very good. I think 220 grit is probably fine for MDF if you sand very thoroughly. It’s also acceptable on basswood, although not as smooth as on MDF. Oak, pine, plywood – forget it, you’ll need finer grit paper.
I’m using all Rustoleum: some primer of theirs, a metallic aluminum looking paint, and then multiple coats of hammered black, which looks really good, btw. I may go with their textured black for the gun. I’m using MicroMask for weathering, applying between the aluminum coat and the blacks.